Category

Trees

Basic tree maintenance techniques for landscapers: 3-point cut

By | Arborist Insights, landscape maintenance, Trees | No Comments

There are many key landscape maintenance techniques all landscapers should know well. I try to teach these techniques to our new company recruits; and home owners can benefit as well from knowing them. Trees are an important component of our landscapes and must be maintained properly.


Three point cuts

This is a basic technique all landscapers must know. ISA certification is not required, although I always recommend it to workers with 2-3 years of field experience. This 3-point cut technique does appear in the Certified Landscape Technician practical testing module on pruning. However, you just have to tell the judge how you would make the 3-point cut because they use one tree to test all candidates.

For now, let’s stick to basics.

Yesterday I was at a site doing normal winter maintenance. I finessed beds, blew leafy piles and then I ran into Magnolia trees that were clearly encroaching on a staircase. So I took action because I had time for it and I also enjoy the work.

To remove an unwanted branch, you must use a 3-point cut, unless you’re removing a smaller branch that could almost be taken off with hand snips. Why 3 point? Because first you have to take off the weight of the branch. If you don’t you risk bark damage.


IMG_4307edd


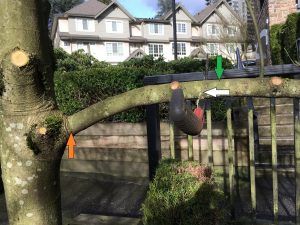
(1) Undercut (White arrow)

Make a decent undercut without getting your sharp hand saw pinched by the wood.

(2) Second cut (Green arrow) to take the weight off. See how cleanly the branch shears off. If you attempt to make just one cut at the branch collar (Orange arrow) you risk ripping off the bark.


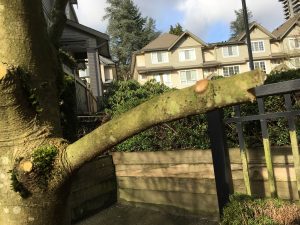
IMG_4309ed

The first two cuts are completed.


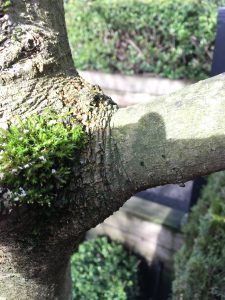
(3) The final cut happens at the branch collar (Orange arrow). We give the tree a chance to cover up the wound. Just make sure you don’t cut into the branch collar.
 

IMG_4310ed

The branch collar is clearly visible.


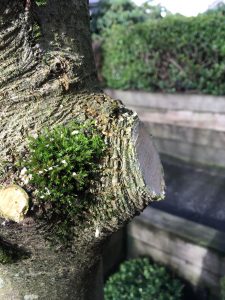
IMG_4311ed

All done!


The problem with stubs

Leaving a stub means the tree can’t properly heal the wound by closing it over. The stub dies anyway but it could allow diseases to enter the tree. So make proper cuts without leaving stubs.


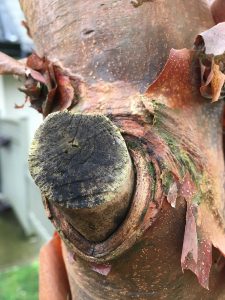
IMG_4278 (1)ed

Acer griseum with a stub.


This cut was poorly done. The stub is clearly dead and you can see how the tree tried to cover up the wound. You wouldn’t believe how many of these cuts I see in the field. Sometimes the dead stub just breaks off.

Once you learn the 3-point cut, it will become automatic with practice.


The case of struggling paperbark maples

By | Arborist Insights, Trees | No Comments

I got to see a number of our sites before Christmas because the regular foremen were on vacation. It’s always nice to get a fresh pair of eyes on site, especially before the holidays. Everything must look perfect for the holidays.

One site in White Rock stood out because of its many paperbark maple trees (Acer griseum). They look awesome thanks to their peeling cinnamon coloured bark. So I was stunned when one of my helpers started rubbing off the peeling bark as if the tree was diseased. He clearly preferred a smooth bark look but I doubt the tree appreciated the assault. I told him to stop.

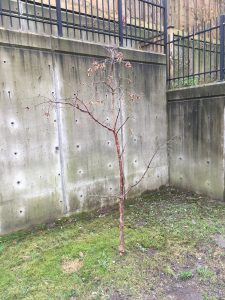
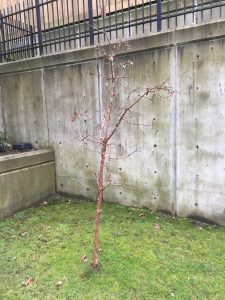
Every paperbark maple on site looked great until I turned the corner into a dead end surrounded by cement walls on three sides. Here we had two specimens of the same maple species and they were clearly struggling. Why?


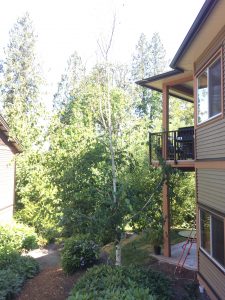
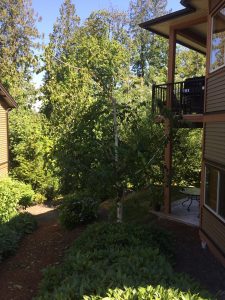
IMG_3574edIMG_3575ed


A) Lack of light. Trees require sunlight for food production and the setting here is horrific. Since there are cement walls on three sides, this is a shady corner. It’s not a great place for these maples to thrive. And the same goes for the grass. It, too, could benefit from more light.


B) Competition. We already know that young trees planted into turf struggle with competition for resources. And they often lose. If you must plant trees into turf areas then establishing tree wells around them to help them. The tree wells channel water and nutrients into the root zone and they keep machines away.


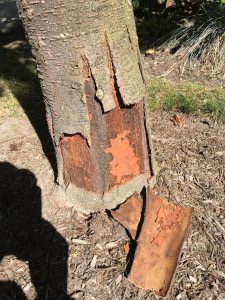
C) Conflicts with machines. If you zoom in, you will notice bark damage at ground level. I say it’s line edger damage. The kind of damage that could be prevented with plastic tree guards or by establishing a tree well around the tree.

Repeated hits can kill the tree. Here it looks like the trees are using precious resources for repair and stress mitigation instead of growth. Thus the struggling look exhibited by these two specimens.

One other possibility is digging up the trees and moving them to a sunnier location away from lawns. The cement walls could be covered by climbing hydrangeas which are already planted on this site.


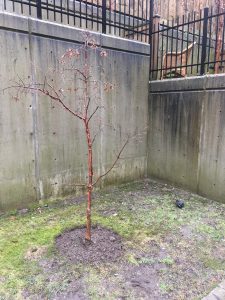
IMG_3825ed

January 2018: sporting a new tree well.

Frosty plant identification

By | Species, Trees | No Comments

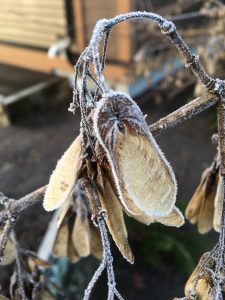
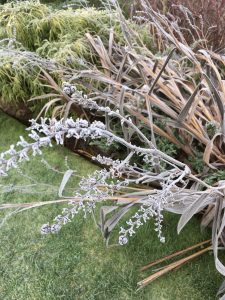
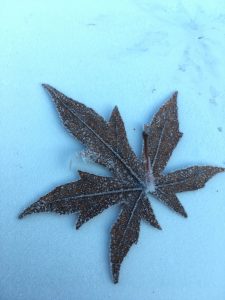
It was fun to observe some of our common plant species covered in frost. How many of them do you recognize? I suggest you look up any that are new to you and learn more about them.


Acer ginnala (Amur maple)


IMG_3345ed


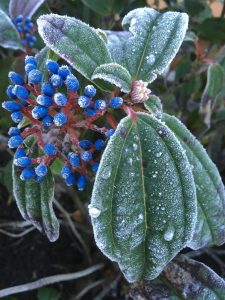
Viburnum davidii


IMG_3350ed


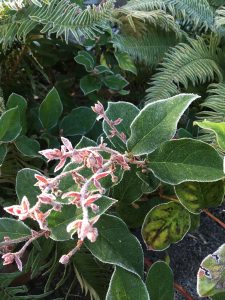
This is a common landscape shrub in the Lower Mainland. The berries are attractive. Hand prune when required. When it’s this frosty, just enjoy the view.


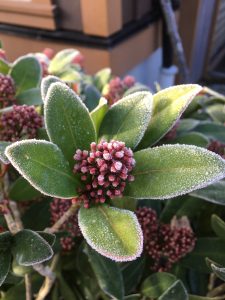
Skimmia japonica


IMG_3363ed


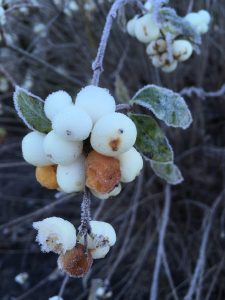
Symphoricarpos albus (Common snow berry)


IMG_3351ed


This is a native species and birds love it.


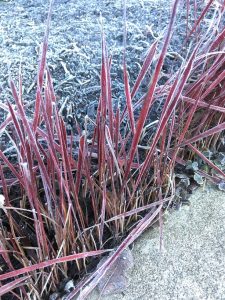
Imperata cylindrica (Japanese blood grass)


IMG_3358ed


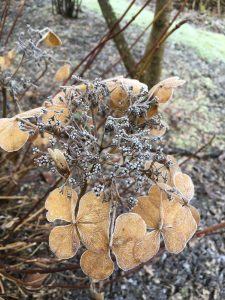
Hydrangea


IMG_3366ed


Some people deadhead their Hydrangeas and use the flower heads in vases; some people leave the spent flowers on so they have something to look at in winter.


Crocosmia ‘Lucifer’


IMG_3369ed


This perennial should have been flush cut at ground level weeks ago. I don’t find it attractive, even when it’s covered in frost.


Gaultheria shallon (Salal) 

IMG_3364ed


Liquidambar styraciflua (Sweetgum)


IMG_3355ed


This is a common landscape tree and a nice alternative to maple trees.


Parrotia persica (Persian ironwood)


IMG_3357ed

This is an attractive landscape tree with great fall colours.


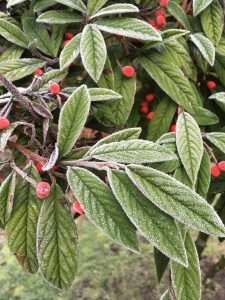
Cotoneaster salicifolius var. floccosus (Willow-leaf cotoneaster)


IMG_3368ed


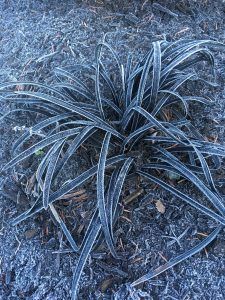
Ophiopogon planiscapus ‘Nigrescens’   (Black Mondo grass)


IMG_3353ed


What plants did you notice on your walks and in your own gardens?

How to pimp out your boulevard tree wells

By | Arborist Insights, landscape maintenance, Strata Maintenance, Trees | No Comments

Sometimes you look out on the boulevard at your strata site and the tree wells look a bit tired. But it doesn’t have to be that way. With some tools and a bit of soil amender you can quickly pimp out your tree wells and make them look great before the holiday season hits.


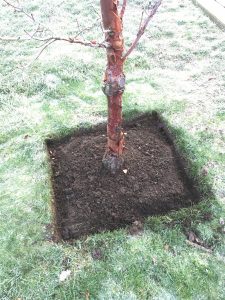
IMG_3329ed

This looks a bit tired.


Step 1

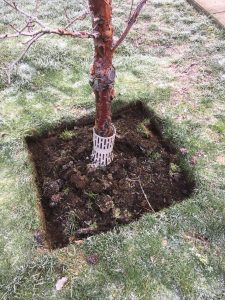
First we grab a nice sharp spade and we deep edge the tree wells. The spade must hit the edge at a ninety degree angle. Nothing else will do.

As for the depth, it should be deep enough to anchor the new soil that’s coming in but not too deep. We’re not building ditches although I have created some ankle-busters in my past. Soil conditions will sometime dictate the appropriate depth.


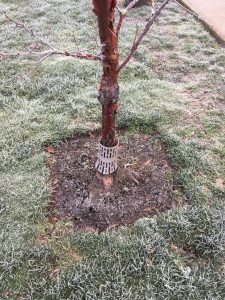
IMG_3330ed

Acer griseum tree well. You might as well remove the tree guard.


Step 2

I know, most people dread this step but we have to weed the tree wells nicely. Use a good cultivator and when you remove the weeds also grab the chunks from step 1.


IMG_3331ed

Nice and clean. The ground was a bit frozen so weeding was a challenge.


Step 3

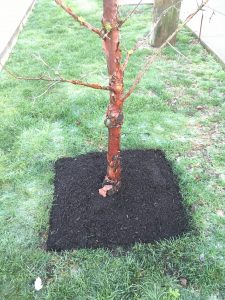
Next, install good quality soil amender and pile it on nicely. Remember, it will settle so don’t worry if the tree wells look a bit puffy. This step gives you an instant upgrade because the fresh black soil looks great!

Warning: do you remember what a doughnut looks like? That is exactly what the soil around your tree should look like. Find the root flare and make the new soil level with it. Then build it up and taper it off as you hit your new deep edge.

Why? Because piling soil above the root flare leads to problems. For some reason, people love building soil pyramids at the base of trees. But it’s a common mistake. The bark above the root flare isn’t supposed to be in a dark, damp environment and it can over time rot. This in turn invites disease in.

Another potential problem is adventitious roots developing above the root flare inside your soil pyramid. There the roots start to circle and they can over time girdle the tree.

So remember, don’t create soil pyramids. Think doughnuts!


Step 4

The last step involves clean-up. Especially the grass edges of your new tree wells. Blow them off gently.

That’s it. Now your clients can enjoy beautiful boulevard tree wells on their Christmas holiday walks.


IMG_3339ed

All done! Weeded, edged and top-dressed. This is my kind of tree well.

Bronze birch borer related pruning

By | Arborist Insights, Trees | No Comments

Because I am ISA certified, tree-related tasks are automatically given to me by default. And that’s fine. This blog post is about a birch tree which exhibited top dieback. So I was sent in with pole pruners and an extendable Stihl chainsaw to take care of the request.


IMG_6085

It’s not super clear but the top leader is dead.


Once I took out all of the dead branches, I pruned the live parts of the tree to give it some sort of shape. Then I hauled out the debris up to the road for later truck pick up. Only later did I realize that my boss expected me to take the whole tree down! Not my style anyway.

Since we suspected the cause of the dieback to be the bronze birch borer (Agrilus anxius) my approach was correct. Pruning out affected limbs is the way to do it. I just couldn’t burn the diseased branches on a strata site surrounded by woods. My only hope is that no adults emerged before the debris was processed with other green waste.

Bronze birch borer

Adult bronze birch borers are half an inch long and have slender dark green bodies with metallic bronze sheen. In summer, females lay their eggs in bark crevices of weak and stressed birches. They prefer sunny, south facing branches.

Larvae hatch 14 days later, enter the bark and feed on sapwood. After one or two years adults emerge by chewing D-shaped holes in the bark.

Signs

So let’s review. Bronze birch borers cause treetop dieback, leaf wilting on branches and D-shaped exit holes in the bark

What can we do?

Since the bronze birch borer only picks on weak and stressed birches we should keep our birches in good shape with regular watering, feeding and pruning. Also, put your birches in shadier corners.

One other idea is to plant birch borer resistant river birch (Betula nigra) cultivars.

If you are lucky, you will get some help from natural allies like parasitic non-stinging wasps and woodpeckers.

The birch featured in this blog post is still alive and standing.


IMG_6086

After removing all dead branches and pruning others to give the tree some sort of natural shape.


Source: GardenMaking magazine no.30, pp.56 and 58.

Still purchasing lady beetles for your garden?

By | gardening, landscape maintenance, Trees | No Comments

A few years ago I met a home owner at one of our sites and she told me about her annual lady beetle buy and release events. I smiled politely and privately thought she was insane and had way too much disposable income. She paid $16.95 retail plus tax for a bag of lady beetles. As we learn from the fact sheet below this biocontrol business is extremely lucrative.


IMG_2832


Now, a few seasons later,  there is a new Fact Sheet from the University of Washington Extension that clarifies the issue and it happens to be co-authored by my favourite horticulture scientist Dr. Linda Chalker-Scott.

As it turns out many gardeners buy lady beetles for their gardens and landscapes. And the fact sheet concludes that “release to open gardens and landscapes is unlikely to be successful.” Now my burning question is answered.

Control

Adult and larval beetles control aphids and scale insects, mites, beetle larvae and immature bugs.


Aphid problem

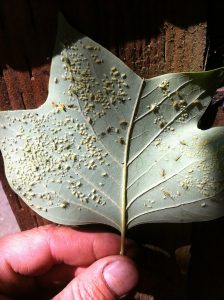
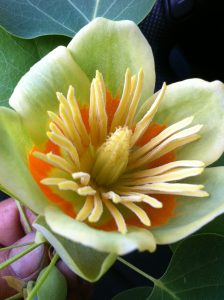
The site mentioned above has lots of tulip trees (Liriodendron tulipifera) which are known to attract aphids. The aphids suck on the new leaves but otherwise don’t harm the trees. Incidentally, don’t miss tulip tree flowers. They are spectacular.

Since aphids can’t process sugars, they excrete them. That’s why honeydew drops on leaves, cars and sidewalks. Then lady beetle sales go up. The lady swore that her lady beetle releases are effective. OK.

But perhaps you don’t have to spend your after-tax dollars on lady beetles. What if you can attract them naturally? Grasses and wildflowers will attract them to your gardens. Lawns not so much.

As we learn from the fact sheet, lady beetles eat fungus, fruit and occasionally vegetation. Adults look for sugar sources such as nectar or honeydew. These energy-rich supplemental foods improve lady beetle reproduction and survival over winter.

Take it easy on insecticides because they kill the target pests and natural predators.

Good or bad idea?

There are some negative aspects to this whole biocontrol business. First, we are removing populations from their natural ecosystems which may not be a good idea.

Second, native beneficial insects may suffer when we introduce non-natives. And third, introducing lady beetles may transport parasites.

Conclusion

In conclusion, I must say that the lady gets a gold star for spending $16.95 plus tax on a bag of lady beetles; and for inspiring this blog post. As we know from the new fact sheet, these lady beetle releases are unlikely to be effective. And yet, she swears by them. Perhaps the tulip tree honeydew attracts the lady beetles naturally.

I say, try to attract lady beetles naturally and save your money. Perhaps you can donate some cash to the University of Washington Extension so they can produce more science-based fact sheets.

Chinese windmill palms on the West Coast

By | Arborist Insights, Species, Trees | No Comments

I love palms! They remind me of tropical locations we all love to visit. So when the August 2017 issue of Arborist News featured an article on palms, I finished it on the same day. It also gave me one credit towards my recertification.

This blog post features a palm we see in the Vancouver area. I learned about Chinese windmill palms (Trachycarpus fortunei) after they got absolutely hammered this past winter at a client’s place. The lady was clearly distressed because the fronds were all beat up and brown. Plus, her palm was situated near her pool and outdoor kitchen. So I did the only thing I could; I pruned off the brown fronds. When my client retreated into her beautiful home, I snapped a photo of the palm tag and made a reminder to myself to check the species online.


IMG_5294

This poor palm didn’t make it. All growth originates from the top and clearly, not much is happening there. But perhaps there is hope. See the next picture.


IMG_0132

We almost gave up on this palm but look at it now!


IMG_0096ed

This specimen survived the winter nicely.


Winter hardiness

Trachycarpus fortunei is the most tolerant to cold temperatures of all palmate palms. But remember, our last winter in British Columbia was the harshest winter in thirty years. My boss almost lost his juvenile Chinese windmill palm this year. See the second picture above. And it just so happens that my boss and my client both live in an area which held on to snow the longest.

The other complication is that mature Chinese windmill palms handle cold better. Younger specimens are most susceptible.

Details

The Chinese windmill palm is a solitary fan palm with a slender trunk. The key distinguishing feature of this palm is a messy layer of brown fibers that turn gray with age.


IMG_0083ed

Note the messy fibers.


The palmate fronds are up to two feet (0.6m) wide and deeply divided into one inch (2.54cm) wide, stiff segments. The petiole is 1.5 feet (0.5m) long and armed along the base with blunt teeth. Yes, the teeth are blunt but weeding around this palm is still unpleasant.

Mature specimens can reach 25 feet (7.6m) in height. This species is a good selection for small gardens.


IMG_0082ed

All brown fronds should be pruned off.


IMG_0095ed

This is a picture after pruning.


What palms grow in your home area?


References: Arborist News August 2017 volume 26, number 4, pp. 12-21. This is an excellent article. If you are ISA certified you can earn 1 CEU credit.

On branch attachment

By | Trees | No Comments

One day last year I went out for a jog at Shoreline park in Port Moody, British Columbia and ran past a fallen tree. Ok, trees fall all the time in the forest. But luckily the municipal workers made a nice clearance cut exposing one of the branch attachments. See the picture below.


17309078_10202932613351875_7343264063360363219_n

Look how strong this branch attachment is. It belongs there.


Strong attachment

What do you notice? Do you see how the branch on the right is firmly attached? It’s solidly in place because it belongs there. It’s a true branch developed in a socket of overlapping wood tissue. So I stopped running and snapped a few photos. Then, after I resumed running I thought about my arborist friend’s tree lecture.

Paul Buikema is one of my tree mentors and his lectures are to be recommended. He related one story, complete with slides, showing a gorgeous deciduous tree with large leaves. I totally forgot the exact species. Paul was asked to prune it so he climbed inside. Then, horrified, he realized that all of the branches he was stepping on were pseudo-branches.

Weak attachment

The tree had been topped in the past and the branches Paul was standing on pushed out from apical meristems. Basically, when you top a tree, the buds nearest to the top push out and develop into branches. These are pseudo-branches, not real, strongly attached branches. They are attached only in the outermost layers of the parent branches and prone to failure.

Of course, Paul didn’t push his luck and bailed out of the project. It just wasn’t safe for him to stay there.


18765783_10203271351700122_5338216496762398942_n

This is an illegally cut pin oak (Quercus palustris). Note the three shoots. They will never be as strong as normal branches.


This is an extreme example but it illustrates my point. This pin oak (Quercus palustris) was cut down illegally. Now look at the shoots. They will never be as strong as normal branches. Of course, I love the resilience of this oak. It’s pushing back after getting abused.


Don’t top trees

So here again we have one of the main reasons to not top trees. As the new pseudo-branches develop into big branches they can snap in wind or ice storms. This is one of the arguments arborists use to talk residents out of tree topping. Insisting on tree topping means that they accept future failure liability. That might scare them off.

If you want to read more about tree topping click here.


Help your trees with watering bags

By | Arborist Insights, Reviews, Trees | No Comments

It’s very hot in our July British Columbia landscapes and plants need help. Trees are plants so let’s help them with some supplemental water. One great invention is the Gator watering bag.


IMG_6060edd

A Gator watering bag in action. They work best when they are filled with water. Full marks to this dedicated home owner.


Installation and benefits

You don’t need any tools to install the bag. Just put the bag around your tree and zip it up. Then add water. The slit is located under the label tag. Once, when I was working for the City of Coquitlam, an elderly couple walked by and wondered how we get water into the bags. Just lift the tag.

The Gator website states that new plantings require a refill every 5-7 days. The average watering time is 5-9 hours. And the benefits? No run-off and limited evaporation.

You can use the bags to protect young trees which should limit losses and labour costs associated with tree planting. That said, some young trees still don’t survive. Perhaps they weren’t planted properly or came from inferior nursery stock.

Not so fast

It would be great if this was the end of the story. Bags go around the tree trunk and deliver much needed water boost to thirsty trees. Not so fast. Just last week I visited my favourite blog called the garden professors. It’s a special blog because people try to use good science to answer questions.

One post that appeared on the blog site was about Gator bags. The author noticed two problems:

a) Many watering bags were empty!? Since the bags were designed to deliver water to trees they should be filled with water. Obviously.

b) A bigger problem was unzipping the bags and discovering bark rot. As the full bags press against the tree trunk they create moist and dark environment and, over time, this can lead to bark rot. Rotting bark then invites diseases and pests.

So I did my own survey on a large site we maintain. I found one tree with a moist bark section; some had bugs hiding under the zipper.


IMG_6590ed

All clear. The bark was dry and, alas, so was the bag.


IMG_6593ed

Same as above.


Think of the Gator watering bags as a temporary solution. Install them, fill them up and check on the condition of the bark periodically by unzipping the bag. I hope your trees get through the summer heat without injury.

Katsura tree with too many leaves

By | Arborist Insights, Pruning, Trees | No Comments

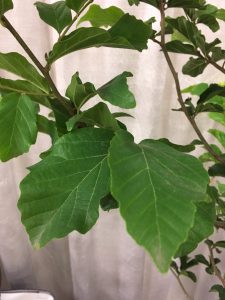
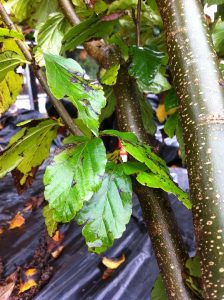
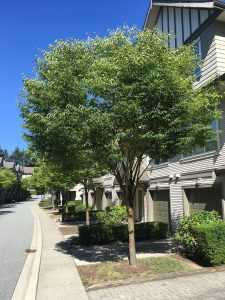
“Every year this tree makes too many leaves.” That is a direct quote from the strata owner whose patio looked out on a nice Katsura tree specimen (Cercidiphyllum japonicum). I almost laughed. The tree makes too many leaves every year? Really? I talked to her politely and agreed that some thinning cuts were in order. But too many leaves? That deserved a blog post.

Thinning cuts

On a multi-stemmed tree like this one, thinning cuts are totally fine. Just pick a branch that rubs or crosses with others and remove it. You should be able to create some openings in the crown while still preserving a natural tree look. I didn’t have any trouble with this. It was easy to see crowded spots.

Just remember not to go too crazy. You can always come back next year. I made a few cuts on every tree and assessed it before taking more. And I will assess it again once the trees leaf out.

Too many leaves

This is a joke. Trees know what to do. We can’t tell them how many leaves to produce. What’s the big deal with leaves?

Trees use leaves as factories to make food from sunlight through photosynthesis. This is a free service which produces oxygen for us and removes carbon dioxide from the air. This process also releases water which affects local climate. Without leaves the tree can’t survive.

Once the food is made it is distributed throughout the tree. Upper branches can act as storage sites which is why pruning during drought can starve a tree. Under drought conditions, leaf openings called stomata close to prevent moisture loss. This, in turn, means that carbon dioxide can’t enter therefore food production stops. Then, here comes a landscaper with strata orders to prune trees. As he removes some of the upper branches, he removes food that was stored in them. Boom. Starvation ensues.

Leaves also serve as food for various animals and they act as cover for birds. For example, caterpillars munch on young leaves and are in turn eaten by birds.

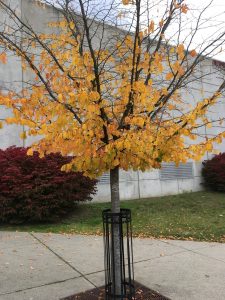
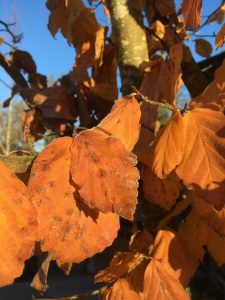
Leaves also look great in the fall as they turn color. This katsura tree is no exception.

Too many leaves? Not likely. Let the tree do its thing.