Category

Arborist Insights

One major glitch with ISA’s TRAQ qualification

By | Arborist Insights, Education | No Comments

One of the four lectures listed in the Urban Forester’s Symposium didn’t really excite me. Effective report writing sounded too soft. I prefer hard, technical lectures. But effective writing is very important. I should know. I’m trying to grow this blog and squeeze money from clients on other blogs.

Occasionally, I also have to write tree-related correspondence and construction sign-off letters.


IMG_3502


The glitch

TRAQ (Tree Risk Assessment Qualification) is ISA‘s new qualification and my lecturer, Dr. Julian Dunster, is heavily involved in the training of new candidates in the Pacific Northwest. But there is a glitch: as new TRAQ qualified arborists start writing reports, clients complain that the reports they generate are poor. So you may be able to assess the condition of my tree at home but your report to my municipality may not be understood. Or flat out rejected.

I thought it was almost comical but effective writing is a skill. You have to practice it and develop it. You can start by taking Dr. Dunster’s January course. Keep on writing and get better.


Seminar notes


Below are some key ideas from my notes.

1. There is no such thing as a private report. Assume that your writing will be made public. So be careful.

2. Think clearly-write clearly.

3. Know your audience and assume they know nothing.

4. Start at the beginning: what’s the assignment? Tree inventory, risk assessment or tree removal?

5. What’s the deliverable? Memo, email or a detailed report?

6. What’s the purpose of the report? Are you simply recording events and facts or are you informing people of your opinion?

7. Who is the client and what’s her educational level? Homeowner will differ from an engineer.

8. Don’t waffle: say what you mean!

9. Unsure about your grammar? Read it out loud. If it sounds funny, it probably is. Also, eliminate obvious typos.

10. Your report should contain evidence and justify your opinion. Simply saying that the homeowner’s tree is declining doesn’t help.

11. What’s your style? Passive or active? WordPress likes it when I use active voice but writing passively on a technical report might be fine. Just don’t mix the two styles. “It was observed….” vs. “I observed….”.

12. Keep your sentences sharp, short and to the point.

13. Remember, your reader needs information from you to make a decision.

14. Expect your reports to be in pdf format and follow logical steps: Introduction, Body, Wrap-up. Include pictures. Data can go in the appendix.

15. If you can’t explain something simply, you don’t understand it well enough. You must be credible.

16. Punctuation is important!

17. Cut out unnecessary stuff and don’t rush- come back to your report later.

Conclusion

  1. Good reports take time
  2. It’s hard work
  3. Be professional
  4. Mistakes happen


Why Persian ironwood rocks!

By | Arborist Insights, Species, Trees | No Comments

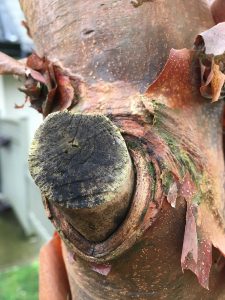
I discovered the Persian ironwood tree (Parrotia persica) in 2014 while working for municipal gardener Tracey Mallinson. We had many of these trees at the Poirier complex in Coquitlam, BC. But I didn’t expect this tree species to rock the Urban Foresters Symposium. It was mentioned in two lectures and for good reason. It also appeared in the plant ID contest as one of the 25 specimens.


IMG_3596


Bullet proof


In lecture one on urban street and landscape trees, the lecturer referred to Parrotia persica as bullet-proof. Then he introduced us to three new Parrotia persica cultivars (cv.).

Parrotia persica cv. ‘Ruby Vase’ has a more compact crown while P. persica ‘Vanessa’ has a narrow crown habit. The third cultivar is the most interesting. Called P. persica cv. ‘Persian spire’, it’s a slow-growing non-aggressive street tree or it can be used as a hedge plant. The leaves have an awesome purple boarder.


Lecture two

Lecture two covered moisture stress in the landscape. While the lecturer didn’t want to recommend specific species he did cover three tree species he liked. One of them was Parrotia persica, our new bullet-proof friend.

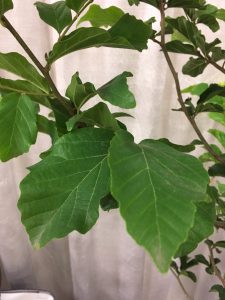
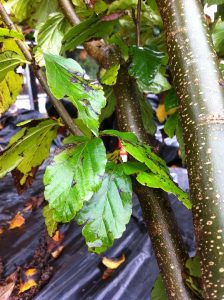
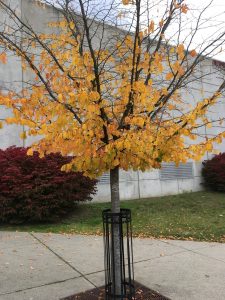
It can handle drier conditions because it comes from the high deserts of Iran. Thus the specific epithet “persica”. It has thick, somewhat hairy leaves. And it tolerates drought and alkaline soil conditions. It doesn’t suffer from any diseases and it has beautiful fall colours.

Cons

Parrotia persica is a slow grower; and the specimens I know from my landscapes tend to have irregular crowns because once in a while a branch pushes out of the crown. But again, it depends on who is looking. Personally, I have no trouble with some idiosyncrasies. Other people freak out when the crown isn’t perfectly round.

I don’t recall any problems with this tree species on any of our strata sites. So bullet-proof it is.


Perottia persica


Conclusion

If you’re considering what tree species to plant as our climate goes drier, the bullet-proof Parrotia persica is a great choice. You can try any of the three cultivars mentioned above; and you should expect decent fall colour.


IMG_3734

When you have to top natives for size control

By | Arborist Insights, landscape maintenance, Trees | No Comments

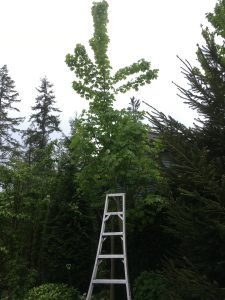
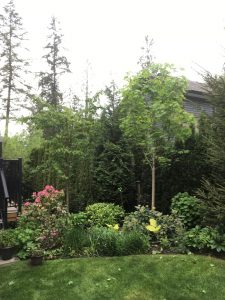
I hate topping trees and so does the International Society of Arboriculture (ISA); they even publish pamphlets detailing why the practice of tree topping is bad. This blog post, however, shows two cases where topping was somewhat justified and forced.

It was forced because a) the strata client insisted that it be done and they pay the maintenance fees so all you can do is attempt to educate them and, b) the natives in question threatened to overwhelm the spaces they occupy.


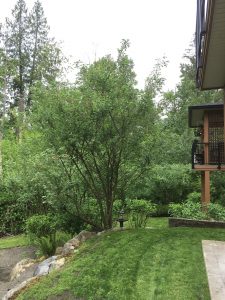
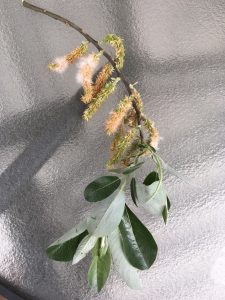
Salix discolor


IMG_7325

Before height reduction, Salix discolor. Note its landscape use close to woodland in the background.


IMG_7332


This is our native willow and it’s technically a shrub. In this setting it’s used as woodland margin shrub. But there is one problem. It reaches 7m heights quickly and the owners don’t want to see it from their upstairs patio, preferring instead to look at the tall native Douglas firs (Pseudotsuga menziesii).

So I went in with an extendable chain saw, pole pruners, a ladder and my best friend, a Japanese hand saw. Remember, most tree work can be done with a good hand saw.

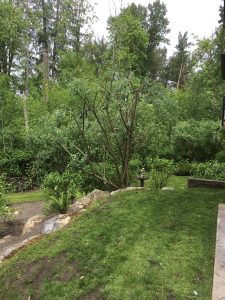
The idea was to bring the willow height down and it went fairly well although I was a bit frustrated with some of my cuts. The willow is very soft and if you fail to finish your cuts briskly then you risk bark peeling below your cut. But considering that this is a native shrub, I expect it to shoot out again after my assault.


IMG_7336

After picture.


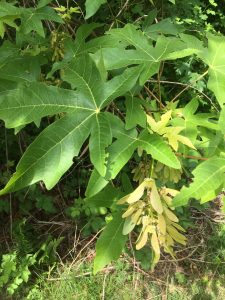
Acer macrophyllum


IMG_7339

BC native Acer macrophyllum with 5 lobed leaves (3 lobes dominate). The leaves are, well, big!


I wasn’t very happy about being sent in to top a maple tree but what do you do when the backyard belongs to the in-coming strata president? One look at his backyard made me wonder if the big leaf maple (Acer macrophyllum) was planted or simply drifted in. If you could look to the right you would see giants of the same species in the woods. There the maples are left alone and they reach the regular 30m tall, 25m spread dimensions.


IMG_6906

There is not enough space for this native species which will reach 30m without topping.


Here it is clearly not the right tree species so topping it is somewhat justified except, of course, the tree will grow again and I have a feeling I will get to know it intimately as the seasons pile on.

Most of the work was done with a pole pruner with the exception of the biggest leader. That required a saw and some care because there is a planted garden under the tree.

The owner was happy with my work (of course!) but all I was thinking about was how the tree did not belong there.


IMG_6910

After topping picture.


Conclusion

Tree topping is a horrible idea but in some cases it has to get done. Please try to avoid it as much as possible. The big-leaf maple above will grow again which means I will get called in periodically to bring it down. The same is true for the willow which will eventually reach the upper patio sight lines.


Installing a 4′ cedar hedge is a breeze

By | Arborist Insights, Landscaping | No Comments

Putting up a quick cedar hedge barrier can be a breeze. I did it last week in between two yards where one side needs to keep a dog in check. The dog is fine, it’s the owner that fails to pick up after it. But this blog post is about planting a quick cedar hedge, not about suspicious dog owners.

Size

Small size is key because a four foot cedar can be easily purchased at your local Home Depot for $18. Anything larger will require a longer trip to a nursery and higher costs. So let’s assume four foot cedars (Thuja occidentalis) are fine.

Now, when you go to your local Home Depot bring your patience with you. It took me forever to order and pay for 13 4′ cedars. The cashier didn’t have the code so she sent a young dude outside to get one. I could have memorized the entire sales flyer in the time it took him to get back.

Outside, another young dude had trouble counting to 13. He loaded up more than I had paid for and then hopped around the back of my truck recounting and off-loading. So of course, I had to recount everything myself.

Planting

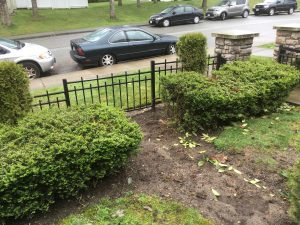
The cedars looked a bit dry. It’s always nice if you can soak the pot before planting. For my project I had a T-formation with 6 and 7 cedars. Normally, people dig a hole and then place their tree inside and so on. But when you plant a full line, it’s best to dig up the entire trench. You can then place the trees in and assess. Is your spacing OK and line straight? If not, it’s easy to adjust the plants without any extra digging.


IMG_5163ed

Before.


When you remove the tree from its pot, don’t be afraid to rough up the root ball. Gently massage the roots with your fingers. If fingers don’t help, use your snips and cut top to bottom to loosen up the roots. It looks a bit rough but trust me, do it.

Once your cedars are set as a new hedge, backfill the trench with the same soil. If you must bring in new fresh soil, only use it to top-dress at the end.

Watering after install is always a good idea and so is removing any tags from the cedars. New baby cedars are thirsty so keep checking on them. They have to get established and high summer temperatures are coming soon. Don’t neglect this step.

Clean-up

Clean-up is also critical. Now that you have a nice new cedar hedge let’s not spoil the show. Collect all plant tags and plastic pots. Recycle everything if possible. Then blow or rake up any excess soil from surrounding lawn or whatever is nearby.

I also used a small rake to even out the soil and to obliterate my boot prints.


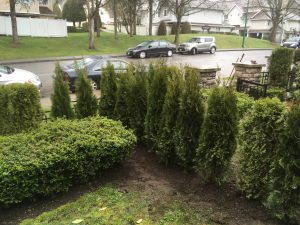
IMG_5177ed

After.


Conclusion

Planting a new 4 foot cedar hedge can be a breeze. Just follow the steps above and don’t forget to keep watering the plants as temperatures shoot up in spring and summer. Young cedars are very thirsty.


When installing artificial turf makes sense

By | Arborist Insights, landscape maintenance, Lawn Care | No Comments

Regular readers of this blog will know that I am not a fan of artificial grass. It’s plastic, man-made with petro-chemicals, it heats up and it doesn’t produce oxygen. But there are legitimate cases where desperate people can find salvation in artificial turf.


Dog damage


IMG_4842ed


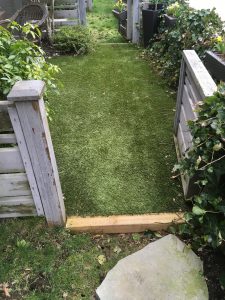
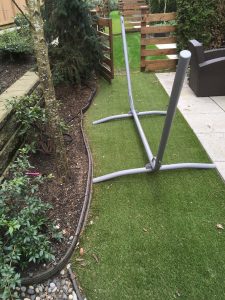
These people have a tiny back lawn frequented by their dog. The daily urine assault left the grass burned and struggling. The owner tried to fix it, over and over and finally got fed up. Since parting with the family pet wasn’t a popular option, they decided to install artificial turf. And it works in this case. Even our lawn maintenance was awkward before the changeover.


Clay soils


IMG_4847ed

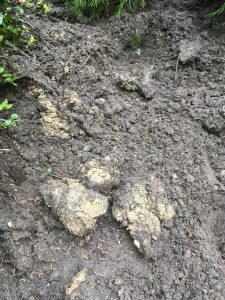
Some owners are still clinging to their natural grass lawns. The soils are full of clay. You don’t have to dig far to see it.


Our West Coast soils have lots of clay in them which means that lawns installed over them drain poorly. The clay forms a nasty layer that doesn’t allow water to percolate down easily. If you want to fight these conditions one recommended procedure involves top dressing these lawns with organic soil. This can over time break up the clay layer. But this would take time and resources.

So what do you do? You stop fighting the conditions and install artificial turf.

You will notice in the picture that some owners are still clinging to their natural grass lawns.


IMG_5176ed

Note the sticky, dense clay chunks.


Shade


IMG_4838ed

In summer these backyards are dark as the Fraxinus trees flush out.


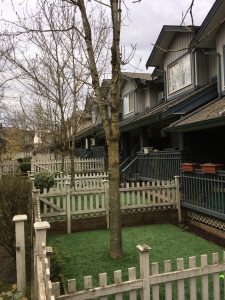
Shade also affects grass lawns negatively. Grass needs light to thrive and in this case we have four joined sections of backyards that turn dark in summer as the mature ash trees flush out with new growth.

Two years ago I personally pruned whatever branches I could reach on these mature ash trees (Fraxinus). Alas, it had very little effect on the lawns. They were still shady and weak. So the strata council called a tree company to remove the trees. However, the tree company advised them that the municipality was unlikely to issue tree removal permits because the trees were mature and close to houses.

Ok, so now what? One last idea: artificial turf. It looks great in shade and it eliminates the annual fight with expensive grass seed and soil top-dressing. In addition, landscape maintenance workers don’t mind skipping these units because they are difficult to access with push mowers.

This is one case where artificial turf was the last resort.

Conclusion

If you must have lawn, natural grass is better. I personally dislike man-made plastic turf. But there are cases where installing artificial turf makes perfect sense, such as dog damaged lawns, shady lawns and poorly draining lawns sitting on top of clay soils.


Oak tree versus artificial turf

By | Arborist Insights, Landscaping | No Comments

It pays to join green Facebook groups because once in a while you run into interesting landscaping cases. Like the case of an oak tree versus artificial turf.

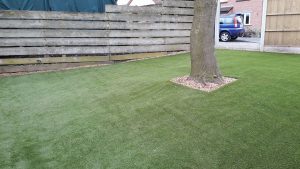
While I am not a fan of plastic grass I will show in a future blog that there are some legitimate cases where artificial turf makes sense. More on that later. For now all we need to know is that the artificial turf install was done well. It was done in Europe in an English-speaking country obsessed with royals. See the picture below.

Poor oak

I understand the landscape installer tried to get a tree removal permit but the local authorities wouldn’t have it. So the oak stayed (yes!) but the artificial turf still went all around it.

I’m convinced that trees and artificial turf don’t mix well. Here’s why.

a) Trees rely on surficial roots to obtain water and nutrients and this root network often extends far beyond the drip line. The oak in this example was left with a small square at its base, the rest of the area got artificial turf. This will make it extremely difficult for the tree to obtain all of its required resources.

b) Artificial turf usually involves the use of compactor machines and soil compaction around tree bases is deadly. Once the soil gets compacted it’s difficult for the tree roots to obtain resources. Water will just run off instead of penetrating into the soil. Soil compaction is a silent tree killer.

This install didn’t use any stone crush base and it’s not completely clear if the soil was compacted with a machine. Any landscape work around the tree base is detrimental. The bare soil must have been graded before turf install.

c) Artificial turf heats up! I know this because my son plays soccer. If the turf can heat up my son’s modern plastic cleats, imagine what it does to the soil below. Soils under artificial turf die. My poor son suffered during his match because the host soccer club failed to water the turf. Who will help the poor oak?


IMG_0702


Conclusion

It takes time for trees to decline and die. I don’t like this oak tree’s chances. I’m convinced that landscape trees and artificial turf don’t mix well. You can have one or the other but not both.


Basic tree maintenance techniques for landscapers: 3-point cut

By | Arborist Insights, landscape maintenance, Trees | No Comments

There are many key landscape maintenance techniques all landscapers should know well. I try to teach these techniques to our new company recruits; and home owners can benefit as well from knowing them. Trees are an important component of our landscapes and must be maintained properly.


Three point cuts

This is a basic technique all landscapers must know. ISA certification is not required, although I always recommend it to workers with 2-3 years of field experience. This 3-point cut technique does appear in the Certified Landscape Technician practical testing module on pruning. However, you just have to tell the judge how you would make the 3-point cut because they use one tree to test all candidates.

For now, let’s stick to basics.

Yesterday I was at a site doing normal winter maintenance. I finessed beds, blew leafy piles and then I ran into Magnolia trees that were clearly encroaching on a staircase. So I took action because I had time for it and I also enjoy the work.

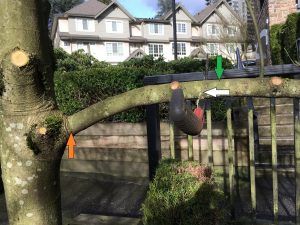
To remove an unwanted branch, you must use a 3-point cut, unless you’re removing a smaller branch that could almost be taken off with hand snips. Why 3 point? Because first you have to take off the weight of the branch. If you don’t you risk bark damage.


IMG_4307edd


(1) Undercut (White arrow)

Make a decent undercut without getting your sharp hand saw pinched by the wood.

(2) Second cut (Green arrow) to take the weight off. See how cleanly the branch shears off. If you attempt to make just one cut at the branch collar (Orange arrow) you risk ripping off the bark.


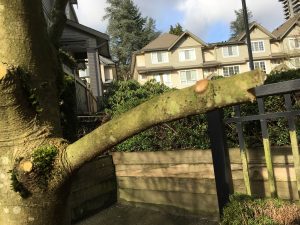
IMG_4309ed

The first two cuts are completed.


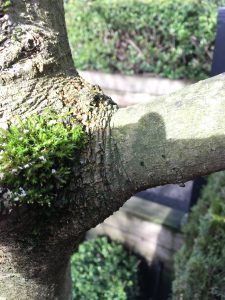
(3) The final cut happens at the branch collar (Orange arrow). We give the tree a chance to cover up the wound. Just make sure you don’t cut into the branch collar.


IMG_4310ed

The branch collar is clearly visible.


IMG_4311ed

All done!


The problem with stubs

Leaving a stub means the tree can’t properly heal the wound by closing it over. The stub dies anyway but it could allow diseases to enter the tree. So make proper cuts without leaving stubs.


IMG_4278 (1)ed

Acer griseum with a stub.


This cut was poorly done. The stub is clearly dead and you can see how the tree tried to cover up the wound. You wouldn’t believe how many of these cuts I see in the field. Sometimes the dead stub just breaks off.

Once you learn the 3-point cut, it will become automatic with practice.


Why pollarding trees gives me a rash

By | Arborist Insights, Pruning | No Comments

I’m kidding, of course, I don’t suffer from rashes after tree pruning. But I do find pollarding too forced and ugly immediately after. In summer, when the tree crowns are full of foliage the trees look fine.

Incredibly, I’ve been an ISA certified arborist since 2006 but last week was my first-ever pollarding session. Since our site was all snowy, it was a great time to prune trees.

Why pollarding?

So why do we resort to pollarding? In the very old days, people understood that cutting down all of their trees for firewood was short-sighted. So instead they pollarded their trees and then used the wood. But times have changed.

Now we pollard trees to keep them at a smaller size then they would otherwise reach. It makes sense at our site where three London plane trees (Platanus x acerifolia) are located close to the pool. See the picture below taken from my Kindle e-book: Common Strata Plants: A Guide for West Coast Landscapers, available for download from Amazon.


Platanus x acerifolia

Platanus x acerifolia


Pollarding involves the removal of the upper branches of a tree which then promotes a dense head of foliage and branches. It just looks like hell right after you do it. In a perfect world, the London plane trees could be let go to grow as big as they wished. I wish!

The trick, then, is to pick a height and pollard the trees annually. The actual work is very simple because you’re simply beheading skinny branches that shot up from the previous pruning cuts. Staying safe while you prune is more demanding.

My arborist technician apprentice climbed the tree while I stayed on the ground and used a ladder with pole pruners. Once in a while I would steal a big-brother glance at my eager apprentice to make sure his ropes were still supporting him.


IMG_4425ed

My work in progress. The gnarly ends of the branches don’t exactly inspire me.


Timing

Late winter or early spring are best for pollarding. One exception are maple (Acer species) which bleed sap when cut at these times. The pruning rule for maples is before Christmas.

If you have trees that are outgrowing their space and you don’t want to lose them or can’t afford to replace them, then by all means pollard your trees annually. The trees look horrific immediately after pruning but in summer they’re fine. Personally, I would prefer not to pollard anything.


51NTPMQ0wOL

The case of struggling paperbark maples

By | Arborist Insights, Trees | No Comments

I got to see a number of our sites before Christmas because the regular foremen were on vacation. It’s always nice to get a fresh pair of eyes on site, especially before the holidays. Everything must look perfect for the holidays.

One site in White Rock stood out because of its many paperbark maple trees (Acer griseum). They look awesome thanks to their peeling cinnamon coloured bark. So I was stunned when one of my helpers started rubbing off the peeling bark as if the tree was diseased. He clearly preferred a smooth bark look but I doubt the tree appreciated the assault. I told him to stop.

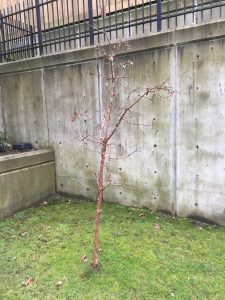
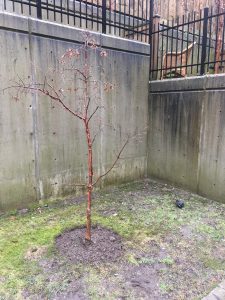
Every paperbark maple on site looked great until I turned the corner into a dead end surrounded by cement walls on three sides. Here we had two specimens of the same maple species and they were clearly struggling. Why?


IMG_3574edIMG_3575ed


A) Lack of light. Trees require sunlight for food production and the setting here is horrific. Since there are cement walls on three sides, this is a shady corner. It’s not a great place for these maples to thrive. And the same goes for the grass. It, too, could benefit from more light.


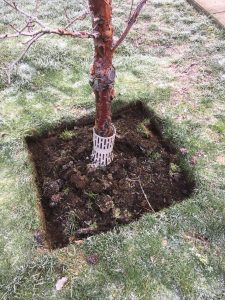
B) Competition. We already know that young trees planted into turf struggle with competition for resources. And they often lose. If you must plant trees into turf areas then establishing tree wells around them to help them. The tree wells channel water and nutrients into the root zone and they keep machines away.


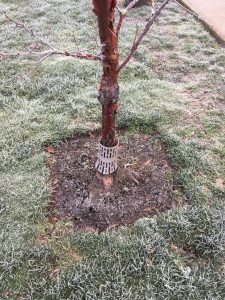
C) Conflicts with machines. If you zoom in, you will notice bark damage at ground level. I say it’s line edger damage. The kind of damage that could be prevented with plastic tree guards or by establishing a tree well around the tree.

Repeated hits can kill the tree. Here it looks like the trees are using precious resources for repair and stress mitigation instead of growth. Thus the struggling look exhibited by these two specimens.

One other possibility is digging up the trees and moving them to a sunnier location away from lawns. The cement walls could be covered by climbing hydrangeas which are already planted on this site.


IMG_3825ed

January 2018: sporting a new tree well.

How to pimp out your boulevard tree wells

By | Arborist Insights, landscape maintenance, Strata Maintenance, Trees | No Comments

Sometimes you look out on the boulevard at your strata site and the tree wells look a bit tired. But it doesn’t have to be that way. With some tools and a bit of soil amender you can quickly pimp out your tree wells and make them look great before the holiday season hits.


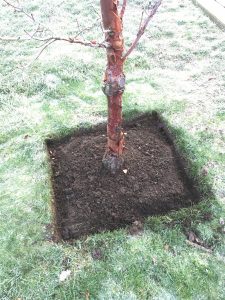
IMG_3329ed

This looks a bit tired.


Step 1

First we grab a nice sharp spade and we deep edge the tree wells. The spade must hit the edge at a ninety degree angle. Nothing else will do.

As for the depth, it should be deep enough to anchor the new soil that’s coming in but not too deep. We’re not building ditches although I have created some ankle-busters in my past. Soil conditions will sometime dictate the appropriate depth.


IMG_3330ed

Acer griseum tree well. You might as well remove the tree guard.


Step 2

I know, most people dread this step but we have to weed the tree wells nicely. Use a good cultivator and when you remove the weeds also grab the chunks from step 1.


IMG_3331ed

Nice and clean. The ground was a bit frozen so weeding was a challenge.


Step 3

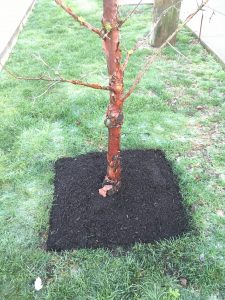
Next, install good quality soil amender and pile it on nicely. Remember, it will settle so don’t worry if the tree wells look a bit puffy. This step gives you an instant upgrade because the fresh black soil looks great!

Warning: do you remember what a doughnut looks like? That is exactly what the soil around your tree should look like. Find the root flare and make the new soil level with it. Then build it up and taper it off as you hit your new deep edge.

Why? Because piling soil above the root flare leads to problems. For some reason, people love building soil pyramids at the base of trees. But it’s a common mistake. The bark above the root flare isn’t supposed to be in a dark, damp environment and it can over time rot. This in turn invites disease in.

Another potential problem is adventitious roots developing above the root flare inside your soil pyramid. There the roots start to circle and they can over time girdle the tree.

So remember, don’t create soil pyramids. Think doughnuts!


Step 4

The last step involves clean-up. Especially the grass edges of your new tree wells. Blow them off gently.

That’s it. Now your clients can enjoy beautiful boulevard tree wells on their Christmas holiday walks.


IMG_3339ed

All done! Weeded, edged and top-dressed. This is my kind of tree well.