All Posts By

Vas Sladek

Line edger maintenance basics

By | Edging, Education, Lawn Care | No Comments

Let’s talk about basic line edger maintenance. An earlier blog discussed the importance of line edger head lubrication. Now we consider the spool and smooth line feeding.

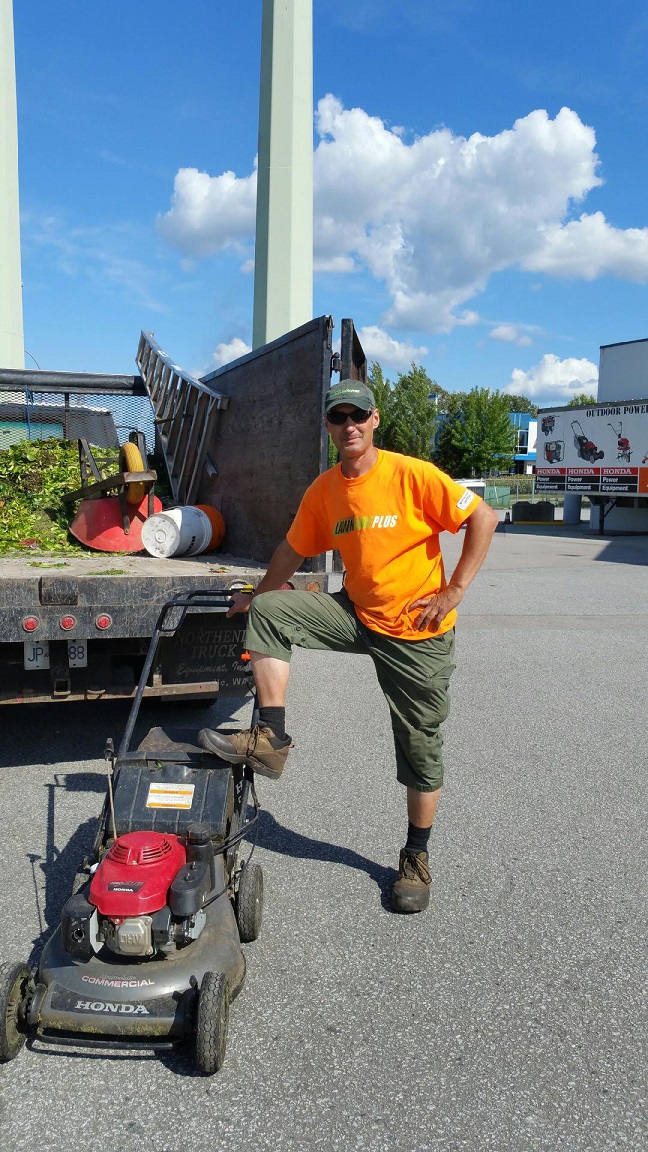
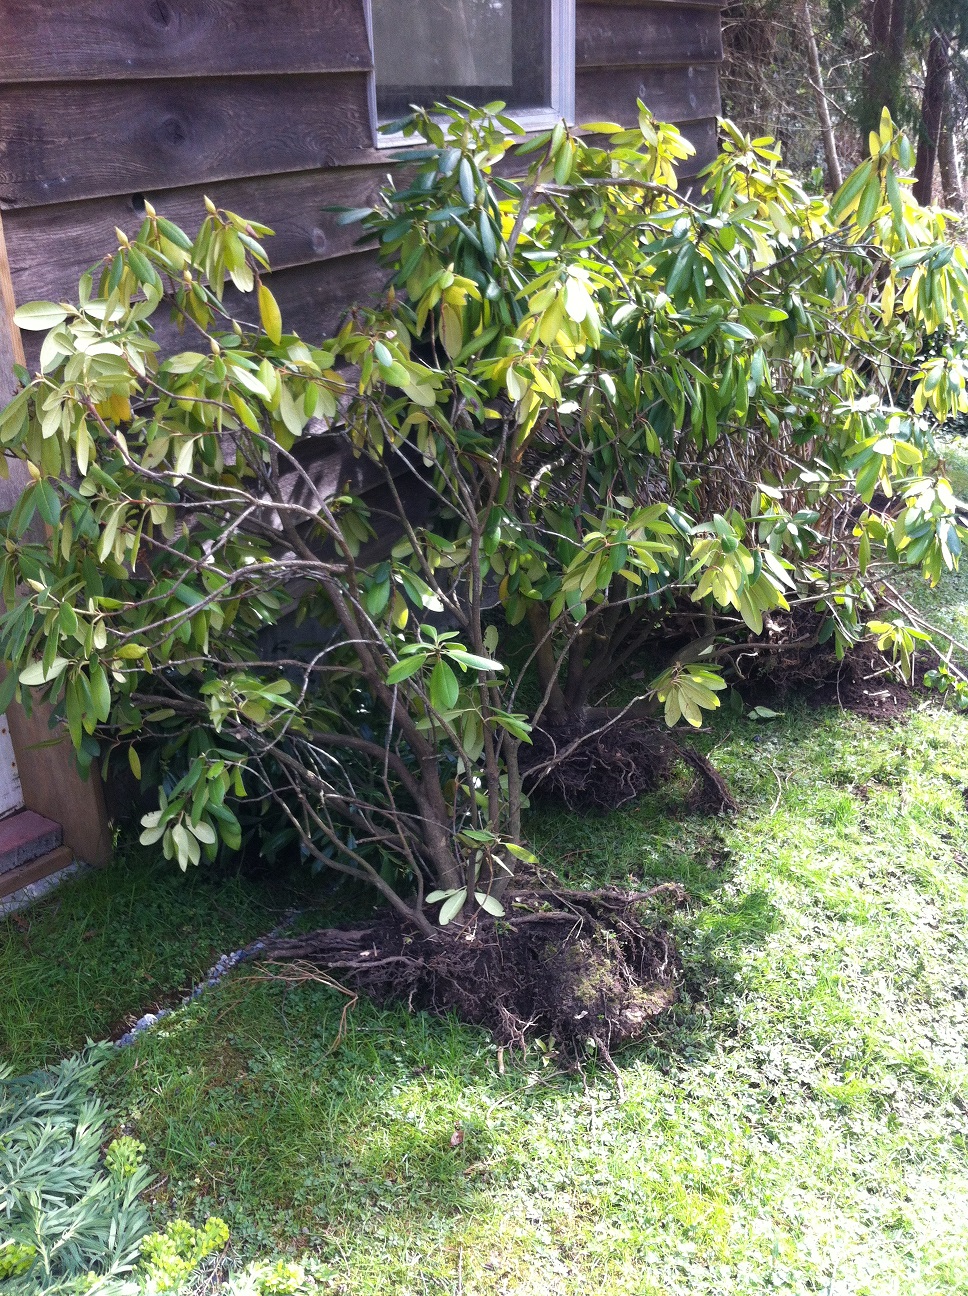
July 1st Canada Day is prime fun time but sometimes the schedule demands a little bit of work. Like all work on stat holidays, the directions are mow-blow-go. Get the basics done and bail. Overtime is costly and residents would prefer to enjoy their holiday without noise and exposure to small engine exhaust.

So imagine my frustration when the line edger was not feeding new line. Normally you bump the head -gently!-on a hard surface and the line advances. Not this past Friday. It was very hard to make progress like this, especially when the directions were to get it done quickly.

There could be two problems with the line.

A) The line is about to run out and is too short to feed out

B) The line is crossed or otherwise stuck in the spool

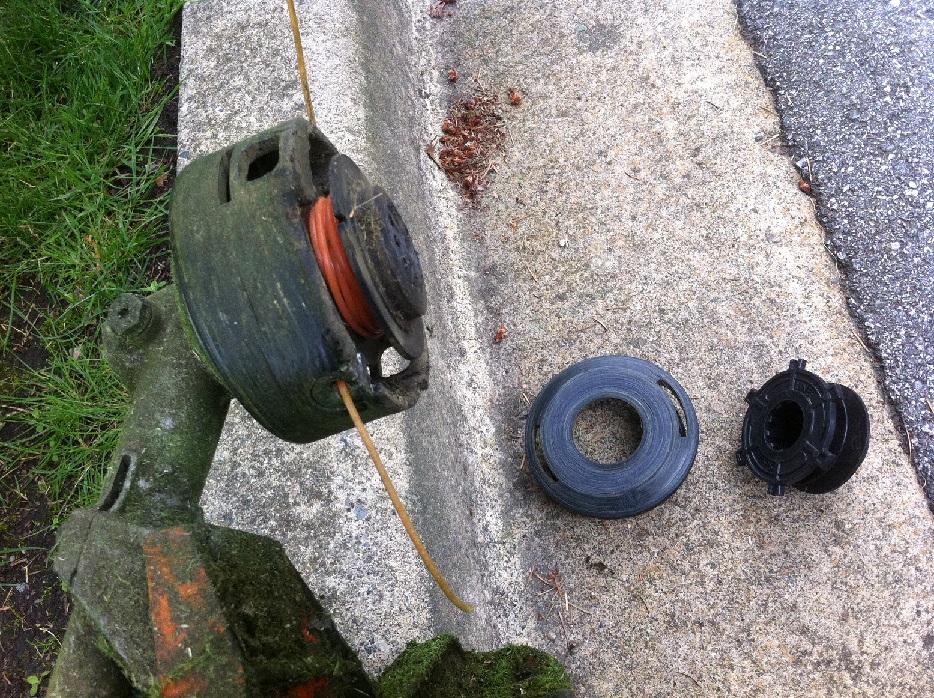
I changed the line carefully and still the line wouldn’t advance properly. Then it hit me. The spool in the middle of the head was worn out. (I don’t normally use this machine.) Worn out is an understatement.
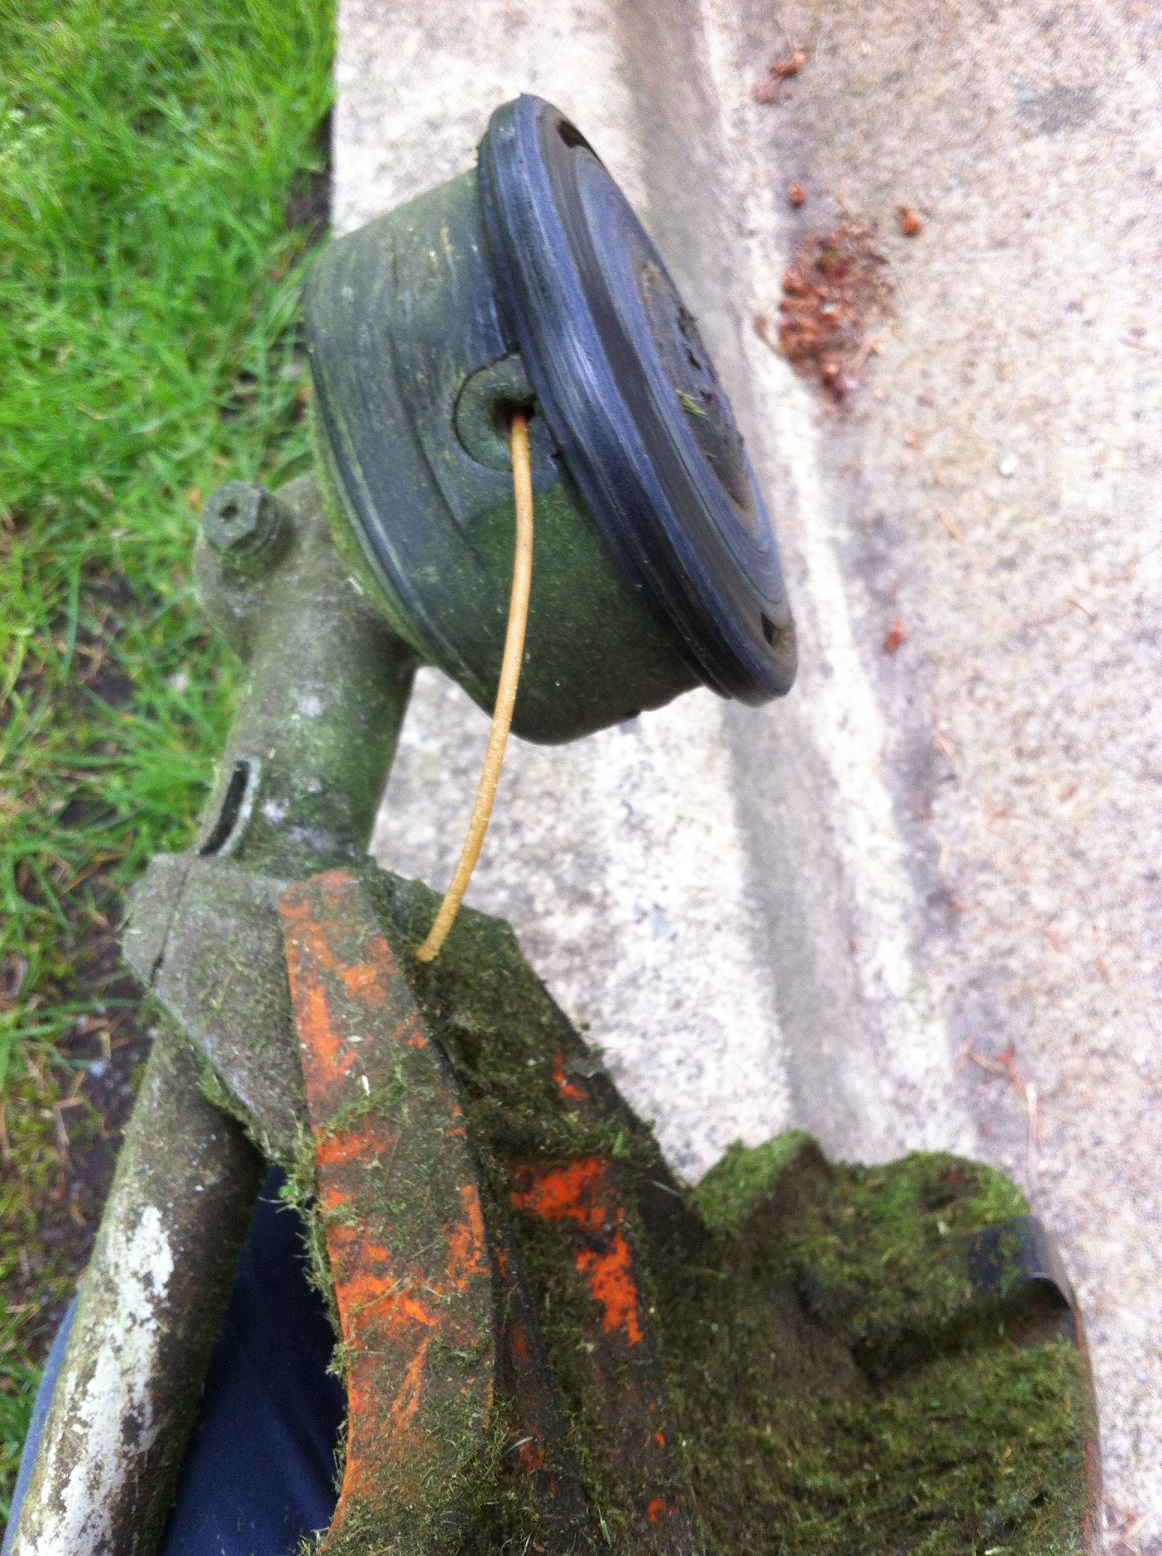
 

IMG_5124edit

worn out spool


IMG_5126edit

pop the head


IMG_5127edit

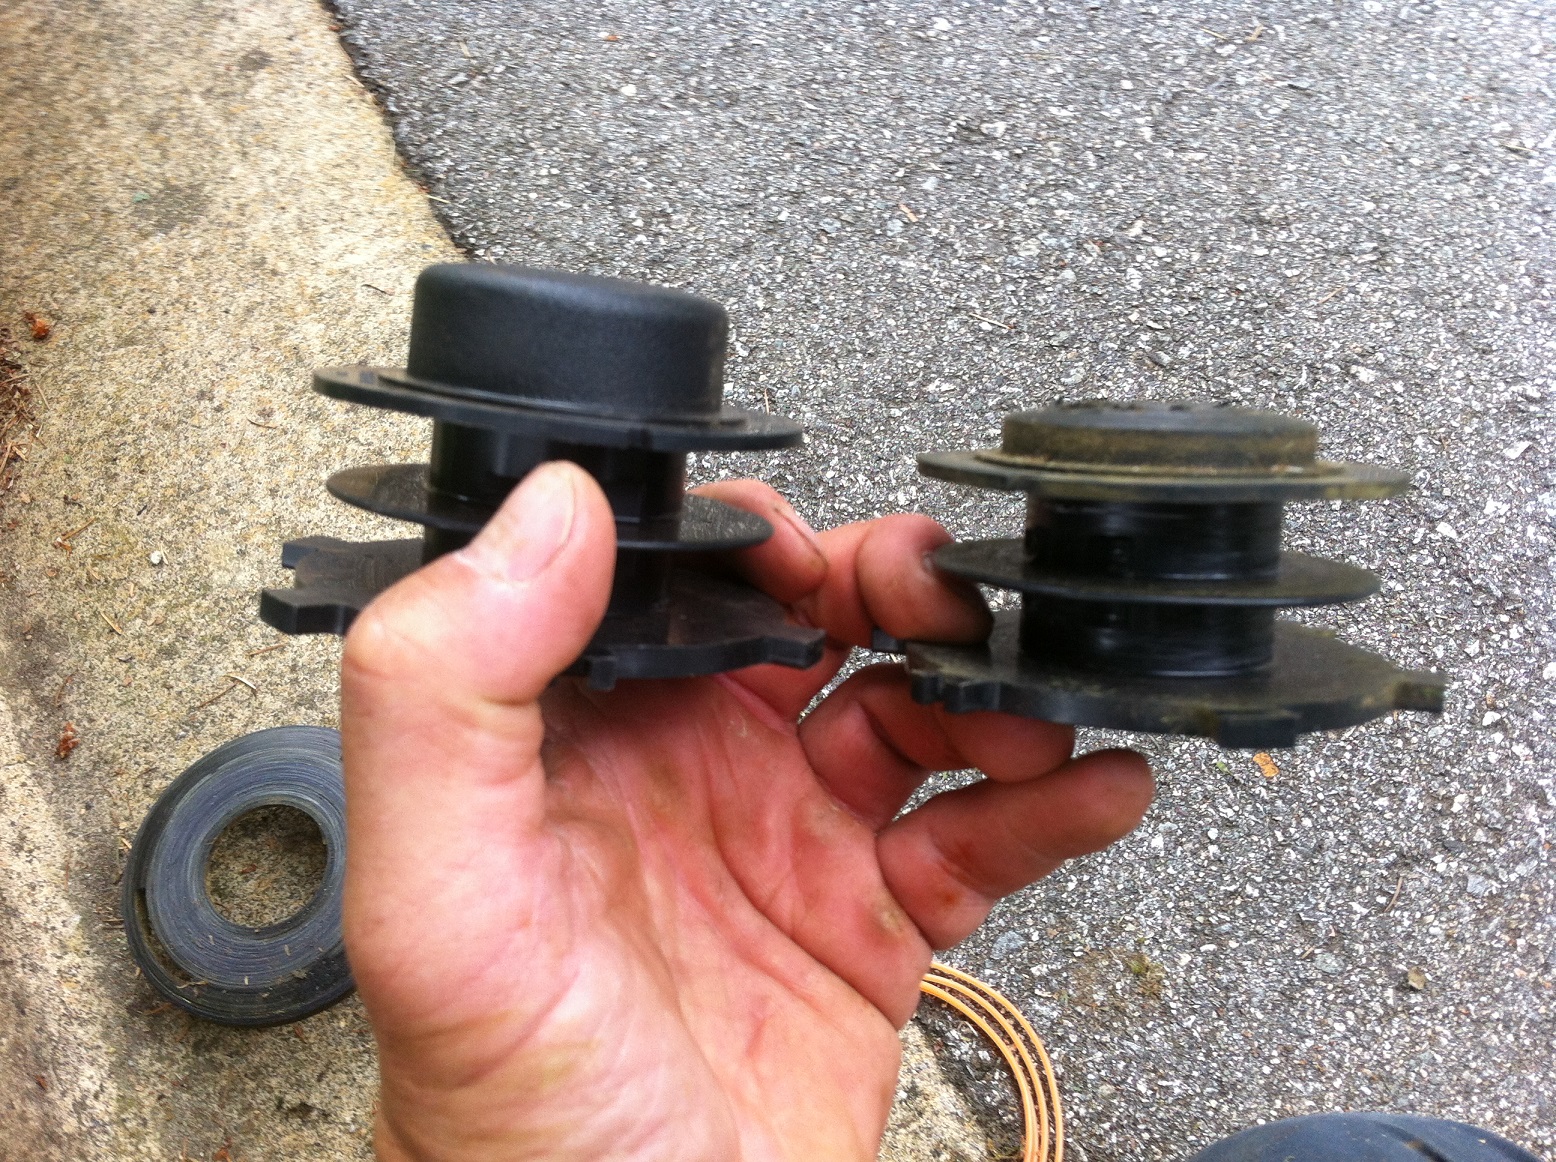
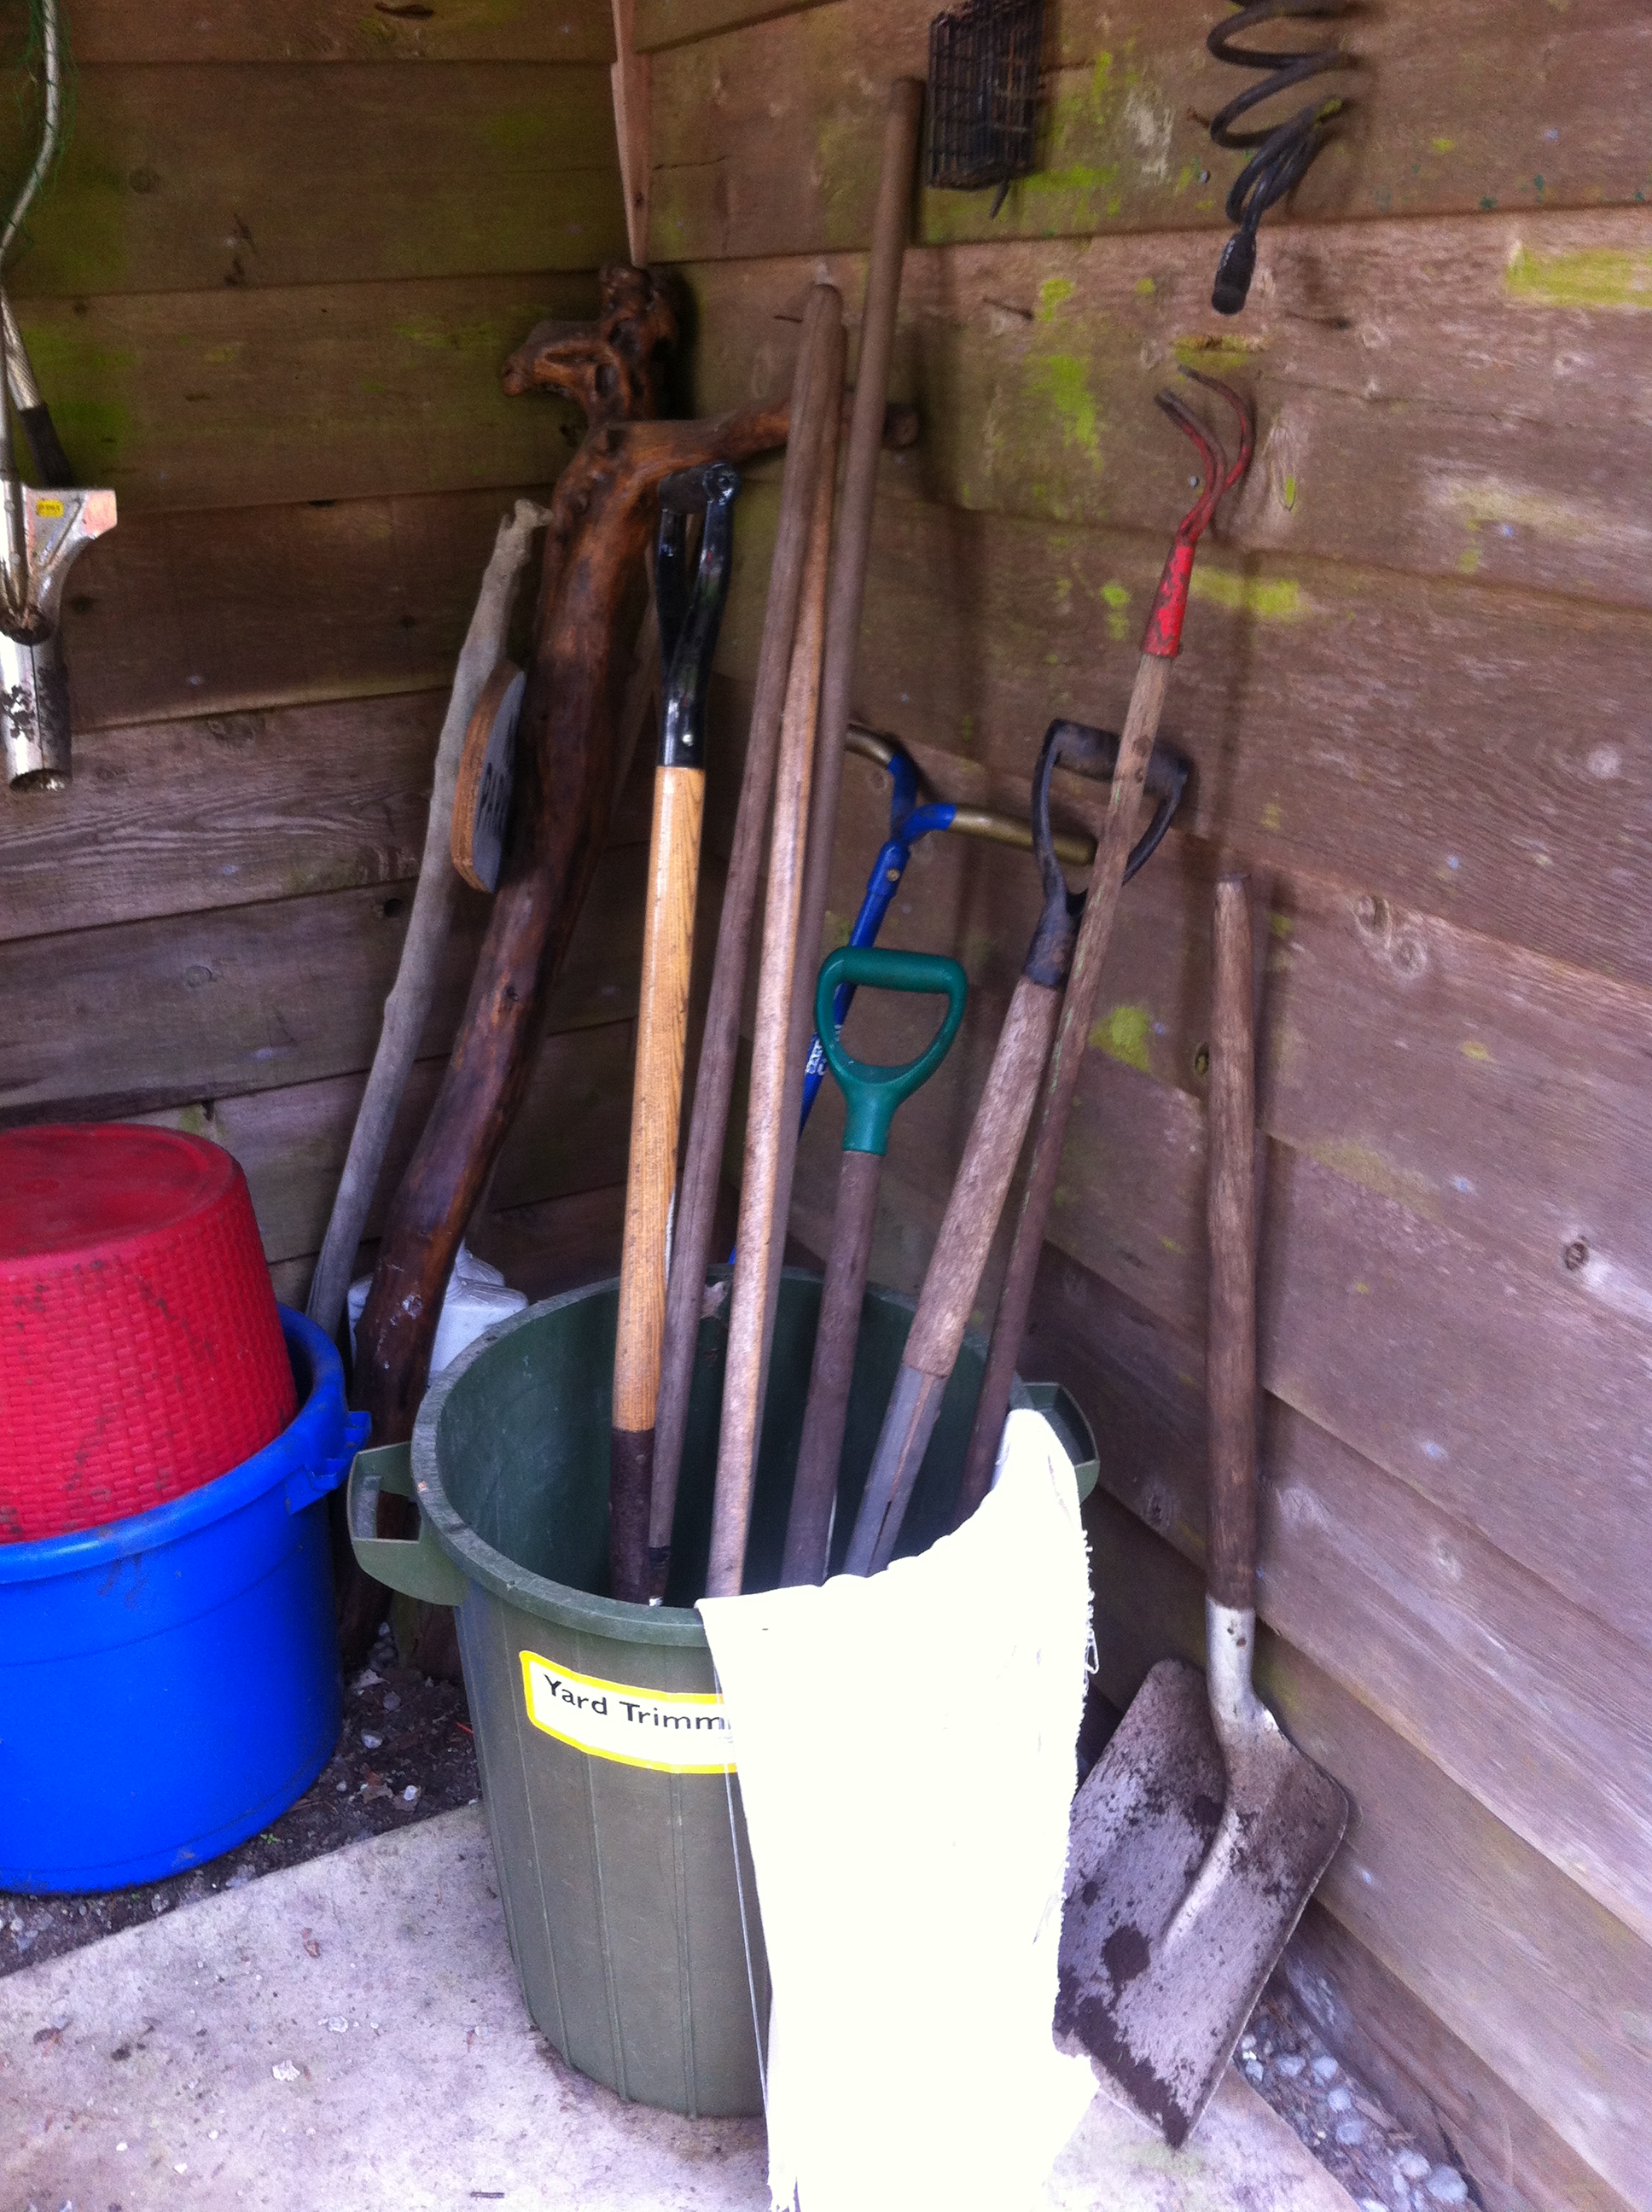
replace spent spool, carry spare parts in your truck


IMG_5130edit

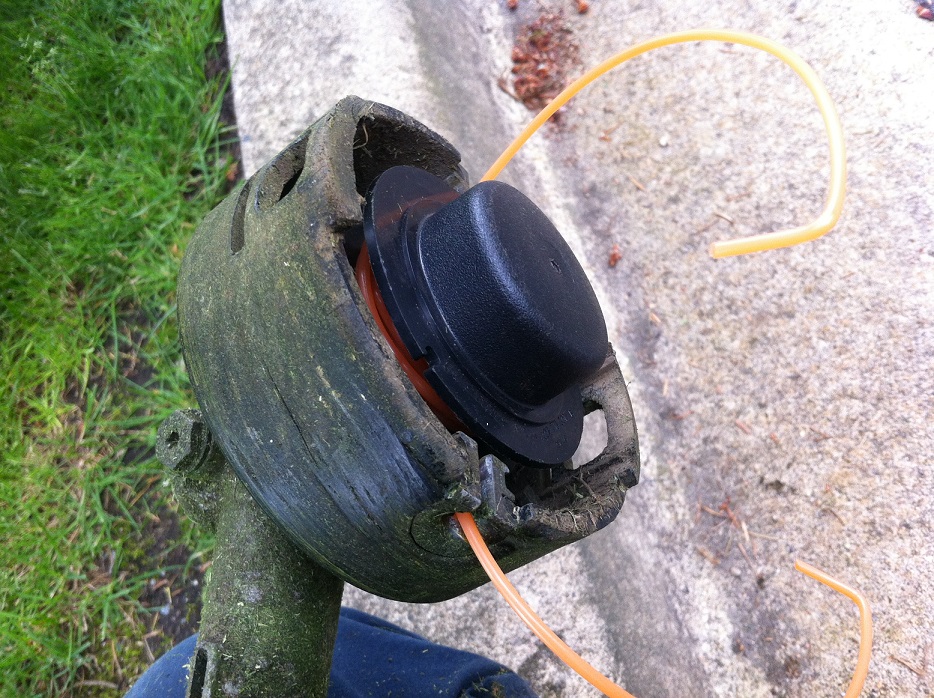
might as well install new line
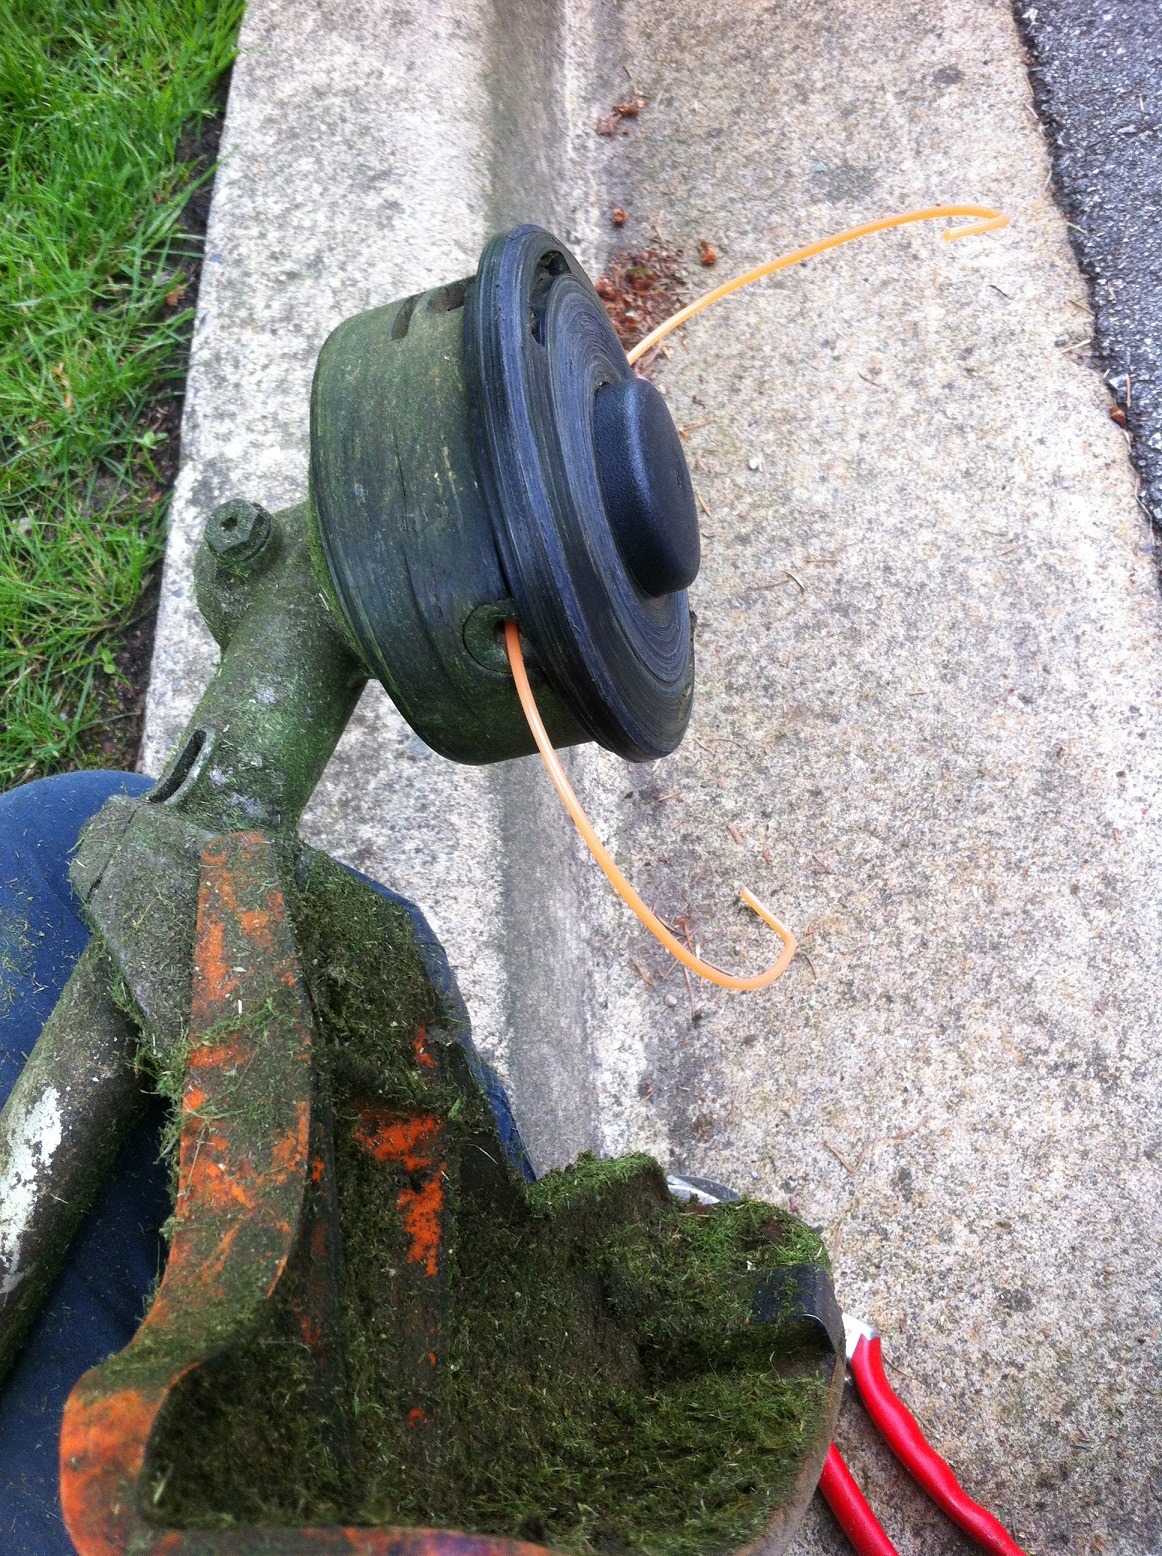
 

IMG_5132edit

much better!


IMG_5133edit

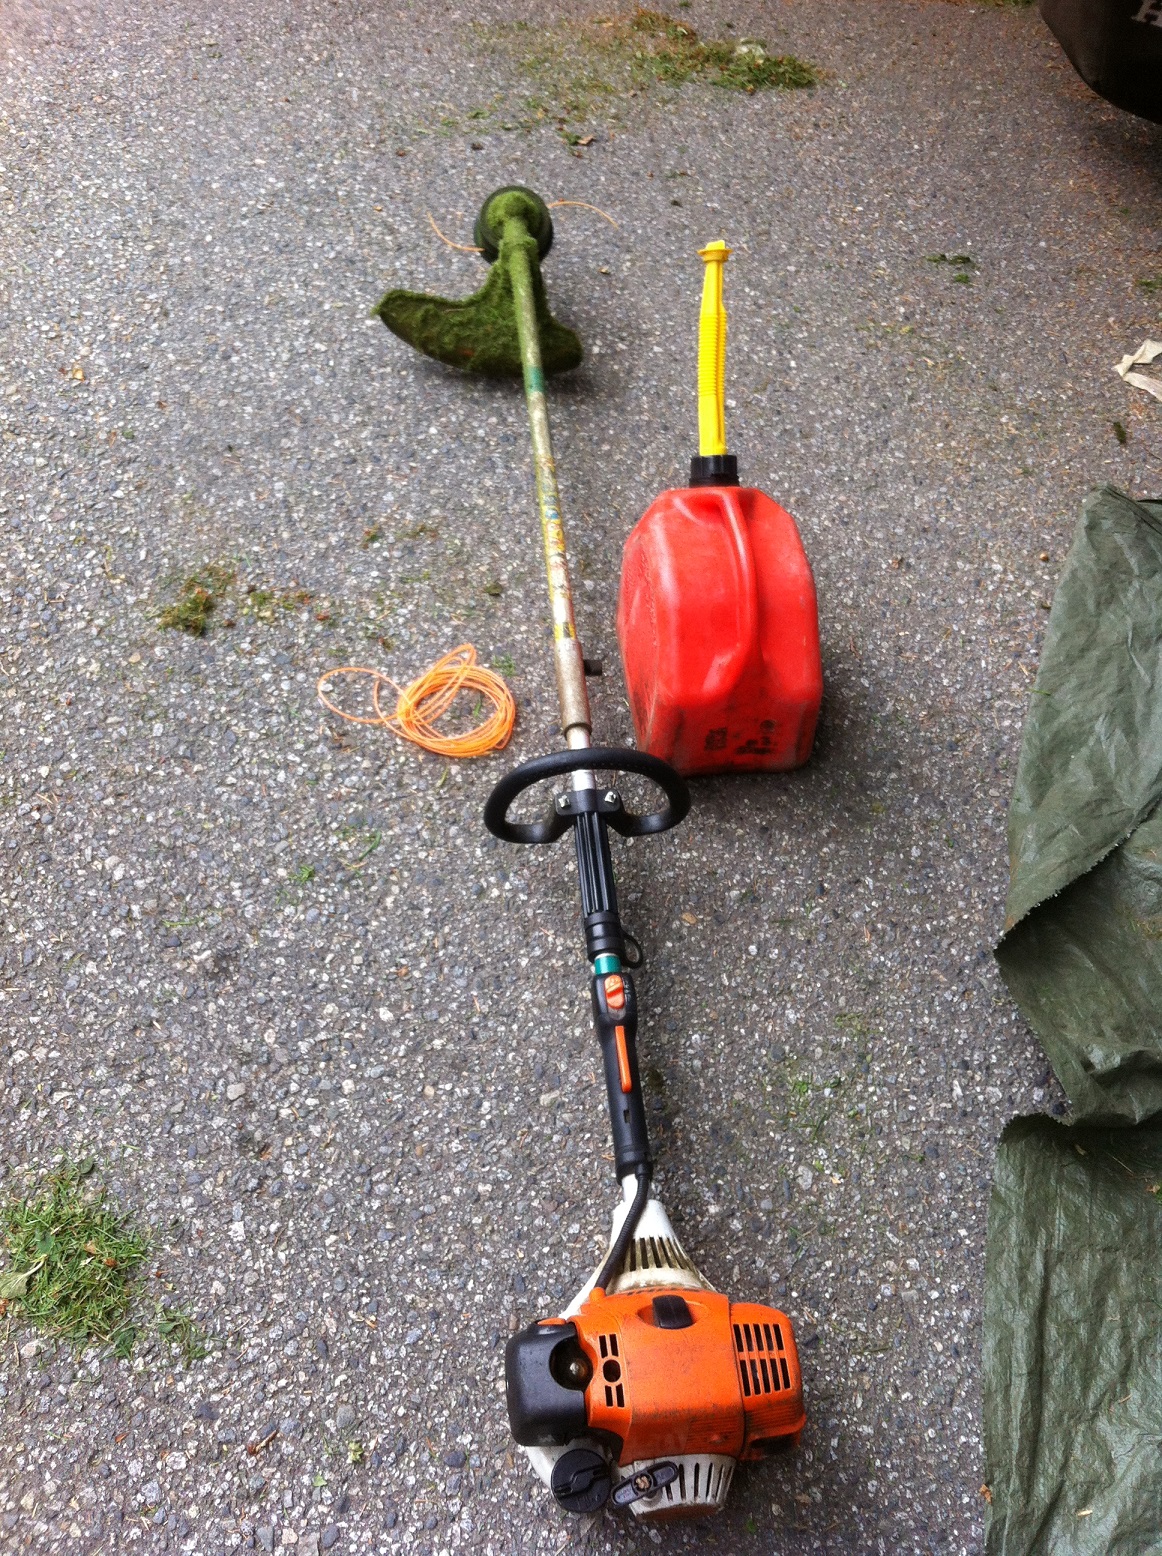
re-fuel and bring spare line


Before you resume your line edging work, re-fuel your gas tank and put correctly pre-cut spare line in your pocket. Maximum efficiency dictates that you have spare line ready to go if you should run out far away from your truck. Extra walking is the enemy of production.

Ear protection, safety goggles and long pants are all mandatory for safe line edging. Make sure residents are at a safe distance from you. Little boys love watching machines.

Your line edger is a workhorse so take care of it.


Can West Hort Show 2016

By | Education, Events | No Comments

Can West Hort Show is again returning to the TRADEX in Abbotsford, BC, this year from September 28 to 29, 2016.

Registration opens on July 22. If you have never been to the show, check it out this year. It’s the biggest horticulture show in BC and well worth the entry fee. Landscape companies get lots of free passes. Ask around.

Personally, I attend the day-long (9-3pm) Urban Forestry Symposium every year. The $200+ fee is an investment in my education and includes lunch. My employer might have budget for this. I will ask nicely. We will see. You can do the same. Just ask nicely. Don’t forget the ISA will give you CEUs for the five hours. Same for the CNLA, if you are Landscape Industry Certified.

The lectures are all tree related. It’s also a chance to mingle with people from other companies and municipalities; meet new people and reconnect with old acquaintances. Last year one of the lectures was delivered by the ISA president and university professor on “Trees and drought.” Very topical. Sadly, when I walked over to pick up a copy of the lecture notes, I missed meeting journeyman horticulturist Todd Major by a few seconds.

Once the lectures finish, I walk around the trade floor checking out the booths. Inevitably, I will run into someone I haven’t seen in ages and we’ll talk. My pockets will be full of candy and bag full of catalogues.

The best booth to visit is the Landscape Industry Certified plant ID station. It is set up like a test station with actual live specimens and you have to match them to the list on your sheet. Why not test yourself? You could win a prize.

The show also features general sessions and power clinics. Pick one you like or attend them all. Collect CEUs.

There is lots of free parking in front of the Tradex building. The show opens 10-5pm.

(visit http://www.canwesthortshow.com for details)

See you there!


IMG_5413edit

If you see Vas in orange, say Hello


SOL garden opens at Douglas College

By | Education, Events, gardening | One Comment

The SOL (Sustainable Outreach Learning) garden at Douglas College in Coquitlam is now officially open. The creation of  new gardens is always good news! I attended the June 20, 2016 official opening of the garden. Free refreshments also helped after a long day at work.


IMG_4924edit


Built one year ago, the garden was officially opened after speeches and grass ribbon cutting. It features research beds and native planting at the entrance and on the edges. How many native plants can you name? I spotted Gaultheria shallon, Rubus spectabilis and Polystichum munitum.


IMG_4948edit

This ribbon almost required power shears


IMG_4957edit

How many native plants can you name?


The key point is emphasis on beneficial insects. I love plants and openly confess to outrageous ignorance when it comes to insects. I know bees are fuzzy with friendly faces; wasps are smooth with mean faces. I have lots to learn. But I know how important pollinators are. They are responsible for pollinating something like 80% of the food we consume. We must therefore care for them by providing food sources and eliminating harmful chemicals.

One interesting research plot is full of nursery cultivars which lack pollen and nectar. The insects are tricked but not for long. They know what the good stuff tastes like and fly off to search for it.


IMG_4927edit

Yarrow


IMG_4929edit

Study the tags and improve your plant ID


IMG_4931

Verbena bonariensis


IMG_4926edit

Vegetables


IMG_4934edit

Note insect traps


IMG_4933edit

Feel free to visit and pick any ripe strawberries. Once local black bears catch on……


IMG_4943edit

Delicious dessert, no pollination required


The garden is located on the south side of the Douglas College campus in Coquitlam. Feel free to visit. Check for ripe strawberries and study the plants. The college has a gardening club you can join, you can volunteer and, if your pockets are deep, you can donate cash. Cash is required for tables and a storage shed.

I saved the best for last: there are plans for seminars and educational programs which is very exciting. For now, you can pick up handouts on insect and plant identification.

European chafer beetle battles: busy June

By | Education, gardening, Lawn Care, Strata Maintenance | No Comments

June is a busy month for the European chafer beetles. I was thinking about it this past weekend as I finessed beds for a client. Instead of grubs, I was uncovering adult beetles. Some were spent and some just played dead, then made a run for it.


IMG_5049edit

European chafer beetles on a Hydrangea leaf. Only the top beetle is dead, the other three played dead and then made a run for it!


The beetles mature and emerge out of the ground; most likely out of your damaged lawn. Then they fly into nearby  trees to mate and back down to lay eggs. If you’re lucky, they invade your neighbour’s lawn. If you plan to defend your lawn with nematodes, pay attention to the timing.

Nematodes

In late June the beetles lay eggs and by mid-July nematodes should be available. They must be applied to your well-watered lawn, preferably on a rainy day. The recommended nematode species is the “seeker” Nemasys G. Nematodes work but they are not selective. They hunt down beneficial grubs as well. The other problem is that you might have to re-apply the nematodes again next year. Cut your lawn higher and baby it with proper watering and fertilizing.


Fabric alternative

But what if you don’t feel like applying nematodes to your lawn? One alternative I have seen is breathable fabric used in agriculture. It makes it difficult for the beetles to stick their bottoms into your lawn and lay eggs. Pin the fabric to your lawn at this critical June stage, store it and re-use it next year. In the example below the fabric cost was around $250.


IMG_5002edit


IMG_4996edit


Seed alternative

Another alternative is using a different seed mix that will make your grass less appetizing. One test I am involved with involves “Chafer-resistant” seed mix with tall fescue grasses and 2% micro-clover. Warning: the micro-clover will produce white flowers and attract insects to your lawn. At $110+ for a big bag, it will also cost you.


IMG_4566edit

We are testing this seed mix on one site


IMG_4572edit

Spot the micro-clover

The European chafer beetle battles aren’t going away anytime soon but we can fight back with alternatives.


Landscape pros make their own laundry detergent

By | Education, Tips | No Comments

This blog will show you how to make your own laundry detergent, save money, avoid industrial chemicals and wash your work clothes well. It’s a long season outside for all landscape professionals, in all kinds of weather. Clothing gets filthy and beat up. We wash it almost daily since company uniforms with logos must be worn. Follow the steps below and save money on laundry detergent for your work clothes.

Credit: the idea and actual procedure comes from a book called “397 ways to save money”. I tried it out and a blog was born.

Step 1

Find leftover soap bars or get a third of a new bar. Warm up 1.5L of water and cut up the soap bar into it. The smaller the better. Gently stir until the soap melts. I use a “retired” pot to avoid unnecessary conflict with my wife.


photo 1

Step 2

Add 125ml of washing soda (not baking soda) and 125ml of borax powder. Stir everything until it dissolves. Don’t over-boil it as it can get quite messy. It’s best if you have the kitchen to yourself and your partner is out of the country. (The box labels remind you that the powders are NOT to be used for drug manufacturing!)


photo 2


Step 3

Transfer the pot contents into an 8L container. I use two 4L milk containers. Top up with warm water. Let the contents settle for 24 hours.

Step 4

You did it! Enjoy your new cheap detergent.


photo 3

4L milk jug, 24 hours to settle

Yes, you can make your own laundry detergent, save money and avoid nasty industrial chemicals.

When I first told my co-workers I made my own laundry detergent on the weekend, I got puzzled looks back. Some even felt sorry for me, asked me if everything was fine at home and offered me financial help! I’m happy to report that my clothes are fine and the powder boxes make a lot of detergent. But don’t just take my word for it. Try it out and save some money. Post comments below this blog.

Love note for tulip trees (Liriodendron tulipifera)

By | Arborist Insights, Landscaping, Plant Species Information | No Comments

It’s early May and tulip trees are hard to miss on one of my Maple Ridge strata sites. Liriodendron tulipifera (family Magnoliaceae) are eastern USA natives. In landscapes they are used as shade or lawn trees. They are large trees and therefore need ample space. Always consider your tree’s mature size. They are fast-growing trees but weak-wooded. This may be part of the reason why tulip trees are not recommended for street tree use. Then there is the size issue.

A little twist

Tulip trees bloom from May to June but there is an interesting twist. Trees usually flower and then leaf out. Cherries, for example, put on a great show, fade and then green foliage appears. Show is over. Tulip trees flower as they leaf out and since the cup-shaped tulip-like flowers are borne high in the trees, they are easy to miss. Not for me. Armed with this knowledge I was able to shoot my own flower pictures for this blog.


IMG_2988

IMG_2984


Tulip tree leaves also have an interesting tulip-like appearance. Together with the tulip-like flowers, it makes it easy to remember the common name. But remember it’s best to learn botanical names. You will be glad you did. Sometimes I find it amusing how both leaves and flowers are tulip-like. The actual leaf-out mechanism is  interesting but difficult to describe.


IMG_1510edit


IMG_2712edit


Tulip trees like full sun and tolerate moderate drought conditions. In dry weather interior leaves turn yellow and fall off. This is a response to weather, not a disease.

One problem

One annoyance with tulip trees is aphids. When aphid infestations are large lots of honeydew secretions appear on the leaves. These provide the growing medium for sooty mold fungus. Usually there is little permanent damage to the tree but it is annoying. Mrs. Tushman goes out to get her latte and the family Porsche is covered in sticky secretions. Then the world is close to ending.


IMG_4239edit

Aphids


Tulip trees are gorgeous trees. Spot them in your neighborhoods. Plant them if you are lucky enough to have the required big spaces for it.

Creeping jenny: rampant and aggressive!

By | gardening, Landscaping, Plant Species Information | No Comments

Creeping jenny (Lysimachia nummularia) is an attractive perennial groundcover. But first, allow me to begin this  blog with a story. Years ago I used to maintain a Westwood Plateau site in Coquitlam, BC  with a roundabout which had  creeping jenny planted around the edges. One of the managers, a no-nonsense polished business guy, fussed about it almost weekly. Do we need more? Is it flowing over the curb edge too much; not enough? Don’t hurt it with your cultivators. Did the delivery dudes run it over again?

Then one day I got a phone call from my boss saying the manager collapsed in his office and died. He was barely into his 40s. Brain aneurism. That was it. Gone in a flash. Now the nearly indestructible Lysimachia nummularia always reminds me of him.


IMG_2575edit

hard to miss yellow flowers coming in summer

Description

Lysimachia nummularia is a low-growing ground hugger, rampant, and evergreen. In summer it produces cup-shaped, bright yellow flowers. That’s when you really notice the plant. Bees will thank you for planting it in your garden. I find yellows very warm, happy colors. I have also seen creeping jenny planted in containers where it nicely spills over the edges. My own salvaged plants are doing fine in pots on the patio. Other uses include hanging baskets and border edging; just watch the spreading habit.


IMG_2574edit

weekly mowing doesn’t stop jenny from creeping into the lawn


IMG_2573edit

labeled rampant and aggressive and this proves it. Lysimachia invading a lawn from its border location


Unlike many other types of groundcovers, it can handle damper soil; it can also handle limited foot traffic. It survived numerous run-ins with delivery trucks in the above-mentioned roundabout.

It prefers full sun or partial shade. Obviously, full sun will give you better looking flowers. If your garden is shady, this will be a colorful groundcover plant. There are no serious diseases or insect problems to report.


IMG_2342edit

In combination with yellow-flowered Coreopsis


IMG_3817edit

As spiller in a pot

Source: www.finegardening.com

Pictures: Vas Sladek

How to design pots without stress

By | gardening, Landscaping, Seasonal, Strata Maintenance, Tips | No Comments

First, a quick flashback to 2014. Late in the day we pulled up at a seniors center and my municipal gardener boss asked us to quickly use up the flowers on the back of the truck. By planting four large pots. No guide, no plan. Go, go, go! I admit I panicked. How do you quickly arrange everything? Which plants go where? Colors? Oh my, I was sweating. Luckily it all turned out fine. I took a picture kneeling by “my” pot but the smile hid a ton of stress.

This event popped up in my head when I opened a recent issue of Landscape Management magazine (February 2016, page 16) and saw an article on pot design. The how to article conveniently divided the planting task into three categories.

  1. The pot should have a thriller in the middle to attract attention.
  2. Spiller plants spill out over the pot edges.
  3. Filler plants are placed in between the thriller and spiller plants.

Clearly this article was published a few years too late. I love the simplicity. Thriller, spiller, filler. Done.

Now for some examples before YOU start to panic.

Thriller plants could be: yuccas, cannas, fountain grasses, Angelonias, and dracaenas. For shade pots you can use ferns, hostas or heucheras.

Spiller plants could be: creeping jennies, vincas, bacopas, calibrachoas, lotuses and scaevolas

Filler plants could be most annuals.

Of course, proper design considers more than plants. Don’t forget other factors like wind, sun, fertilizers, water, upkeep, deadheading and yes, theft.

Now let’s practice:


IMG_1762

City of Coquitlam iGarden

Thriller: Cornus sericea

Filler and spiller: Skimmia

Spiller: Hyacinth


IMG_2456edit

Maple Ridge home owner

Extreme thriller: Ginkgo biloba tree

Spiller: Becopa

Filler: Pansies


IMG_8932

City of Coquitlam park event- my kids helped plant this pot.

Thriller: Dracaena

Spiller: Calibrachoa and potato vines

Fillers: many

Don’t stress like me. Design your pots with confidence. Have some fun. Change things up.

Remember the three key elements: Thriller, Spiller, and Filler. Good luck.

Almost a gardener: the anatomy of a great season

By | Education, gardening, Landscaping, Tips | No Comments

My 2014 municipal season has, so far, been my best working year ever. Sadly, when it became clear that there wouldn’t be a repeat in 2015, I was forced to think about the anatomy of my great season. What was it that made it great?

Learning!

Robin Sharma often uses this quote: “If you are the smartest person in the room, find another room.” My gardener-boss was fun, smart, experienced and certified, with killer plant identification skills. I had her all to myself on most days. Apprentice Vas couldn’t ask for more. Progress was guaranteed.

Encouraged by her positive comments, I walked into my Red Seal exam challenge with confidence; and passed! Now I belonged. It also wasn’t just another paper. It was a huge culmination of 16 sweaty, hard seasons outside in the landscape.

Learning is critical.

Embracing change

Everything was new and exciting and I handled the change fairly well. Some people don’t. Change is good. I found out some subtle and not so subtle differences between landscapers and gardeners. For example, we rarely used a backpack blower. Not every leaf was a messy enemy. Free arbor chips didn’t go to green waste; they were made for bed and tree well mulching. Some weeds were tolerated. No cheating with banned chemicals. Trucks drove speed limits and it was OK to park them on sidewalks. Yes, on sidewalks. Road medians aren’t gardens; they should look good at 60 km/hr.


IMG_3770edit

Free arbor chips, the best stuff for bed and tree well mulching

.Stretching

Scale. All of a sudden you are planting hundreds, thousands of bulbs, rototilling soil and diligently editing out spent bulbs so they don’t ruin next year’s display. Rocks that pop up stay: think soil pore spaces. Bulb planting depths stay uniform. Watering a hanging basket means soaking it.

Perennials everywhere. My notebook showed about 300 plants that were new to me. It is work in progress so I stretch myself. Weekly.

Planting trees bare-root for the first time was an awesome experience. I paid attention. That was exciting stuff.

You should always aim to be better than you were yesterday.


IMG_3834edit

My first-ever bare root planting


Facing your fears

On some days I showed up literally scared. It sucked in the moment but it felt great afterwards. Imagine my horror when I was asked to use a front loader for the first time. Luckily, we were the only ones in the yard. My gardener boss patiently waited as I got used to colliding the front loader with piles of mulch.

Then there was bulb removal. Since the bulb arrangements are changed every season, it is critical to remove 100% of the old, spent bulbs. Gold help you if you missed one.

Once, late in the day, I was asked to quickly plant pots with plants on the truck. No guide, no plan. Go! That was stressful. A  future blog on pots will show that there is no reason to feel stress with pots.

Fun

Work should be fun. I can not openly recount here all of the fun incidents but trust me, there was laughter with great people. On days when we installed brand new perennial beds, work didn’t feel like work. Same on the day I got to use a dibbler for planting for the first time. Magic.

One summer day, getting close to completing a new bed install, I had a young girl stop by, admire the new plants and tell me that I must be the world’s best gardener. Well, almost!

What was your best working year like?


Vas Sladek - Copy - Copy


How to make people happy with free plants

By | Landscaping, Seasonal, Species | No Comments

It pays to think before tossing perfectly good plants into your green waste. In the fall of 2015,  I took bulbs pulled and discarded from a municipal display bed and planted them at my client’s rental place. For free. Of course. The municipality, which we don’t have to name, normally doesn’t reuse its bulbs. Tulips, for example, give the best show in season one. Beyond that they’re not as reliable. Other bulbs on the other hand will keep on giving, assuming you don’t get tired of them. Some bulbs, like daffodils, can be naturalized.

Happy 1

My client was totally happy this year when she looked out of her kitchen window and saw her free bulbs popping up. She had no idea what I put in last year. Not bad considering these bulbs were free, took only minutes to plant ( I have had lots of practice!) and improved bare spots.


photo 1

Free bulbs!


photo 3

Not bad considering these bulbs were discarded; and the bed was a weedy bare spot

Happy 2

The Rhodos and Hydrangeas pictured below came from a strata landscape edit job and were delivered to a gardener in Port Coquitlam. The owner will find a good home for them on her large property. In exchange for the free plants, the property owner gave us a quick tour of her garden; the property is on the annual Port Coquitlam garden tour circuit. It’s good to give!


IMG_1363POCO

Homeless Rhodos and Hydrangeas


Garden tour pictures


IMG_1357POCO

Astilbe hedge!


IMG_1350POCO

Clematis vine with (correctly!) protected base


IMG_1358POCO

$200 plastic planter box; doesn’t rot like wood but you need deeper pockets to buy these


IMG_1348POCO

Chainsaw decoration; I prefer 2016 Stihl models


IMG_1354POCO

Gunnera


IMG_1361

tools!


IMG_1352POCO

primrose

I have some crazy stories about unwanted plants. On one memorable day, a prominent strata member came out to ask me to remove Echinacea because they were spent. I reminded her they were perennials and would bloom again next year. It didn’t matter. Next year was too far away and she had cash for new plants. I kept a few and gave away the others.

Think before you toss unwanted plants. You could make someone very happy!