Category

Tips

Rhododendron pruning 101: rejuvenation

By | Education, gardening, Landscaping, Tips | 2 Comments

Three pruning actions on rhododendrons

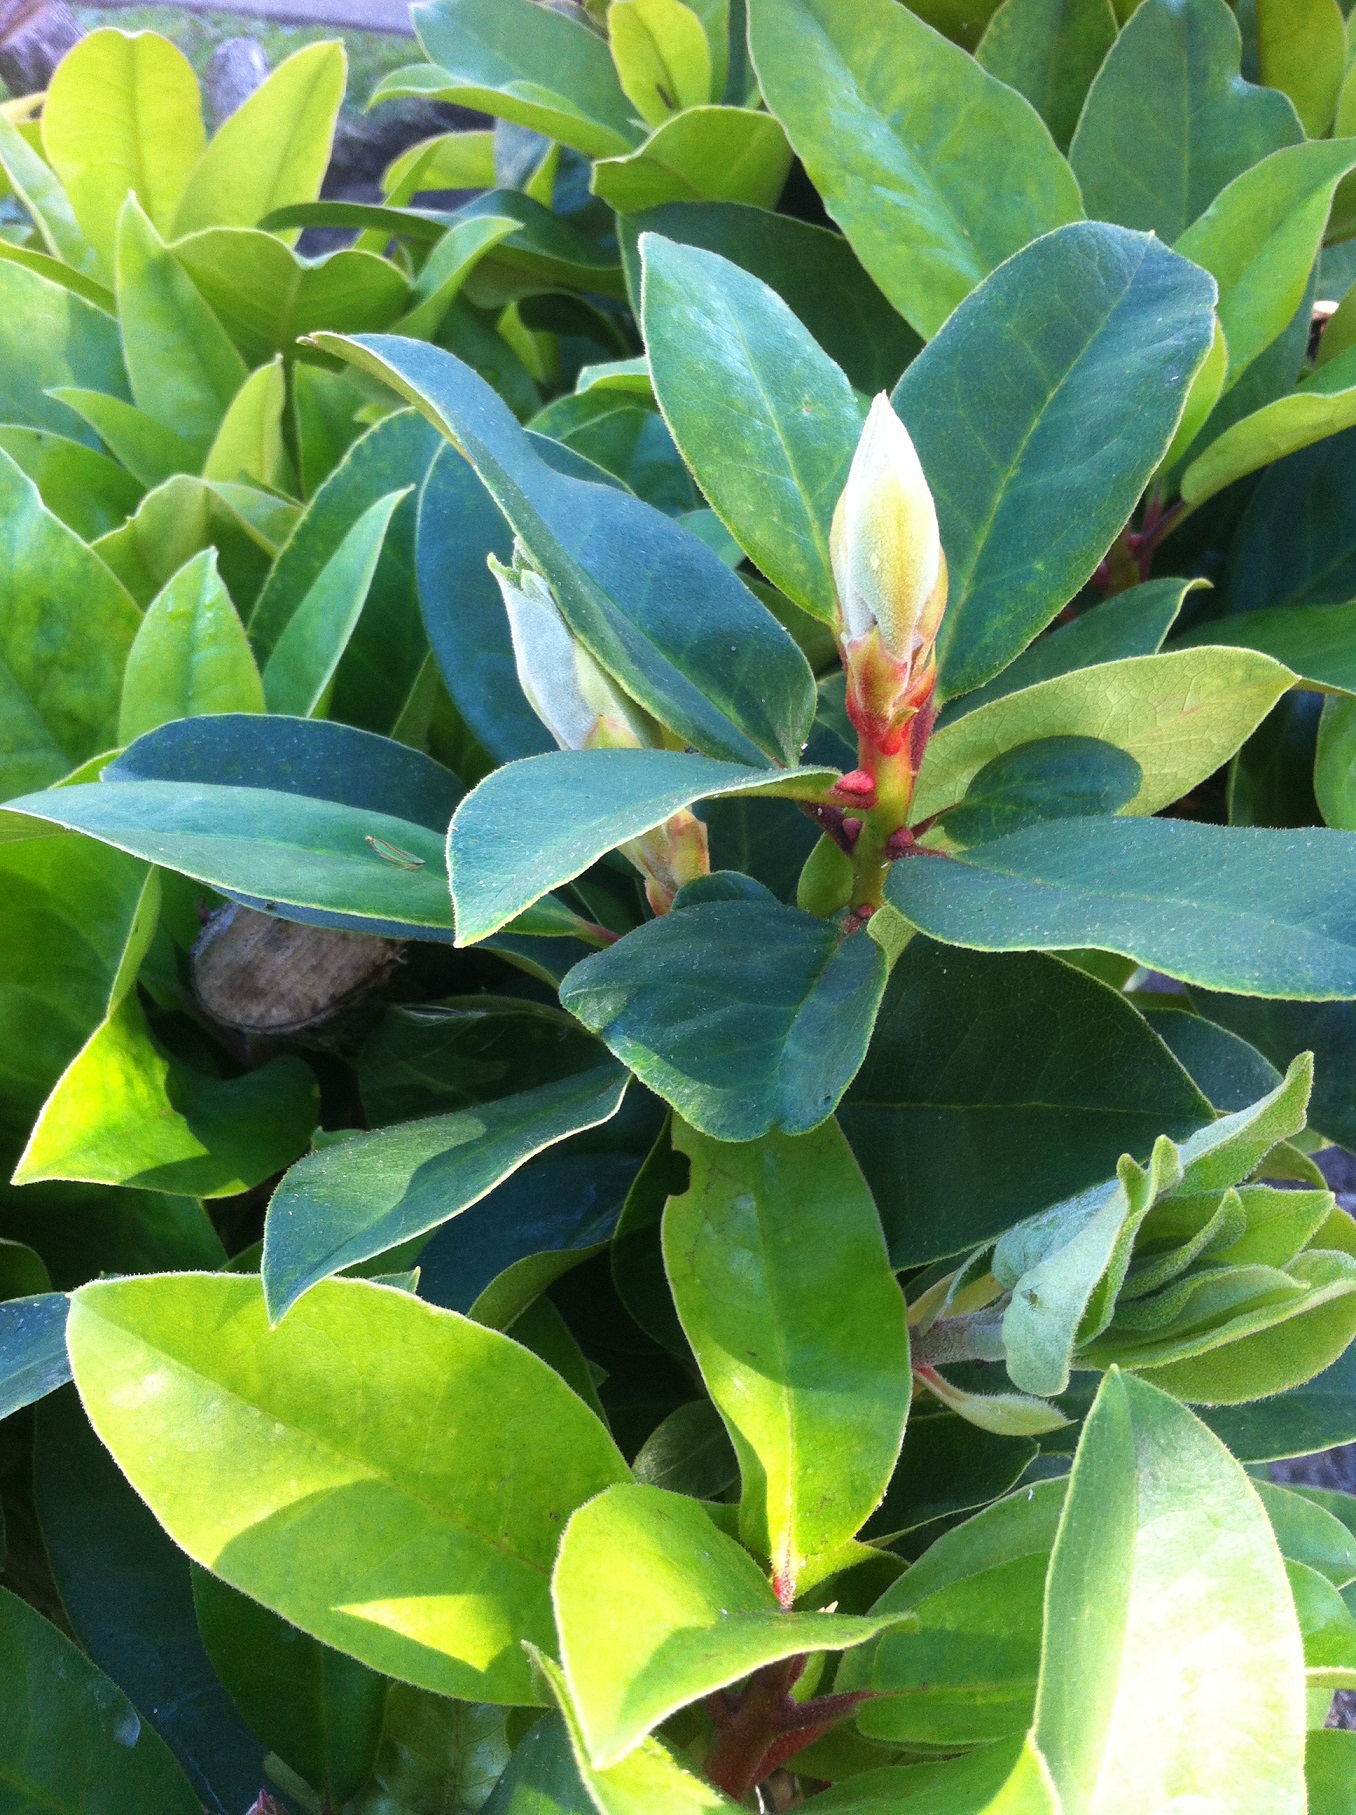
There are three pruning actions associated with rhododendrons. One is the removal of spent flowers (trusses) and any diseased or dead wood. Most rhodos produce seeds and you can get your rhodo to concentrate on growth by removing the spent flowers. Do this soon after flowering before the new buds get big and set. I prefer hand pinching. Just be careful so you don’t injure the buds below. Use hand snips if you are worried.
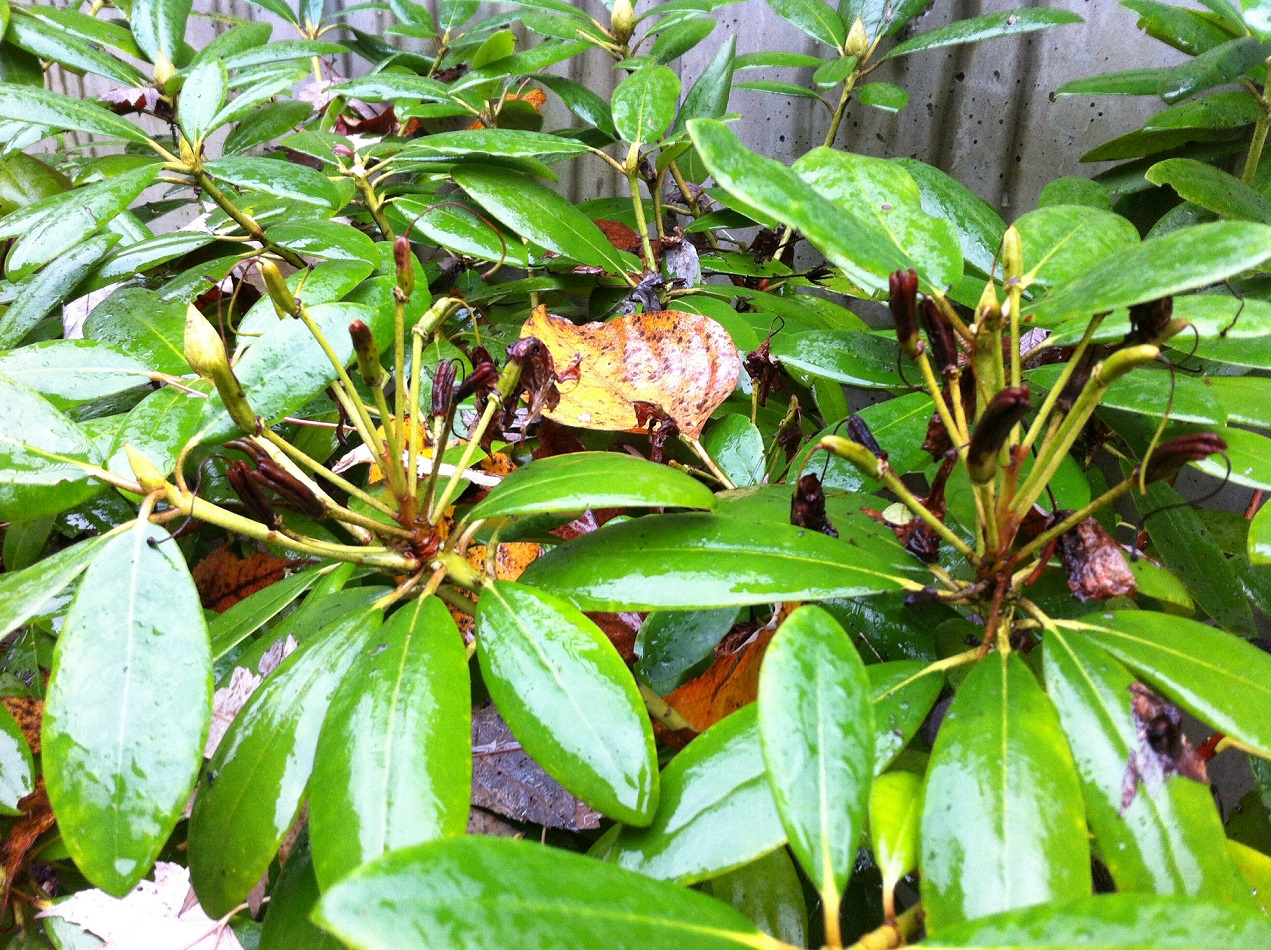
 

IMG_9829eddd

Trusses still on


IMG_9830edit

Trusses pinched off


The second pruning action is for shape. Just follow the branch down to the last whorl of leaves you want to keep and cut just above those leaves. This is what I recommend to clients who wish to keep their rhododendrons from getting too big.

But what if your rhodo is too big? Now what? In this case we employ pruning action three: rejuvenation, which sounds better than renovation. This involves bravely making large cuts and significantly reducing the plant size. This works because rhodos are special. Examine their bark and look for tiny pink dots. Those are latent buds. Always aim to cut above these buds. Best case: cut above a cluster of latent buds. Then watch.
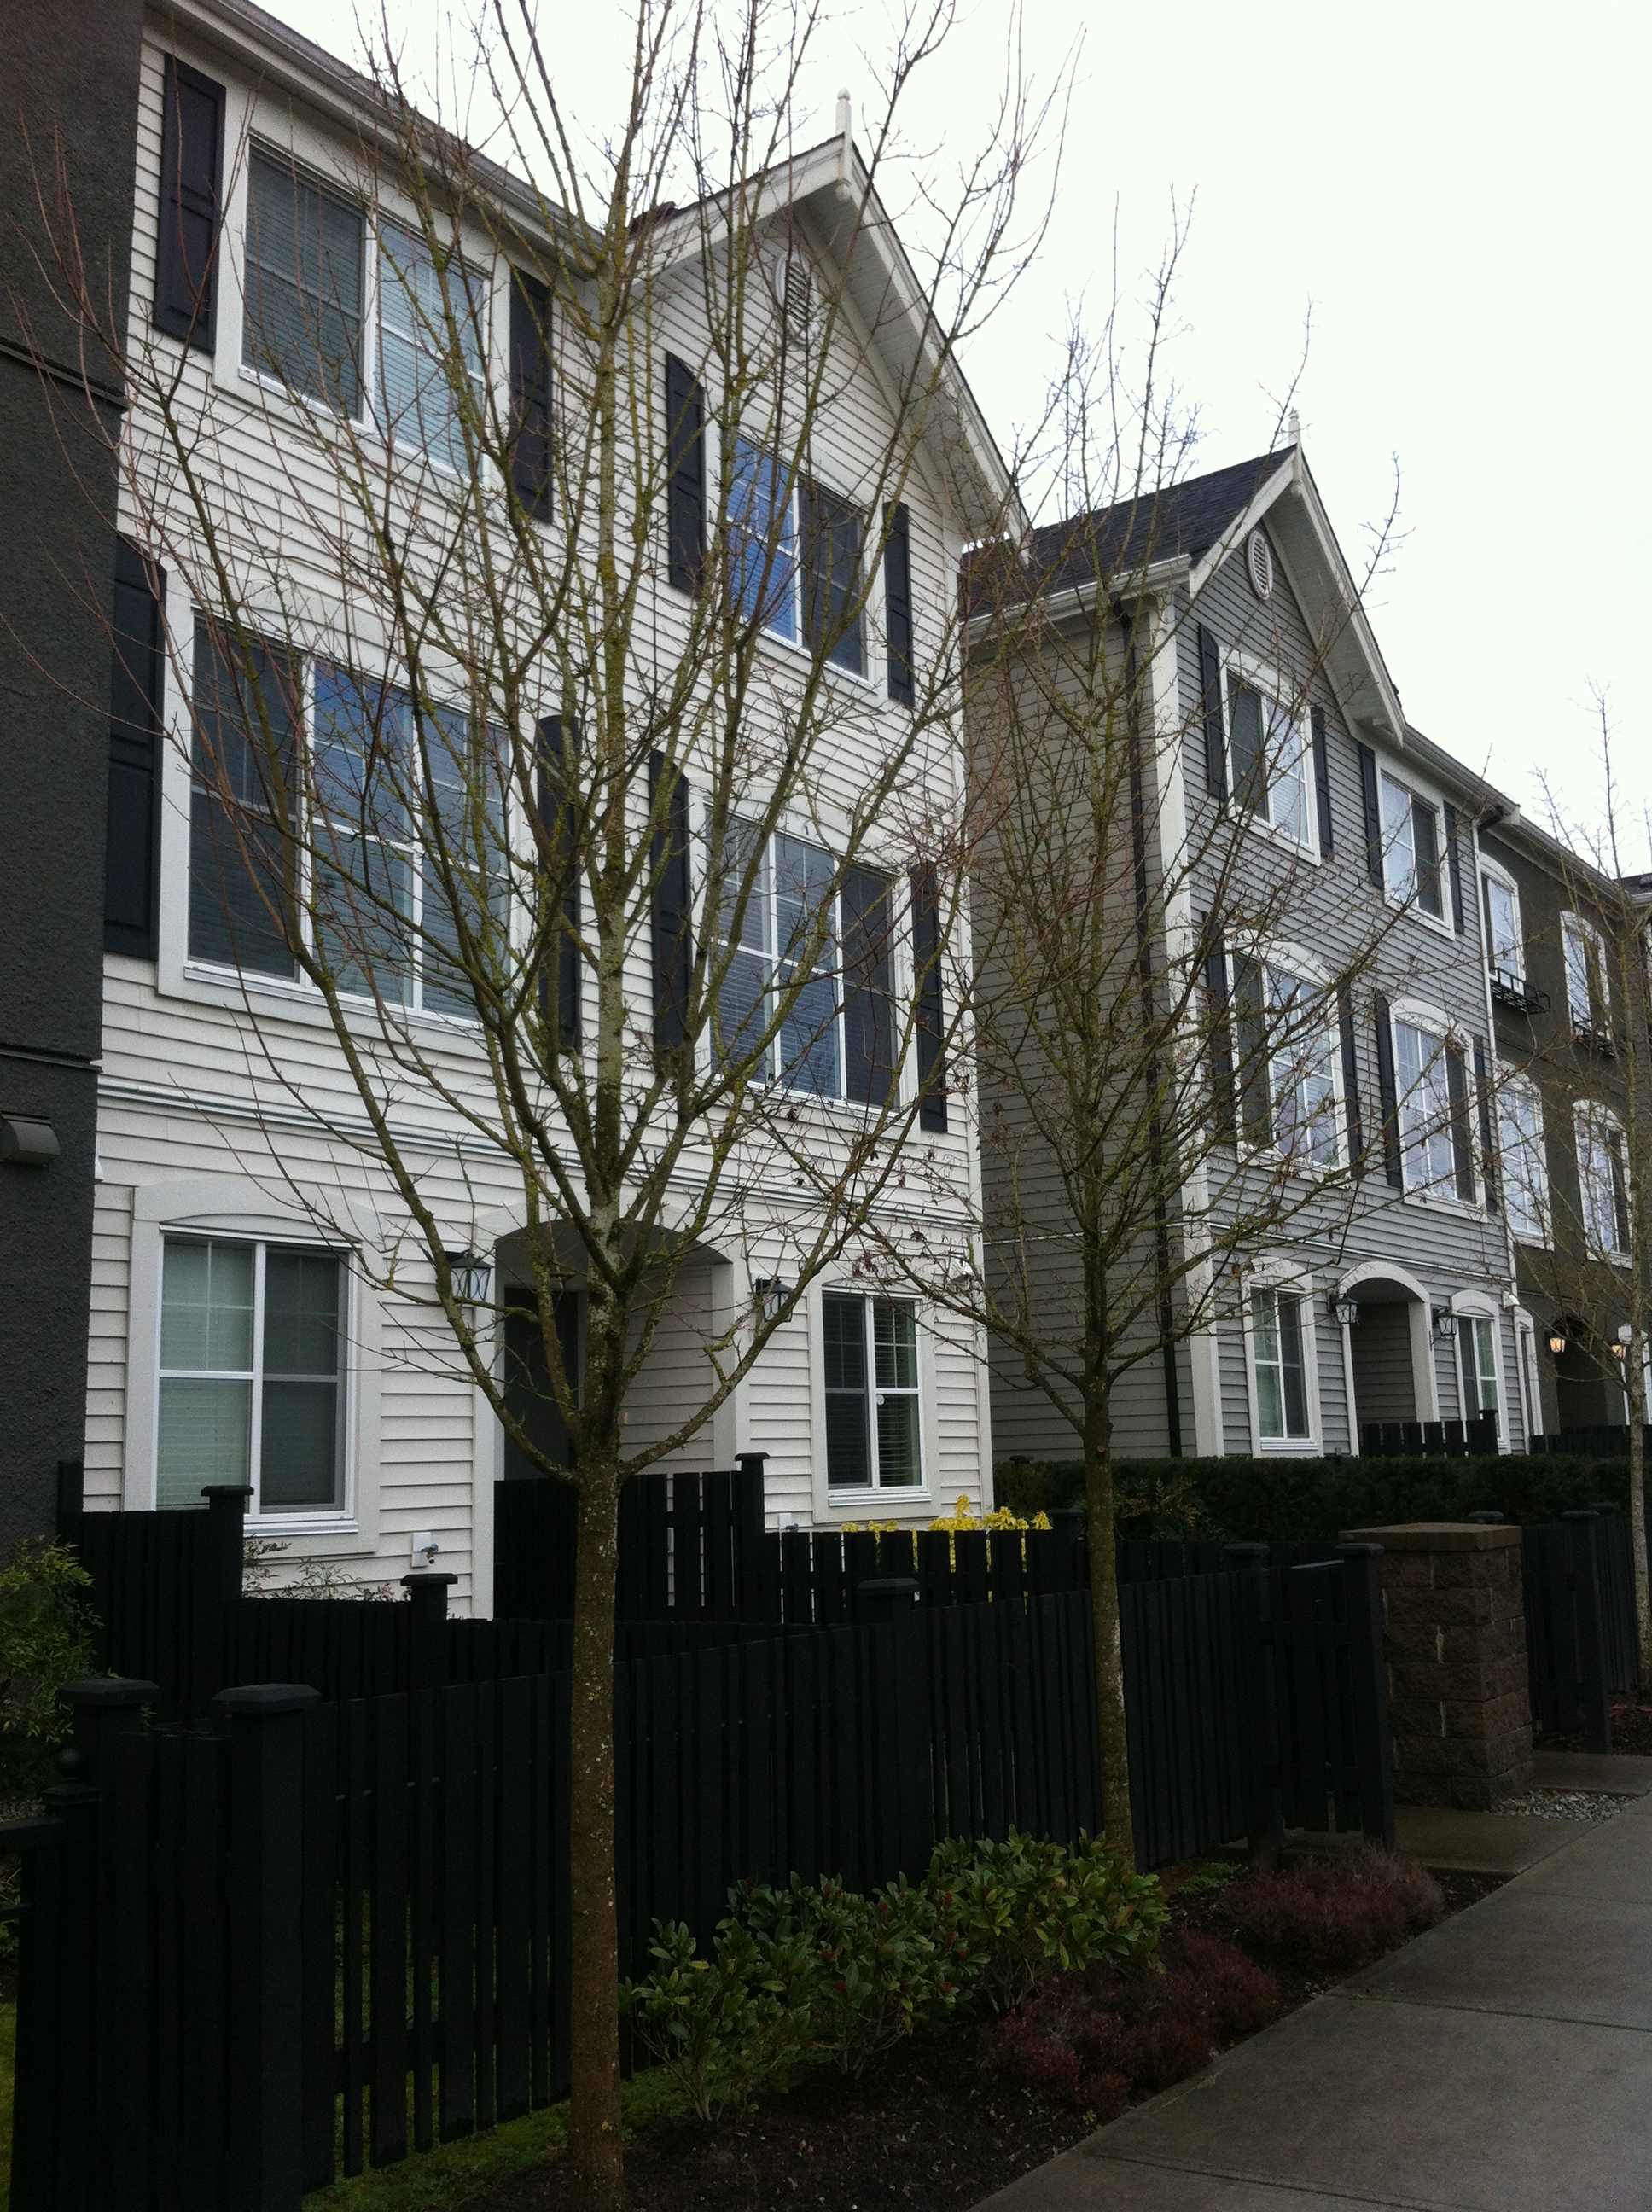
One example

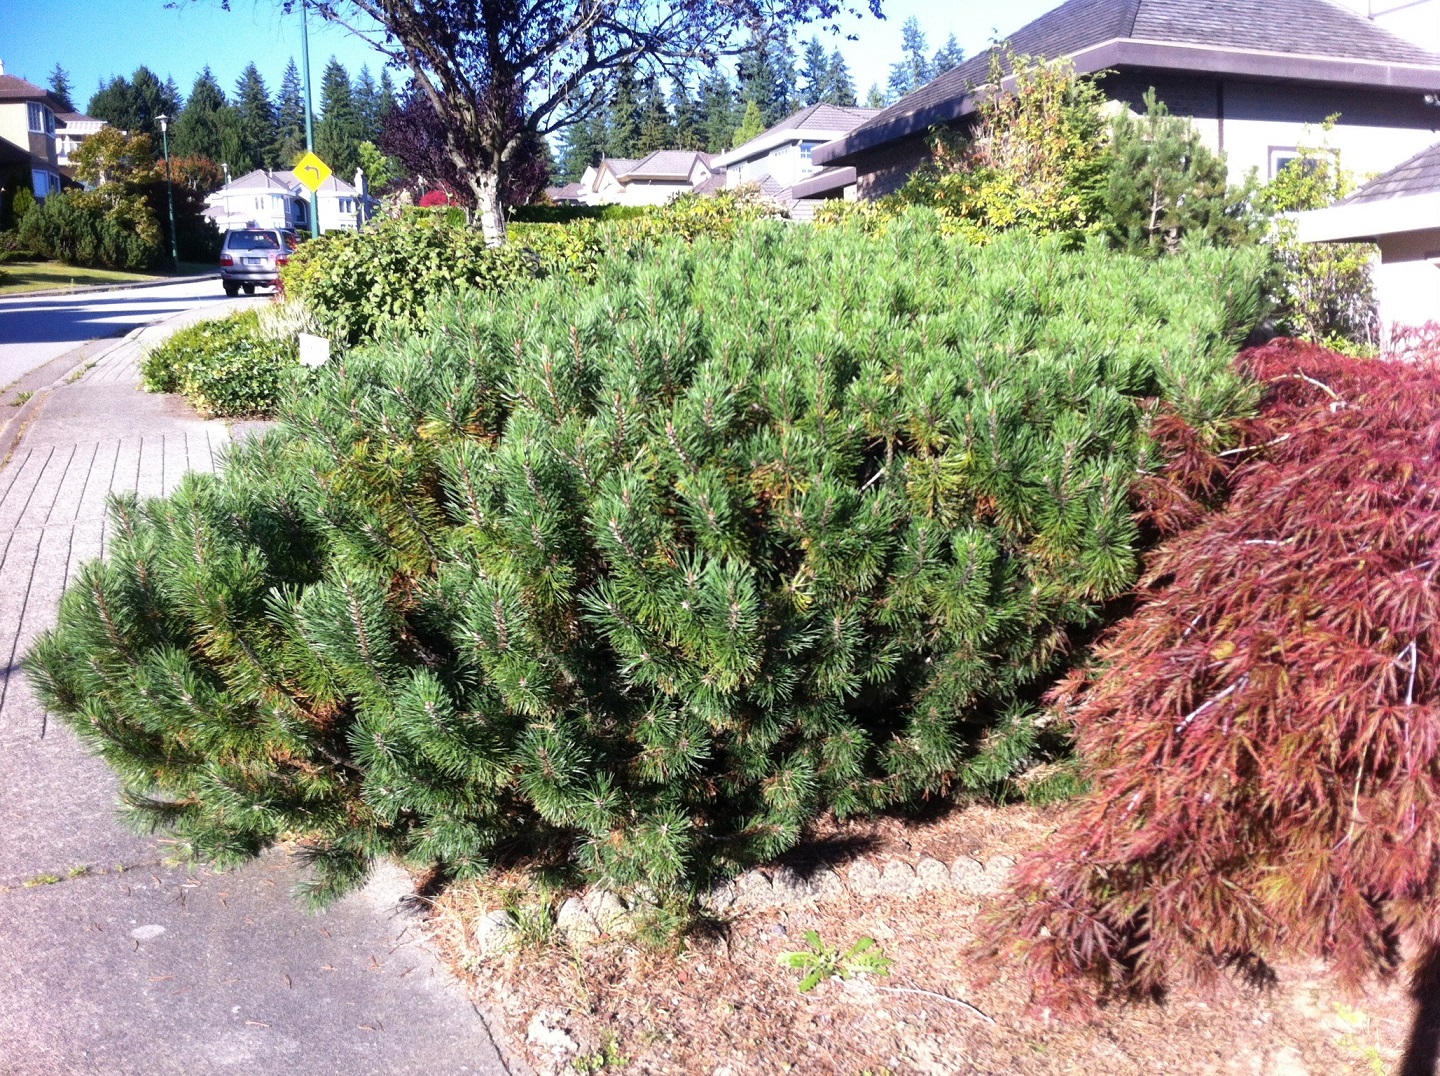
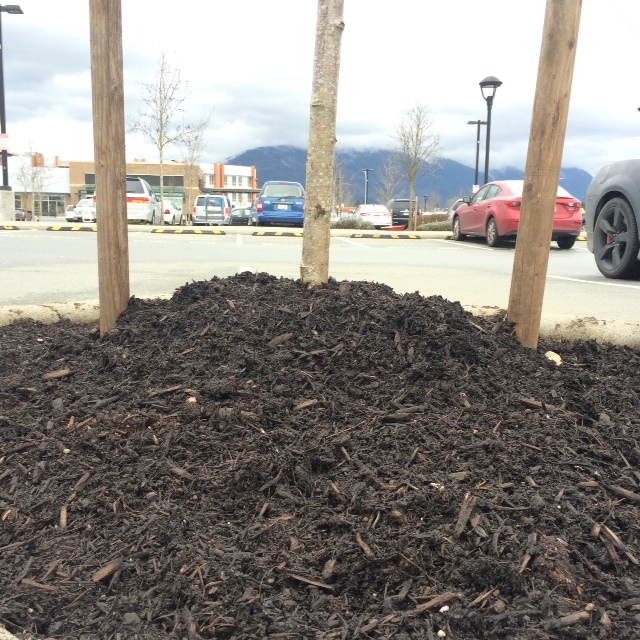
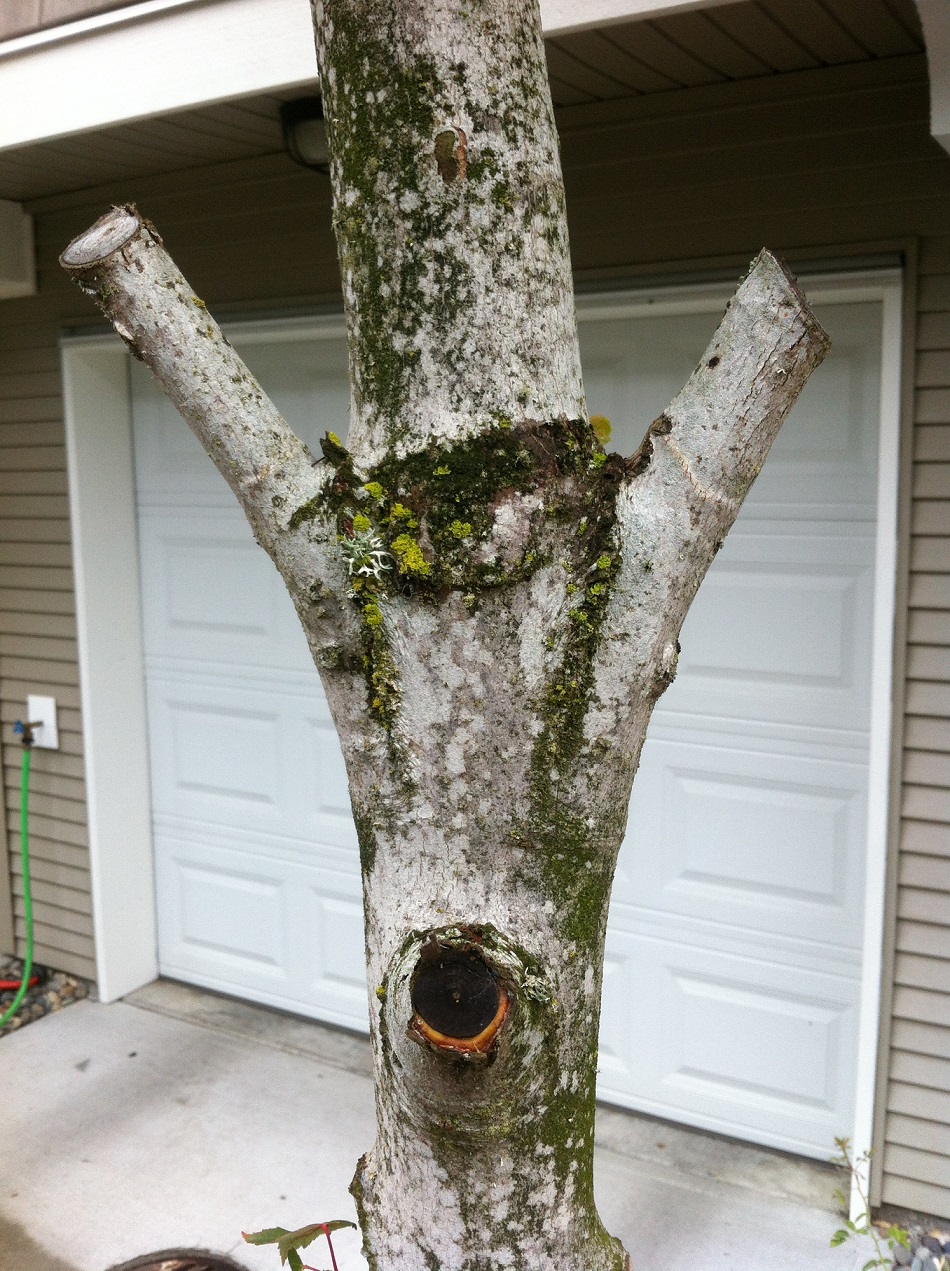
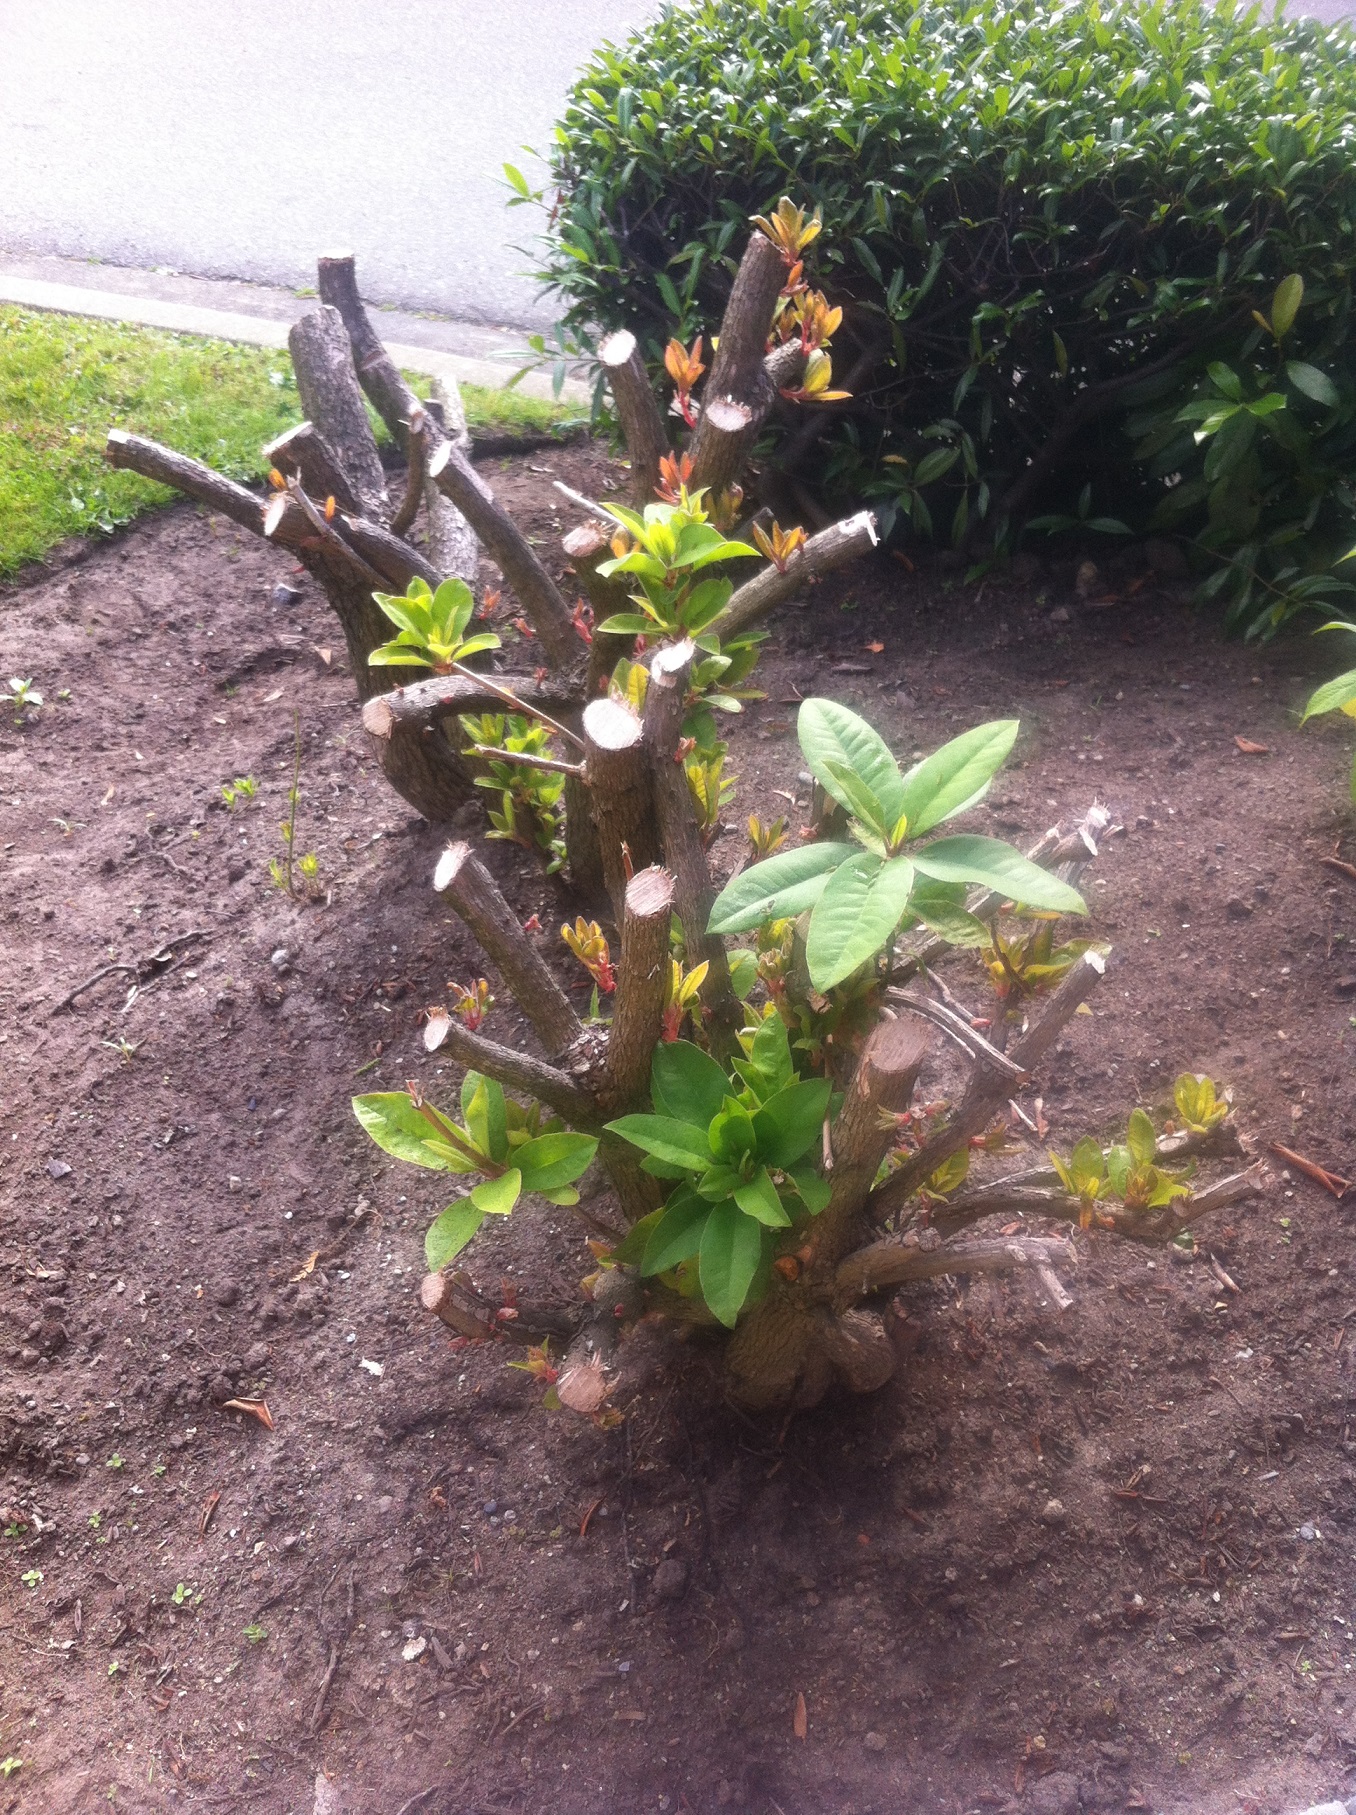
Here is one example from my work site. This rejuvenation pruning was done at a corner unit where there was a problem with vehicle sight lines. Drivers couldn’t see properly when turning. So out came the saw as soon as the request was made. This was the result.


IMG_4903edit

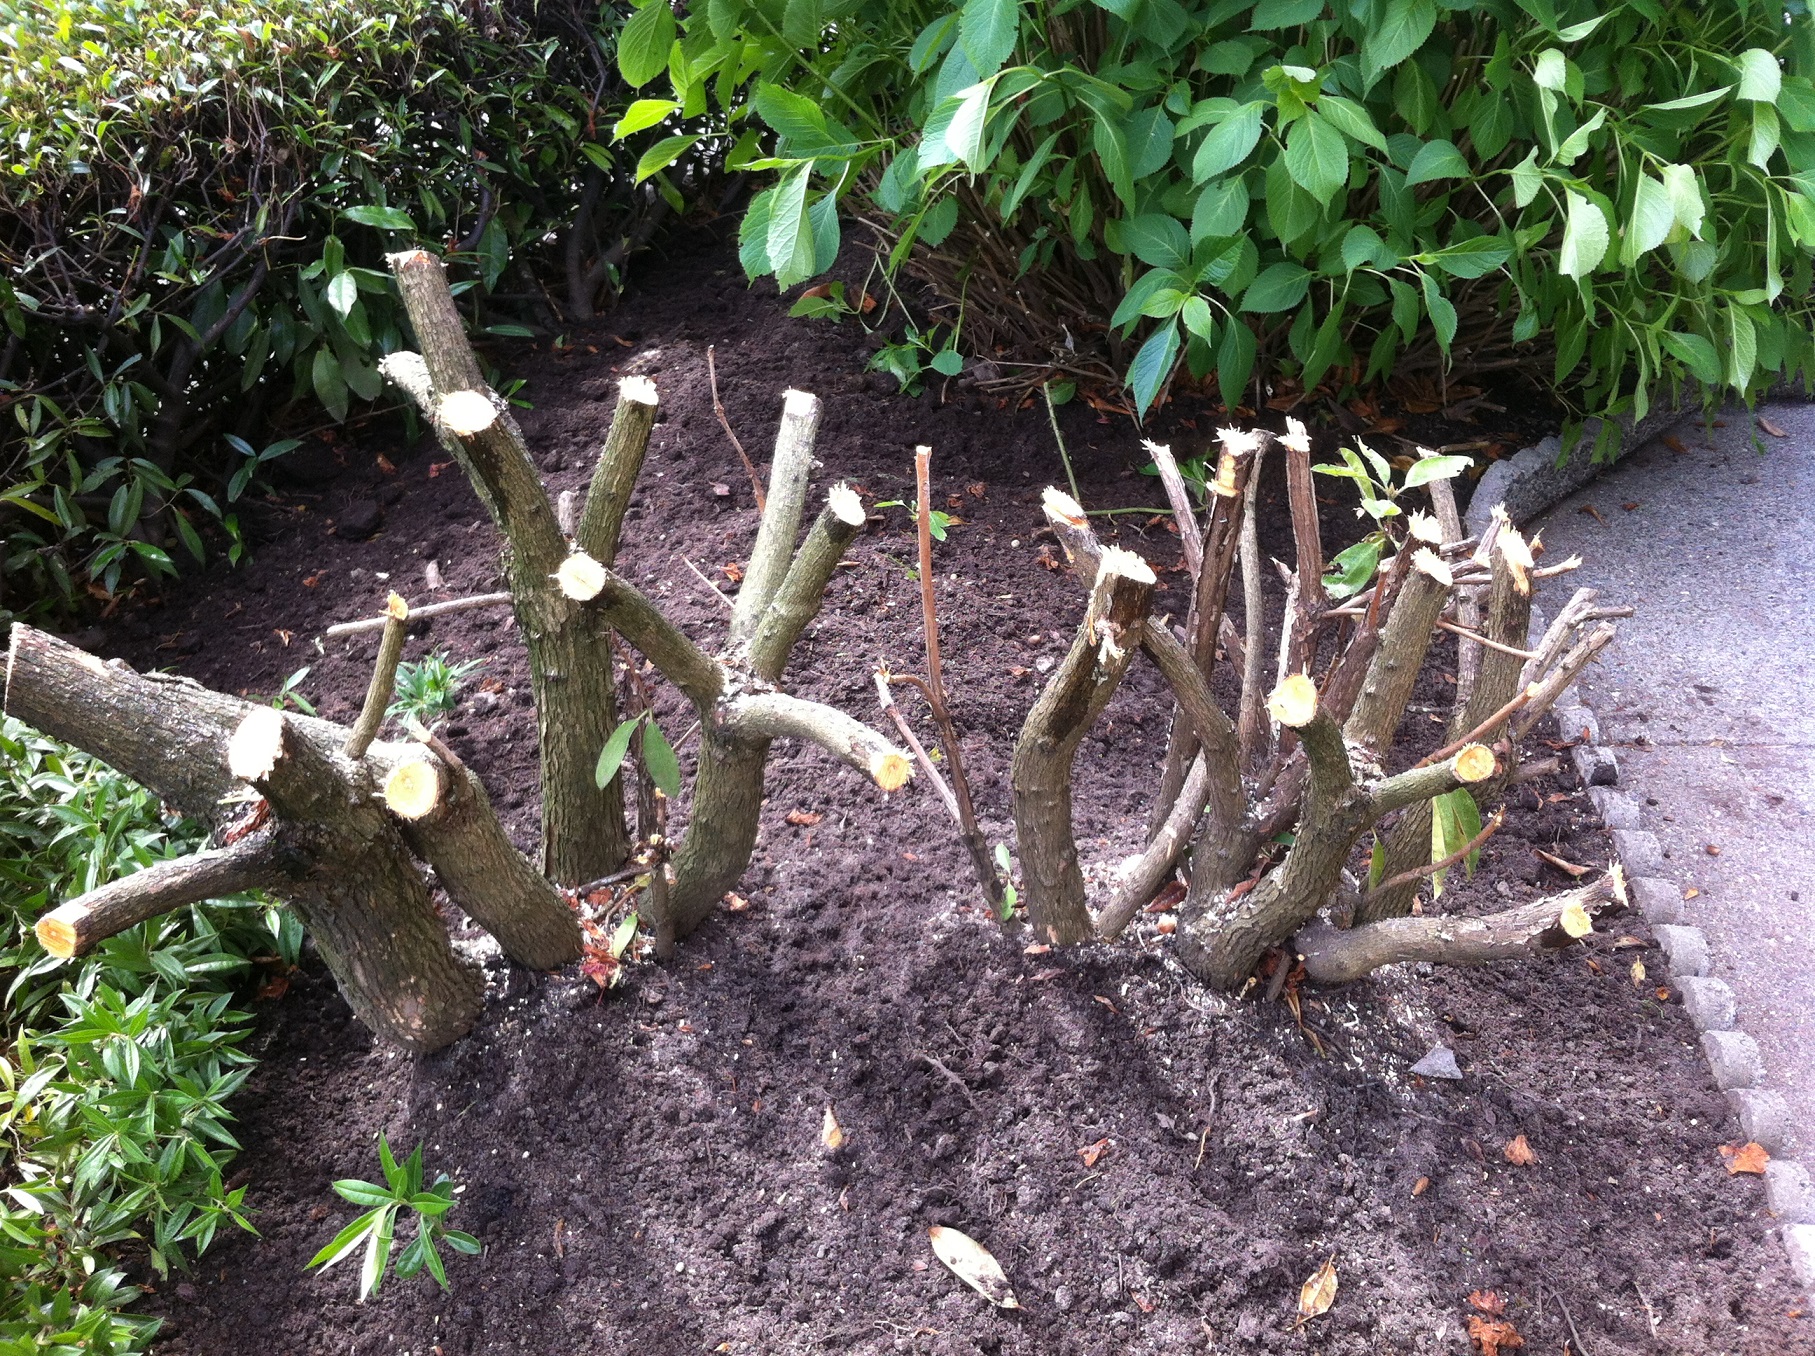
Not much to look at right after pruning. Reduced to 30%.


A few weeks later…..
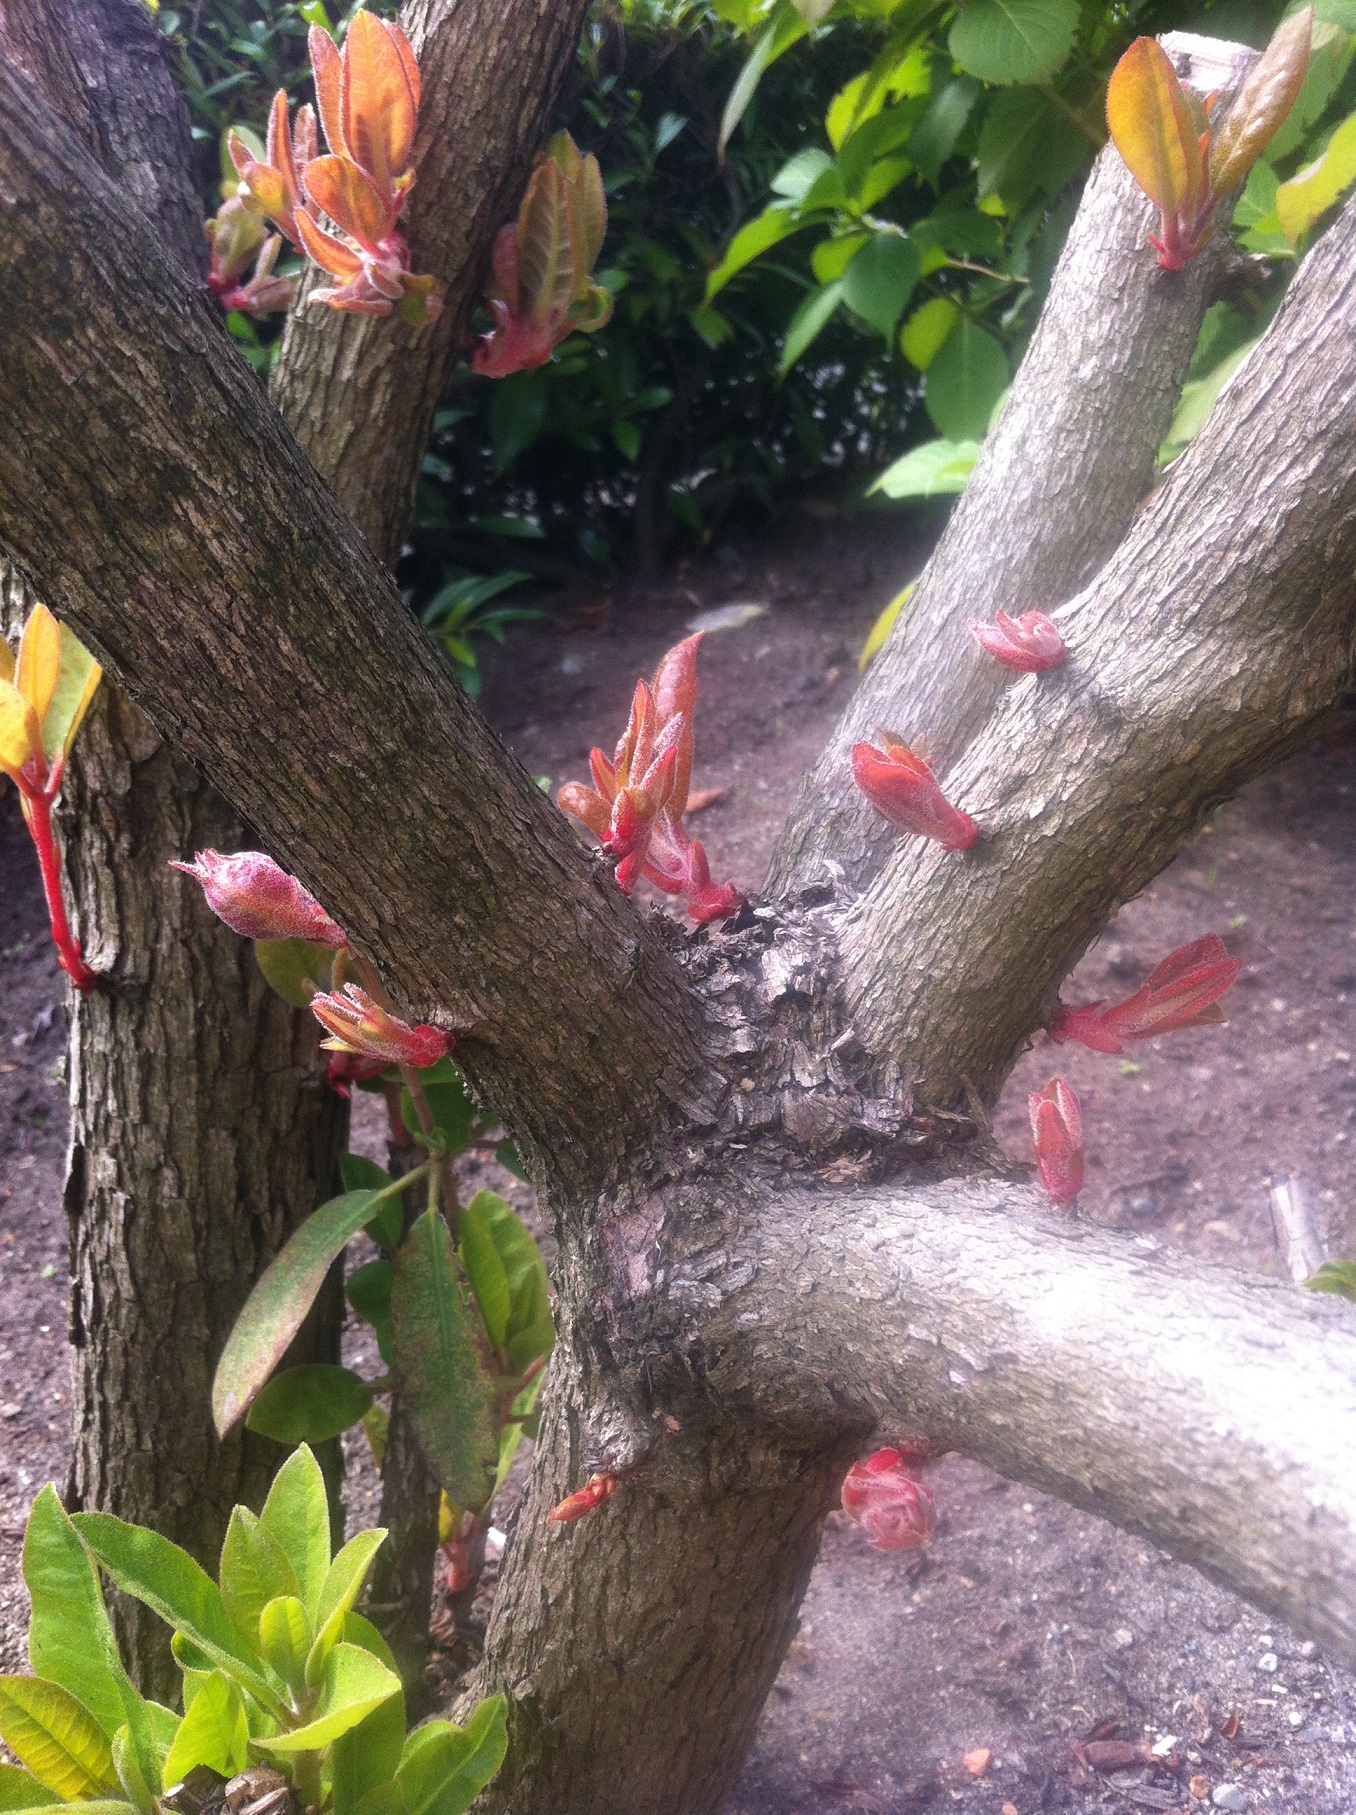
 

IMG_6528

Latent buds popping


IMG_6527

Latent buds in action, a cluster of four buds below the cut


IMG_6526

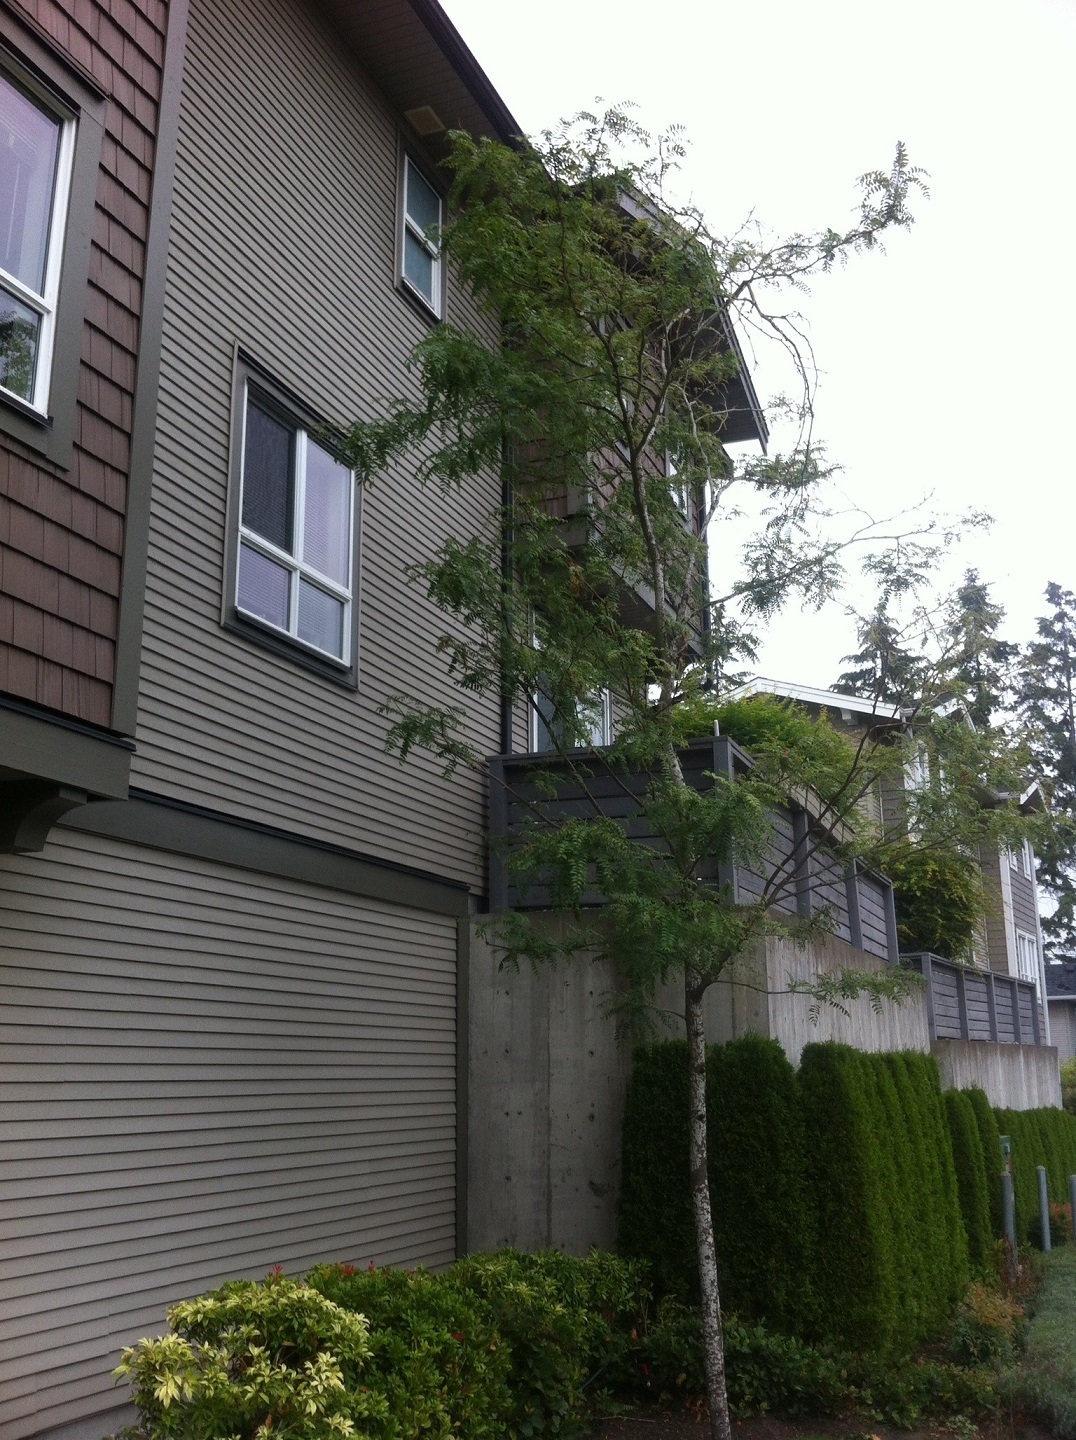
Much better after a few weeks
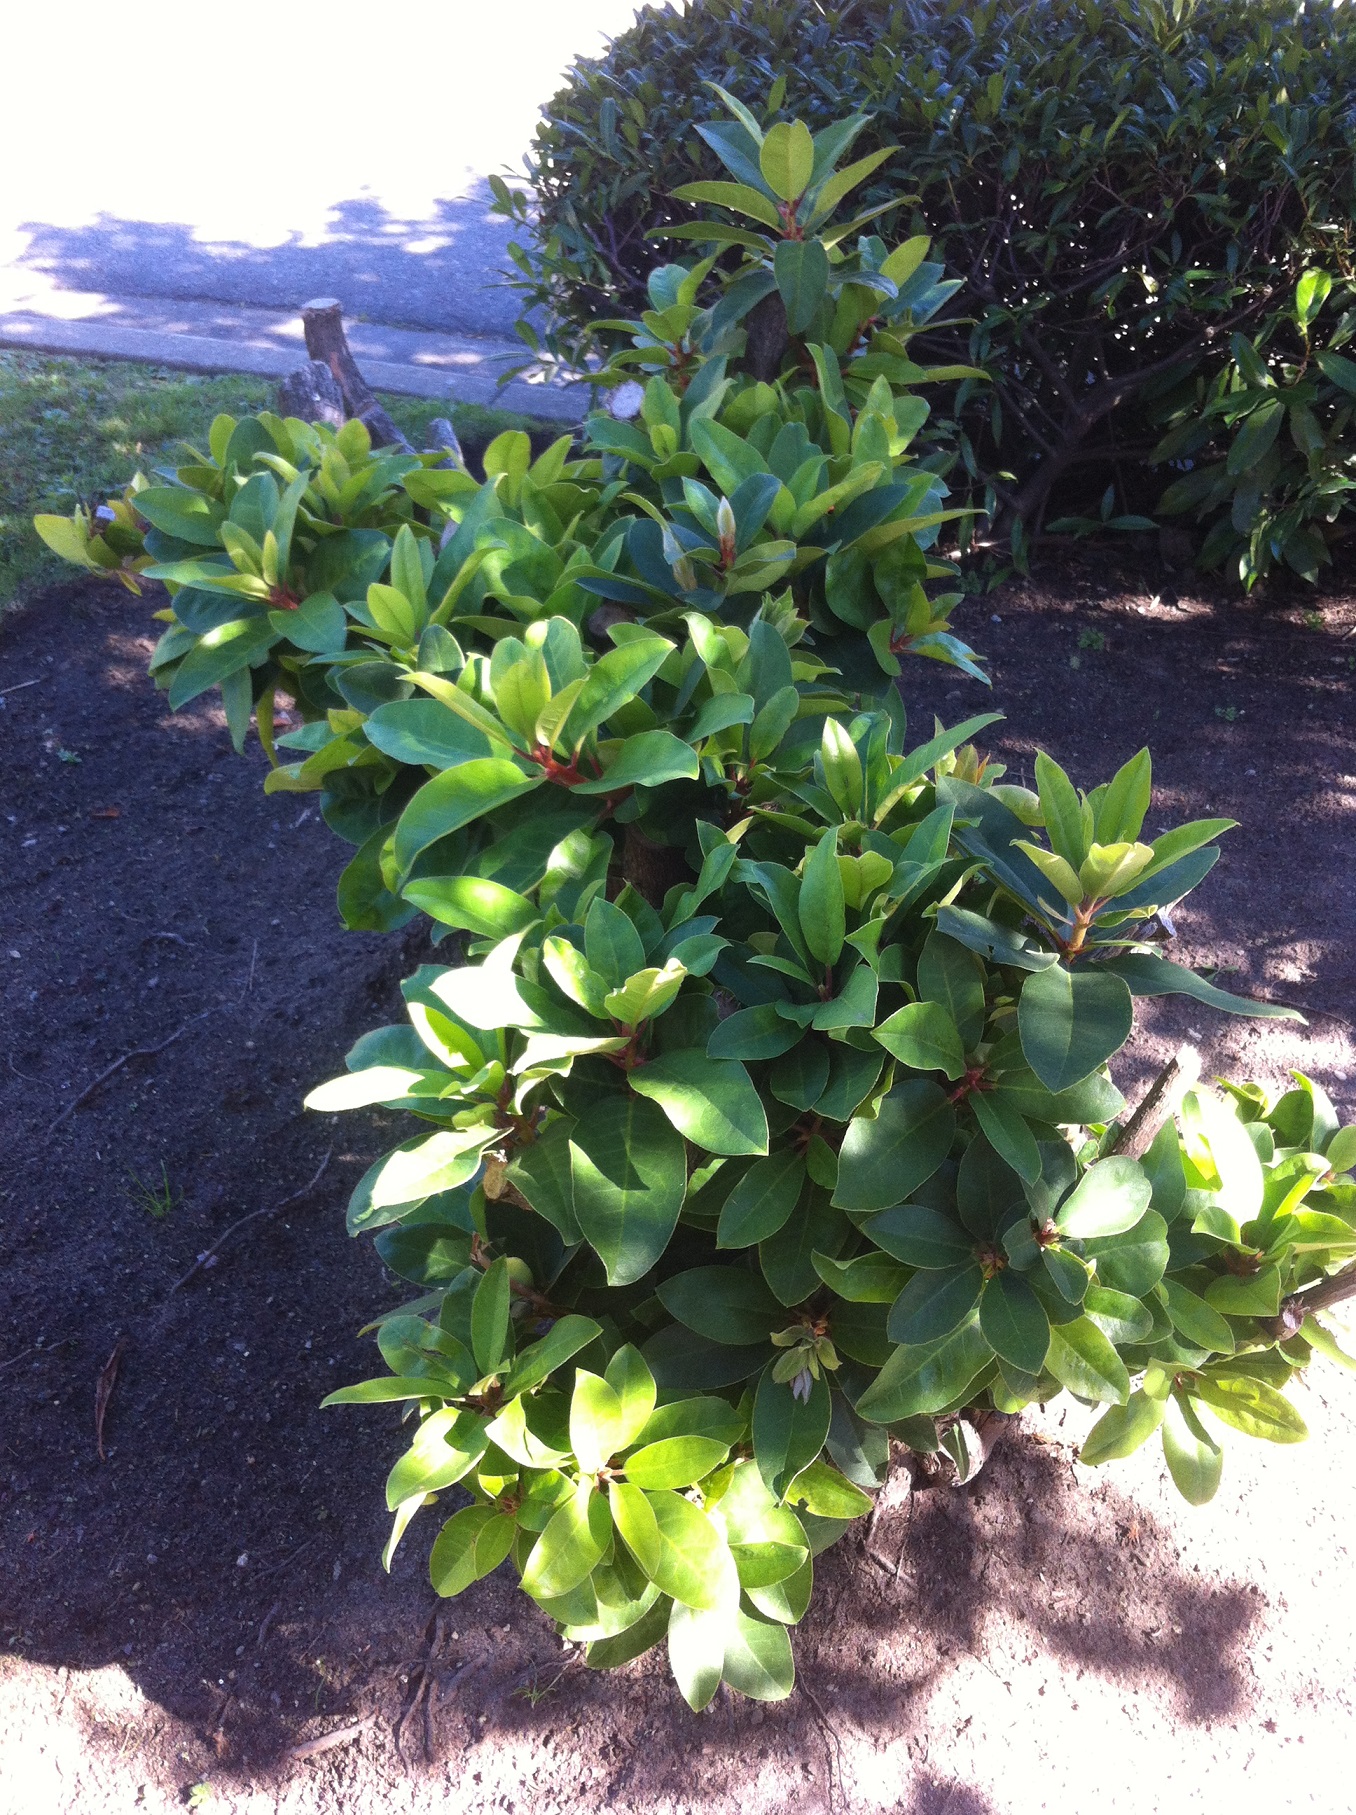


IMG_9329

September 2016


IMG_9330

September 2016


Rhododendrons are forgiving plants. Pinch off flower clusters (trusses) soon after flowering and prune for size. Bravely make big cuts if rejuvenation is required.


References: Fine Gardening, issue 86.

Develop your landscape eye

By | gardening, Landscaping, Tips | No Comments

Landscape eye

Developing your landscape eye is a critical skill. It takes time to develop but your landscape, bosses and clients will thank you for it. Basically, landscape eye refers to your ability to read a landscape and figure out what’s missing, totally wrong or just slightly off. This usually comes with experience once workers are fully proficient on all equipment.

I started landscaping at a prominent Lower Mainland landscape maintenance corporation we don’t need to name. There, the in-house seminar on “Developing your landscape eye” was delivered by the company owner. Not managers. The owner. That was no accident. Workers with good landscape eye can make corrections which leads to sharper and healthier landscapes. This seminar was a platform for the company owner to train his workers to see the landscape the way he does.

Some obvious examples are weeds, shrub spikes, walkway obstruction, flower deadheading, broken tree branches, tree branches touching buildings, missed blade edging, lawns that don’t look lush, dead plants, garbage, debris, cedar pruning lines, shoddy clean ups, etc.

Examples


IMG_4705ed

Obvious weed problem


IMG_4716ed

Ask yourself: how were these weeds allowed to get this big?


IMG_6977ed

A broken Acer circinatum branch: remove ASAP


IMG_6873 (79)ed

Pinus mugo half way across sidewalk: prune back


IMG_5541ed

A broken branch on Liquidambar styraciflua in a high-profile location


IMG_5452ed

Dead cedars


IMG_5498ed

Yucca flower spike can be removed


IMG_1271

Mulch volcano: we can’t cover with mulch anything above the root flare or the tree suffers


IMG_5016edit

Very poor tree cuts: the cut below was correct


IMG_6374ed

Hardscape hazards


IMG_6742

Tree collisions: to stay on the curb, mowers collide with this tree weekly. Put up a tree guard and instruct workers to avoid all collisions. Repeated abuse kills trees.


IMG_6351edd

The deep edge is fine (90 degrees!) but we can’t leave the chunks. Very poor clean up.


IMG_6741ed

This is common: tree branches touch the building


IMG_3778

Remove low branches on trees; we can’t have branches develop this low


IMG_3781

Remove suckers off tree trunk (above) and ivy (Hedera helix) below


As you move and work through your gardens and landscapes, pause to take a good look. Does it all makes sense? Is it all healthy and beautiful? Work on developing your landscape eye.

Common landscape maintenance mistakes, vol. 2

By | Education, Landscape Industry, Landscaping, Tips | No Comments

To Continue with our examination of common landscape maintenance mistakes we consider volume 2. Learning from other people’s mistakes is much better than on your own. The hard way. It’s time to work like pros.


A) Lawn hazards

Check your assigned mow areas for hazards like rocks, garbage and toys. Collisions with foreign objects can cause damage and injury. Get familiar with lawns you are about to cut for the first time. It’s time well spent.


IMG_6024edit


B) Don’t mow around piles

I know this is a pain. Owner-generated piles on our lawns delay our progress but it’s horrible to ignore them. Don’t mow around them. Stop the mower and tarp the piles. Then continue. The owner will be happy and the grass will thank you for it.


IMG_6012edit


C) No tree stubs

ISA certification is optional but good cuts are not. Never leave stubs. The tree can’t cover up the wound, the stub dies and could serve as an entry point for diseases. Look for the branch collar and make a nice cut. Don’t cut into the collar. That’s where protective cells live.


IMG_5815edit

wrong


IMG_5816edit

correct


D) Tree bondage

Discourage tree owners from hanging things on their trees. Wires and ropes are forgotten until it’s too late. The ropes get embedded in the tree and can’t be extracted. Two problems: 1)  girdling eventually starves the upper portion of water and nutrients and leads to death; and 2) breakage occurs at the point of constriction.


IMG_3119

A good illustration: everything above the point of constriction is dead, deprived of water and nutrients; life below the point of constriction; This tree owner loves bird feeders.


IMG_3122edit

Clearly there is life below the constriction point; death above it


IMG_4683edit

A dead Pinus contorta, strangled with arbor tie; this was clearly an attempt at staking a leaning tree

Keep these points in mind as you maintain your landscapes. Your boss and clients will thank you for it.

Common landscape maintenance mistakes, vol. 1

By | Landscaping, Lawn Care, Strata Maintenance, Tips | No Comments

There are many mistakes made in landscape maintenance. I’m hoping that by publishing the common ones, new landscapers can learn from other people’s mistakes. Not the hard way. Here we go.

A) Damage

Line trimmers, blade edgers and mowers have spinning parts and can cause a lot of damage. Get familiar with your work areas and identify any potential hazards. Companies have to pay for damages. Don’t be surprised if your boss has a go-to window guy on speed dial. It happens, so be careful.


IMG_1341edit

Don’t assume these covers are tightened when you mow


IMG_2495edit

line trimmer damage; one little corner full of pebbles, first time line edging here


B) Scalping

This is the biggest lawn care sin. Why? Because grass regenerates from meristems located about a third of the way up a blade of grass. Not from roots. When you scalp the lawn you get a bald spot. Even worse is scalping in November when the grass doesn’t grow much anymore. Don’t scalp. Remember to stay away from edges; the line trimmer is coming by to cover the edges. Your mow should be easy and stress-free. The same goes for line edging.


IMG_1340edit

the mower was too close to the edge and slipped off


IMG_9721edit

extremely harsh line edging


C) Line crossing

Yes, I know, speed is critical to your success in mowing. But when you finish putting in your laser lines don’t ruin your presentation. No line crossing. Take the long way if you have to or follow existing lines. Always. This is especially noticeable around towers where residents look down on their lawns.


IMG_4975edit

Don’t cross over your lines! Use existing lines or take the long way out.


D) Don’t mow through tree wells  

This is my favorite example because we get to review. 1) the space is too narrow for the mower deck, which leads to 2) scalping (brown spot), 3) soil compaction in the root zone (wheel marks) and 4) it crushes our deep edges. Let the line edger take care of the narrow spot. Mowers don’t belong in tree wells.


IMG_1980edit


Learn from other people’s landscape maintenance mistakes and work like a pro. Good luck!

Nematodes vs. European chafer beetles

By | gardening, Landscaping, Lawn Care, Tips | No Comments

One of my clients on the Westwood Plateau in Coquitlam loves his lawn. When his lawn got ripped up by animals searching for European chafer grubs, he was shocked. He installed an irrigation system and hired me so his lawn could receive good, consistent care.


IMG_0747

Damaged lawn by animals looking for tasty grubs


IMG_5644edit

Repaired lawn


Once I repaired the damaged lawn, my client decided to try a nematode application. He pre-ordered the nematodes in June. $80 cost plus my labour.

June is a busy month for the European chafer beetles. As they mature, they emerge out of the lawn and fly off to nearby trees to mate. Then they look for new lawns to lay their eggs in. If you’re lucky, they pick your neighbour’s lawn. Cutting your lawn higher means it’s more difficult for the beetles to stick their back ends in to lay their eggs.


IMG_5049edit

Europen chafer beetles ( the bottom 3 are playing dead!)


The recommended nematode application window is from the third week of July. This is what we did once the nematodes arrived. They were kept cool in a fridge.

A) Cut your lawn short and water it really well prior to nematode application. The microscopic nematodes require water to penetrate into soil. There they seek out the grubs. Important: get a municipal water permit.

B) Because the nematodes  are photo-sensitive we waited until there was no direct sunlight hitting both the front and back lawn areas.

C) We prepared a 4L bucket of water. The we opened the package and soaked the sponges in the water. Also soak the plastic bag holding the sponges.  Carefully squeeze each sponge ten times. Then stir the solution well. Discard bags and sponges.

D) Carefully fill up your hose end sprayer. We used a funnel. Don’t forget to stir the solution before every re-fill.

E) Turn on water and spray methodically. Use sticks, tools or tape if it makes it easier for you to keep track of where you’ve sprayed. We soaked the worst damaged spot.

F) Water your lawn after application.


IMG_5745edit

Pre-order nematodes in June (NemasysG “seekers are best)


IMG_5744edit

Hose end tank and 4L bucket for nematode solution; funnel and stir stick


IMG_5749edit

Soak the nematodes in your bucket, squeeze several times, also wash the plastic cover just in case


IMG_5743edit

Hose end applicator $17 tax included


If everything goes well, the chafer larvae will get eliminated by the nematodes. Two problems with nematodes is that they might have to be applied annually and they eliminate all grubs they find in the soil. In the meantime, the lawn will receive better care.


Landscape pros make their own laundry detergent

By | Education, Tips | No Comments

This blog will show you how to make your own laundry detergent, save money, avoid industrial chemicals and wash your work clothes well. It’s a long season outside for all landscape professionals, in all kinds of weather. Clothing gets filthy and beat up. We wash it almost daily since company uniforms with logos must be worn. Follow the steps below and save money on laundry detergent for your work clothes.

Credit: the idea and actual procedure comes from a book called “397 ways to save money”. I tried it out and a blog was born.

Step 1

Find leftover soap bars or get a third of a new bar. Warm up 1.5L of water and cut up the soap bar into it. The smaller the better. Gently stir until the soap melts. I use a “retired” pot to avoid unnecessary conflict with my wife.


photo 1

Step 2

Add 125ml of washing soda (not baking soda) and 125ml of borax powder. Stir everything until it dissolves. Don’t over-boil it as it can get quite messy. It’s best if you have the kitchen to yourself and your partner is out of the country. (The box labels remind you that the powders are NOT to be used for drug manufacturing!)


photo 2


Step 3

Transfer the pot contents into an 8L container. I use two 4L milk containers. Top up with warm water. Let the contents settle for 24 hours.

Step 4

You did it! Enjoy your new cheap detergent.


photo 3

4L milk jug, 24 hours to settle

Yes, you can make your own laundry detergent, save money and avoid nasty industrial chemicals.

When I first told my co-workers I made my own laundry detergent on the weekend, I got puzzled looks back. Some even felt sorry for me, asked me if everything was fine at home and offered me financial help! I’m happy to report that my clothes are fine and the powder boxes make a lot of detergent. But don’t just take my word for it. Try it out and save some money. Post comments below this blog.

How to design pots without stress

By | gardening, Landscaping, Seasonal, Strata Maintenance, Tips | No Comments

First, a quick flashback to 2014. Late in the day we pulled up at a seniors center and my municipal gardener boss asked us to quickly use up the flowers on the back of the truck. By planting four large pots. No guide, no plan. Go, go, go! I admit I panicked. How do you quickly arrange everything? Which plants go where? Colors? Oh my, I was sweating. Luckily it all turned out fine. I took a picture kneeling by “my” pot but the smile hid a ton of stress.

This event popped up in my head when I opened a recent issue of Landscape Management magazine (February 2016, page 16) and saw an article on pot design. The how to article conveniently divided the planting task into three categories.

  1. The pot should have a thriller in the middle to attract attention.
  2. Spiller plants spill out over the pot edges.
  3. Filler plants are placed in between the thriller and spiller plants.

Clearly this article was published a few years too late. I love the simplicity. Thriller, spiller, filler. Done.

Now for some examples before YOU start to panic.

Thriller plants could be: yuccas, cannas, fountain grasses, Angelonias, and dracaenas. For shade pots you can use ferns, hostas or heucheras.

Spiller plants could be: creeping jennies, vincas, bacopas, calibrachoas, lotuses and scaevolas

Filler plants could be most annuals.

Of course, proper design considers more than plants. Don’t forget other factors like wind, sun, fertilizers, water, upkeep, deadheading and yes, theft.

Now let’s practice:


IMG_1762

City of Coquitlam iGarden

Thriller: Cornus sericea

Filler and spiller: Skimmia

Spiller: Hyacinth


IMG_2456edit

Maple Ridge home owner

Extreme thriller: Ginkgo biloba tree

Spiller: Becopa

Filler: Pansies


IMG_8932

City of Coquitlam park event- my kids helped plant this pot.

Thriller: Dracaena

Spiller: Calibrachoa and potato vines

Fillers: many

Don’t stress like me. Design your pots with confidence. Have some fun. Change things up.

Remember the three key elements: Thriller, Spiller, and Filler. Good luck.

Almost a gardener: the anatomy of a great season

By | Education, gardening, Landscaping, Tips | No Comments

My 2014 municipal season has, so far, been my best working year ever. Sadly, when it became clear that there wouldn’t be a repeat in 2015, I was forced to think about the anatomy of my great season. What was it that made it great?

Learning!

Robin Sharma often uses this quote: “If you are the smartest person in the room, find another room.” My gardener-boss was fun, smart, experienced and certified, with killer plant identification skills. I had her all to myself on most days. Apprentice Vas couldn’t ask for more. Progress was guaranteed.

Encouraged by her positive comments, I walked into my Red Seal exam challenge with confidence; and passed! Now I belonged. It also wasn’t just another paper. It was a huge culmination of 16 sweaty, hard seasons outside in the landscape.

Learning is critical.

Embracing change

Everything was new and exciting and I handled the change fairly well. Some people don’t. Change is good. I found out some subtle and not so subtle differences between landscapers and gardeners. For example, we rarely used a backpack blower. Not every leaf was a messy enemy. Free arbor chips didn’t go to green waste; they were made for bed and tree well mulching. Some weeds were tolerated. No cheating with banned chemicals. Trucks drove speed limits and it was OK to park them on sidewalks. Yes, on sidewalks. Road medians aren’t gardens; they should look good at 60 km/hr.


IMG_3770edit

Free arbor chips, the best stuff for bed and tree well mulching

.Stretching

Scale. All of a sudden you are planting hundreds, thousands of bulbs, rototilling soil and diligently editing out spent bulbs so they don’t ruin next year’s display. Rocks that pop up stay: think soil pore spaces. Bulb planting depths stay uniform. Watering a hanging basket means soaking it.

Perennials everywhere. My notebook showed about 300 plants that were new to me. It is work in progress so I stretch myself. Weekly.

Planting trees bare-root for the first time was an awesome experience. I paid attention. That was exciting stuff.

You should always aim to be better than you were yesterday.


IMG_3834edit

My first-ever bare root planting


Facing your fears

On some days I showed up literally scared. It sucked in the moment but it felt great afterwards. Imagine my horror when I was asked to use a front loader for the first time. Luckily, we were the only ones in the yard. My gardener boss patiently waited as I got used to colliding the front loader with piles of mulch.

Then there was bulb removal. Since the bulb arrangements are changed every season, it is critical to remove 100% of the old, spent bulbs. Gold help you if you missed one.

Once, late in the day, I was asked to quickly plant pots with plants on the truck. No guide, no plan. Go! That was stressful. A  future blog on pots will show that there is no reason to feel stress with pots.

Fun

Work should be fun. I can not openly recount here all of the fun incidents but trust me, there was laughter with great people. On days when we installed brand new perennial beds, work didn’t feel like work. Same on the day I got to use a dibbler for planting for the first time. Magic.

One summer day, getting close to completing a new bed install, I had a young girl stop by, admire the new plants and tell me that I must be the world’s best gardener. Well, almost!

What was your best working year like?


Vas Sladek - Copy - Copy


8 steps to becoming a landscape maintenance professional

By | Education, Landscape Industry, Tips | No Comments

Yes, you can become a landscape maintenance professional. Just consider the following eight steps. I originally published this list in a post on LinkedIn. This is a new, improved version. It came to life as I arrived at a crossroads early in 2016 and had to make a decision. Do I continue with my temporary full-time municipal parks laborer position or accept a better paying, full-time senior supervisor position in the private sector. As I reflected on my own sweaty 16-year journey from rookie at a landscape maintenance corporation to Red Seal Journeyman Horticulturist, the list was born. Feel free to add comments or ask for help.


Practice, practice

New landscape maintenance workers inevitably mow miles of lawns but the idea is to get it down quickly and then move on to all of the other machines. Edgers, blowers, bedwork and power shears. Ask for training. Face your fears. Gain skills and confidence. Add value to your company. The goal is a quick progression from mowing to all of the other skills.


Plant ID

Don’t dismiss this crucial skill. Start on day one. Keep a notebook, take pictures with your smartphone. Learn only botanical names. Some plants have multiple common names so don’t waste your time. All nurseries deal in botanical names. Tests use botanical names.

Plant knowledge is critical for proper care and pruning. To get you started I created an eBook called “Common strata plants, A Guide for West Coast Landscapers“. Message me for a copy.


IMG_0437


Get tested

If you live in Canada or the US, you can get tested and become a certified landscape technician. The test validates your skills and shows employers and clients that you have the required minimum skills to do a great job for them. Going through the written and practical tests is a humbling experience. Getting my certificate felt great! It will boost your confidence and your income. Get your employer to cover the fees.

I invite all prospective Lower mainland candidates attempting the ornamental maintenance module to contact me for a private review session at very reasonable rates. Save money and time by not making the same mistakes I did.


landscape industry certified technician (1)


Hug trees

You only need two field seasons to qualify to write the ISA (International Society of Arboriculture) exam. It’s recognized internationally and prepares you to care for trees in our landscapes. Proper pruning and avoiding conflicts with landscape machines are two critical issues. So is safety. Plus trees are beautiful and provide numerous ecosystem services for free. They deserve a hug!


cert_arb

Mentors

Remember, the goal is quick acquisition of new skills. Get your foreman and senior workers to help you. I spent one season working under a brilliant municipal gardener and I learned a lot. It took one nice comment from her for me to walk into my Red Seal Journeyman Horticulturist exam challenge with confidence. I also read the works of brilliant horticulture professionals. Look for mentors from the beginning.

Industrial athletes

Your body is a money-maker so take care of it. Everything is neatly summarized in this ISA article. Read it. Study it. Green workers may not think of themselves as athletes but consider the daily physical output required on the job. I would just add a regular exercise program based on sports you enjoy. I take part in road and trail running races. Find your favorite sport and do it. Regularly.

Seal it with Red

Landscape horticulture is a Red Seal trade in British Columbia. The recommended procedure is to sign up for an apprenticeship with a good company. Learn the trade in the field and complete schooling in winter. Four years; 9700 hours required. This is consistent with the 10,000 hour idea developed by Anders Ericsson and made famous by the writings of Malcolm Gladwell. See the latest book by Ericsson. Make the hours count.


41rJVsU7tJL__SX331_BO1,204,203,200_

If you possess the required documented hours in the field, you can challenge the exam. I did. It wasn’t easy but with field experience, one day preparation course and some study, I passed. You will too. Journeyman status is critical to your career success. Municipal park departments now demand it. In private industry you separate yourself from other workers and management is a possibility.

Kaizen

Kaizen is a Japanese term for continuous improvement. Never stop learning. Read new books, attend conferences, subscribe to journals and stay in touch with your mentors. Keep reading this blog. The goal is to be better than you were yesterday.

Follow the steps above and enjoy your green career!

Free garden and landscape seminar May 11, 2016

By | Education, gardening, Landscaping, Lawn Care, Mulch, Seasonal, Tips | No Comments

Free seminar

A free gardening seminar in Port Moody within walking distance from my place will take place on Wednesday May 11, 2016. It sounds great already! Remember, this is in line with our goal of continuous improvement. Free education is awesome.

Master Gardener Dr. Linda Gilkeson will talk about “Naturally resilient gardens and landscapes.” Come learn how to make your lawns and gardens more resilient to variable weather patterns; and about year-round natural gardening, native plant selection and natural pest management. Also discussed will be gardening methods for drier and warmer summers, water shortages, and other types of extreme weather. This is very topical. I am in. Notebook in hand. Are you?

When: Wednesday May 11, 2016

Where: Inlet Theatre, 100 Newport Drive, Port Moody

Admission: Free!

A Sedum solution

The theme of this seminar reminds me of a recent strata complex case in Langley. The complex boulevard beds are exposed to the sun and the original planting didn’t survive. Planted between Acer campestre trees were Skimmias and Heathers. Many of them didn’t survive the hot summer. The proposed solution is to plant succulents like Sedums between the trees. It will be interesting to see what happens; and if we get another hot summer.


IMG_0608

Acer campestre and some surviving Heathers and Skimmias; Sedums will replace the Skimmias and Heathers.