Category

Pruning

Hydrangea horror shows to avoid

By | Pruning, Species | No Comments

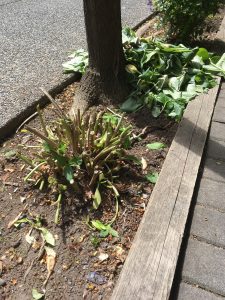
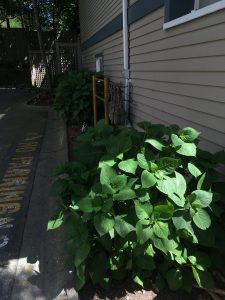
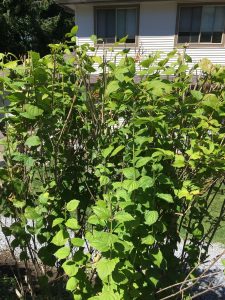
Hydrangeas are beautiful workhorses in our West Coast landscapes. Healthy Hydrangeas reward us with lots of beautiful flowers, many of them in big mop heads. I’m so used to seeing them I don’t even take pictures of them every season.

Lately, I’ve been running into Hydrangea horror shows and so I thought this whole thing begged for its own blog post.


IMG_8165

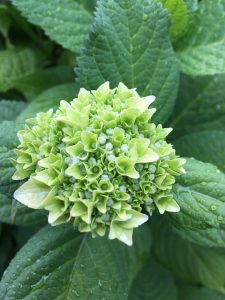
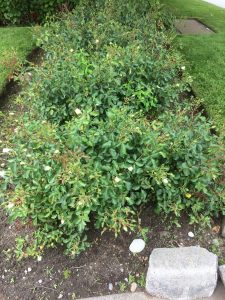
Hydrangeas come in all sorts of colours and we love them all.


Pruning


When it comes to pruning, we can follow the same general rule: prune after flowering. Some people leave the spent flower heads on all winter so they have something to look at. Add a bit of frost and you have a nice show in your winter garden.

Alas, strata landscape bosses like everything tidy so the flowers are deadheaded and the overall size of each shrub is reduced. The key is not removing the old second year canes on which the current year flowers emerge. There are some varieties that flower on all canes but most follow this rule.

If you remove too much of the old second year cane, all you will get next season is greenery. Flowers won’t come until the second season.

This is where problems arise. Homeowners torch their Hydrangeas almost to the ground and when the shrubs fail to flower in the following season, the frustrated owners hack them back. And so it goes until I correct them.


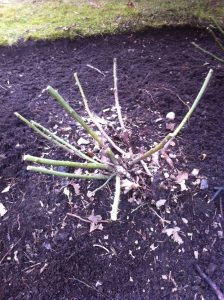
IMG_9519

The owner hacked back his Hydrangea and most of the old canes went missing.


Landscapers are also guilty of taking too much old wood in their struggle to manage shrub sizes inside strata complexes. Strata unit owners notice when their favourite Hydrangeas fail to flower. I made this mistake early in my landscaping career and I still remember the old lady complaining to my manager about her missing flowers. And I never forgot that lesson.


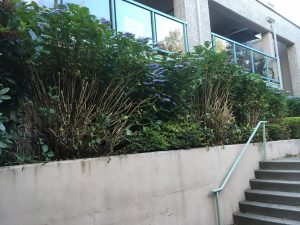
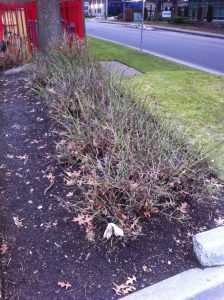
IMG_9521

Not much of a show, is it? I’m almost certain these shrubs were cut back too much last year. You can expect flowers next season.


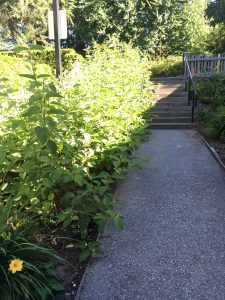
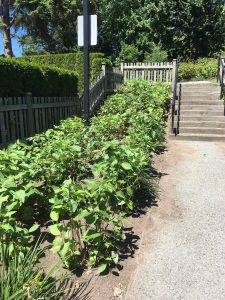
I saved the worst example for last. This is a high-profile walkway and the strata complex’s Facebook group lit up with negative comments soon after this pruning job. And for good reason.

The timing is all wrong because these Hydrangeas are flowering nicely. Why remove flowers at their peak?

The other problem is the severity of the pruning job. I would have at least left some green or alternatively, removed entire canes. Looking at severed canes while the rest of the shrub is still intact and flowering is a bit weird.


IMG_0003


It would be best to wait until the flowers fade and then remove maybe the top third of each cane, roughly 2-3 buds down. When you do this, you can also select the 1-3 biggest canes and prune them right down at ground level. Otherwise the old wood accumulates; what we want is nice straight canes growing out of last year’s wood.


Conclusion

So please remember that Hydrangeas flower from canes growing on second year wood. If you cut back the older canes too hard you will only get green foliage the following season and your clients will wonder what happened to their annual flower show.

Prune your Hydrangeas after flowering and cut back your canes down by 2-3 buds. That should guarantee another flower show next year and that’s why we plant Hydrangeas in our landscapes.

If your Hydrangeas aren’t producing flowers this season then I would be willing to bet that your pruning last year was too harsh.

Pruning 101: consider shrub peak flowering before pruning

By | Pruning | No Comments

Today I found out about an interesting pruning “mishap” from which we can learn several lessons. It starts out like many other mid-season pruning jobs with extendable power shears and fully flushed out shrubs. The foreman went in and pruned everything, especially off the tops.

But there is a glitch. You can’t treat all of your shrubs the same way because different species grow and flower differently. This is another clear illustration of the importance of plant identification. It’s crucial knowing a little bit about all of your shrubs on site.

And keep in mind the rule: it’s normally best to prune after flowering.

Home gardeners

Home gardeners look out at their gardens all year, season after season and they enjoy their flowering shrubs. When you come in and eliminate their one annual flower show, they get angry. Beware of home gardeners!

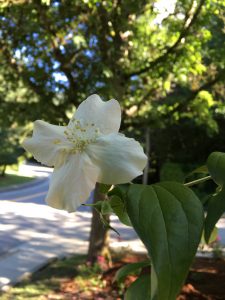
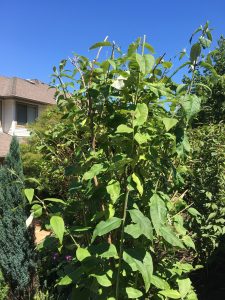
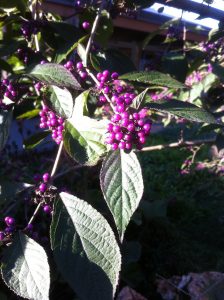
So, this blog post covers three shrub species: Callicarpa bodinieri, Philadelphus and Buddleja davidii. Only the Philadelphus was past its flower peak which normally runs from June to July on the West Coast. In this landscape example the shrub was clearly past its flowering peak and therefore a reasonable target for pruning.


IMG_9926

Power-sheared Philadelphus


IMG_9779

Philadelphus flower example


Unfortunately, the other two shrubs were poor pruning targets for July. Buddleja davidii flowers from June to September and clearly the few remaining flowers after pruning are still immature.


IMG_9930

Look closely and you will see a few developing flower spikes.


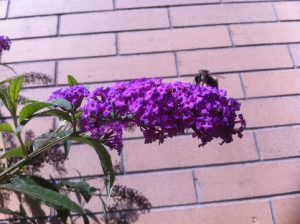
So the gardeners know they will miss out on their usual flower show which would have looked something like this.


Buddleja davidii

Buddleja davidii flower spike.


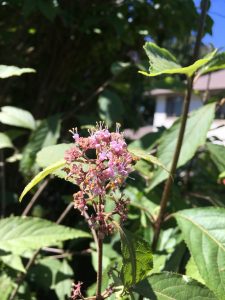
The third shrub, Callicarpa bodinieri, was by far the worst choice for July pruning because it reaches its flowering peak from June to August AND the flowers turn into showy purple fruits from September to October. I personally find the fruits much nicer than the flowers but we have to keep the flowers on to get fruit.

Luckily, the Callicarpas aren’t as imposing as the other two shrubs so only their tops went missing. But of course for veteran home gardeners any dimished flower show is apocalypse.


IMG_9928

Callicarpa bodinieri flower


Callicarpa bodinieri

Callicarpa bodinieri fall fruits.


Clean-up

To make matters worse, the clean-ups were rough and many other plants got trampled during the procedure. We’ve already covered pruning debris clean-up in an earlier blog. Clean-ups must be perfect to match perfect pruning.


Conclusion

This was an extremely useful lesson showing how:

a) pruning must be timed for after peak flowering times

b) all shrubs can’t be pruned at the same time as if they were the same species

c) pruning debris clean-up must be perfect just like the pruning work and care must be taken not to destroy other garden plants during clean-up

d) plant identification skills are extremely important, don’t stop learning

The one key for mid-season pruning success

By | landscape maintenance, Pruning | No Comments

Late June on the West Coast means mid-season pruning and, depending on site size, there can be a lot of pruning to do. Especially woody shrub pruning. And while landscapers do a great job with pruning, I am finding that the clean-ups often don’t match the beautiful precise pruning work. If you want mid-season pruning success then the key is great clean-up.


IMG_9612

Pruned and cleaned-up Japanese holly (Ilex crenata).


Mid-season pruning 101

Most of the mid-season pruning involves shrubs which tend to push out new growth and make people panic. They also tolerate power shearing fairly well. One example is pictured below. Cornus (dogwood), Symphoricarpos albus (Common snowberry) and Ribes. All three are shrubs and tolerate shaping with power shears. Give them a few weeks and they will start to look like they were never pruned.


IMG_9400

Left to right: dogwood, snowberry and currant


For best results, always use good quality power shears with sharp blades. If you have lots to do, always bring a jerry can with you and keep it close by so there isn’t any unnecessary walking. Ear and eye protection is mandatory and I’m assuming everyone is always protected.


Exceptions

If you know your site well then this won’t be a problem. But when I prune on a new site for the first time I always ask about exceptions because they do exist. For example, some clients prefer more natural looking shrubs so you have to prune gently. Other exceptions are laurel hedge tops to be left almost untouched because they block parking stall car light beams.


IMG_9484


IMG_9485


The KEY

I can not overemphasize this: great clean-up work that matches the pruning job is a must. I often have to go behind our crews and double-check because inevitably two big problems arise.

One problem is debris left on top. It looks fine on your pruning day but one week later you start noticing brown branches on top of green shrubs and hedges. And your clients notice, too. So always train your crews to pick debris off the tops.


IMG_8794

Note the debris left on top of the shrub. It will look way worse once it dries out and turns brown. Always check the tops after pruning.


Another problem is clean-up raking. This is where many workers struggle because they have to clean-up really well without removing too much soil; and they have to reach into tight spots which often gets very old. And quickly.

Again, it’s the foreman’s job to double-check before workers move on.

The ultimate sin is skipping clean-up altogether, say, in tight spaces between shrubs. There is no easy way to do the clean-up. It must match the pruning job.

Below are some examples of finished clean-up jobs. Yes, finished. It’s obvious the workers skipped the clean-up and the foreman didn’t check. The effect is horrific; it’s not even close to average when what we need is world class.


IMG_8800

Judging from the piles on the ground, this section was completely skipped.


IMG_8803

I have no idea how this pile got missed.


IMG_8808

Another “finished” section. Yes, it’s tedious but it must be done.


IMG_8811

Corrected.


Conclusion

Mid-season pruning can be extremely demanding, especially when sites are huge. The key to mid-season pruning success is perfect clean-ups. Nothing can be skipped and the aim should always be to match the clean-up with your pruning job quality. Aim for world class!

Can you really machine gun your rhododendrons?

By | Pruning | No Comments

June on the West Coast means mid-season pruning and on large strata (multi-family) sites there can be a lot of it. So we’re busy power shearing shrubs and making sure the clean-ups are as good as the pruning.

Shrubs like dogwoods, snowberries and currants are easy to power shear into shapes because they’re fairly soft and they grow back very quickly. Almost too quickly.


IMG_9400

Left to right: Cornus, Symphoricarpos and Ribes, all are easy to power prune.


But what about rhododendrons? Can you really power shear rhodos like the other shrubs? I witnessed this recently and I don’t think it’s a good practice. I know, there is often very little time for mid-season pruning on large sites. It’s almost stressful to get everything under control and looking decent. But still, compared to the other shrubs rhodos are like the one-percenters. They give us a great show when they’re in bloom, they’re woodier and they deserve better treatment. I say spend the extra time on them.


IMG_6414

Not a bad show.


Also, unlike the shrubs mentioned above, they don’t grow as quickly. There is no need to rush rhodo pruning. I’m convinced that if you want a good-looking rhodo in your garden you must hand-prune it. Keep your power shears for softer shrubs.

Take a good look at the rhodo below. This is the finished product before clean-up and I can’t say I would recommend this approach to anyone.


IMG_9396

I hate the look of this because there are too many “sticks” and shredded woody branches poking out.


IMG_9399


This specimen was power-sheared along with the other shrubs which I believe was a mistake. Note the shredded wood and branch ends poking out. It’s not pretty.

If you take a bit more time you can prune it properly. First, remove any dead wood. Then, check for any nasty crossing and rubbing branches. After that, remove any branches that are touching the ground.

If you’re worried about height then clip off the newest growth with your snips. And if you have even more time, hand pick the spent flowers carefully without damaging the new buds. By taking extra time for rhodo pruning you can shape it nicely without creating unsightly wood forks.


Why pollarding trees gives me a rash

By | Arborist Insights, Pruning | No Comments

I’m kidding, of course, I don’t suffer from rashes after tree pruning. But I do find pollarding too forced and ugly immediately after. In summer, when the tree crowns are full of foliage the trees look fine.

Incredibly, I’ve been an ISA certified arborist since 2006 but last week was my first-ever pollarding session. Since our site was all snowy, it was a great time to prune trees.

Why pollarding?

So why do we resort to pollarding? In the very old days, people understood that cutting down all of their trees for firewood was short-sighted. So instead they pollarded their trees and then used the wood. But times have changed.

Now we pollard trees to keep them at a smaller size then they would otherwise reach. It makes sense at our site where three London plane trees (Platanus x acerifolia) are located close to the pool. See the picture below taken from my Kindle e-book: Common Strata Plants: A Guide for West Coast Landscapers, available for download from Amazon.


Platanus x acerifolia

Platanus x acerifolia


Pollarding involves the removal of the upper branches of a tree which then promotes a dense head of foliage and branches. It just looks like hell right after you do it. In a perfect world, the London plane trees could be let go to grow as big as they wished. I wish!

The trick, then, is to pick a height and pollard the trees annually. The actual work is very simple because you’re simply beheading skinny branches that shot up from the previous pruning cuts. Staying safe while you prune is more demanding.

My arborist technician apprentice climbed the tree while I stayed on the ground and used a ladder with pole pruners. Once in a while I would steal a big-brother glance at my eager apprentice to make sure his ropes were still supporting him.


IMG_4425ed

My work in progress. The gnarly ends of the branches don’t exactly inspire me.


Timing

Late winter or early spring are best for pollarding. One exception are maple (Acer species) which bleed sap when cut at these times. The pruning rule for maples is before Christmas.

If you have trees that are outgrowing their space and you don’t want to lose them or can’t afford to replace them, then by all means pollard your trees annually. The trees look horrific immediately after pruning but in summer they’re fine. Personally, I would prefer not to pollard anything.


51NTPMQ0wOL

Things to consider before you “skirt” Thuja plicata trees

By | Pruning | No Comments

Raising tree crowns by “skirting” is a common pruning job. It basically means removing the lowest branches so the crown above looks raised up. This is usually necessary when cedar trees (Thuja plicata) haven’t been pruned for a while.

Two potential problems

When you do this kind of work, don’t forget about two common pitfalls. One is not stopping and removing too many branches so that the tree looks like a lollipop. It’s unnatural and should be avoided. It’s a common problem with other tree species, not just Thuja plicata. So by all means, raise up the tree crown but know when to stop.

Two, privacy. Unless you know the site well and your directions are very specific, don’t forget to consider people’s privacy.
True story

I wish it wasn’t true but I’ve heard of a gung-ho landscaper who was servicing a new site for the first time. He walked by a double line of Thuja plicata trees separated by a wooden fence. At one corner the trees were especially low so he skirted them right up. Great. Except the owner of the unit loved every single branch and he was livid. His comments can’t be printed in a clean, family blog like mine. Suffice it to say that he failed to express himself intelligently.
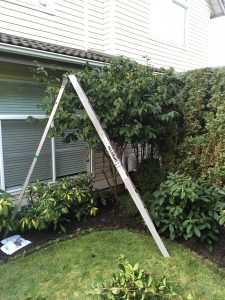
But I feel for him a little bit. The tree was fine the way it was and now he has the view of a wooden fence. So when you take over a new site, get to know it well first.
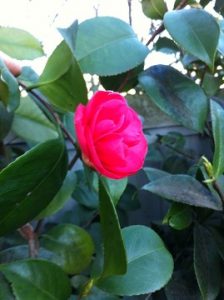
Privacy

Recently we made our way around a large complex that had been neglected for many seasons. I noticed several low-hanging Thuja plicata branches and almost reached for my trusted Japanese hand-saw.

Of course, I am a Red Seal professional with many seasons under my belt. My instinct told me that the low-hanging branches were probably providing a privacy screen for the residents. If I had removed the branches they would be looking at a residential tower and its car ramp. So unless I hear otherwise from the strata council, the low hanging branches will stay. Always consider privacy issues.

Residential request

It’s very easy when your clients actually request the crown raising. In these cases it’s just a matter of knowing when to stop. And in this one residential example, the client clearly  told me to “rescue” her overwhelmed patio and plants.

So I made nice cuts until all Pieris japonica, Rhododendron and Yucca plants were no longer obstructed by the cedar trees. Remember to make three-point cuts where the weight is taken off first and then the cut completed nicely. Cedar branches are heavy.

The pruning also solved the same problem for her patio where she entertains guests in summer. She was absolutely thrilled to get some breathing room on her back patio. And happy clients are the best clients.


IMG_3987ed

Before pruning, the Pieris and Yucca plants were covered by cedar branches.


IMG_3985ed

Not only are the cedar branches off the plants, the patio is also unobstructed.


Raising Thuja plicata tree crowns is an easy pruning job but always consider owner privacy issues and know when to stop.

Camellia japonica pruning: timing and technique

By | Plant Species Information, Pruning | No Comments

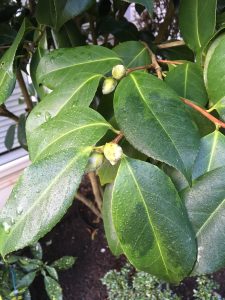
I heard recently about a case where one landscape maintenance foreman pruned a lot of stuff on his site. Including Camellia japonica full of flower buds. The owner loves her Camellia and she was extremely unhappy about losing so many buds to needless pruning. Oops.


IMG_3427ed

Camellia japonica


Pruning involves correct technique and timing. Normally we use hand snips or power shears and both are fairly easy to use. I prefer to use hand snips whenever possible because they are quiet.

Timing depends on the specific shrub or tree in question and thus requires plant-specific knowledge. That is both exciting and scary. All top horticulture professionals have a lot of plant-specific knowledge which takes time and experience to acquire.

December request

Then this week I helped with the last service of the season at a Port Coquitlam site. And there it was again. Another Camellia japonica and a passionate owner used to enjoying her flower show. And I was ready.

The timing of the request was way off. December is not the right time to prune Camellia japonicas. The only thing I really power shear in December is cedar hedges (Thuja occidentalis ‘Smaragd’).

The proper pruning time for Camellia japonica is in spring, right before bud break, according to my Timber Press book “Essential pruning techniques”.

Camellias don’t really need pruning but this specimen had several shoots sticking up and the owner wanted them pruned. But only those shoots. So I hand snipped all of the shoots down to a bud. It was easy and it didn’t take much time. Power shearing would have been slightly faster but the shredding that occurs is unsightly. Hand snipping works perfectly in this case.


IMG_3426ed

The task was to remove the long top shoots which don’t sport any buds. I made the cuts down to the first bud I encountered.


IMG_3428ed

This is the after shot. The long shoots are gone and very few buds were lost in the operation. Any additional pruning will happen in spring, just before bud break.


Camellia japonicaed

Camellia flowers are stunning and can be cut for home vases. You can see why owners would get upset over losing this kind of show.


Conclusion

Remember to pick-up plant-specific knowledge so not everything on your site or garden is power sheared at one time. Camellia japonica should be pruned in spring, just before bud break; if you must prune it.

Don’t be shy with Roses

By | Pruning, Species | No Comments

Let me start this blog post by saying that I’m not an expert on roses. I know how to snip them and I know it’s usually done in February. Of course, there many rose varieties and lots of exceptions but on my commercial site I didn’t worry.

When I took the site over there was a lot of work to catch up on before lawn care started in the spring. Weeds were overdue and I also gave the lawns a nice, sharp blade edge.

By far the ugliest aspect of this commercial landscape were the roses. Since it was still technically winter it was easy to see the tangled mess inside the individual rose bushes. This is what happens when you quickly power shear the roses, season after season. Eventually, without good hand-pruning, the dead brown canes accumulate. Obviously, power shearing is quick and convenient. But I had time…..I was in charge now.

Dead canes


IMG_1083ed

This is a tangled mess full of dead canes oak leaves.


You will note the many brown dead canes. The dead is pruned out first. Then we move on to ugly twisted canes that rub or touch the ground. This pruning requires faith. Trust in your own work. By spring you will be rewarded.


IMG_1088ed

That’s much better.


This is the look we should aim for with nice canes pointing outward without crossing or rubbing each other. It looks too harsh at first. Just wait for summer. The rose plants push their available resources into the remaining canes. So for now we wait for the buds to swell and pop.


Growth and buds


IMG_4229ed

It’s all green and we have lots of buds. It’s just a matter of time.


See, everything is cool. We have new growth and flower buds. Correctly missing is the useless dead wood.

Summer success


IMG_4524ed

Summer success! It almost makes you forget the harsh look from winter.


Take a look at the second picture again. The one that made you cringe because it looked too harsh. Except it wasn’t. I would call this summer success. I knew it would work out because I have done it before. So don’t be shy, have some fun with your roses next February 2018 and watch them go.

The roses require some summer maintenance as the flowers fade. You can clip off the spent rose buds but be careful. Always look for upcoming rose flowers. Keep those on unless you’re pruning for shape. It’s OK to lose some flowers when a long cane reaches into the road for example.


How renovation pruning saved Escallonias

By | Pruning | No Comments

It’s been hot for weeks now in the Lower Mainland of British Columbia but this blog will take you back to last winter. The last winter we went through was the harshest in the last 30+ years. Consequently, many plants didn’t survive, namely Ceanothus and Choisya.

So, many strata sites required heavy plant editing. We had to carry out the dead to make room for new plants; budgets allowing, of course. And budgets are tight. Many strata councils have many projects on the go and replacing dead plants probably wasn’t in the budget. One strata owner told me that his own building spent $21,000 just on snow removal last year. It’s a good idea for strata councils to budget for snow removal because global warming is bringing lots of changes.


Carnage

Walking through one particular site we had to toss many Ceanothus thyrsiflorus (California lilac). They are already marginal in the Vancouver area and one especially crazy winter killed them.

Choisya ternata also got hammered. Since residents were alarmed we had to toss many of these brown hedges. And quickly.

IMG_4402ed

Escallonias

Then we reached many Escallonias beat up by snow and low temperatures. So what do you with this mess? Complete removal is one obvious choice but it would leave a huge hole. If you take a good look you will see growth at ground level. With life at ground level this calls for renovation pruning.

Step 1
First we take out power shears and we remove as much dead as we can. It’s harsh on the blades but it saves time on hand pruning later.

IMG_5224ed

Power shear dead stems.

Step 2
We hand snip all remaining dead stems above the ground level green growth. See how the “new” hedge emerges.

IMG_5228ed

Step 3
Last we do a nice clean-up and blow the area.

IMG_5247ed

Now let’s take a look at the finished renovated Escallonias. We saved the hedge from complete obliteration, thereby saving the strata council money. Passersby won’t even notice that the plants are down by half. I expect them to grow again and flower as if nothing happened. Hopefully, this coming winter will be gentle with them.

I have also done renovation pruning on rhododendrons.

Obstruction in the landscape

By | landscape maintenance, Pruning, Strata Maintenance | No Comments

Obstruction in the landscape is a well-known theme but it’s often missed or ignored. Especially by newer crew leaders and workers. So let’s examine some cases of obstruction and learn from them.


Spring rains

This is what happens after spring rains and early season growth. All of a sudden we have obstruction everywhere. Immediate corrective action is required by people’s front doors.


IMG_3201ed


Walkways

It happens all the time. Your new worker concentrates on his lawns and in his rush to complete the work places his tarps on walkways. Then a senior citizen pulls up in a motorized scooter and we have a problem. If you think senior citizens aren’t capable to angry outbursts and middle finger salutes, think again. Never block walkways.


18119349_10203111679748423_6949587408846556966_n

This isn’t the best place for a tarp.


IMG_4381ed

Much better and stress-free!


Signs

Signs exist because they have a message to convey. It’s easy for vegetation to obscure them so check your sites and take action. This is especially true for sites you have recently taken over.


IMG_4202ed


IMG_4203ed

Much better.


Exits

All exits should be clear. This example is from a neglected strata site. I pruned off the offending maple tree (Acer circinatum) branches in a few minutes. The residents must have been ducking here for months.


IMG_4472ed


IMG_4676ed

Another walkway example with Indian plum going wild.


IMG_4677ed

Problem solved!


Peonies

Peonies usually require staking and more space. I used a bit of string and two minutes.


IMG_4689ed


IMG_4704ed


Parking stalls

Parking stalls should always be clear of any obstructions. This took one cut with my snips.


IMG_4889ed


IMG_4890ed

Done!


Vehicle site lines

This one is much harder to spot. Residents driving out couldn’t clearly see other approaching vehicles so I had to prune the maples. Note that you should be able to see through Japanese maples (Acer palmatum) anyway.


IMG_4758ed


IMG_4760ed


Dog waste

This is a most disagreeable topic but let’s not be shy. This is what it looks like on the ground for landscape maintenance workers. The ignored long grass indicates the presence of large dog waste piles. So in this case the obstruction is created by the owners.


IMG_4691ed

Dog waste in the open, urine soaked lawn and hidden inside shaggy islands.


Future obstruction

This is an interesting small yard. I once took the liberty of pruning a few branches off this Magnolia so we could get through the gate. The owner had a fit, calling us nasty names. Unjustly, I believe. She planted two Magnolias in her small yard never bothering to read the tree tags still attached to the trees. Considering the future size of these trees I fully expect this owner to beg me to prune her trees in the future. Always consider the mature size of your new trees before planting them.


IMG_4947ed


Obstruction in the landscape is a well-known theme. Train your workers to spot it and correct it.