Category

Pruning

The case of an abused snowbell tree

By | Arborist Insights, Pruning | No Comments

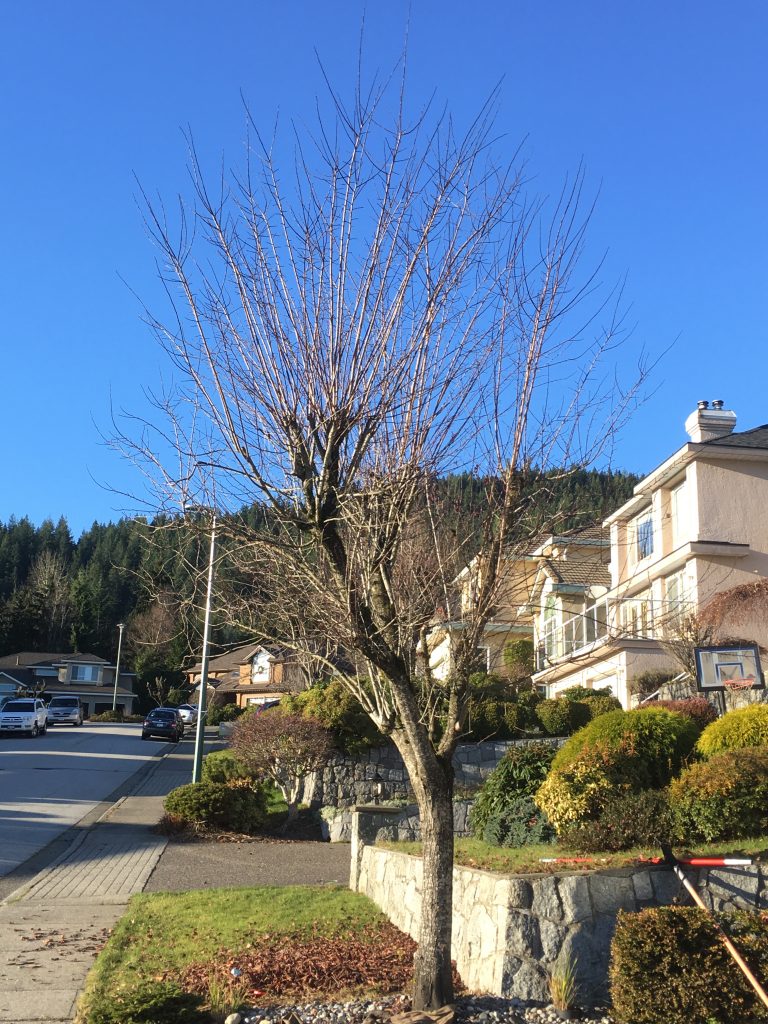
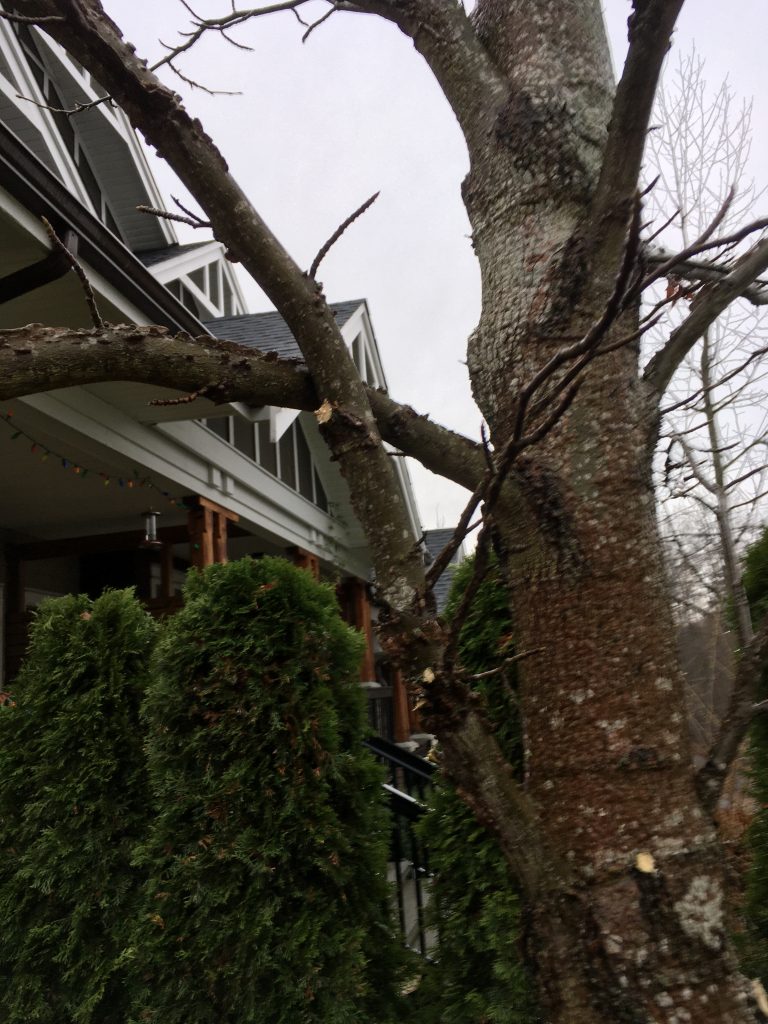
When strata contracts run for only ten months, the owners get two winter months to turn rogue. That’s how one snowbell tree (Styrax japonicus) lost one half of its trunk.

Because we don’t recommend “pruning” this severe, the owner probably got fed up with strata council approval requests. Requests can go from council to the management company; and from there to the landscape contractor. I’ve seen requests so old, they were completed several weeks before the contractor formally received them.

The setting

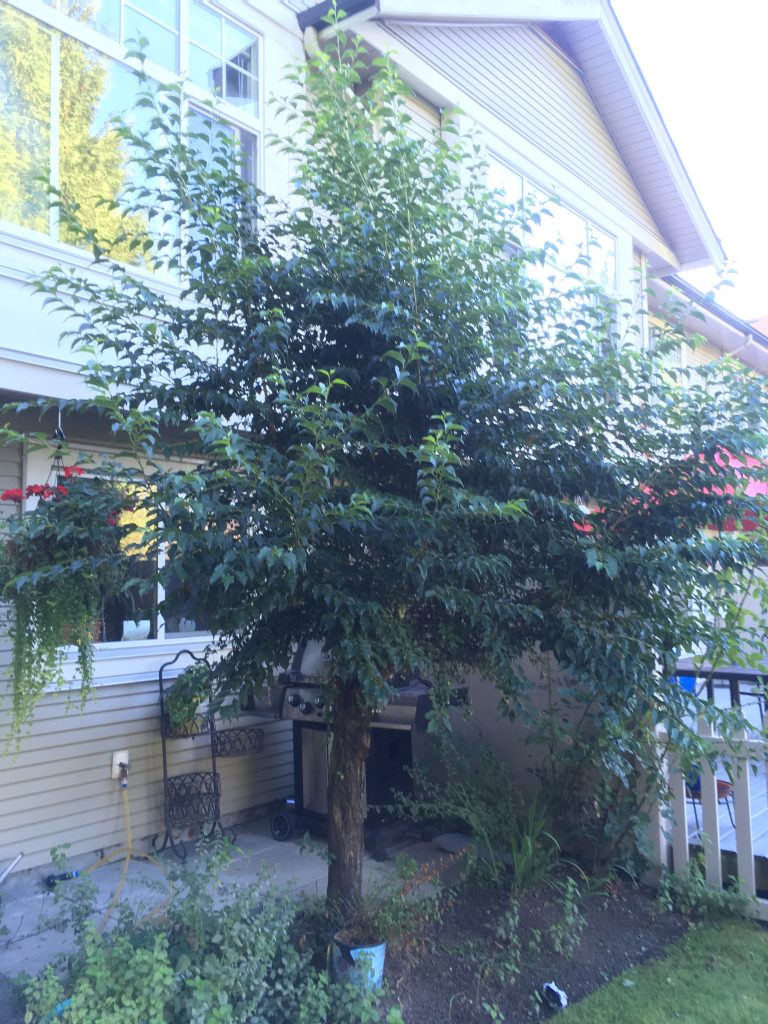
I’m not sure how the poor tree ended up so close to the owner’s patio. It might have been a wayward seed or deliberate planting. Either way, the tree is way too close to the patio. Even if the roots don’t affect the patio stones, chances are, the foliage will eventually touch the building.

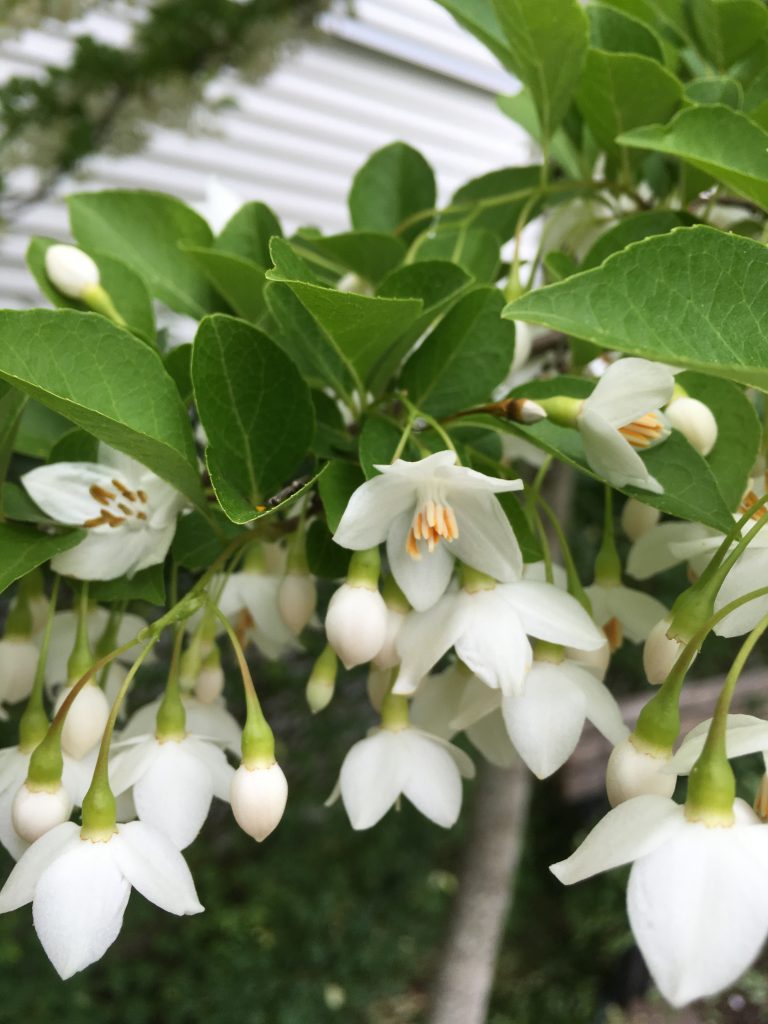
Styrax flowers are beautiful snow bells but they turn into hundreds of seeds that cover the patio and could cause the owner to slip. I’m also not sure if they wanted this much shade on their patio. I never got to interview them.

The bottom line is: the tree is situated too close to the patio.

Best solution

By far the best solution would be to remove the tree completely. There is very little available space for the tree to grow.

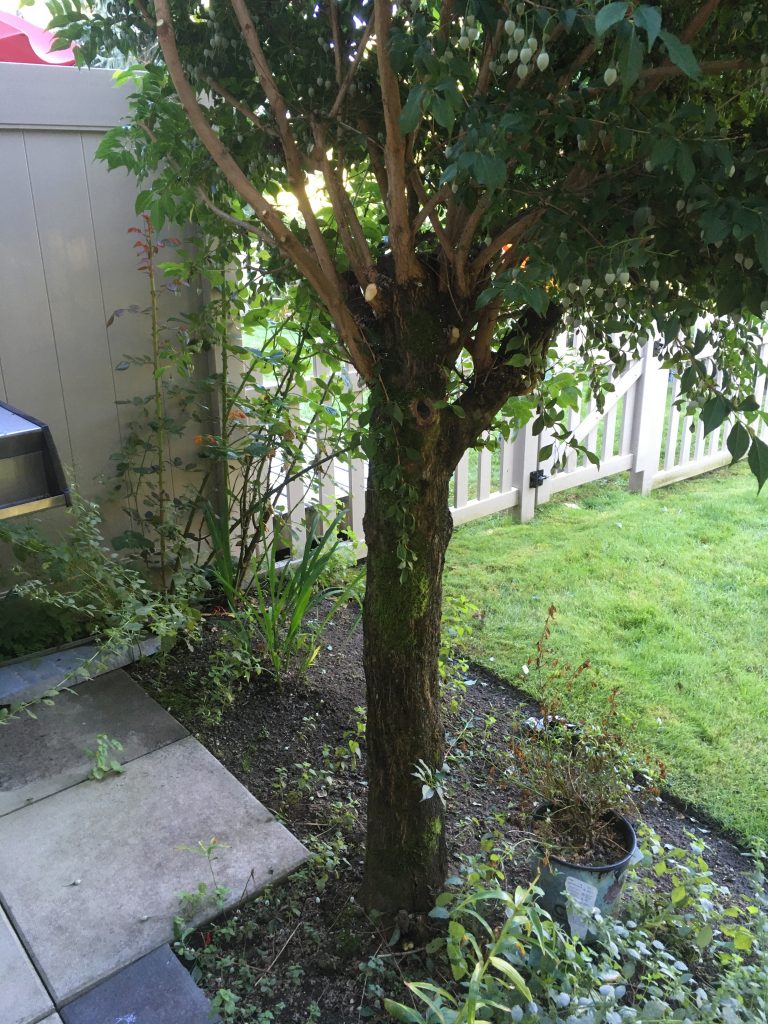
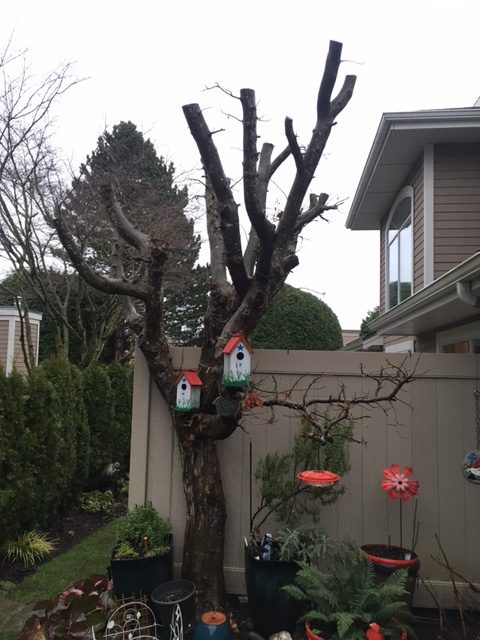
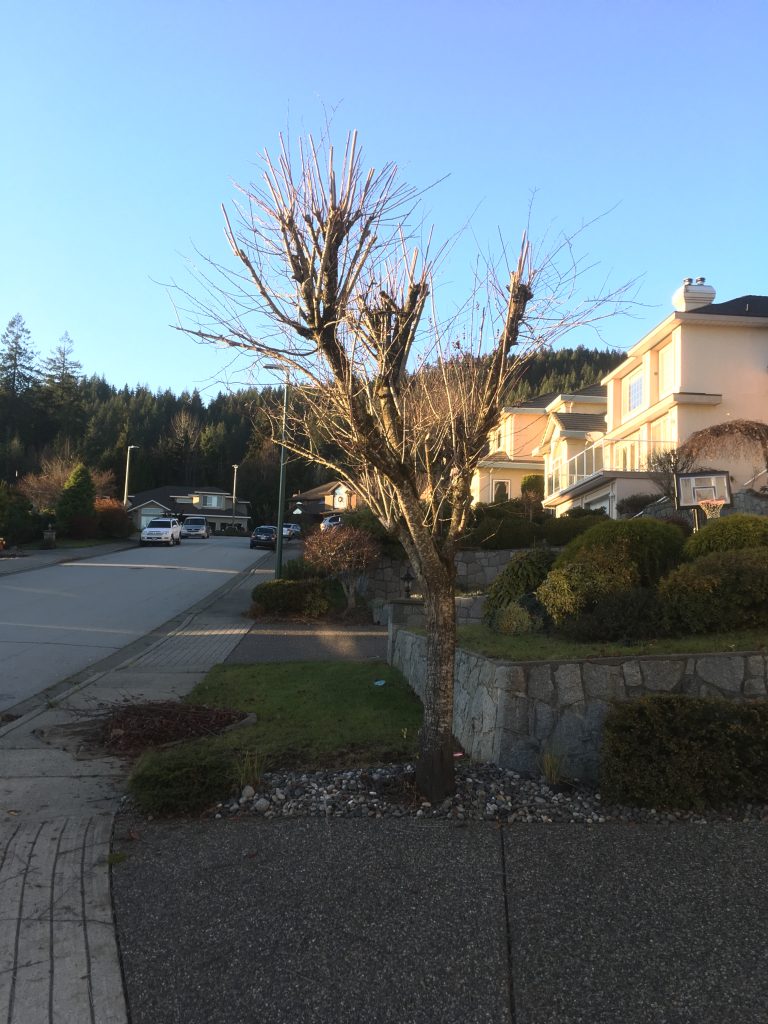
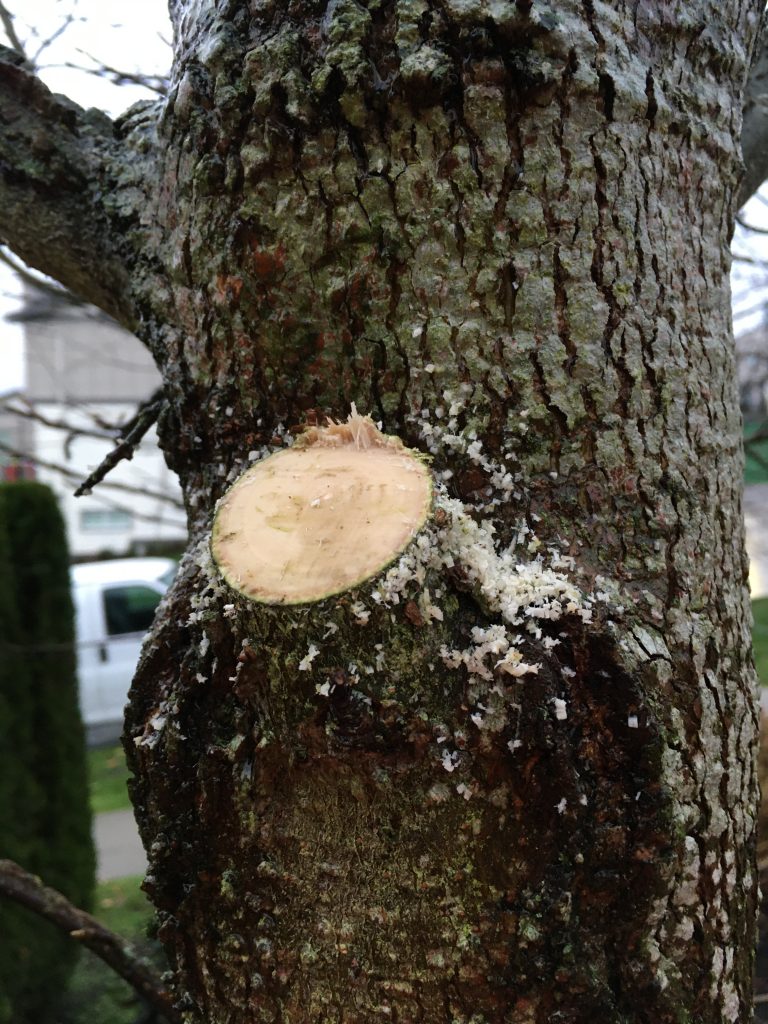
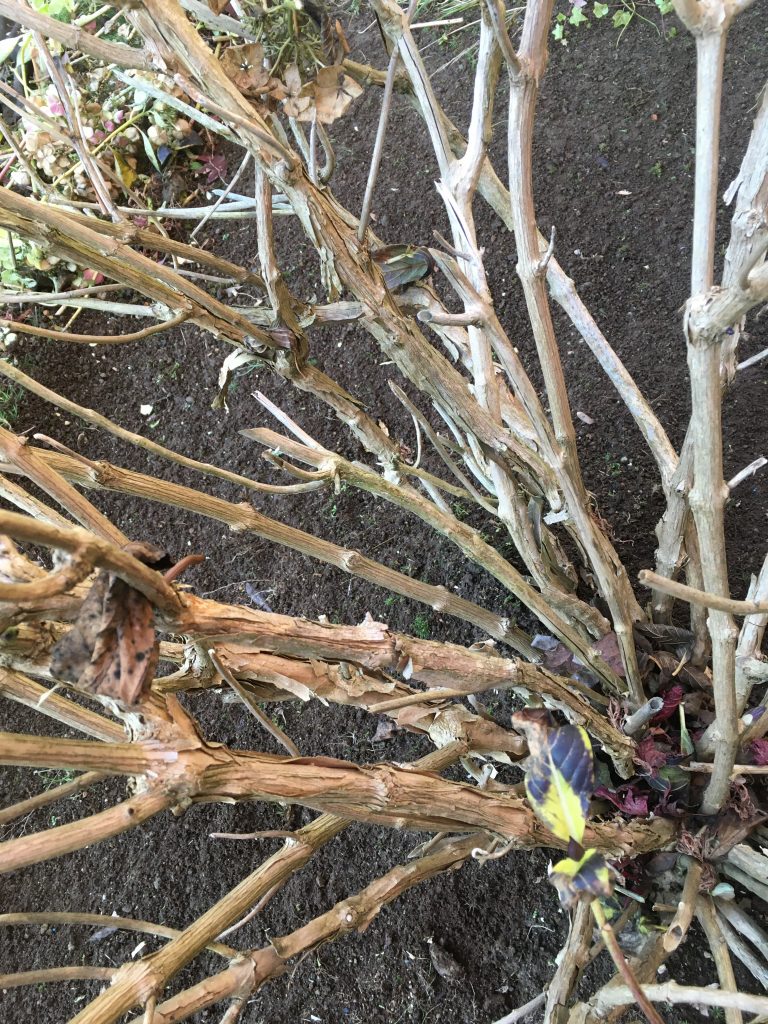
The owner’s solution didn’t go far enough. She cut the tree at 4-5 feet so only the trunk was left. Which looks weird. It also removes whatever food was stored in the branches.

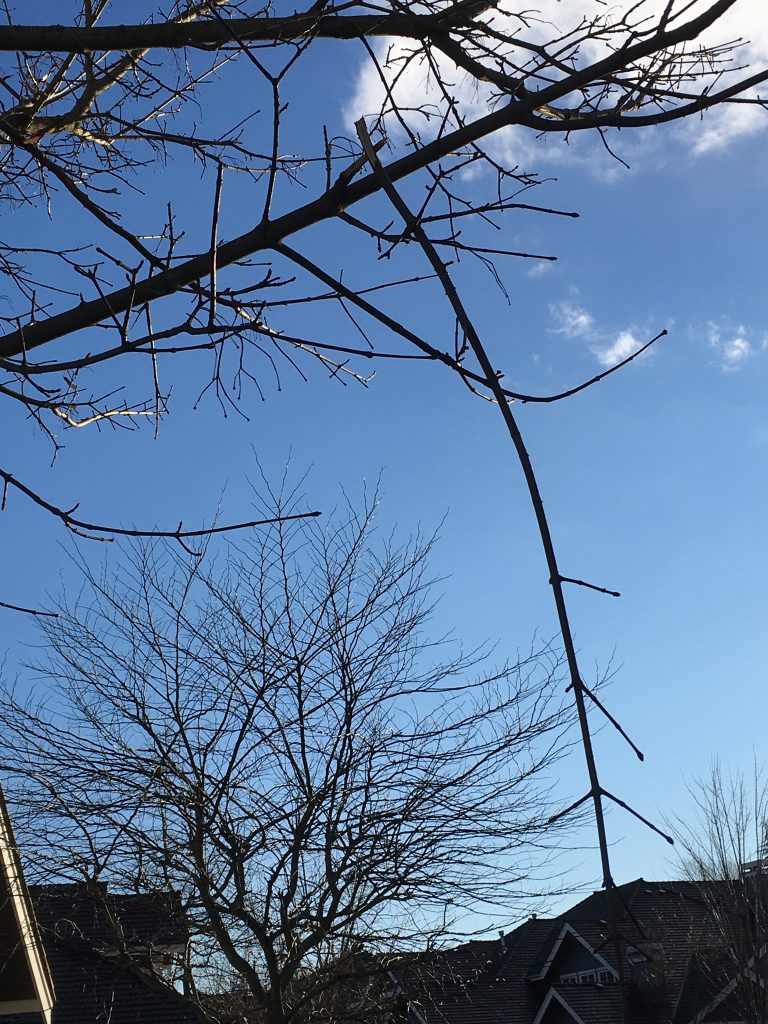
When over half of a tree goes missing, the tree notices it and pushes out many sprouts. After all, it will need leaves to feed itself. You can see the response in the picture below.

The response is furious, as the tree fights. The new sprouts mature into poorly attached branches and the owner is back to square one. Now you have a choice: remove the sprouts every year, remove the tree or rehabilitate it.

You can see the original cut at roughly 4 feet.

You can rehabilitate topped trees by keeping a few leaders, subordinating a few more sprouts, and completely removing the others. But here it wouldn’t make sense because there is not enough room for this Styrax.

ISA certified arborist Vas recommends complete removal!

Always learning about trees

By | Arborist Insights, Pruning | No Comments

Learning never stops

Learning never stops! Which is why I love the green industry and feel like I will never run out of topics to write about. Especially about trees. There is so much to learn.

Lee Valley

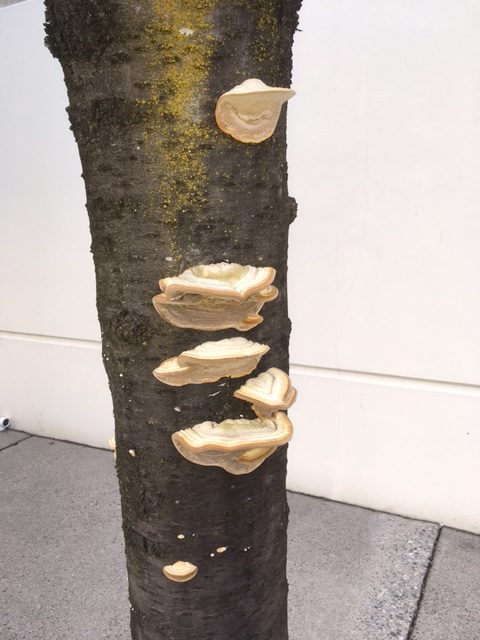
Take my shopping visit to Lee Valley as an example. I was there to buy new blades and springs for my Felcos ( Visit again on March 6, 2021, to read my Felco blog post). As soon as left my car, I noticed a cherry tree, planted in the middle of the sidewalk. Fungal fruiting bodies were screaming at me to notice them. And bang, as soon as I saw them, I knew the cherry tree was dead. That’s the rule. Fungus inside your tree is a disaster.

I love how the fungus-tree death connection automatically clicked in my head.

Healthy trees don’t sport fungal fruiting bodies.

Ray cells

Ray cells.

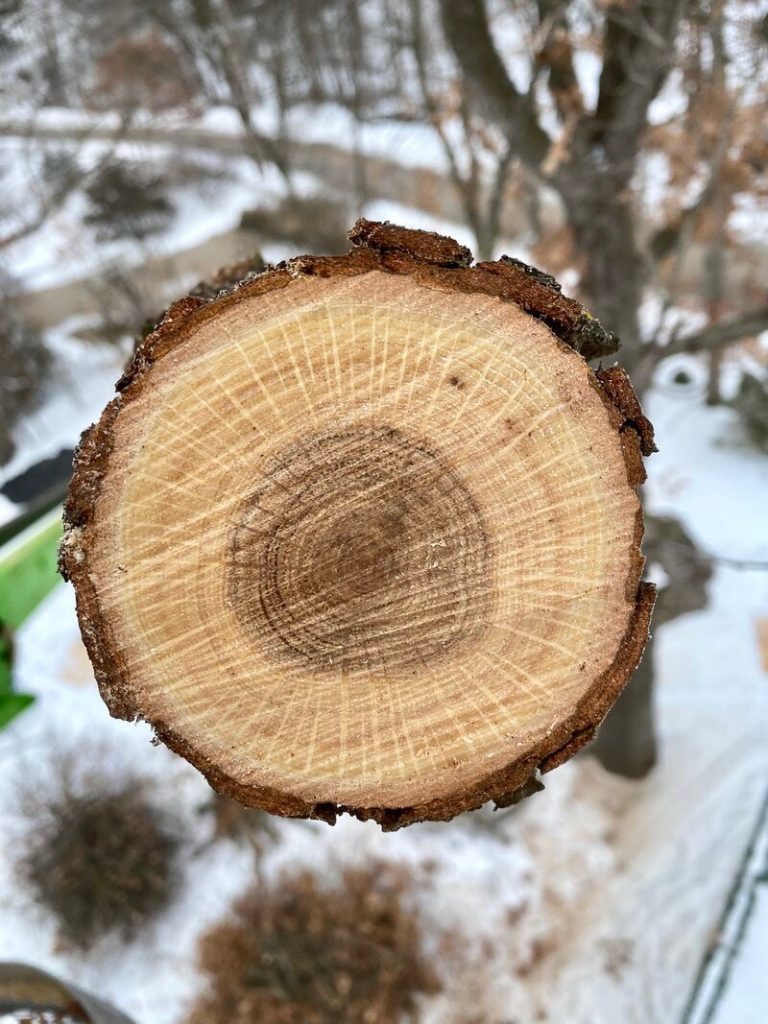
It pays to be connected to people on LinkedIn. I got this picture from a contact who marveled at seeing ray cells so clearly. Allegedly, ray cells are clearly seen in oaks.

Now, in keeping with the continuing education theme of this blog post, I went home and looked up ray cells on the internet. And I found out they’re pretty amazing.

The two main functions of ray cells in trees are:

  1. ray cells keep the growth rings together
  2. ray cells help shuttle water and nutrients in the xylem

They also look cool in cross-section.

Heading cuts

One of my private clients received a letter from her municipality, asking her to clear Japanese maple (Acer palmatum) branches off their city lamp. So they hired an arborist to do the jobs. And when I was on site to do finesse work (a nice way to say weeding), I took pictures of his heading cuts.

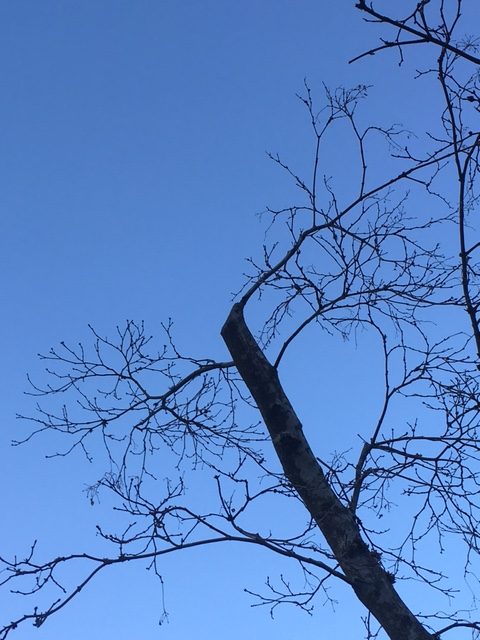
A heading cut.

Heading cuts are made to discourage main stem growth and promote side growth. In this case, we want to keep the maple from reaching the city lamp. The cut is made just above a branchlet or bud. And we can expect any new growth to happen sideways, not straight to the top.

Then I put my iPhone away and went back to weeding, mumbling something like “I could have made those cuts!”.

Never stop learning!

Tree topping disaster

By | Arborist Insights, Pruning | No Comments

Don’t do it!

Tree topping rules are straight forward: don’t do it! I was stunned recently at a site in White Rock, British Columbia, when I saw a topped Persian ironwood (Parottia persica) tree.

Persian ironwood trees are bulletproof. They don’t suffer from any diseases, the branches have interesting look and their fall color is spectacular. You can’t do much better when deciding on a landscape tree. But this owner had his own ideas; and it helped that he was the strata council president. That’s how it works. If you’re not on council, you won’t get approval.

If you’re feeling crowded, then take out the whole tree. But that’s very complicated nowadays because municipalities now care about tree canopy cover percentages. Unless your tree is dangerous, it’s difficult to get a removal permit.

I suspect, if the municipality knew about this tree topping, they might issue a ticket. It’s a nasty procedure. So nasty, I had to compose this blog post about it. So nasty, the International Society of Arboriculture (ISA) publishes a handout about tree topping.

Future growth

The tree will now push out new sprouts and the president will have to hack them down every year to keep the tree at the same height. If you don’t remove the sprouts, they will develop into poorly attached shoots.

Another drawback is that it no longer looks like a Persian ironwood tree while the other specimens nearby still look great. It’s a weird effect.

Trees also store food in their branches and heavy removal can cause serious shortages for the tree. They also need lots of leaves to produce food and topping removes huge chunks of the tree crown where leaves would have developed.

Also, large wounds like these may not heal and could potentially invite insects and diseases in. Generally speaking, three inch diameter is your rule. Any cut bigger than that, may be slow to heal.

With huge sections of the crown missing, the bark can also get injured by heavy sun exposure.

Conclusion

Don’t top your trees!

Adventures in shrub pruning

By | Pruning | No Comments

What’s your goal?

Why are you pruning? What are you trying to accomplish? It’s important to get this right with your client’s help before you start pruning. Inform your clients what the resulting shrub will look like after pruning.

This will help you avoid the following embarrassing situation. A landscaper in the United States was asked to prune shrubs next to a building. So he did it.

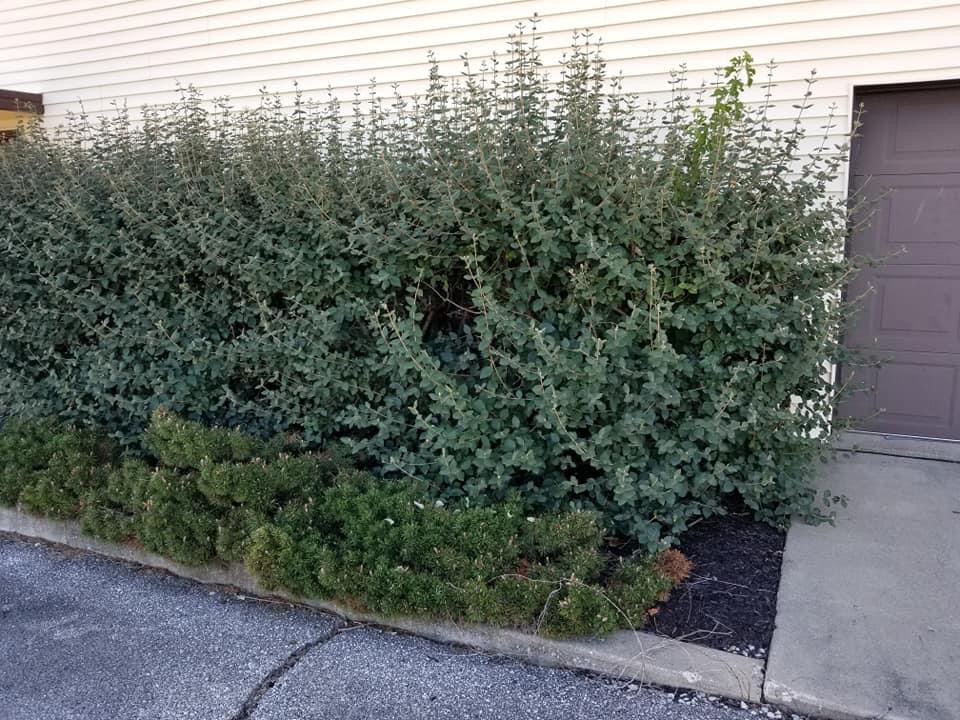
Before pruning.

If it was me I would use power shears to give the shrub some shape back by removing the new spiky growth.

Instead, this happened…..

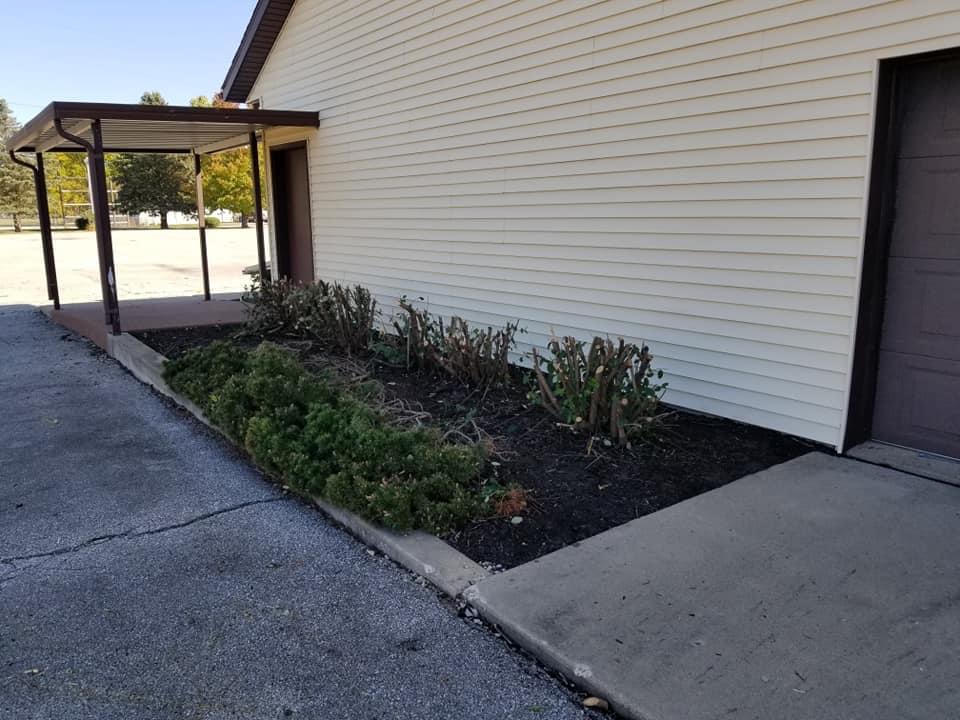
After pruning.

This isn’t pruning, this is, technically speaking, renovation pruning. Like you’re starting over. I could see how the client would freak out. Although, I’m sure the shrub will flush out again with new growth. It’s not fatal, unless heat stress kills the shrub.

Rhododendron renovation

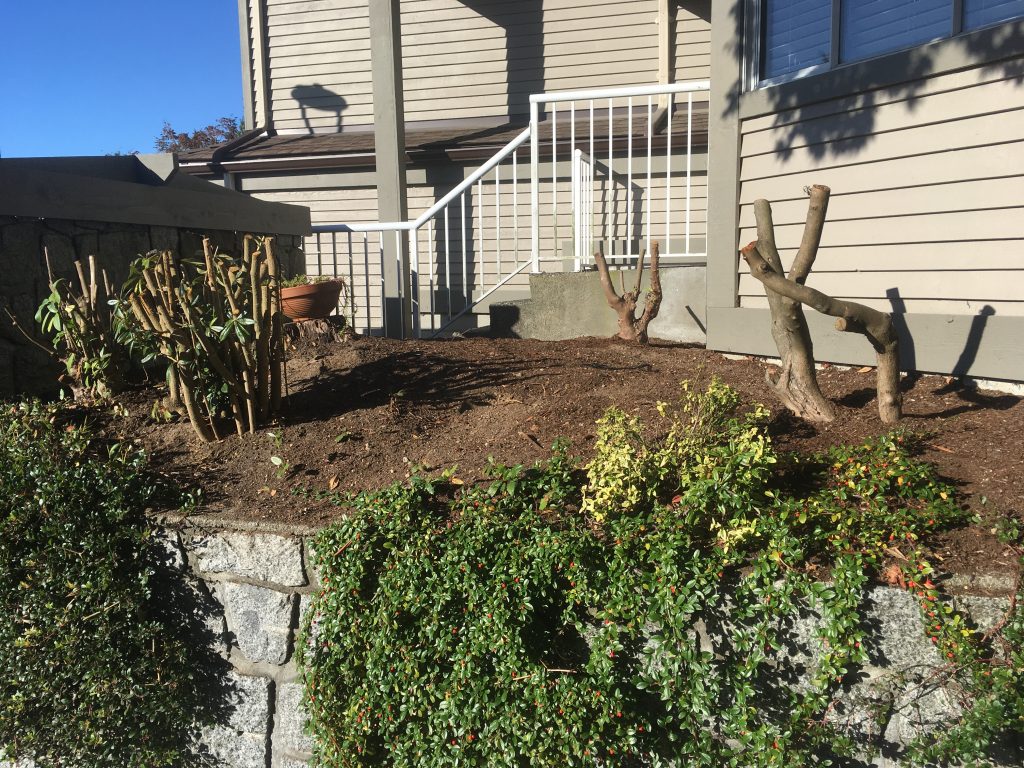
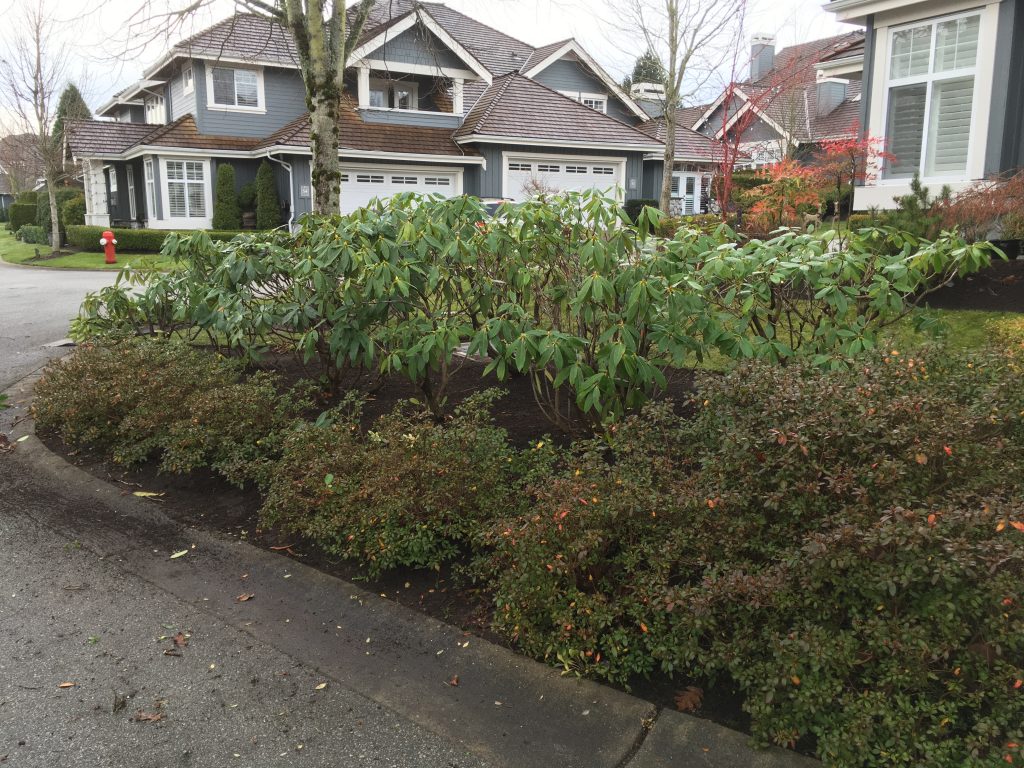
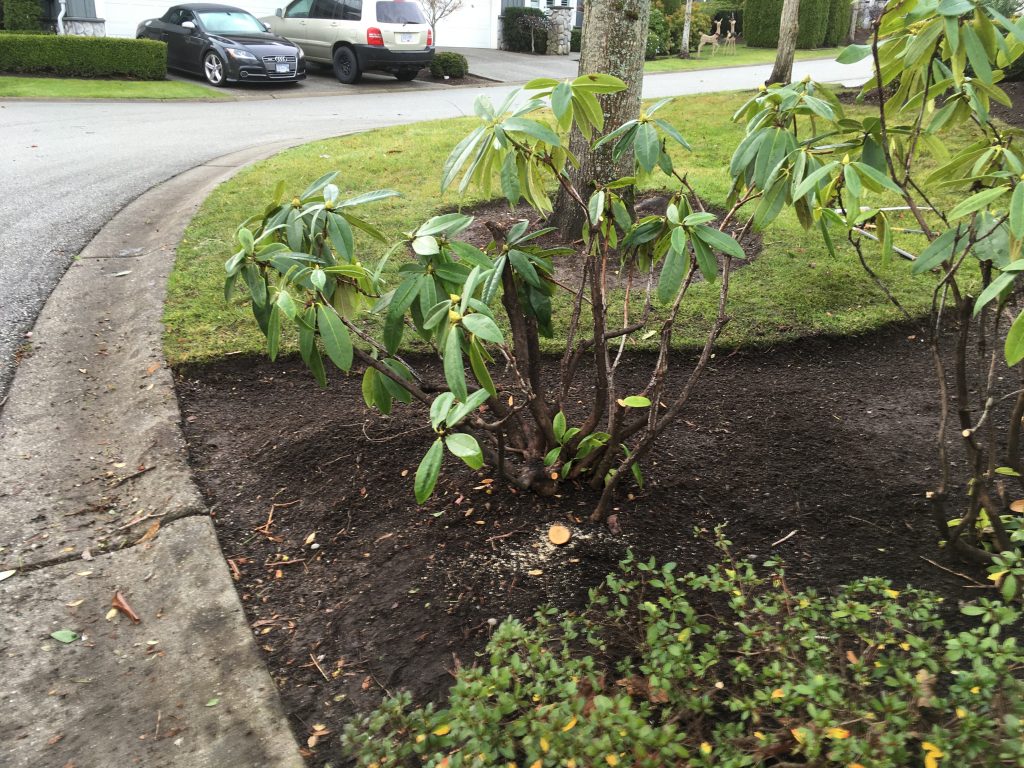
Renovation pruning.

On this project it was clear from the beginning that the client would see stumps with latent buds. Once the buds pop, the Rhododendron will green up. Period. No confusion.

Reduction pruning

Reduction pruning means the size of the shrub is significantly reduced but it still looks green. Like a normal shrub. Just smaller.

Here the goal was 50% reduction to allow for better visibility from vehicles.

Before
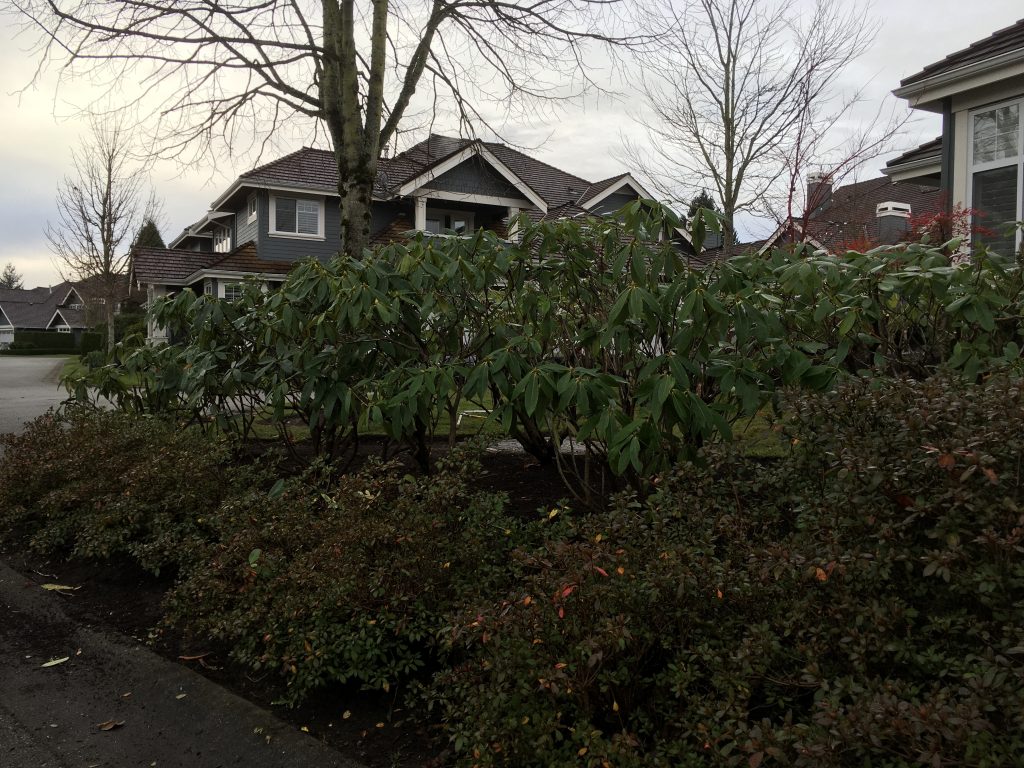
Reduced and still green.

It should be noted that on this project the clients were ecstatic. That’s what we want. Our goal was clear and mutually agreed upon before we started pruning.

Typical mid-season pruning

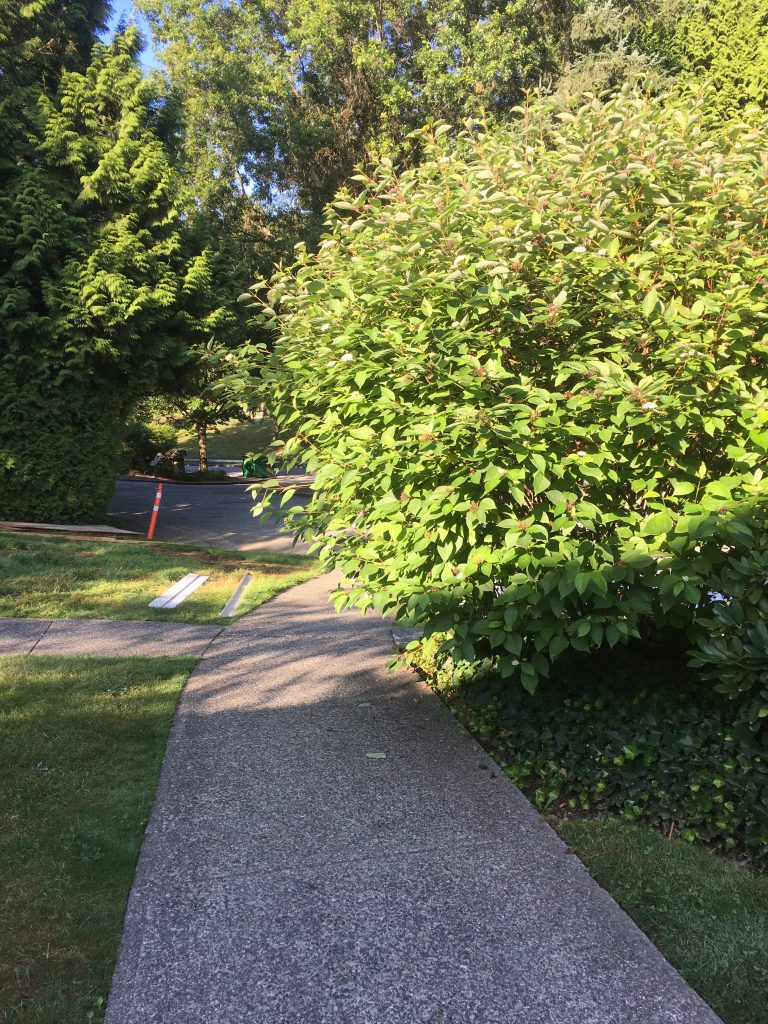
Let’s see an example of typical mid-season pruning. I think this is what the client above expected to see.

This dogwood (Cornus) just needs a trim.
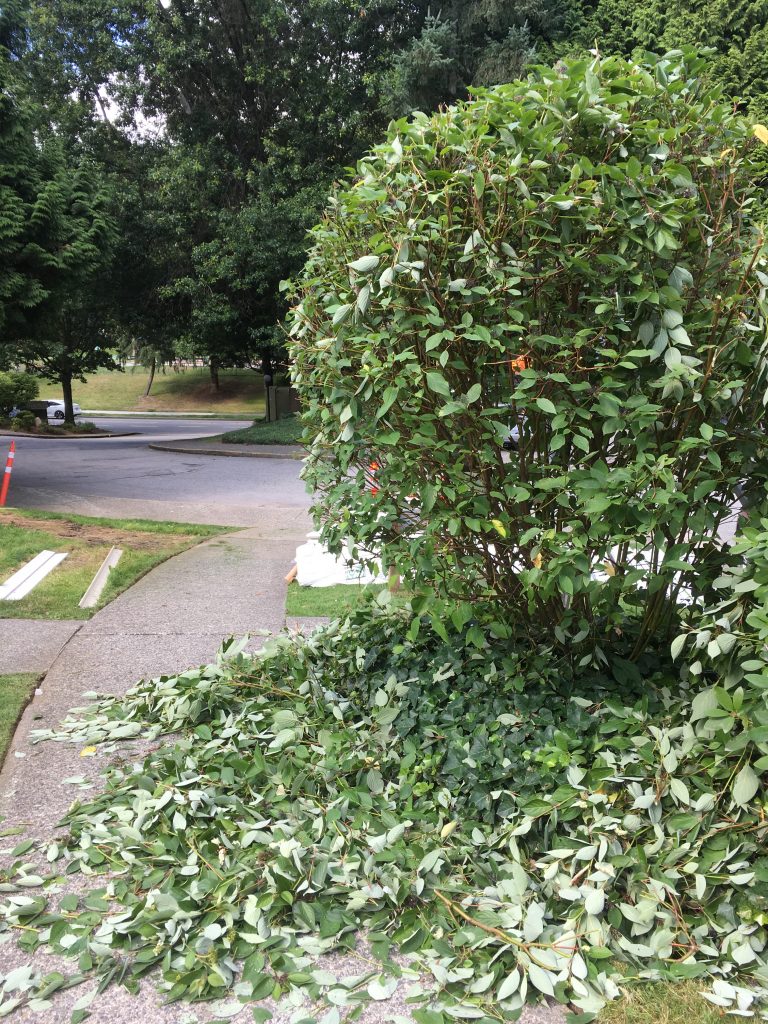
All done.

This dogwood shrub still has its shape and the walkway is clear for pedestrians. If you require loppers, you’re doing more than mid-season pruning.

Conclusion

Mid-season, reduction and renovation pruning jobs accomplish different goals so make sure you know what your client wants from you. Then over-deliver.

Security through shrub pruning

By | Pruning | No Comments

Start with why

Always start with why. Why are you pruning your shrubs? What’s the goal? In this blog post we cover pruning for increased security.

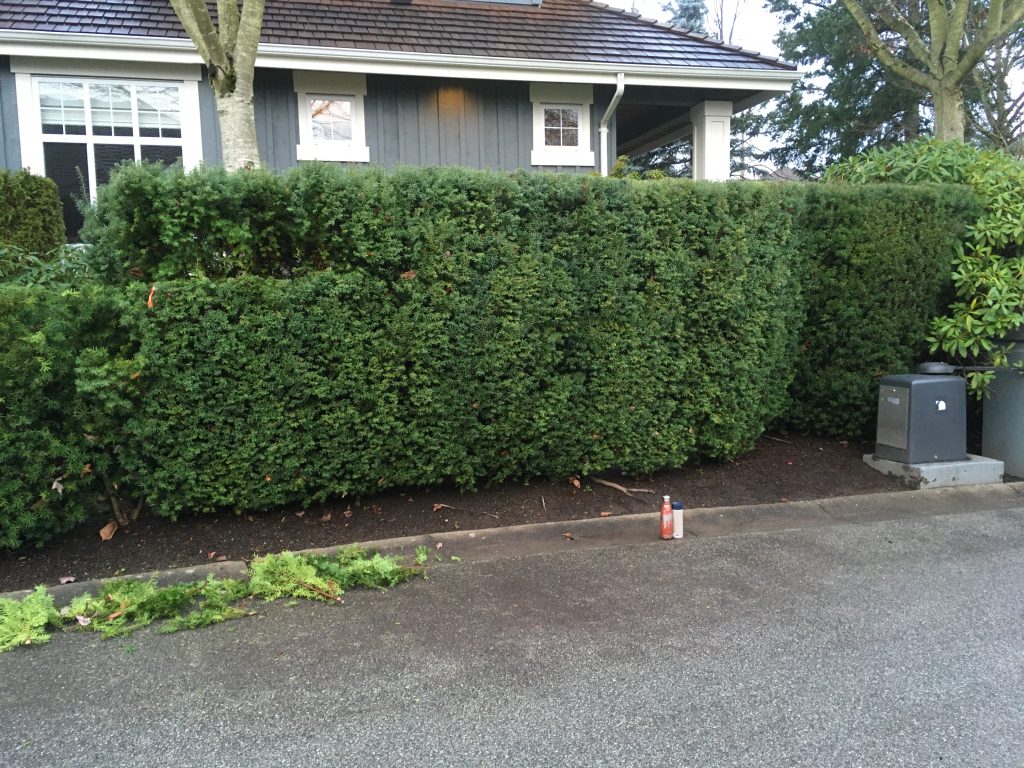
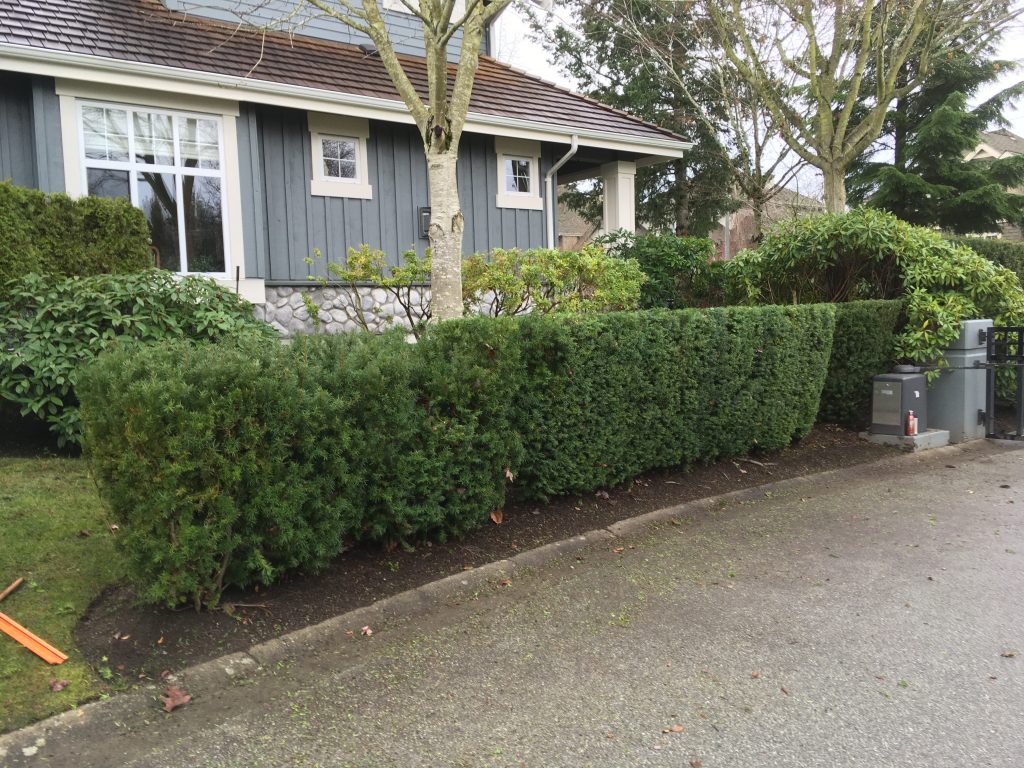
Left: new level; right: existing level.

The owners living behind this yew (Taxus) hedge were concerned about degenerates entering the gated complex, hidden by the hedge. And, while I don’t have any neighborhood crime statistics to share with you, the job was fairly easy.

Procedure

The new desired hedge level was marked with tape which made it easy. I used power shears and made a line along the front and then back. In step two, I used loppers to take out the biggest wood. You can try to use your power shear blades but it’s difficult and the wood gets chewed up. Use loppers.

The key is to lop out the middle stems slightly below the new top level so they aren’t visible when you drive by. The hedge will green up next year.

All done!

Sight lines

Now that we had made it harder for perverts to enter the site undetected, we turned to driving sight lines.

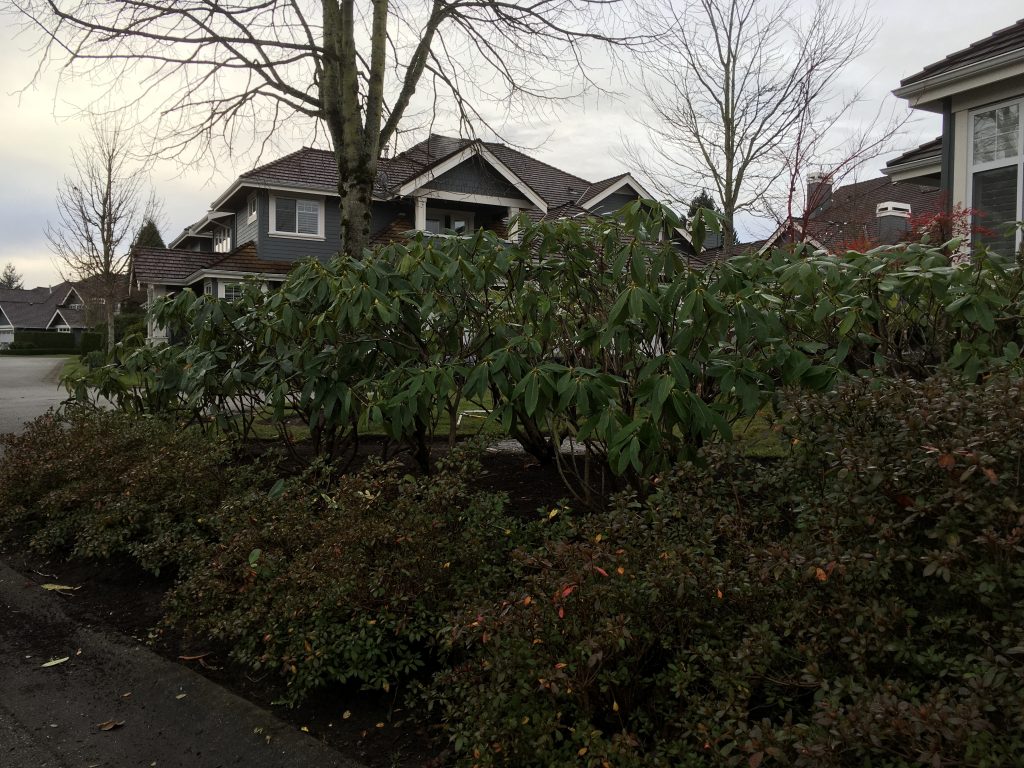
Before picture. Poor visibility from vehicles.

This Rhododendron hedge made it hard for people driving to and from the gate to see other vehicles so we were asked to lower it by a half.

If you immediately start to worry about Rhododendron flower buds, you are correct. Rhododendron buds are set in summer, after flowering. Therefore, any pruning in December would result in lost blooms. But, safety trumps horticulture, usually.

Procedure

Note that this pruning job was reduction pruning, not renovation pruning. Renovation pruning is much harsher and leaves lots of naked woody stems. Here we wanted a green Rhododendron hedge but lower.

So, any harsh stem cuts were made inside the hedge where they are hidden. This was much harder to achieve with the far left specimen. I had to leave two naked stems. It looks weird but remember that Rhododendrons have latent buds in their stems. These swell up and pop after pruning. This is a common response to pruning, especially with rough-barked Rhododendrons. If your Rhododendrons are smooth-barked, you’re pushing your luck.

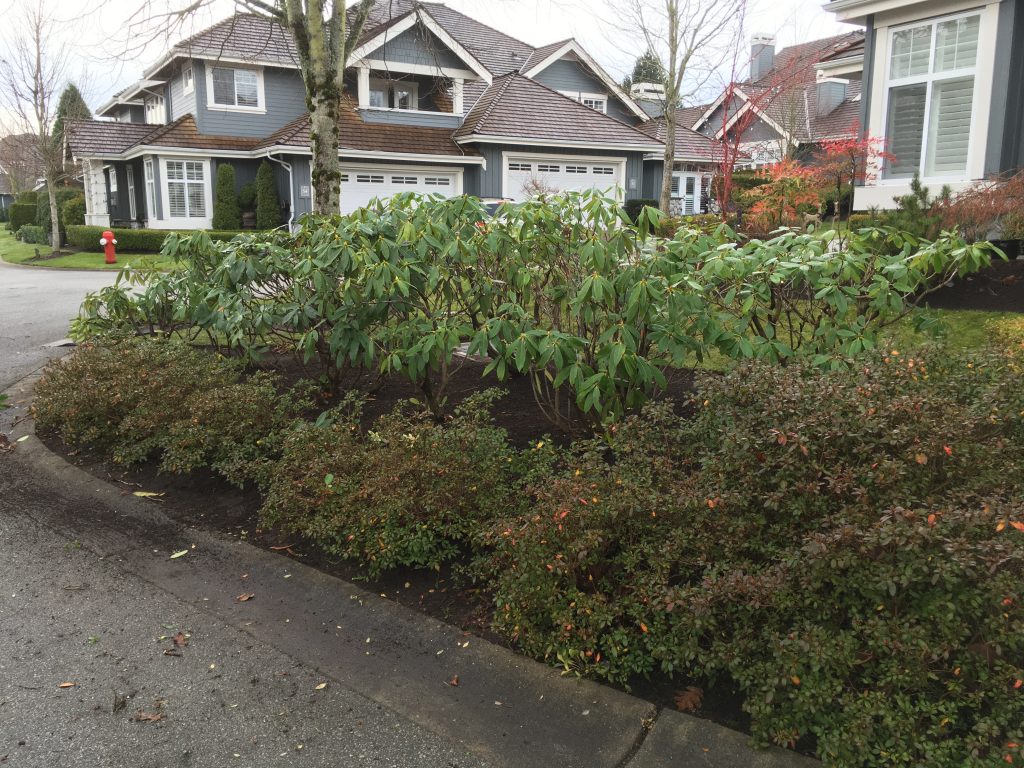
All done. Reduced by half and thinned out.
Reduced by half and thinned out for improved visibility. The shrub will flower next year but not as furiously.

Gold star

Later that morning, the owner across the street opened up her garage and beamed at us. She loved our reduction pruning job. We reduced the shrub size roughly by half while still keeping it green and preserving some flowers. Gold stars!

On pruning abused plum trees

By | Arborist Insights, Pruning | No Comments

Topped plum tree

Topped plum tree with suckers

Well, this happens all the time. To reclaim his view, the neighbor “pruned” my client’s plum tree without asking. You can see the previous harsh cuts because that’s where all of the suckers originate. It’s a normal response by the tree and now, instead of one branch, we have many new suckers.

Pro tip: don’t top trees!

Now, months later, there is a new owner next door and was she ever excited to see me! This will be our annual dance from now on.

Is it hopeless?

Are topped trees doomed? Not necessarily. I pruned above the previous cuts and took out most of the suckers. I left some higher as new leaders, and some just below as subordinates. That’s the procedure: establish new leaders, subordinates and eliminate the rest. This way the tree will regain it’s “natural” shape.

Option two is to eliminate all of the suckers every year, which resembles pollarding. You can save the branches and keep your family warm in winter; or learn basket-weaving.

Next winter, I will do more corrective pruning on this tree.

Better, but I will do more on this tree in 12 months.

Bonus!

As soon as I started pruning this plum tree, the new neighbor came out in homely sweat pants, smiling. Then, across the street came a nicely dressed lady, still holding the keys to her Land Rover; and very new to the neighborhood. Clearly, her family up-sized to a nice corner lot house.

As we walked around her garden, two workers moved what appeared to be an extremely heavy safe over the lawn to the back of the house. Right there I knew it, they could afford me!

Two days later I was hired to prune their maples and cedar hedges. Bonus!

Conclusion

Don’t top trees! Trespassing on your neighbor’s property to top trees is even worse. If you google tree topping, you will see a long list of negative consequences.

If you want to improve previously topped trees, keep some of the new suckers as new leaders, cut others shorter as subordinates, and eliminate the rest.

Winter tree pruning 101

By | Arborist Insights, Pruning | No Comments

Why are you pruning?

Before you start hacking your prized trees, ask yourself why you are pruning. Then, once you’re clear on your pruning goals, go for it. And always use sharp tools.

The winter is great for tree pruning because the trees are dormant and, with the leaves gone, we can nicely see the full tree crown.

Remember the 3-point cut

Just to review, all decent-sized branches should be pruned out using the three point cut. The first cut is an undercut; the second cut is a few inches above your first cut; this is where most of the wood will drop to the ground. The third cut completes the procedure without leaving a nasty stub that would die and potentially invite disease into the tree.

Why not just make one cut and save time? Because you risk damaging the bark as the branch shears off before you complete your cut.

1. undercut
2. second cut just a few inches over the first cut; get ready for the branch to drop!
3. final cut to clean things up; don’t leave stubs.

Branches to eliminate

Let’s take a look at some examples of branches I couldn’t tolerate and had to eliminate. When tools are available, I stop what I’m doing and take care of these offending branches right away. Otherwise, people forget and things get worse. Let’s not do that.

Broken branches are an obvious example and should be pruned out immediately. They look awful and there is always the possibility of diseases entering the tree.

I know, it’s not a huge branch but it looks awful. When I walk by and see this, I’m close to breaking out in a rash. I don’t tolerate broken branches on my trees and neither should you.

I used a pole pruner to remove this branch.

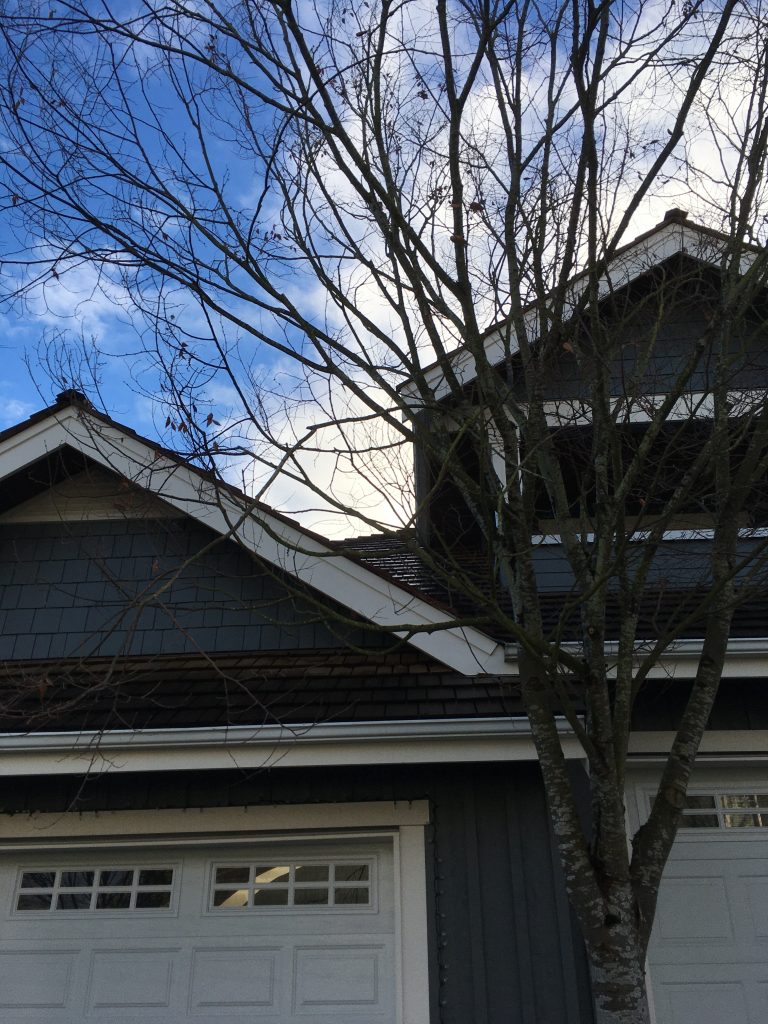
Take a minute to study this picture and find the offending branch. Found it? It’s the branch growing from the middle left down over the garage. Downward pointing branches affect the crown structure so remove them to get a nice looking tree.

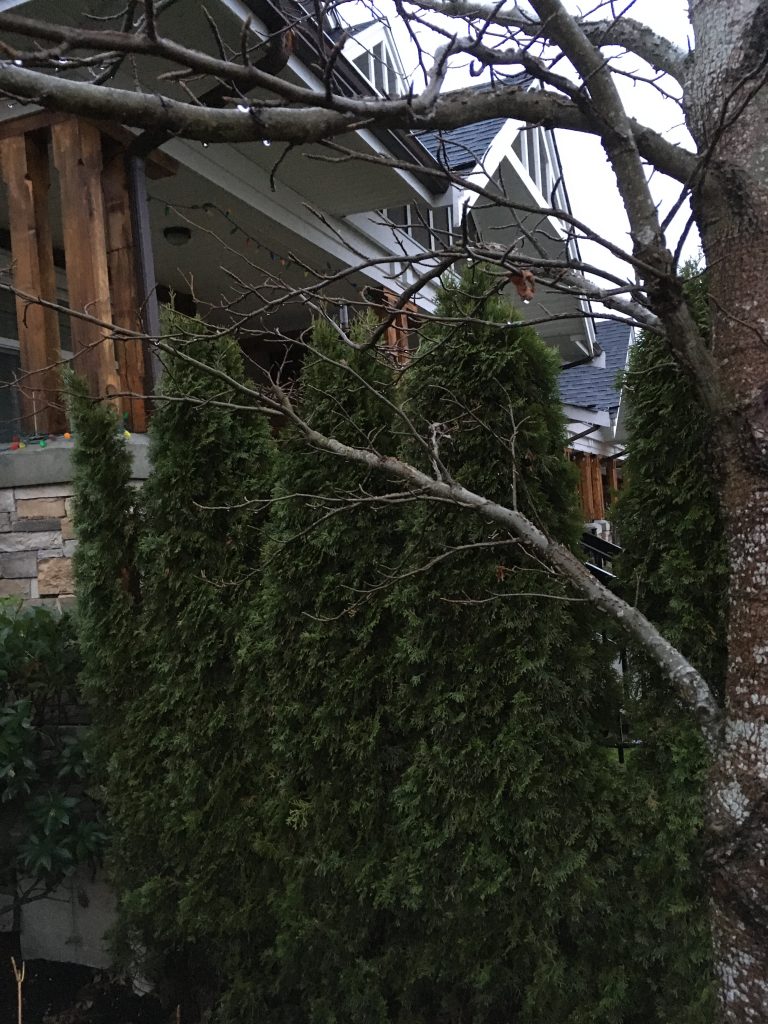
This sweetgum (Liquidambar styraciflua) branch had to go since I couldn’t properly access the cedar hedge (Thuja occidentalis) with my power shears. It also runs through the hedge which is a no no, plus it will shade out the hedge. Any branch touching a building gets insurance agents excited. Branches like this have to go.

Rubbing branches should also be removed. Here I removed the lower branch because it was growing at a huge angle.

Conclusion

This winter, check over your trees and see if they require any corrective pruning. Eliminate any broken, dead, rubbing, crossing or interfering branches with proper cuts. Unless your branches are very small, always use the three-point cut to prevent bark damage.

Make a few cuts every year for great looking, healthy trees. Call, if you need help!

Hydrangea massacre

By | Pruning | No Comments

Slow down

Power shears have their place in landscape maintenance work, especially now in winter when we have miles of cedar hedges to shear. But in this blog I will build a case for slowing down and considering your targets.

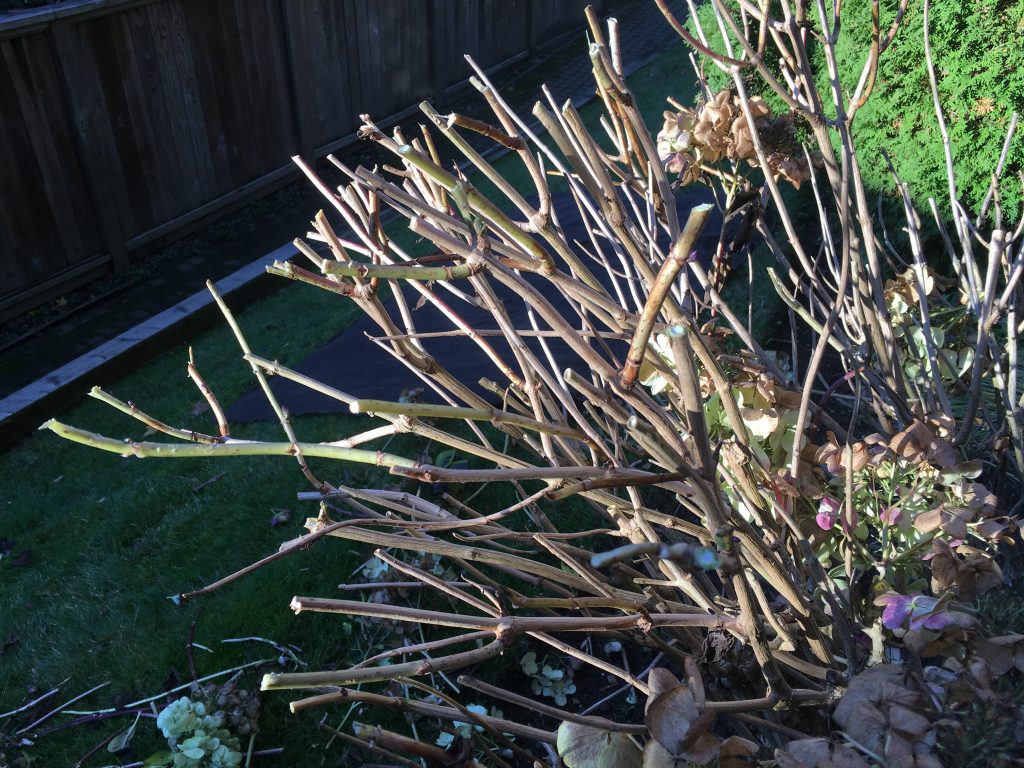
Now, I know that home gardeners have tons of time for their gardens and some even prefer not to prune their Hydrangeas until spring. When frost hits the spent Hydrangea flowers the result can be stunning. Definitely worth a picture.

Things are different in commercial landscape maintenance where there is pressure to get lots done in a day. That’s why some landscapers aren’t shy about massacring their Hydrangeas with power shears. But are they really saving time? I think not.

Massacre post-mortem

Power shearing Hydrangeas shreds the woody tops, leaving them looking rough. And there are other problems. For example, the sheared bits are launched all over the place; and the beheaded flowers gets lodged inside the shrubs. The clean-ups are annoying and time-consuming.

Shredded bits get launched all around the shrub.

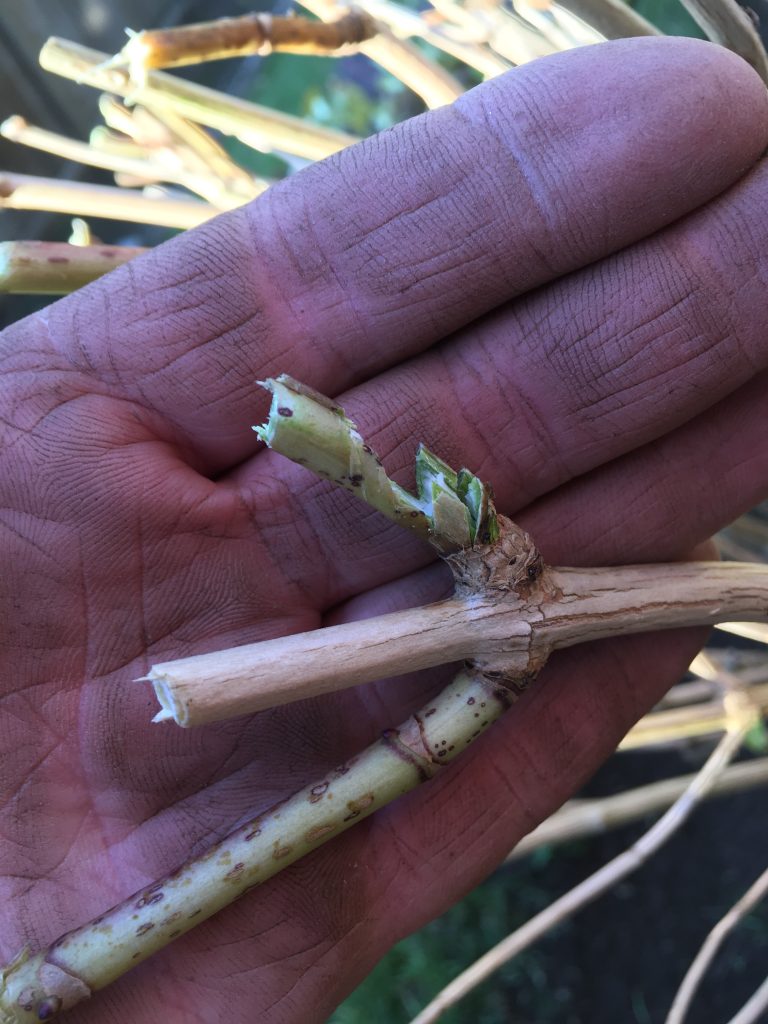
Now, consider hand pruning. Here you hold on to each cane before snipping at the correct height and just above a pair of buds. The snipped top stays in your hand so you eliminate time-consuming clean-ups. Simply put the eliminated cane top into your green waste bin or tarp and move on.

Power shearing isn’t targeted so it can damage existing buds or leave long stubs. This isn’t how we achieve a good-looking flowering shrub.

Power sheared Hydrangea. Note the flowers lodged inside the shrub.

Shredded plant tissues look awful

A major limitation

One major drawback of using power shears on Hydrangeas is that you can’t take out the biggest canes; or at least not easily. It’s always a good idea to take out 1-3 of the biggest canes every year. This keeps the shrub looking good with mostly younger straight canes. Power shearing can’t accomplish this step.

Every year eliminate 1-3 of the biggest canes.

Peace, not massacres

Power shearing Hydrangeas in a rush means you miss out on quiet gardening work. I love hand snipping because it’s quiet and allows me to touch the shrub. It’s almost peaceful and it doesn’t generate any air or noise pollution. Turn off your power shears and prune your Hydrangeas by hand.

What landscapers do in winter

By | Pruning | No Comments

Winter work

Every year I get asked one question: what do you do in winter? And the answer is cedar shearing. Miles of cedar hedging. In all kinds of weather.

Classic winter shot.

Always start with sharp shears. I detest shearing with dull shears so much, I carry my own set with me every day. Using dull shears is extremely frustrating: it’s slow and the tops get all shredded. Sharp shears fly through the cedar and leave the top looking razor sharp. Trust me.

Bonus: Thuja plicata hedges give off an extremely pleasant odor when cut!

When you take lunch, bring your shears with you and put the cover back on. Keep it on when the shears are in the truck to eliminate accidental cuts.

Try to lubricate your shears after every use.

Keeping a full jerry can close by is also mandatory. Walking back to your truck to re-fuel is extremely inefficient. Bring your fuel with you and move it along.

If you’re lucky, your company uses Aspen fuel which is much cleaner than regular gas.

Morning coffee is optional, of course, but I like to warm up in the morning. Your water bottle, however, is a must. Keep it close by and re-hydrate as you prune. If you do it right, you will sweat and your cheeks will be rosy.

Procedure

Always prune bottom to top, not the other way. This way you minimize the chances of putting a hole in your hedge. And remember not to go too hard on the sides: the hedge should still be green when you’re done.

The tops should be pruned harder so we have a nice laser line on top.

The sides are still green and the top is sharp!

Before you start a new hedge, consider how much time you’ll need for pruning and clean-ups. Don’t rush this work. I prefer to start a new hedge fresh on a new day.

Great cedar pruning is an acquired skill over several seasons. Start on lower-profile hedges and watch more experienced landscapers. Eventually you’ll get to do high-profile hedging at entrances and club houses.

And the best news? There is no shortage of work! And that is great news during a nasty pandemic.

Obstruction pruning

By | landscape maintenance, Pruning | No Comments

Favor for friends

It’s always nice to get a call from your friends during a pandemic. It allows you to catch up and feel some sort of connection. It’s even nicer when you know your buddy has extra work for you.

Now, normally this would be a headache because my buddy, let’s call him Sam, lives deep in Vancouver. And driving for forty-five minutes to do a small job isn’t appealing. Sam knows this so he pays me well.

So, I solve his problem and I earn some extra money during a sketchy pandemic time. With COVID-19 raging on, it would be insane to turn down extra work on a Saturday. Take the work while you can because it’s not very clear what 2021 will bring.

The problem

Sam’s bamboo badly encroached into the sidewalk and it was only a matter of time before a neighborhood Karen complained about it. So I drove in on a sunny Saturday morning to take care of it.

Incidentally, I waited until ten o’clock to start. Municipalities have different by-laws but ten o’clock is a standard start time for Saturdays. Always be careful in mature, well-to-do neighborhoods.

The shearing and clean-up took me exactly fifteen minutes. I used sharp shears and the green waste filled up one tarp. Then there was some touch up work with my hand snips where the bamboo encroached onto the sidewalk.

I did my clean-up blow quickly with the smallest gas-powered backpack blower, designed for noise-sensitive environments. By ten thirty the street was full of landscapers with heavyweight Stihl blowers on their backs. Of course!

Later, Sam stopped by the house to check things out and we had enough time to catch up, with masks on. Then I casually confirmed that he would be taking care of my invoice.

Pro tip:

Do side-gigs on project basis, not by the hour. For this job I quoted a price based on pictures. The actual length of the job is my problem. Sell your service, not man-hours!

Much better.

Obstruction in the landscape is a problem that shouldn’t be ignored. Eliminate the obstruction as soon as you can.