Category

Landscaping

Japanese willow response to drought

By | Landscaping, Species | No Comments

Every time I install new plants on a site I worry about them because I want them to get established and thrive in their new landscape. Usually I won’t see the plants for months but in the case of two Japanese willows (Salix integra) I planted it was different. After my company schedule was re-done in spring, I kept coming back to the same site so I could observe my newly installed plants, including the two willows.

Summer heat

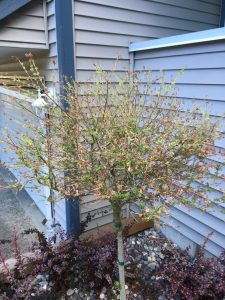
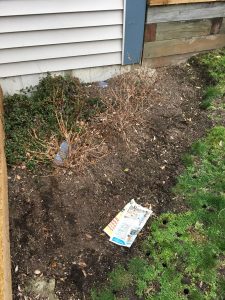
Everything looked fine until summer heat arrived. That’s when I noticed browning in the leaf tips. That’s called necrosis or tissue death as the plant is unable to draw up enough water into the crown. So I immediately did my own weekly watering with a hose that’s literally right next to the bed.


IMG_9516

Also note the growth at the bottom of the stem.


Sadly, this is very common on strata (multi-family) complexes. People are very busy and when they water, they do it badly. Guaranteed, the owners sprinkle the plants for a few minutes and go back inside. Proper watering requires a gentle soak that lasts for several minutes. I watered in the morning and then again before exiting the property.


Bonsai response

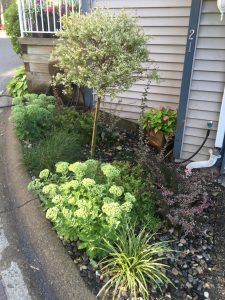
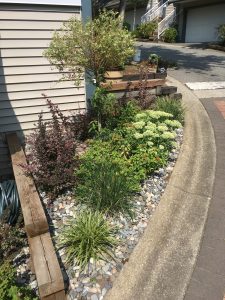
Now observe the same plant weeks later. The top is recovering but the stem has significant growth along the stem. This is another classic response to lack of water. Since the top isn’t getting enough water, the plant starts to bonsai itself by pushing out new growth along the stem. I’m leaving it on for now to protect the bark but by fall I will prune it all off.
 

IMG_1114

Note the growth along the stem.


For comparison, examine the other Japanese willow (below) planted at the opposite corner. The owners water better and it gets a little bit more shade. I noticed some browning in the leaves but it wasn’t severe enough for the plant to attempt a bonsai move. The stem is clear of any new growth.


IMG_0566


Conclusion

Summer heat conditions are harsh for landscape plants so owners need to water properly. And when there are newly installed plants, watering is an even more pressing issue because water allows roots to develop. So check on your plants and don’t forget to water them.


Why dead spaces are a problem

By | gardening, Landscaping, weeds | No Comments

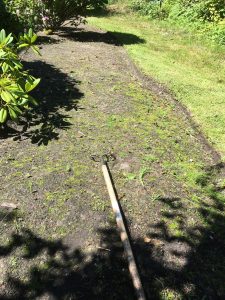
Dead spaces in your landscape can be a problem and one example for you to consider is pictured below. What do you see?


IMG_9605


This kind of garden bed drives me crazy because there is way too much “dead space”. Without plants and groundcovers the open space gets colonized by weeds which then have to be removed periodically. And that means precious labour man-hours are spent on unnecessary weeding.

Plants shade out and out-compete weeds and they also improve the look of the garden bed. You can even attract beneficial insects with the right plants. All for a small investment of money and time.

Close weeding

Now what? Remember this isn’t your only bed to weed so how do you do it quickly? There are two approaches but I can only recommend one.

Some people prefer hand-weeding without tools where you pick at your weeds and pray that you also removed the roots. I only do this with big weeds.


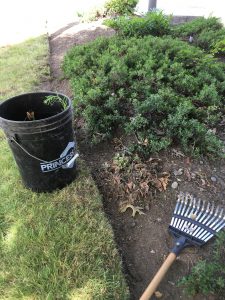
IMG_9614

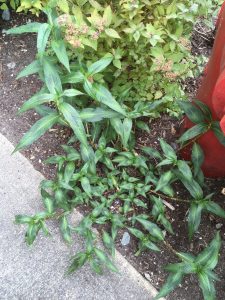
Big weeds like these are easy to hand-pick.


With big weedy beds I find hand weeding too slow and brutal on my fingers. When hand-weeding and debris clean-up were combined on the same day it exposed hand-weeding as too slow. You must stay on your feet, cultivator in hand and press on.

Cultivate!

No, you don’t have to suffer. Just cultivate the bed and rake up the debris. I use Dutch hoes or four-prongers (pictured above) to rip up the weeds and then I gently rake over the area. This approach is much faster and it allows you to stay upright. Also, your fingers won’t bleed.

Cultivation haters point out two problems with cultivation: soil loss and weed seed exposure to sunlight. Both are valid comments but considering the condition of the bed there isn’t much to worry about. The critical factor is speed because we have many other beds to weed.

One huge bonus of cultivation is that the bed looks sharp and fluffy and stays weed-free longer than hand-picked beds. I am absolutely certain that hand-weeding doesn’t always remove the weed roots so the weeds bounce back quicker. Cultivation, on the other hand, up-roots the weeds.

One critical note on pile pick-up: keep your piles in the bed edges, do NOT rake them onto your lawn. Piles on lawn edges leave debris that will have to be blown and could potentially get picked up by trimmer machines, thus creating a hazard.


IMG_9717

Correct: keep your debris piles in the bed edges.


Conclusion

Fight dead spaces in your garden beds by planting shrubs or groundcovers. And if you want to weed like a professional use a cultivator.


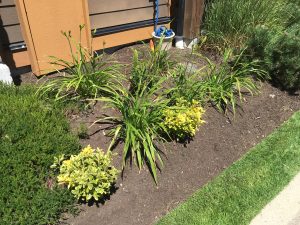
IMG_9817

This used to be dead space until we moved shrubs and perennials in.

58 and still hustling

By | Landscaping | No Comments

“58 and still hustling” were the only words accompanying the picture below in a Facebook group post. Love it or hate it, Facebook groups can be worth your while. I ignored the smart comments from various group members and started thinking about the larger issue of workplace ageism.


30411863_1882822411751270_422553463994449920_n


Ageism

According to an article by Nicole Gallucci published in the Globe and Mail newspaper ( May 2, 2018, section B10 Careers), ageism is becoming a challenge for businesses. It’s defined as “prejudice or discrimination on the basis of a person’s age.”

In landscaping, age-related comments are often laughed off but the article states that 25% of employees make judgements about their co-worker’s and supervisor’s abilities to do their jobs based on their age alone. This rate goes up to 39% among millennials. I knew it.

So the young dudes are rushing up the ladder, trying to skip rungs and veterans like me know full well what kind of fight it was to make it up the ladder to a supervisory position. It took me about fifteen seasons to become a landscape professional with enough experience to pass the Red Seal Journeyman Horticulturist examination.


IMG_3172

Landscape professional Vas.


Ladders

Most workers try to move up to relief and full foreman jobs where leading a crew comes with more money and responsibility. My job as supervisor is to help them transition into their new roles mainly by working on their technical and leadership skills.

But what about the older workers? Gallucci writes that often companies forget about their older workers and their need to stay sharp and motivated. Personally I have plenty of motivation and I constantly seek out new courses and seminars so I can stay sharp and current.

Since landscaping is physically demanding I also try to stay in good physical shape. I know that the young dudes are watching; and I also know that not all of them are ready to sweat. Some are clearly spooked by their own sweaty T-shirts.

Tasks

If you’re lucky, your boss is thinking about proper task assignments. For example, one day we had two important tasks after lawn care: installation of boulders and plant installation. I can definitely move boulders but as an experienced supervisor it made more sense for me to do the plant install. In addition, I was asked to show my young female helper how to plant new plants properly. We had a perfectly fine afternoon together and she went home with new skills.


IMG_6134

This was a pleasant planting task for me and a young female helper.


The young dudes eagerly moved the boulders into place and everything got done.


IMG_6140

Rocks in place.


This example illustrates how it should be done in the field. Gallucci calls it an “egoless team of minds“. One team working together; all generations bringing in their talents and learning from each other.

The young guys bring energy and I bring experience and technical knowledge. That’s how the company advances toward world class work.

How to rescue stepping stones from encroaching turf grass

By | Landscaping, Lawn Care, machines | No Comments

Regular readers of my landscape blogs will know how much I love the blade edger machine. The machine can redefine hard and soft landscape edges and it can prevent turf grass from swallowing stepping stones and drains.

So I got to make myself happy recently when I filled in for our regular foreman on a small strata site. As always, lawn care came first; mowing and line edging. Then when I did the blade edging I noticed many stepping stones and drains on site with turf grass creeping over the edges. Left alone, the grass will eventually cover up the stones thereby defeating their original purpose. And that would most likely give me a nasty rash.

Luckily, I was on the case armed with a brand new blade. New blades are best for soft edges between lawn and beds. For hard edges you can always use older blades and grind them down to “stumps” that can be later recycled.


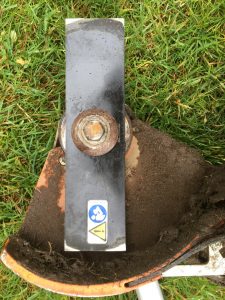
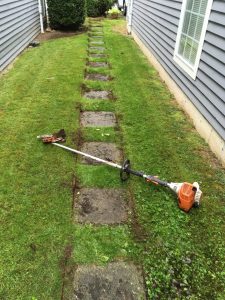
IMG_9418

For best results use fresh blades for soft edging and stubborn overgrown stepping stones.


Distress

Take a look at the picture below. It’s not a complete disaster, yet, but the stones could look sharper. Now. Right now. And I had time because the site was small and I was filling in for the regular foreman.


IMG_9411

It’s not a complete disaster yet but these stepping stones could use some redefining.

Step 1

Blade the edges just deep enough to re-establish the hard edges. If you go too deep you will kick up a lot of dirt. Remember, you’re not building a ditch.

I normally run the entire right line out, then the left side back before finishing each stone. Doing each stone separately makes me dizzy.


Step 2


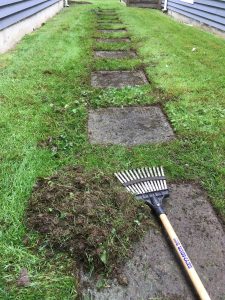
IMG_9422


Stubborn edges like these must be raked out. If you just rely on your blower you will have to make a debris pile anyway. The rake worked just fine in this case.


Step 3


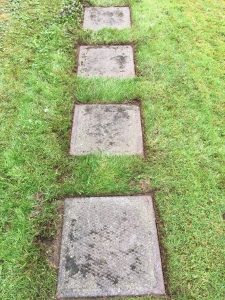
IMG_9423


Blow off the stones and note how beautiful they look with their sharp edges; separated from the lawn. This should be done periodically between May and November when the lawn grasses are the most active. This is NOT a weekly task. This work should hold for several weeks.

And don’t forget round drains while you’re at it. They actually serve a more crucial function in the landscape so keep an eye on them.


IMG_9426

A rescued drain.


If you have yet to fall in love with a blade edger, I hope this blog post will inspire you. It’s important to check lawn creep around drains and stepping stones and redefine all hard edges periodically.

Can you handle boxwood aroma?

By | Landscaping, Species | No Comments

Last spring one strata owner approached me regarding boxwoods (Buxus sempervirens) by her front door. Allegedly they smelled bad and she wanted them removed. Yeah, sure. Once she shut the door I bent down and smelled the green foliage. The aroma was completely neutral: I didn’t love the smell nor did I detest it enough to pull the plants. Then a new foreman took over the site and I forgot about it.

Now let’s fast forward to spring 2018. After making landscape upgrades at one of our sites, one corner unit had a new boxwood hedge installed by their front door. It looked great but the owner’s wife couldn’t handle the smell!? So we had to pull the boxwoods and replace them with dwarf cedars.


IMG_7113

These “smelly” offenders were removed and replaced.


I couldn’t believe it. There it was again: female occupant unable to handle the smell of her boxwood hedge. And a new blog post was born because I had to look this up.

Searching for aroma

According to one internet source, boxwoods get their scent when the sun heats up the oil in their leaves. I find that I have to get really close to the plant to smell anything. And there are people who compare the boxwood scent to cat urine. Others get reminded of their time spent in gardens. Personally, I fall into a neutral category: I don’t find the scent attractive, nor do I detest it. I simply notice the plants.

Buxus

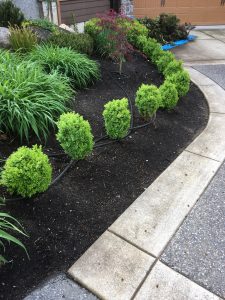
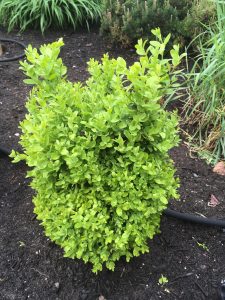
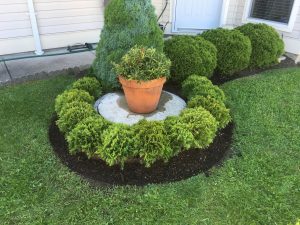
Boxwoods are great! They can be sheared into formal hedges and they stay green all year. In one case four owners got together and they replaced tired-looking Heathers with boxwoods.


IMG_6894

Note the pile of discarded Heathers.


IMG_6896

Buxus


Actions

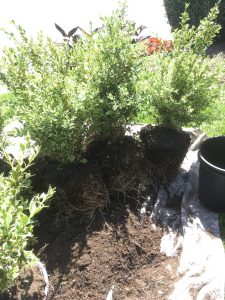
So what can you do if you want to avoid boxwood aroma issues? For one, don’t install Buxus sempervirens by front doors or by any frequently used area in your landscape. And two, plant Buxus microphylla which doesn’t sport the same offensive aroma. Finally, you can replace the boxwoods with something else.


IMG_7129

The switch is completed.


The key idea is that everything depends on your own sense of smell. Some find the boxwood aroma unbearable and some get reminded of the happy times they spent in gardens. So next time you see boxwoods, bent down and smell them.

You can also learn about boxwoods by joining the American Boxwood Society.


How I spent an afternoon with dandelions

By | gardening, Landscaping, Species | No Comments

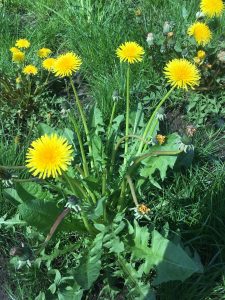
Dandelions (Taraxacum offcinale) didn’t become unwanted weeds until the twentieth century, probably just as green lawns became the norm for detached houses. Ted Steinberg shows us how the whole quest for perfect lawns happened in his book “American green.” This blog post will show you that you can actually have some fun pulling dandelions from your lawn.


IMG_5863

Taraxacum offinale


Strata setting

Stratas or multi-family complexes also demand lush green lawns so that’s why I got to pull dandelions one afternoon from high-profile front lawns. And after mowing for four hours straight, it was a welcomed cool-down task.

The yellow dandelions stick out too much and kill the green monoculture look so they have to go. And I had a great, sunny afternoon at work pulling them out.

Fiskars tool

This was also my first time using and testing Fiskar’s weeding tool which promises easy weeding without bending over. Great. The tool worked perfectly fine but allegedly some of the other units fell apart quickly.

Step 1

The unit has a plastic orange slider which gets the tool ready like a one-shot gun. Pull it up and get ready to aim.

Step 2

Aim the tool right over the dandelion leaf rosette and plunge it in. You need good aim and decent soil. Our lawns were fine so forcing the tool in was relatively easy. My aim took a bit of time, especially when the plant was smaller. I still had to bend over to pick up leftovers and pull out very stubborn specimens.

Step 3

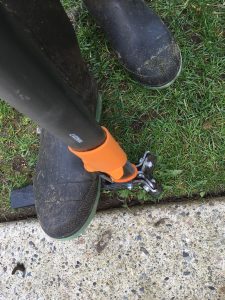
Step on the black plastic bar. This tilts the tool and pulls up your dandelion, assuming your aim was good. No bending over required.


IMG_5457

Step on the black bar to pull out the weed without bending over.

Step 4

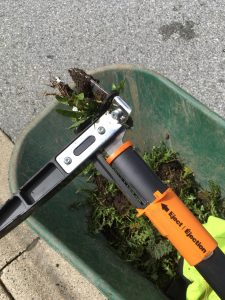
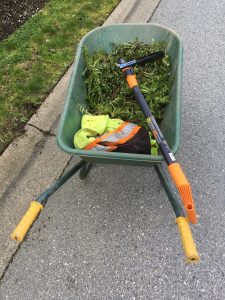
Move the plastic orange bar down to release the captured weed. This step reminds me of removing a spent gun shell. Definitely use a tarp for your weeds unless you’re mowing the lawn right after. I brought a wheelbarrow with me.


IMG_5458

Slide the orange bar down to eject the captured weed.


IMG_5461


Cool plant

According to Wikipedia, in the past gardeners used to weed grass from around dandelions. How things have changed. I remember playing with dandelions as a kid but now as a landscape professional I’m not allowed to tolerate them in the landscape.

I knew you could make tea from dandelion roots because once I bought a box and actually drank the tea. And you can eat every part of the plant. The roots are best consumed in late fall or winter when they’re not as bitter. Both flower buds and leaf rosettes can be eaten.

I don’t want to list all of the health benefits here but let’s just say dandelions contain a lot of good stuff. I think they’re amazing plants.


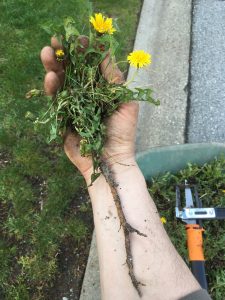
IMG_5476

The entire plant is edible!


For people who wonder what a classic landscaping day looks like

By | Landscaping | No Comments

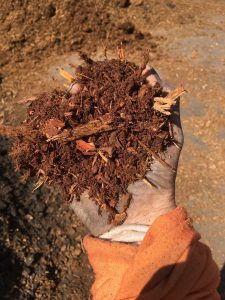
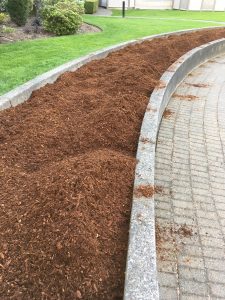
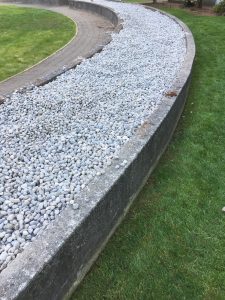
If you’re considering a career in landscaping or you just wonder what landscapers do all day, I’m here to help. It’s not all about lawn care. There are many other seasonal tasks landscapers perform. Take my day from last week. It was classic. We installed 6 yards of Douglas fir (Pseudotsuga menziesii) mulch, then 3.5 yards of 1-3″ round granite rocks and then, to cool down, we built up lawns with 6 yards of lawn and garden mix soil followed by the planting of boxwoods (Buxus).


A new raised bed

This raised bed was full of weak laurels (Prunus laurocerasus ‘Otto Luyken‘) and the strata asked for a thick layer of mulch and rocks on top. Sure. The mulch is nice and light and it smells great. This was the highlight of my morning. I wheelbarrowed most of the six yards into position.


IMG_6251

Douglas fir mulch. It’s light and smells great.


IMG_6218

Almost finished.


Then came the hard part. The 1-3″ round granite rocks are obviously heavier and they don’t smell great. But it had to get done.


IMG_6225

Not shown are decorative rocks that were placed in this bed at regular intervals in groups of three.


Lawn build-up

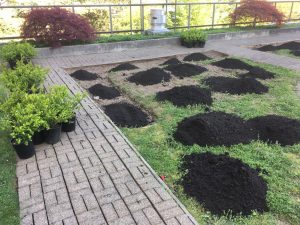
After lunch we turned to lawn build-up. This involves covering existing lawns with a nice layer of lawn and garden soil mix which contains a large percentage of sand. Once you move it in, you rake it out nicely and then run a rolling pin over it to get it level and ready for overseeding.


IMG_6231

To build-up this tired lawn we required several yards of soil.


IMG_6243

Ready for Boxwood planting and overseeding.


Boxwoods

Planting boxwoods (Buxus sempervirens) is easy. The only challenge is not messing up the new soil with mulch from the plant pots. I placed a tarp nearby to help me. If you do this at home, definitely water in your new plants.


Vents

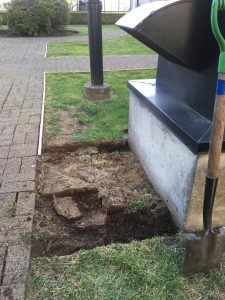
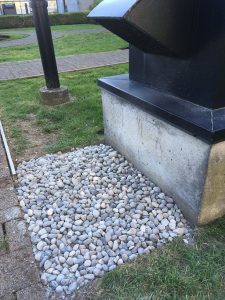
The lawn patches under the vents struggle as the constant air streaming dries out the grass. So we dug it up and put in leftover road base. Then we placed extra rocks from the new raised bed job on top of it. There, another permanent solution to a nagging lawn problem. The rocks won’t care one bit how much air streams over them.
 

IMG_6227

The grass under this vent struggled all year so removed the top layer.


IMG_6228

Next came road base layer because we had some leftover.


IMG_6229

The rock on top finished the job and now we don’t have to worry about struggling lawns.


Conclusion

This was an awesome, sunny and busy landscaping day. The hours just flew by and the site looks much better. We created a new raised bed, built-up tired looking lawns, replaced dead boxwoods and we solved a nagging problem. Not a bad day.


How you can use Berberis thunbergii as a green barrier

By | Landscaping, Species | No Comments

Prickly plants can be used as green barriers in the landscape to discourage people from entering certain spaces. I was reminded of this recently when I was sent to a strata (multi-family) complex to install Berberis thunbergii plants. My task was to plant a row of plants at the top of a wall because the strata council was hoping to discourage kids from playing on top of it. Aha. There you go. It’s not just about pretty flowers. Plants can be used for specific functions. In this case to deter young kids from playing on top of a wall.

Why Berberis?

There’s lots to like about Berberis thunbergii. For one, the purple foliage is very attractive. Berberis also flowers nicely but the flowers aren’t super showy. The plants also splash out nicely in arches and they tolerate shearing.

One important key is that the plants do well in our Lower Mainland landscapes once they’re established. But how do they deter kids from playing? Well, the plants sport soft prickles that hurt just enough to discourage you from brushing your body parts against them but not so much as to cause deep gashes and bleeding. It’s a perfect plant for this situation. We had enough prickle collisions when we planted, I imagine the kids will also have some fun.


IMG_5346

Berberis thunbergii, attractive foliage and soft prickles ready to meet any juvenile trespassers.


Step one

First, my apprentice and I had to remove the struggling Mahonia aquifolium plants which, incidentally, sport prickly leaf margins. Also note that I kept the best looking specimens and re-used them at a bare boulevard bed. I hate throwing out decent plants.


IMG_5330 (1)

If you’re lucky enough to have a 4th-year apprentice to help you, squeeze him hard!


Step two

Planting the Berberis thunbergii wasn’t very easy because woodland setting means tree roots and moss. Always massage the plant roots before planting. We don’t normally have time to water in our new plants but the ground was wet and rain was in the forecast. And remember, Berberis thunbergii is a champ, that’s why we use it. As the plants grow they will fill out and form a nice barrier.

Step three

Whenever possible, use soil amender to top dress your new planting. It gives it a new black look and it gives the plants a nice kick with new soil. And remember to top dress only. Always backfill your planting holes with the native soil you excavated.

Step four

Clean up nicely with a blower and broom. Always leave your work site in great shape. If you read this blog regularly you will already know that.


IMG_5344

All done! Planted, top-dressed and cleaned-up.


Step five

Re-plant the rejected plants elsewhere. I did this on a boulevard bed which was mostly bare and it made me happy to see the plants salvaged and given space to grow.


IMG_5332

Unwanted Mahonia aquifolium and Nandina domestica were replanted in this almost bare bed.


Conclusion

Berberis thunbergii is a great plant to use if you need a decent plant barrier to discourage people from entering a certain space in your landscape. The prickles are hard enough to discourage trespassing and soft enough to not cause deep gashes and profuse bleeding.


On transforming tired landscapes

By | gardening, Landscaping | No Comments

It’s always fun to see tired landscapes rejuvenated. It just takes some strata council resolve and a bit of budget. And assuming you use perennials, your new landscape should be fine for years. Check out the example below and see what you think.


Tired landscape


IMG_4972 (2)ed


There isn’t much to look at. The lawn is mossy, tiny and lacking deep edge definition. There are three dead Pieris japonicas, and one still functioning native kinnikinnick groundcover plant (Arctostaphylos uva-ursi). This whole corner bed is ripe for re-editing.


Step 1 Preparation

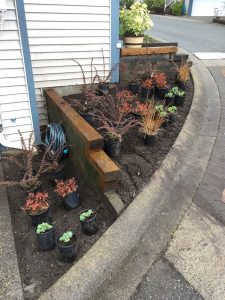
Start over and toss everything out! Bring in new plants and lay them out before planting. Note that all new plants are perennials. They should live for many seasons, assuming they are watered enough so they can get established in their new home.


IMG_5082 (1)


Step 2 Planting!


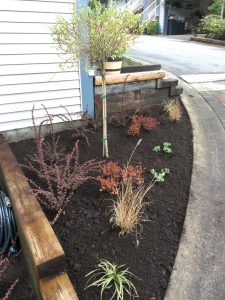
This is the fun part. Once the layout is approved you can plant. Only the green Sedums by the curb were tricky. They are succulents and easily break off.  The back corner plant is Berberis thunbergii, the reddish clumps are Spirea japonicas, the two light plants are fountain grasses (Pennisetum) and there is one sedge (Carex) on each end. The focal plant is Japanese willow (Salix).


IMG_5101 (1)


Step 3 River rock

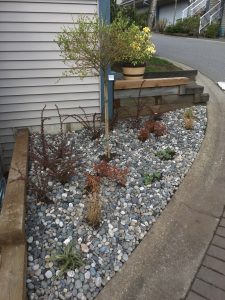
The strata asked for and received 1-3″ river rock. Again, this step had to be done carefully. The Sedums would break off if they were hit by river rocks so care had to be taken to place the rocks around the plants. If you can, hose off the river rock so it looks better. This also helps the plants. A final clean-up blow completes the project.


IMG_5129


Now go back to the before picture and compare. I think this new version is much better. And all it took was a few brave strata council members and a bit of budget.

Landscapes aren’t static. They change and evolve. It’s OK to be the agent of change. Try new things and experiment. It doesn’t always cost a lot of money.

Lady Di: Grandiflora Rose

By | gardening, Landscaping, Species | No Comments

I don’t get to work with nice roses very often. Most of the time I have to cut back Rosa rugosa specimens because they are suckering and spreading out of control. Usually it’s raining so my rain gear gets all torn up by its rough thorns.

Lady Di

Recently I got to install Grandiflora rose called Lady Di. That’s more like it. Finally some class!

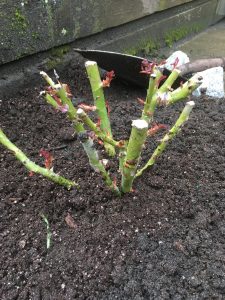
The potted roses displayed wax on their canes and I had no idea why. That’s how little I work with roses. So I googled it and found out that wax on roses is used to prevent them from drying out during transportation or while they sit on the shelf. No action is required because the wax will eventually fall off.


Rose details


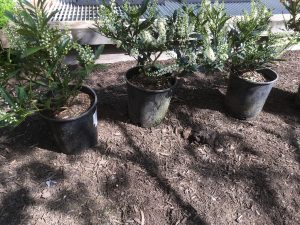
IMG_5072 (1)

Grandiflora rose showing wax on its canes.

According to the tag, this rose variety produces bouquets of perfectly formed soft coral pink flowers. Great. I can’t wait to see them. The glossy green foliage is allegedly also spectacular.
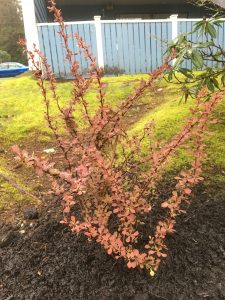
The Grandiflora rose is expected to reach the height of 3-4′ and I hope there is enough room in the skinny front beds where we planted them. Since the rose has strong fragrance it should keep the owners happy.
 

Planting

Our small front beds have trees in them so I expected some push-back from tree roots but overall we managed fine. The one interesting twist is planting depth. To properly plant this rose, you have to make sure the branch union (the big fist-like base from which the canes shoot out) is planted slightly below ground level.

We are also advised to keep the soil moist throughout the growing season. Spacing between roses should be 60cm or 24″. Plant Lady Di in full or partial sun, not in shade.


IMG_5191ed

Ready for planting.


IMG_5194ed

Planted. Note how the branch union is covered by soil. The wax will fall off eventually. Now we just keep it watered and wait for the flowers and fragrance.