Category

landscape maintenance

Deep edging faux pas

By | Edging, landscape maintenance | No Comments

Deep edging is an easy but labour-intensive landscape task. It gives our planted beds a nice definition and, if you read this blog regularly, you will know how to do it.

Deep edging 101

  1. Grab an edging shovel and drive it into your bed edge at ninety degrees. This will give you a nice sharp edge.
  2. The depth depends on conditions and your needs. Personally, I love deep, ankle-busting edges but it makes me extremely unpopular at work.
  3. If your edging generates grassy chunks, shake off the soil and discard the grass.
  4. The last step is cleaning up the chunks with a rake or cultivator so the bed surface is nice and smooth without visible chunks.

One exception

There are exceptions in life and in landscaping. I’m repeating myself a little bit but only because I ran into this one deep edging exception last week.

Pro tip: Training never really ends. Pay attention to all new workers.

Everything ran smoothly for hours until we hit a nicely mulched bed. This is where we have to disconnect the autopilot. The edging chunks landed on top of the mulch and now this blog post is called a deep edging faux pas.

It’s a mistake because the chunks mess up the nice, ordered look of the mulched bed. Instead, we have to do one of two things.

  1. Deep edge the bed but do not kick the soil up. Just leave it dislodged so we can manually remove it without messing up the bark mulch.
  2. Or you can rake the bark mulch away from the edge, deep edge, remove any excess soil and, lastly, rake the bark mulch back into its original place.

In this particular case, we didn’t do any major harm. I picked up the chunks and cultivated the bark mulch to incorporate any soil into the mulch. And the client will never know.

Conclusion

Deep-edging is an easy landscape task but be careful when you deep edge freshly mulched beds. You have to take a few extra steps to deep edge these areas.

Why you shouldn’t freak out about secondary drop

By | landscape maintenance | No Comments

Regular readers of this blog will know that I preach about great clean-ups in landscape maintenance all the time. When I prune, I want the clean-up to match the pruning. No excuses, just great pruning and clean-up. Period.

Cedar hedges

On the West Coast we prune cedar hedges (Thuja plicata and T. occidentalis) from early fall until late winter. It gives us work to do in the slower part of the year and it’s better for the hedges because it’s cooler.

But the power shearing generates a lot of clippings and makes the clean-ups extremely annoying. This is because the clippings get stuck everywhere, including in the hedges.

Cones

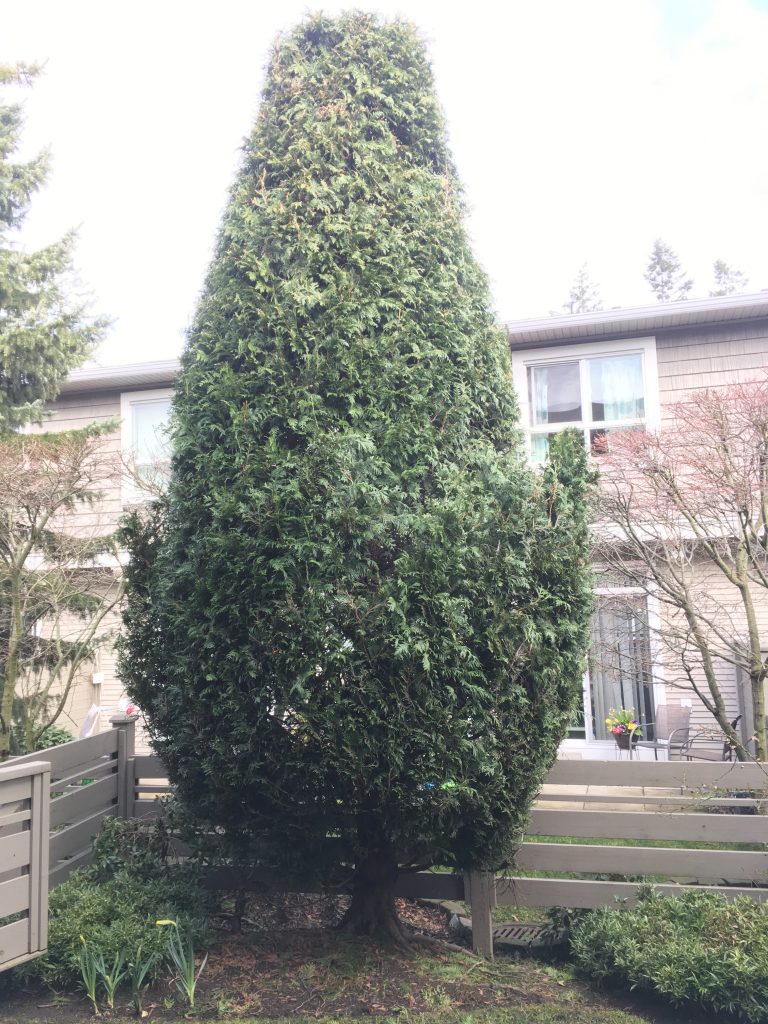
Cedar cones are especially difficult because you have to use a ladder for the job. This makes it awkward to dislodge any larger clippings from the tree. Just switching from power shears to a rake is time consuming; and using a rake messes up the look of the cedar.

Smaller rectangular cedar hedges are easier in that we can brush off the debris from the tops before finishing the job. Large cones are tricky.

Secondary drop

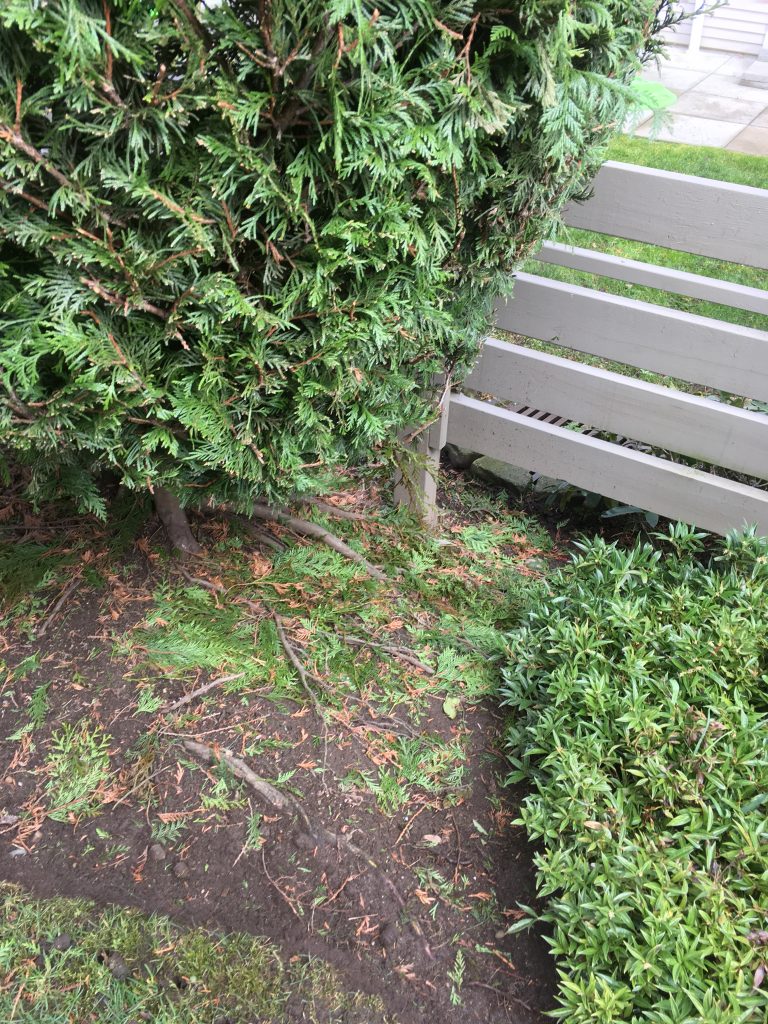
The debris at the base of this cedar looks terrible. It would make any normal landscape foreman freak out and haul his workers back in to re-do it. But not so fast; I took this this photo weeks later. So, we’re seeing the dreaded “secondary drop“.

Secondary drop refers to debris that falls down after the initial pruning and clean-up. It comes with the job so there’s no need to freak out. We have to accept that some debris will fall off the cedars later. We can’t help it.

Pro tip: I know that some people will disagree with me but I am convinced that the bottoms of cedar hedges should be kept shaggier. This is to protect the roots from intense summer sunlight. In the wild, Thuja plicata trees are starting to suffer from more intense summer heat waves.

When you prune cedars, clean-up the clippings as best as you can knowing full well that there will be some secondary drop for you to clean-up later.

Why landscape supervisors have more fun

By | landscape maintenance | No Comments

Landscape supervisors have more fun because they often get to escape from routines. For example, today, I spent the entire morning on requests while the crews deep-edged and finessed beds.

Because I’m the extra man in the field, I can handle requests that would otherwise distract site foremen from their weekly plan. And I’m happy to help out. Let’s take a look.

Hedge reduction

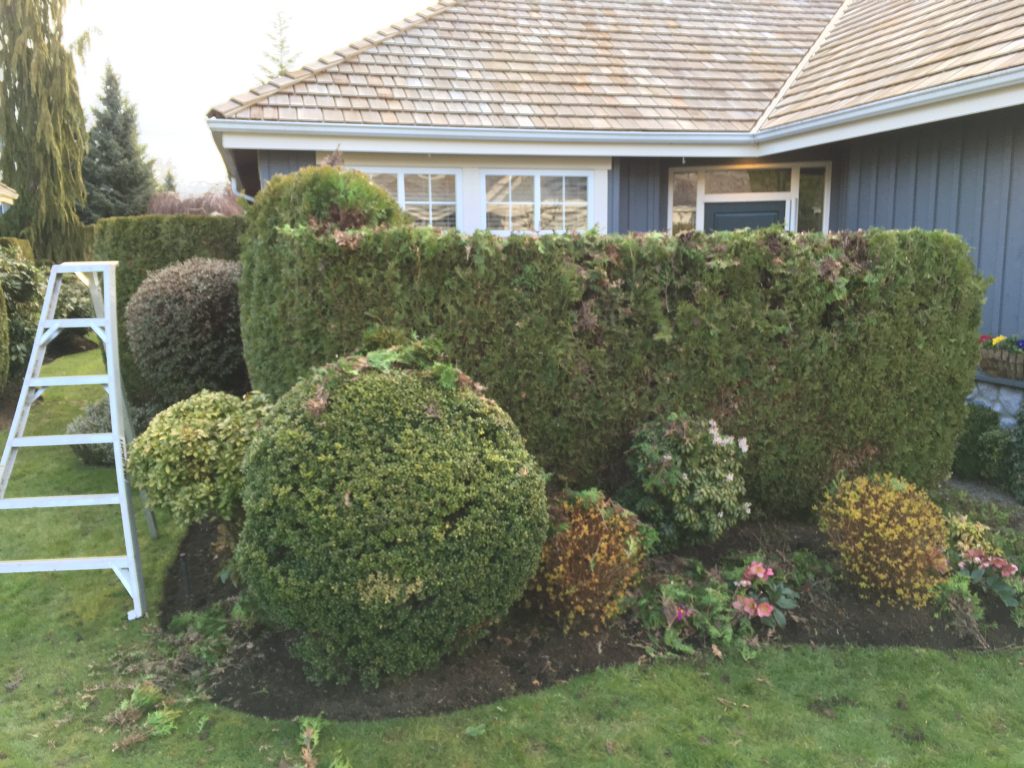
The owners of the cedar hedge (Thuja plicata) below felt boxed-in so they requested a significant 12-18 inch reduction. Armed with sharp new shears and Stihl’s new KM 94 R engine, I bravely attacked the hedge.

The key is establishing the new height and marking it in the hedge. Then the shearing can begin. Luckily, I didn’t run into any huge stems. When you do, use loppers to eliminate them, not your shears.

I managed to catch the owner as she retrieved her newspaper and she was pleased with her “new” hedge. When you reduce cedar hedges drastically you must accept the brown wood look on top. Over time, it won’t look so freaky.

As always, the clean-ups should be as nice as the pruning. In this case, the debris filled four tarps. The last step involved a clean-up blow and putting all patio furniture and pots back to their original places.

Sarcococca

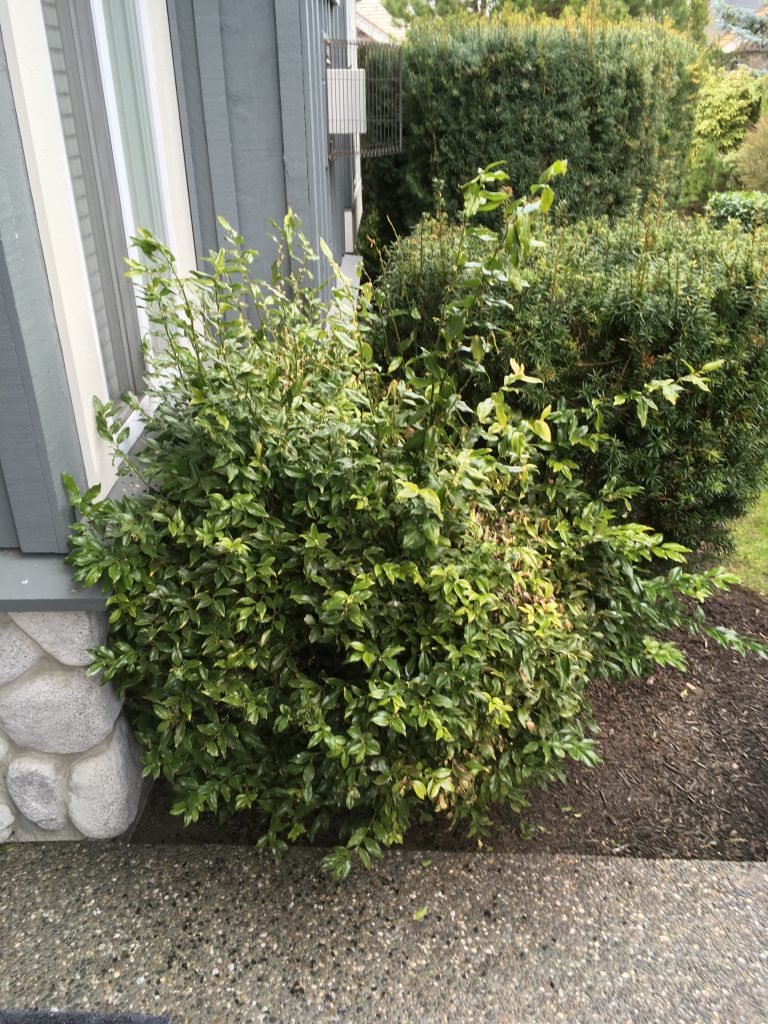
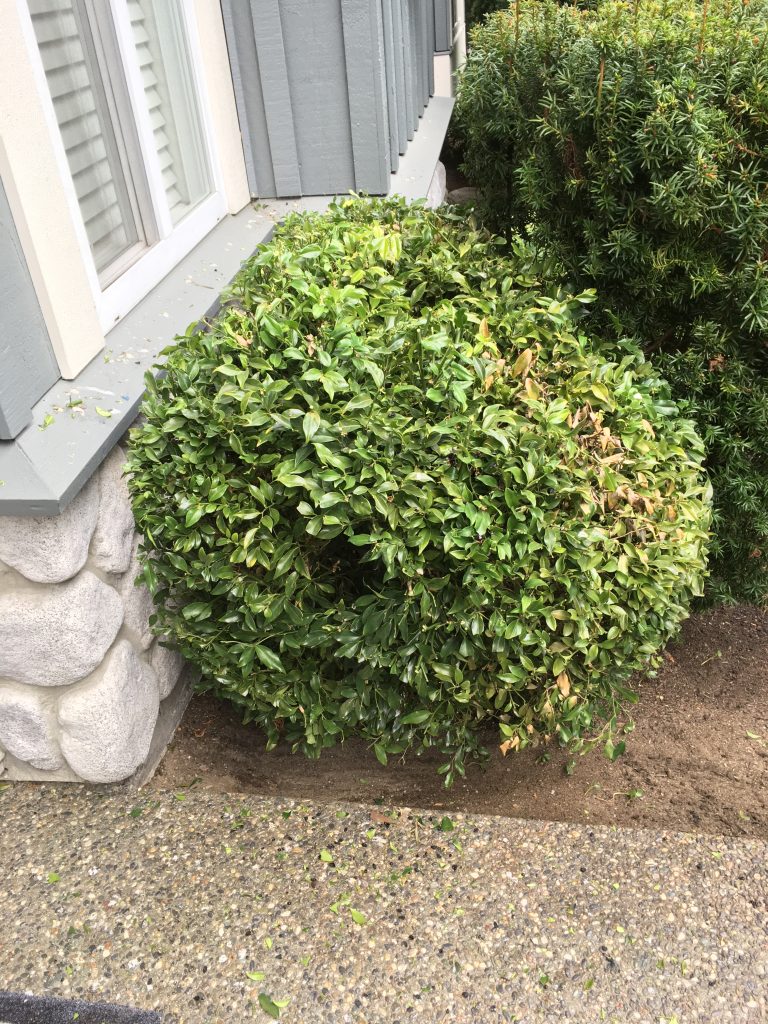
This request was nice and quick. It’s common for people to complain about overgrown shrubs by entrances so I grabbed my shears and went to work.

Note that Sarcococca flowers in winter and produces an attractive scent at a time when nothing much is happening in the landscape. So, now at the end of March it’s fine to prune this shrub.

Pro tip: Pruning after flowering is a common rule for most shrubs.

Grasses

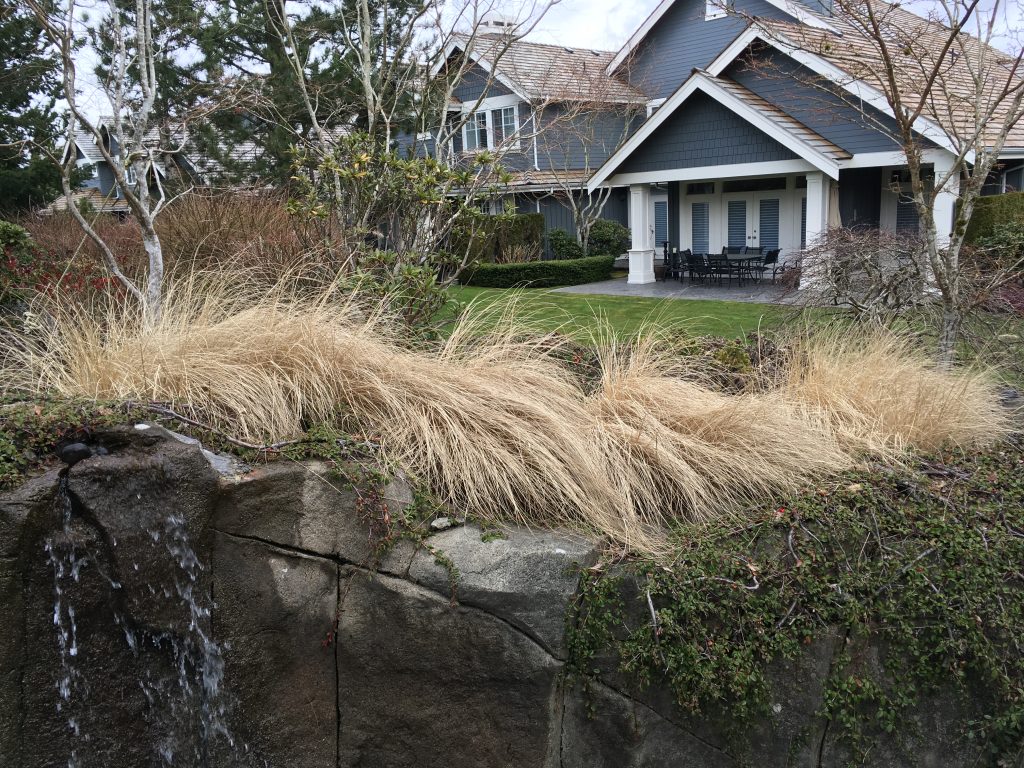
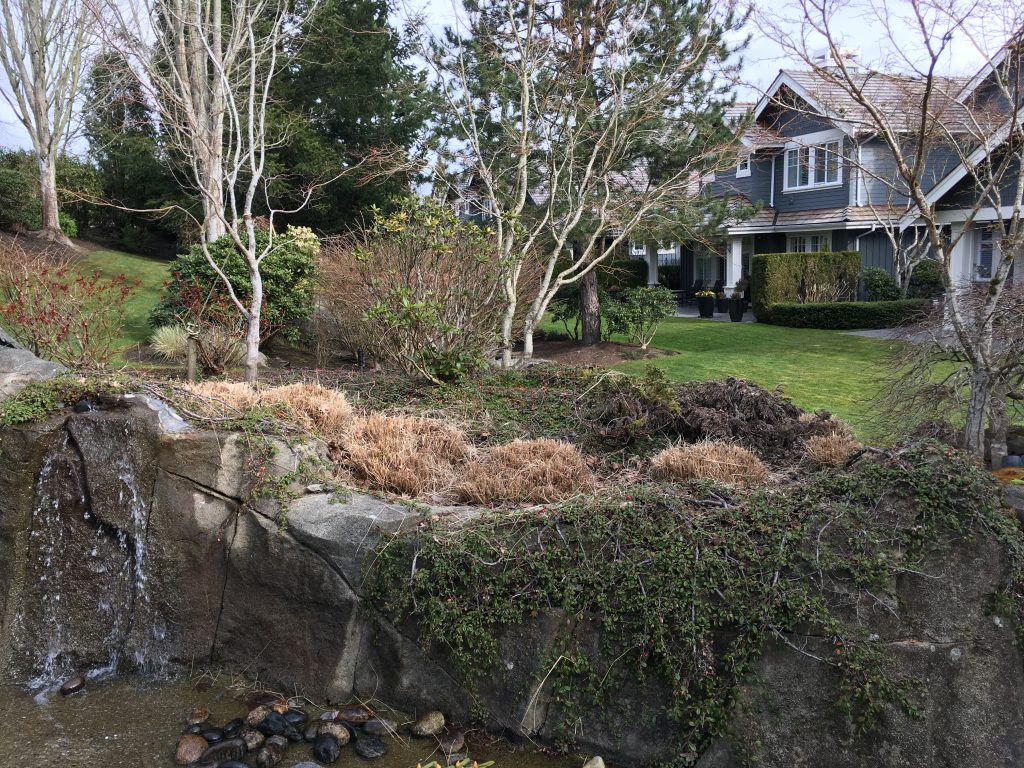
Here, again, the homeowners didn’t like the look of their grasses so I took them down by hand. Yes, it’s slower but using long extendable power shears in tight spots is awkward. The other issue was power cables on the ground.

Pro tip: Don’t rush your tasks. Look around for dangers like outdoor light cables.

Dogwood tree

The last request involved a dogwood (Cornus) tree. The idea was to reduce the height of the crown and I pulled it off easily. One, I could reach the top branches without a ladder; and, two, because the tree is multi-stemmed reducing the top-most branches still leaves the tree looking natural.

The whole job took maybe ten minutes.

Mornings like this are gold for landscape supervisors. They almost don’t feel like work. Supervisors have more fun!

Hydrangea deadheading

By | landscape maintenance, Plants, Pruning | No Comments

Do you cut off dead flowers from Hydrangeas? This is another burning question online so let’s examine it.

Bad habit

In commercial landscape maintenance workers tend to rush deadheading Hydrangeas and it’s a hard habit to break. There is absolutely no need to rush this task. Why?

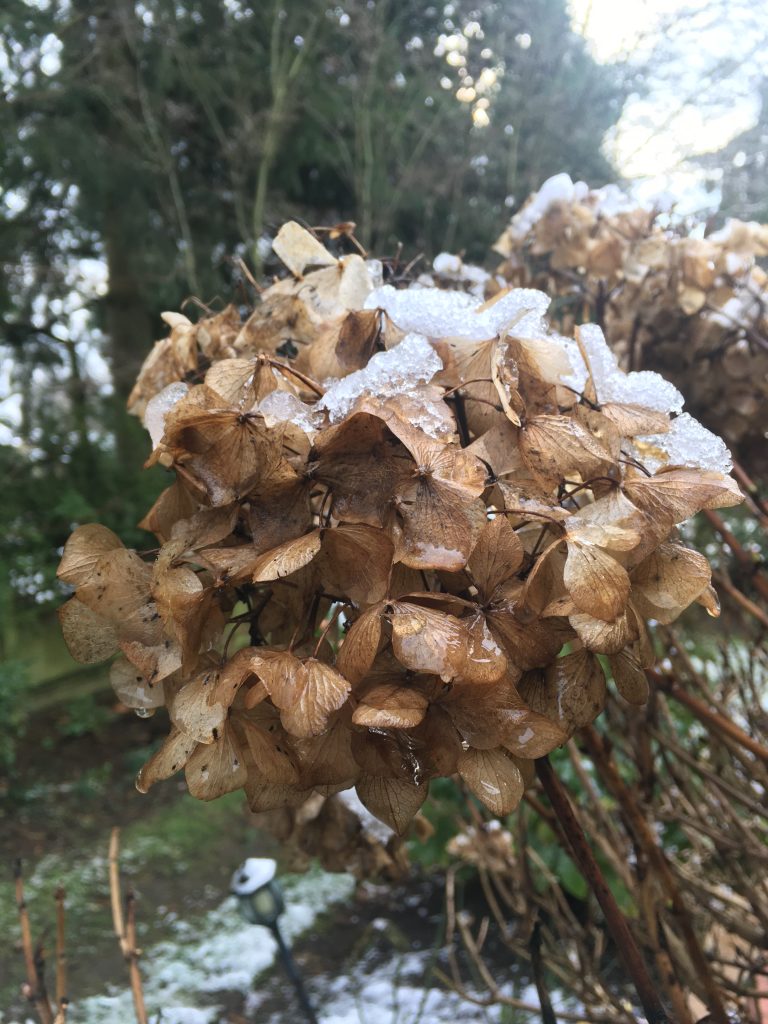
The spent flowers can protect the new buds below from low temperatures and, when frost hits, the old flowers look brilliant. Once you cut them off, the show is over until summer. All you get to see is canes.

Recently, I had a client tell me to leave her spent Hydrangea flowers alone because birds like to hide in them. Ok. Done!

I think landscapers enjoy this deadheading task because it’s easy. It’s much easier than weeding and cultivating beds or worse, re-establishing deep-edges. I prefer to have something to look at in winter.

Careful!

If you must deadhead your Hydrangeas, do it carefully. Don’t cut lower than 2 to 3 buds. Since most Hydrangea plants flower on old wood, cutting too low risks removing flowers for next season.

This is where training comes in. It’s important to train all workers on proper pruning techniques. It happens every year. One unhappy client asks me to remove her Hydrangea because it never flowers. It just produces green canes. What a disappointment.

So, yet again, I have to beg her to stop pruning it. Green canes without flowers means that the pruning was too severe. Now all we can do is wait for next year because the flowers appear on last season’s wood.

I used to deadhead everything on my patio and in the landscape but not this past winter. I let the birds enjoy my perennials and I made some of my co-workers angry by insisting that we leave ornamental grasses standing. And the world didn’t end. So try it. Maybe you’ll form a new habit that will help birds in winter.

How to pimp out a barbecue area

By | landscape maintenance | No Comments

Good landscape maintenance dictates that we follow our plan for the day. Usually there is a set rotation so that every section of a given site is completed. Working without a plan is a recipe for disaster. Landscape foremen must know what tasks they must complete on the day they visit and on the following visit.

When small requests pop up we try to do them right away. Assuming they are small. Anything bigger and time consuming should be pushed to your next visit.

One exception

There are always exceptions, in life and in landscaping. This occurred to me in late July 2019, when a resident came out to alert us to a social event happening that weekend in the barbecue area. Now what? Do you ignore it and continue with your finesse work plan?

We decided to pimp out the barbecue area because when residents have a social event they talk. And the barbecue area needed some help so we switched and attacked the area.

Tasks

One obvious blemish were the many crack weeds showing around the barbecue pit and benches. So we carefully line trimmed them to oblivion. When you do this work check for nearby windows and pedestrians so there isn’t any trouble.

IMG_2846

All unsightly crack weeds are gone.


I also pruned the Japanese maple (Acer palmatum) lightly. A few branches were sticking out into the walkway; and there were some dead branches inside the tree. You should be able to see through Japanese maples.

The other maple (Acer palmatum disectum) had a weeping habit and it didn’t require any pruning but there was a lot of landscape fabric showing around the tree. That’s very unsightly. Landscape fabric should be covered by several inches of mulch.

Since we didn’t have any fresh mulch, I poached some mulch from a lonely corner on the site. Poaching mulch from a neighbouring site would be wrong.

Weeds and tree seedlings were also removed from both beds. I cultivated where the old landscape fabric was still covered by mulch. This gives the bed a fresh look and it uproots weeds.

The final task is always a courtesy clean-up blow. Just try not to blow too long in summer because it’s hot and dusty outside and windows are open. I blew the barbecue area and bailed, satisfied that the residents would enjoy their barbecue.


IMG_2844ed

Weeds and seedlings are gone, the bed is cultivated and the maple is off the walkway.

Mulch volcanoes are here to stay

By | landscape maintenance | No Comments

This isn’t my first blog post about mulch volcanoes and I’m returning to this topic only because of a picture I saw on Facebook. One lawn care group member shared the picture below and people had a good laugh. I felt like crying.

What’s wrong here?


IMG_0209


It will definitely prevent weeds from growing and it looks pretty, doesn’t it? It’s a massive volcano; and reddish, too. But it’s completely twisted. I know the workers weren’t professionals. Professionals would never allow this kind of work to pass inspection.

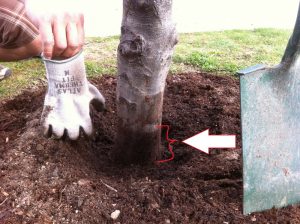
Here is what mulched tree wells should look like: imagine a donut. No mulch touches the root flare, then it extends out in the middle and tapers towards the lawn edge.


380387_1625670257187_1667459786_n


This Acer platanus has a berm around it because that’s what specifications demanded. The mulch doesn’t touch the tree trunk. Why is this so critical? To answer this, I’m borrowing heavily from the work of my mentor Dr. Linda Chalker-Scott.

The above trunk tissues aren’t supposed to be covered by mulch because it creates dark, damp and low-oxygen conditions. The wetness can lead to rot and disease entry. See below how wet the section above the root flare is. This is asking for trouble. Opportunistic pests love this.


IMG_574ee0


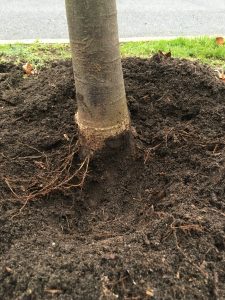
Another problem related to mulch volcanoes is root girdling. When you cover trunk tissue with mulch, the tree can push out adventitious roots which develop from the stem. As they grow and thicken, they can girdle the tree, essentially choking itself to death.


IMG_6717ed

This is a great example showing adventitious root development inside a mulch volcano.

Mulch volcanoes aren’t going away. They’re like antibiotic resistant bugs. We need constant vigilance and good worker training. Otherwise, our landscape trees will suffer at a time when more and more trees are needed to combat Global Warming.

So, remember, apply tree mulch as if you were making a donut. Don’t build tree mulch volcanoes or I will erupt again on the pages of this blog.

Never tolerate death in the landscape

By | landscape maintenance | No Comments

Some months ago I spent a very satisfying morning at one site removing dead plants.  I say satisfying because I hate seeing dead plants on any site. It always looks like the landscapers don’t care.

We removed so much dead plant material, it loaded up our truck. That’s how bad it was; and how long overdue it was.

Two special cases

There are two special cases where removing dead plant material can’t be done. One is where the strata council decides against it for whatever reason. Since they’re the people paying you for your services, all you can do is suggest courses of action.

Two, the site plants may still be under warranty if the site is still new and the strata council hasn’t taken over the site from the developers. You might get to catalogue the dead specimens and hope the developers replant them. It’s usually a bitter fight so don’t make it worse by removing dead plant material. Just wait until everything gets resolved.

Why?

It’s not always possible to find out why some plants died but you should try. With our West Coast summers getting hotter some plants are doing worse than others. For example, Western Red Cedars are suffering.

Sometimes it’s poor installation or malfunctioning irrigation system.


IMG_0956

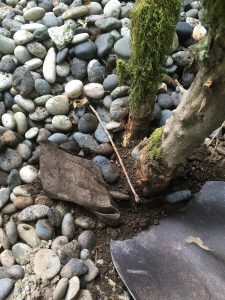
This Rhododendron was smothered by landscape fabric and river rock. Fabric plugs up and doesn’t allow water to penetrate to the root zone.


Assuming the plants didn’t die because of your poor maintenance, this is a great opportunity to sell the strata new plants. And that means putting together a quote with labour costs plus mark-up on every plant. In exchange the strata gets a better looking site. Looking at dead plants is depressing.


IMG_0948

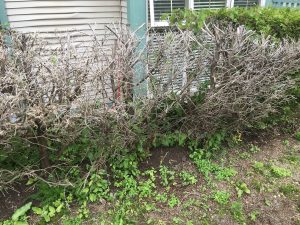
This dead Thuja plicata hedge looks terrible.


Not same old

Obviously, it wouldn’t make sense to replace dead cedar hedges (Thuja occidentalis) with more cedars. We’re finding that Portuguese laurels (Prunus lusitanica) are doing much better in the landscape and form very nice hedges. You just have to make sure they get established well.

Trees should be treated the same way. Try a different tree species once you’re sure the tree is really dead. If you’re not sure, take your snips and gently scratch a branch. If it’s green underneath there is still life in it; if it’s brown, it’s toast and you should replace it.


IMG_1573

This Cornus tree failed the wiggle test but just to make sure, I scratched the branch. Brown means it’s toast so I pulled it out easily.


Conclusion

Dead plants look awful in the landscape. We want healthy, beautiful landscapes for people to live in. Try to remove and replace dead plants as soon as you can get approval from your clients.


Aphids from hell

By | landscape maintenance | No Comments

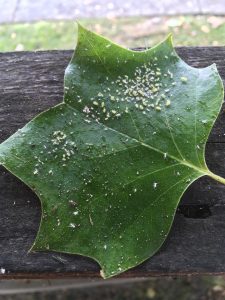
Aphids are soft-bodied, sucking insects and they have a well-known association with tulip trees (Liriodendron tulipifera). As they suck on the leaves they exude sticky honeydew because they can’t process sugars. The trees aren’t harmed and beneficial insects arrive to feast on the sugars and on the aphids. That’s the basic biology.


IMG_2230

Tulip tree leaf covered in aphids and sticky honeydew because aphids can’t process sugars.


One desperate owner

Every summer the same desperate patio owner approaches me asking if I could take out more branches off the tulip trees. And it turns out I can’t. I would need a bucket truck.

Whenever there is a clash between people and trees, I normally favour the trees because we need them. Trees provide many, many, free ecosystem services; and lately tree planting is suggested as one way to fight climate change.

And yet, I really feel for this lady. Imagine her sitting out on her back patio, drinking wine with her husband as her little kids play at their feet. Then she looks up and sees aphid honeydew falling down all over her yard. That’s messed up. Aphids from hell!


IMG_2216

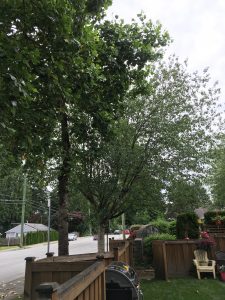
Untouchable city trees on the left and honeydew covered patio. An unfortunate choice of tree species for this setting.


City trees

Since the boulevard trees technically belong to the City of Maple Ridge, they are protected and very unlikely to get removed. Poor lady.

I’ve taken out a few lower branches but taking out any more with a bucket truck would probably attract the attention of bylaw officers. And I don’t even have access to a bucket truck. Plus the trees wouldn’t look like normal trees.

And so the lady suffers every summer, sitting on sticky patio furniture and probably cursing her real estate agent.

She isn’t the only one. I have written a blog post after reading about another desperate home owner in Vancouver.

Still, we need trees in our cities and sticky honeydew can’t be enough to condemn them.


Is vertical edging worth the trouble?

By | landscape maintenance, Lawn Care | One Comment

I hate vertical edging but sometimes I have to do it because blade attachments aren’t available. Then, when I finish I’m close to developing a rash that will only go away after I complete blog posts like this one.

Why vertical?

Why do we vertical? Why flip a machine on its side and shred your edges? Because it’s convenient. You’re already there, your flat edging is completed and now you just burn out the edges and bail. There is no need to walk back to the truck to change attachments or change blades. And you don’t have to train workers on a new machine.

Personally, I think vertical edging is too much trouble. Let’s examine some of its limitations below.

Vertical limitations

Let’s consider many of the limitations of vertical edging. And before we get into it, note that some big companies don’t allow you to vertical. This is mainly because it gives your site or home an inconsistent look; and it also increases the chances of worker injury and site damage.


Shredding plants

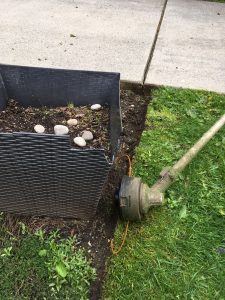
This is my biggest problem with vertical edging. As you go along the edge, inevitably you will encounter plants growing over the edge. So you either skip the edge or you shred the plants. Most workers just shred the plants. Either way your site look suffers.

By contrast, the blade edger has a metal cover which discreetly slips under the plant and allows for edging without injury to the plant.
 

IMG_9692

Damage isn’t limited to plants. This pot is missing a lot of plastic already.

Injury risk

Since there is no cover over the line edger you’re bound to eat a few rocks and other debris. Definitely wear goggles every time and close your mouth; and kiss your baby skin goodbye. To avoid getting hit workers angle the edger from the recommended 90 degrees which nicely leads us to the next point.

By contrast, the blade edger blade is covered with a shield and a rubber flap on the bottom.

Erosion

When you shred the edges at 45 degrees every week you eventually get erosion. Think of the UK coastline. This can lead to client complaints as the owners’ lawn edges retreat. Also, anything short of 90 degrees is ugly. If your edge can’t break your ankles, it’s not done right.

Reestablishment

Sometimes you fall behind on boulevard edging and when you finally get to it, you have no hope of re-establishing the edge. The plastic line is too weak.

By contrast, the blade edger digs in with a new blade and easily re-establishes the edge. This is also true for soft edges where the edge is gone.

Hard edges also look inconsistent and it’s slow work because as the plastic line shreds I have to constantly reload it by tapping the attachment head.
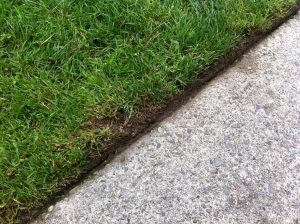
 

IMG_9646edit

While blade edgers can be kicked off course by sidewalk blemishes, vertical edging is much less consistent.


By contrast, the blade edger just digs into the hard edge and flies away. This is the best place to start training new workers.
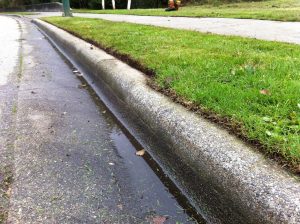
 

IMG_9643edit

The top edge is my blade edger work; the bottom is a private landscaping company with line edgers. No contest!

Tight edges

My blade edger blade can nicely start and finish the lines by fitting tightly against the hard edge/soft bed zone. Vertical lines struggle here so the beginning and end of many edges stay shaggy.

Tree wells

I can blade edge around a tree well in seconds and leave it looking sharp. Vertical edging around tree wells is a pain.

Sucking exhaust

Vertical edging requires you to lift the engine higher which means the exhaust is much closer to your head. If you start getting dizzy, it’s the exhaust. This blog post assumes that you or your employer aren’t paying big dollars for the much cleaner Aspen fuel. Burning regular gasoline mixed with oil in a small engine isn’t very ecological. I want the engine down by my waist with the exhaust pointing back.
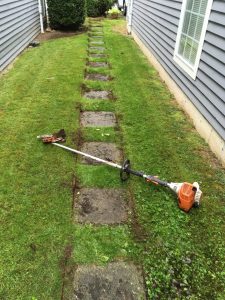
 

IMG_9411

Only blade edgers can nicely sharpen up stepping stones.


Is vertical edging worth the trouble? I don’t think so. Do you? Please leave comments.


Making the case for attention to detail in landscape maintenance

By | gardening, landscape maintenance | No Comments

Details matter a great deal. I was recently called to a residential garden with lawn care and pruning clearly completed well. But what about the details? Many details remained and taken together, they detract from the overall presentation. So, I got to work.

Details

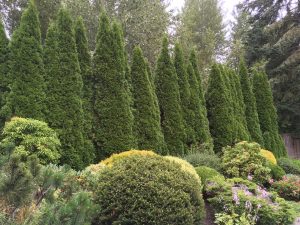
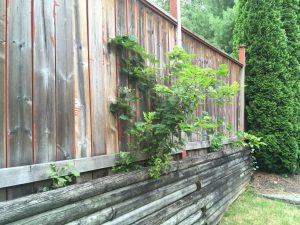
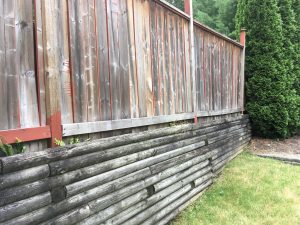
Blackberry and salmon berry shoots protruding from the cedar hedge and shrubs were by far the biggest blemishes. So, I cut them down which sounds easy until you see the wild zone at the back of the cedar hedge. The school board never maintains the wild zone so of course it allows all kinds of undesirables to encroach on the neighbouring landscape.


IMG_2258edit

Blackberry and Salmon berry invasion in progress.


IMG_2270edit

After my intervention.


IMG_2256


IMG_2278

Much better!


Ferns

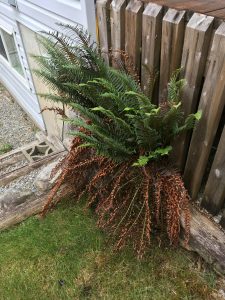
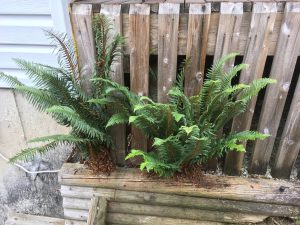
I also found two ferns on the side of the patio and cut them back. They are native sword ferns (Polystichum munitum) and only require one annual cutback after new fronds push out.


IMG_2260


IMG_2264

Much better and we’re good for another twelve months.


Weeds

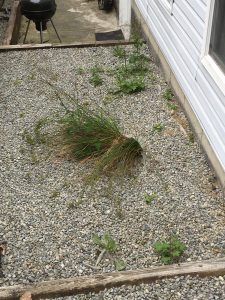
Nobody likes picking weeds but the side of the house was starting to “burn”. The rock layer isn’t deep enough to deprive the weeds of sunlight so they poke out of the landscape fabric.


IMG_2261

These weeds had to go.


Tree branches


IMG_2274


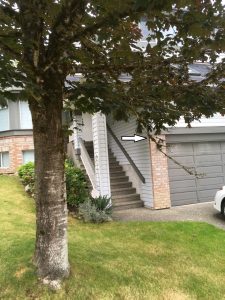
It’s a small detail but one dead branch pointing down (see white arrow) is unsightly and it presents an obstacle for lawn care people. So grab a sharp hand saw and make it disappear.