Poor strategies from experienced workers!?

By | Lawn Care, Leaf clean-up | No Comments

Lessons learned?

It’s always better to learn from other people’s mistakes. That’s why I put together an online course which covers other people’s lawn care mistakes. It’s on sale for only $5 until January 1, 2024. Check it out.

This blog post covers two strategic mistakes committed by experienced workers!? How, you ask? I honestly don’t know why experienced workers work like amateurs. But I know that we can learn from their mistakes. It doesn’t matter if you’re a new landscaper or homeowner. Use good strategies to get things done efficiently. Every time.

Leaf clean-up

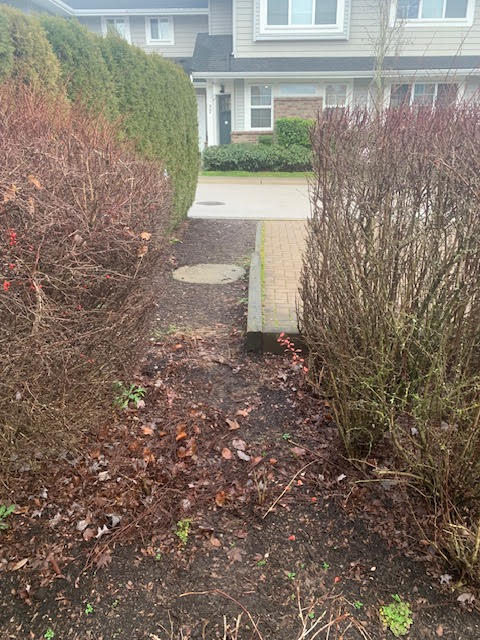
What’s wrong with this picture?

After all, the leafy pile looks tight, doesn’t it? Sure, but it should be blown onto the lawn for several reasons. One, it’s an obstruction. Think visually-impaired passerby with a seeing-eye dog or someone disabled using a motorized wheelchair. Your pile could cause trouble before you get to it. Remember, some disabled people ride around like pirates. They will finger you for making life difficult for them.

Two, it’s easier to rake up leaves on the lawn and, as a bonus, you don’t have to come back later to blow off remnants. You’re saving time and creating less noise and air pollution. If you’re mowing, the mower will suck up any remnants left on the lawn.

Now, I would expect senior landscapers with tons of experience to do better.

Lawn care

When you’re mowing, keep your tarps close by so you don’t have to waste time walking. But please don’t put your tarps on the lawn edge where they’re in the way.

Here you’re asking the line trimmer to stop and move your tarp!?

In the above picture I’m line trimming and I only have two hours to spend on this site. So it’s tight. The last thing I want to do is move tarps out of the way so I can edge the lawns. This is really dumb from another experienced landscaper; the kind of dude who frequently shoves his experience in your face.

Place the tarp near the lawn but not in the way. It’s slowing down the line trimmer for no good reason. It’s not like there is a lot of car traffic inside this complex. Always use the best, most efficient strategies to get your lawn care done. Click the button below to see my online course which covers the biggest lawn care mistakes. Learn from other people’s mistakes. The course is on sale for only $5 until January 1, 2024.

On the pain of planting in clay

By | Planting, Trees | No Comments

Clay is a bitch

What’s wrong with this picture?

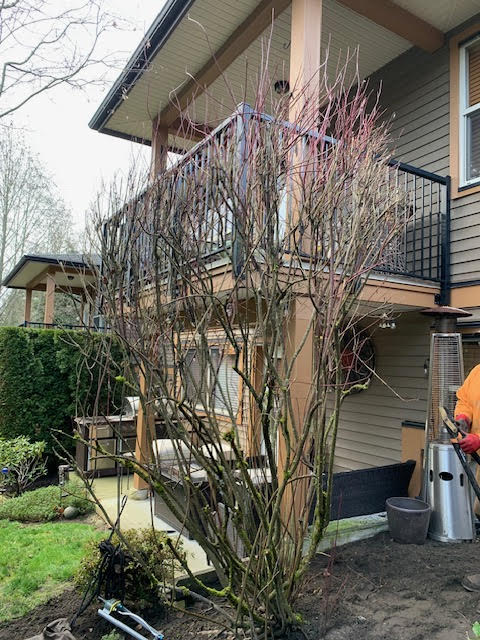
As soon as I saw this poor willow (Salix) planted way too high, I remembered the setting. The entire neighbourhood in Port Coquitlam, British Columbia sits on clay soils which are notoriously tough to dig through and keep the soils soggy because they can’t drain. And so I knocked on the door and asked the owner what happened: and just as I suspected, he gave up digging in the clay and planted the willow high. Good enough! I guess.

Is it good enough?

Is this planting good enough? I don’t think so. With one half of the root ball showing, many roots will desiccate and die. It also looks funny. But I totally understand because once I had to prepare three holes for cherry tree planting and it was a bitch. The clay layer is so tough, it’s easy to give up. I remembered it was solid but I should mention that all three cherries are doing well and flowering every spring.

A better solution?

My solution would be this: take another stab at the clay on the bottom of the planting hole with different tools. Then, once I would run out of energy and bad words, I would “massage” the root ball to make it smaller. It’s very likely that those two steps would allow for planting at grade, just the way we want it.

You can fight clay soils with organic amendments. Adding some to the planting hole and to the backfill soil would help over time. Sometimes you just have to accept the conditions you’re given and do your best. There is no point stressing but I do find the willow root ball sitting high very annoying. I would fight to plant it close to grade. The willow would be happier and I would sleep better at night.

Fountain grass rebel

By | Plants, Pruning | No Comments

Red Seal Vas rebellion

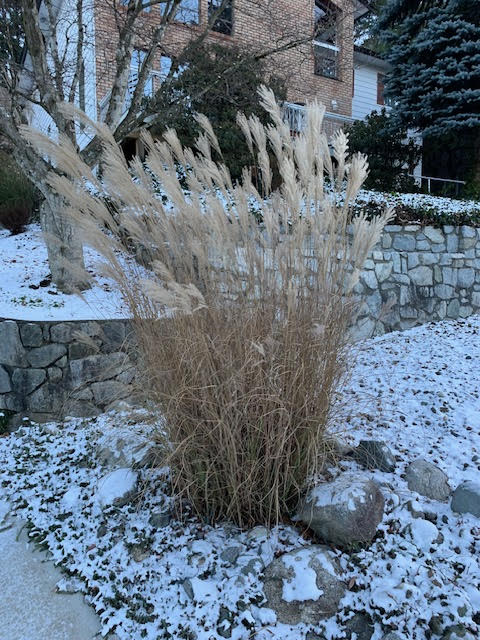
I love fountain grasses. I especially like Pennisetum alopecuroides which is described as a graceful ornamental grass with foliage that rustles in the wind. It also provides non-stop drama, like many of my crew members. And best of all, it requires very little care and this is the main topic of this blog.

Now, I know one site which signs on for ten or eleven months so there is always rush to get everything done before Christmas. Pruning must be completed, weeds removed, and one final blade put in on hard lawn edges. Inevitably, one suspicious landscape manager asks the crew to shave the fountain grasses into tiny mounds. Except the timing is wrong!

Remember how fountain grasses provide drama and rustle in the wind? Well, they can’t when they get obliterated into almost nothing. So let me repeat this: the timing is wrong. Fountain grasses should be sheared in late winter just as the grasses start to grow. Late winter, not early December, which is technically still fall.

With the weak landscape manager mentioned above out of the picture, I instructed the crew to leave the fountain grasses alone until late winter. And to seal the rebellion I also informed the strata council about the change. As soon as I mentioned fountain grasses covered in light frost, the female strata council member was sold. I know she will thank me later.

Sides

I won’t lie, there was some grumbling from homeowners about their cars brushing against the grasses. I know that nothing happened to their cars; the paint is still attached to their car bodies. But I did lightly shear the sides where the foliage looks like beige straw. This was one easy compromise to make.

Lightly sheared sides to shut up fussy car owners.

Lessons

What lessons can we derive from my rebellion? One, make sure you get your timing right. Look up your target plant and prune it when it’s best for the plant, not when some landscape manager thinks it should be done.

Two, don’t be afraid to change things up. We’re not AI bots. If the fountain grasses get obliterated every fall, leave them alone one year. Enjoy them and cut them back in late winter. That’s all you have to do to them all year.

Support my blogging

Support my blogging with merchandise purchases: redsealvas.com

Watering will save your new cedars!

By | Planting | No Comments

Water is the key

It’s pretty sad but I have to say it, newly planted cedars (Thuja occidentalis) require frequent watering after planting. That’s the only way they can establish and thrive. And it sounds so simple and obvious you could be forgiven for thinking I’m wasting your time with this blog post.

And yet, it happens over and over. Every season I’m sent in to catalog and remove dead cedars from multi-family (strata) sites. Then, once the rejects are hauled off to the dump and turned into soil, I visit nurseries to buy new specimens. More time, more labour and more money.

Then comes the hole digging and planting. Obviously, not every site is easy to dig up so the labour involved in this step can be huge. Also, Red Seal Vas doesn’t come cheap but this isn’t about me. I want you to think about watering.

Proper planting

Every time cedars I planted die, I second-guess my planting technique. I always remove burlap before planting but people don’t like that because it voids nursery return agreements. Potted cedars are easier but you still have check the roots, planting depth and water each tree in properly.

Once I’m done, I beg the owners to please water the cedars. After all, you wouldn’t breast feed your baby for just a few days. My wife breast fed for years. Unfortunately, people are busy. And it shows when I show up on site months later.

Night and day

It’s clear what happened here and, shockingly, this is the owner’s patio where they play with their kids and legally smoke copious amounts of marijuana.

Other people on the same site try harder. These specimens look decent so obviously they listened to me. This gives me some hope and stops me from second-guessing my planting technique. It was always about proper, frequent watering. Young cedars are thirsty so water them for at least one year. But don’t drown them. If you’re not sure about moisture levels, stick your finger in the planting hole.

Conclusion

Water your newly planted cedars well and frequently!

Are you still stressing over fallen leaves?

By | gardening, Mulch, Tips | No Comments

David Hobson’s opinion

This past October I travelled to Waterloo, Ontario to cheer on my son’s soccer team. They played in the youth U15 nationals, representing British Columbia.

Now, since they only played one match a day and the team didn’t hang out with parents, I had plenty of time to hang out.

I visited the St. Jacob’s farmer’s market, Canada’s largest outdoor farmer’s market. Safely absorbed by the market crowds, I bought a copy of the Waterloo Region Record newspaper. In it David Hobson wrote about fall leaves and how he deals with them “How about those leafs?” (Waterloo Region Record, October 7, 2023, section C8). Inevitably, this topic comes up every year so let’s see what David does in his own garden.

Easy does it!

David recommends bagging your leaves and leaving them outside exposed to the elements. By spring you should have layers of soggy, decomposing leaves you can add to your garden beds. He has done it for years and suggests you do the same. Start small. Even one bag of leaves is fine.

David doesn’t spread the leaves around in his own garden, except around shrubs where they get trapped and don’t blow away. Normally he makes a large pile of leaves, sometimes two metres across and just as high. The leaves should be wet for best results.

As the leaves begin to decompose, the pile shrinks by half. By early June he peels of compacted layers and adds them to his garden and vegetable beds. They stay there all summer and by fall those leaves are almost gone. They were used to build up soil just the way it happens in nature.

This is one reason I enjoy blowing leaves off multi-family complexes into woodland buffer zones. It’s good ecology and I cut down on green waste dumping charges.

If you like David Hobson’s ideas, try them out; and follow David online.

Stop stressing: blow it into one big pile and let it decompose!

Hedge screens: Prunus vs Thuja

By | Planting, Plants | No Comments

Ask Red Seal Vas

I won’t lie to you, not every client follows my suggestion. But it does happen on occasion. Like when a young couple approached me about creating a screen along their front sidewalk. I was at their house to cut their neglected lawn; more weeds than lawn. So they asked me about potential plants for their sidewalk edge.

Now, cedar hedging is very common. The neighbours on both sides have cedar hedges (Thuja occidentalis); and I’ve seen studies from the UK showing how hard they work keeping pollution away from the house.

But given our warming climate, many plantings are now struggling to establish and survive. (See also my blog from December 11 about cedars and proper watering.) That’s why I hesitated when the young mother asked me for a good suggestion.

Portuguese laurels

Prunus lusitanica are very nice laurels with glossy leaves; they grow fairly fast and tolerate shearing. What we’re finding on our multi-family (strata) sites is that they tolerate summer heat much better; and establish better than cedars.

They also cost much more than cedars. Luckily, this young couple has the means to pimp out their newly built house. They paid and had the laurels installed. Obviously, the screen isn’t as tight as with cedars but that might be a good safety feature. There is an obvious screen but it will be difficult for pedophiles to hide behind it.

Next spring I will establish a deep edge between the laurels and the lawn for easier lawn care work and for nicer definition. As it is right now, I really like the laurels. I’m glad the owners went with my suggestion. I’m always happy to help!

Prunus lusitanica in front, neighbour’s cedars in the background.

Prunus lusitanica

Conclusion

If you need a hedging screen, definitely consider Portuguese laurels. They’re nice and glossy and they tolerate shearing and summer heat. But they will cost you more than cedars.

People love trees on YouTube

By | Training, Trees, Videos | No Comments

Closest thing to viral

People love watching tree videos on YouTube! I found that out recently through my humble YouTube channel: West Coast Landscape Pro. Normally I post short videos of my work and things I see in the landscape; and I’m lucky to get one hundred views. So, imagine my surprise when one of my tree posts hit 4.6 thousand views and generated seven subscribers. That’s like Christmas for my channel.

Don’t leave stubs

The message is clear: don’t leave stubs on trees. Make nice cuts at the branch collar. In the video, the branch collar is a clearly visible raised section between the branch and trunk. Just beware that not every tree shows clear branch collars.

When you leave stubs the tree can’t cover up the wound. Eventually, the stub dies and it can act as a vector for disease to enter the tree. Once it’s inside, it’s hard to save the tree.

Also, always use a sharp saw to do your tree pruning work. In the video I’m using a brand new Silky Big Boy hand saw and it’s super sharp. It’s so sharp, it puts a smile on my face. Thank you Japan.

Impact

Not only did I get 4.6 thousand views, I also got comments. So I did what you are supposed to do: I replied to all of them. One especially was interesting, showing how even one short video can have slight impact on people.

After watching the video, one viewer promised to treat trees better when she goes camping and scours the area for firewood. She can now make decent cuts that the tree can over time cover up. I can only imagine what really goes on around camp sites.

Clear upsell

You can support my channel by viewing and subscribing; and by purchasing merchandise through my companion website: redsealvas.com. I appreciate your support. Also, remember to leave your comments so we can all learn something.

A Christmas gift for homeowners and landscapers

By | Education | No Comments

Holidays!!

With barely three weeks away from Christmas, I feel like all homeowners and landscapers should be rewarded. To thank you for reading this blog, I’ve dropped the price of my online course to just $5 until January 1, 2024.

If you don’t know the background, I will share a little bit here. In my twenty-five seasons in the landscape industry, I’ve seen my share of lawn care mistakes. I’ve made them; and I’ve tried to correct them in others. Then it hit me: why not assemble the biggest mistakes in one course and make it available to a wider audience.

Learn from other people’s mistakes

Obviously, landscape apprentices work with me all year and they learn from their mistakes. But why not learn quickly from other people’s mistakes? My Lawn Care Mastery 101 online course covers the biggest mistakes people make. And sadly, some experienced workers could benefit from a refresher.

Colliding with fixed objects kills your blade and bends the shaft.

Biggest mistakes

My course covers the biggest mistakes. Some are horrific like bending your mower shaft or scalping your lawn down to dirt. Other mistakes aren’t as critical because grass grows back in one week or so. If you cross your mow lines one week, you will get a chance to make corrections the week after. If you run through my course you won’t have to worry about mistakes. And it will only cost you $5. Check it out and get ready for next year’s lawn care season.

Happy holidays!! I appreciate every single reader of this blog. And check back soon because I will be giving away copies of my latest e-book in January 2024.

In the garden: simple summer tasks

By | gardening, landscape maintenance | No Comments

Feeling the heat?

There was a hot, dry and dusty stretch in July and August and many landscapers had difficulty finding work. Since their lawns were short and brown, they had extra time on their hands. And finding work on site shows experience.

To find work you have to look closely at your landscape or garden. The work is there. I know because I have done it. When people cry there is no work, I rush in to help them. That is what good landscape managers do. Let us take a look.

Work examples

Any ferns that have not been clipped in spring, like this native sword fern (Polystichum munitum), can be done in summer.

Dead out

Dead plants and dead branches look awful. We want everything to look great: healthy and beautiful. So do not be afraid to cut dead stuff out.

Easy hand pick: dead branch on top of this rhododendron

This dead rhododendron branch really bothered me. One cut and I could sleep well at night.

Cut back the brown Bergenia leaves
Snip out dead out of junipers.

Hydrangea

This low branch looks terrible; we need a nice upright look. When the branches touch the ground you can make them disappear.

Groundcover

I planted this groundcover to compete with weeds and it’s doing really well. Almost too well. So, clip it back inside the triangle borders.

Sweetgum

This sweetgum tree is sending out suckers from its roots right through a juniper. So, I snipped it at ground level to create the separation we need. It wouldn’t make sense to let the sweetgum get bigger inside the juniper.

It has taken two seasons for this invading cottonwood tree to grow back to annoying size. I actually cut it back myself because the foreman on site thought it was planted on purpose. It wasn’t. Cottonwoods get quite large and this site is small.

I did my best to remove all roots but there is one buried deep in the soil and I didn’t have the time to excavate it, which means I will be back in two years to humble the invader once again.

Conclusion

Take a good look around your home garden or strata landscape. Even during summer when conditions are dry, there is plenty of work. You just have to look for it. Looks for details that get missed during the busy months. Check every corner, every raised bed and every back exit area.

Chainsaw attachment 101

By | Tools | No Comments

The basics

Recently I purchased a chainsaw attachment for around $300 which fits onto my ECHO PAS engine. Since I mostly do pruning, not logging, I opted for this attachment instead of a regular dedicated chainsaw. If you take down trees and cut them into firewood then definitely get one of those.

Yesterday I had to remove six dead cedars so I used this chainsaw attachment to take down the tops in sections, leaving a three foot “joystick”. The joystick gives you nice leverage when you try to take out the root ball.

The new, sharp chain sliced through the dead stems nicely. And that is the point: chainsaws speed things up, especially when you are getting paid by project, not by the hour.

Another job I have lined up involves lifting pine branches growing from a neighbouring property off my client’s maple trees. It’s time for some separation and the chainsaw attachment is perfect for this work because it gives me some space between me and the branches. With a dedicated chainsaw I would require a ladder which would be awkward.

Before you start

Always read the manual and consider your safety before firing up the chainsaw attachment. Make sure you have bar and chain oil in the chamber and always keep your hand tool close by. You will need it if the chain slips off the bar, gets loose or the unit requires cleaning. One optional purchase is a spare chain. I fully intend to learn how to sharpen my chain to save money and learn a new skill. I am an ISA certified arborist but I have never sharpened a chain.

My fear is working out in the field and having the chain break on me. It is nice to have a spare chain.

Put in bar and chain oil and keep the hand tool close by!

Safety is important in the field. Every. Day. So, make sure you have a helmet and eye and ear protection. I have a helmet with earmuffs and a shield. Having the long bar between you and the chainsaw makes this set-up safer than with a regular chainsaw which is closer to your body.

A note on pruning quality

Here is a pro tip: chainsaw attachments are great for taking down trees in sections but not for making awesome, precision cuts close to the main stem. It is very easy to slip and cut into the bark when making a finishing cut at the branch collar. I prefer to make these cuts with a handsaw.

One of my clients has a dead tree in front of his house and he needs to remove it. So, I will take it down slowly in firewood chunks. Note how there are not any precision pruning cuts to make here.

Rating

If you own an Echo PAS engine then this chainsaw attachment is a great buy. Visit Foreshore Equipment in Burnaby and tell them Red Seal Vas sent you.