This past weekend I opened up the New York Times and saw a huge spread about the best books from 2018. But there was nothing for green professionals so let’s correct that omission here. I present to you six books well-worth reading with brief notes. I would say they’re all “must read” books. Who knows, they might inspire you to give someone a great gift this Christmas.
1. Dirt to Soil by Gabe Brown
This is a very important book because Gabe Brown took his conventionally farmed land and regenerated its soils. He did it without tilling, with cover crops and eventually without all fertilizer and chemical use on his North Dakota ranch. He also diversified his operation.
So, YES, you can have great, healthy soil and make great money as a farmer in North America WITHOUT chemical inputs. Read the details in the book. It’s fascinating. The key is encouraging the life in your soil. You can search “regenerative agriculture” for more.
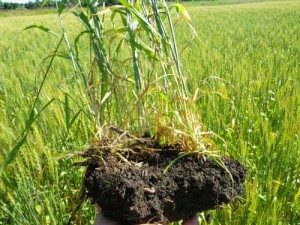
Photo courtesy of http://brownsranch.us/
2. A soil owner’s manual by Jon Stika
Stika is a soil scientist but it took him years to realize that his training wasn’t the best. Eventually he comes to understand that soil biology is crucial for healthy soils. It’s not just the soil components that matter, the life in the soil is critical.
3. The One-Straw revolution by Masanobu Fukuoka
Fukuoka was a “do-nothing” farming revolutionary in Japan. He showed that you CAN have great rice yields without tilling the soil and using costly fertilizers and chemicals. Do-nothing is a bit misleading because farming is a lot of work but the soil wasn’t tilled and cover crops were used. The details are amazing.
It’s possible that Fukuoka’s work inspired Gabe Brown above.
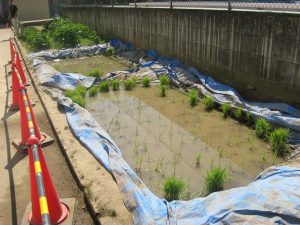
A practice rice field at a Niigata-City, Japan public school.
4. Braiding sweet grass: Indigenous wisdom, scientific knowledge and the teachings of plants by Robin Wall Kimmerer
This is THE book on native American plant use. I often hear about indigenous wisdom and this book spells it out in detail. Kimmerer did a fantastic job with this book; she opened my eyes. You will learn lots about plants. I also purchased her new book on Mosses.
5. The plant messiah by Carlos Magdalena
Two key points: One, Magdalena goes from Spain to study at the famous Royal Botanic Gardens, Kew (I’m jealous) and becomes a plant researcher there. Then he travels the world studying plants and clearly his native Spanish helped. His love of plants is infectious.
Two, at the beginning of the book he shows the reader why plants are important. Our very survival depends on plants. We derive food and medicines from plants plus much more. After reading this book you will appreciate plants much more.
6. Whitewash: the story of a weed killer, cancer and the corruption of science by Carey Gillam
My geography professor at the University of Saskatchewan openly discouraged me from using sources written by journalists. But in the case of Monsanto’s (now Bayer) glyphosate and other chemicals it can’t be done because many scientists have been bought by industry. I know that this debate is polarizing and the book isn’t full of good news. It’s the hardest book to read on this list.
Before you dismiss this book, recall that Health Canada is re-evaluating its recommendations; it now concedes that many of the studies the government agency relied on were sponsored by the chemical industry.
It’s much worse in the United States and the details will make your head spin. I think this book is very important.
Summary
Here are the key ideas.
Yes, you can make good money as a farmer without fertilizers and chemicals; stop tilling and use cover crops; and diversify your operation.
The life in your soil is the key to healthy soil.
We depend on plants for our survival. They’re also amazing.
Indigenous plant knowledge is fantastic and now we have a great book showing us the details.
Scientists can be bought so be careful when you read scientific studies. Carefully check who sponsored them.