All Posts By

Vas Sladek

How to achieve privacy with yew hedging

By | landscape maintenance, Strata Maintenance | No Comments

Privacy is a huge issue at some multi-family strata complexes. One way of achieving privacy is through hedging. This then was my task late in March. I’m not sure why the previous landscape maintenance company didn’t complete this project. It was clearly near the top of the strata list. It took me one day to complete it. I hope the residents appreciate their new privacy.

Step 1 Supplies

The first step obviously involved shopping for supplies. I picked up pre-ordered yews (Taxus x media ‘Hicksii’) at Specimen Trees in Pitt Meadows, a wholesale tree and shrub supplier. I love this place because it’s full of labelled trees and one of friends works there. Since it rained heavily, off-roading in my company truck was a huge bonus.

I also picked up a yard of soil amender. KEY: always top-dress your new installs for instant great look and to give the new plants a nice ‘kick’ with fresh soil.


IMG_2541

Pre-ordered yews at a wholesale nursery


Step 2 Bed preparation

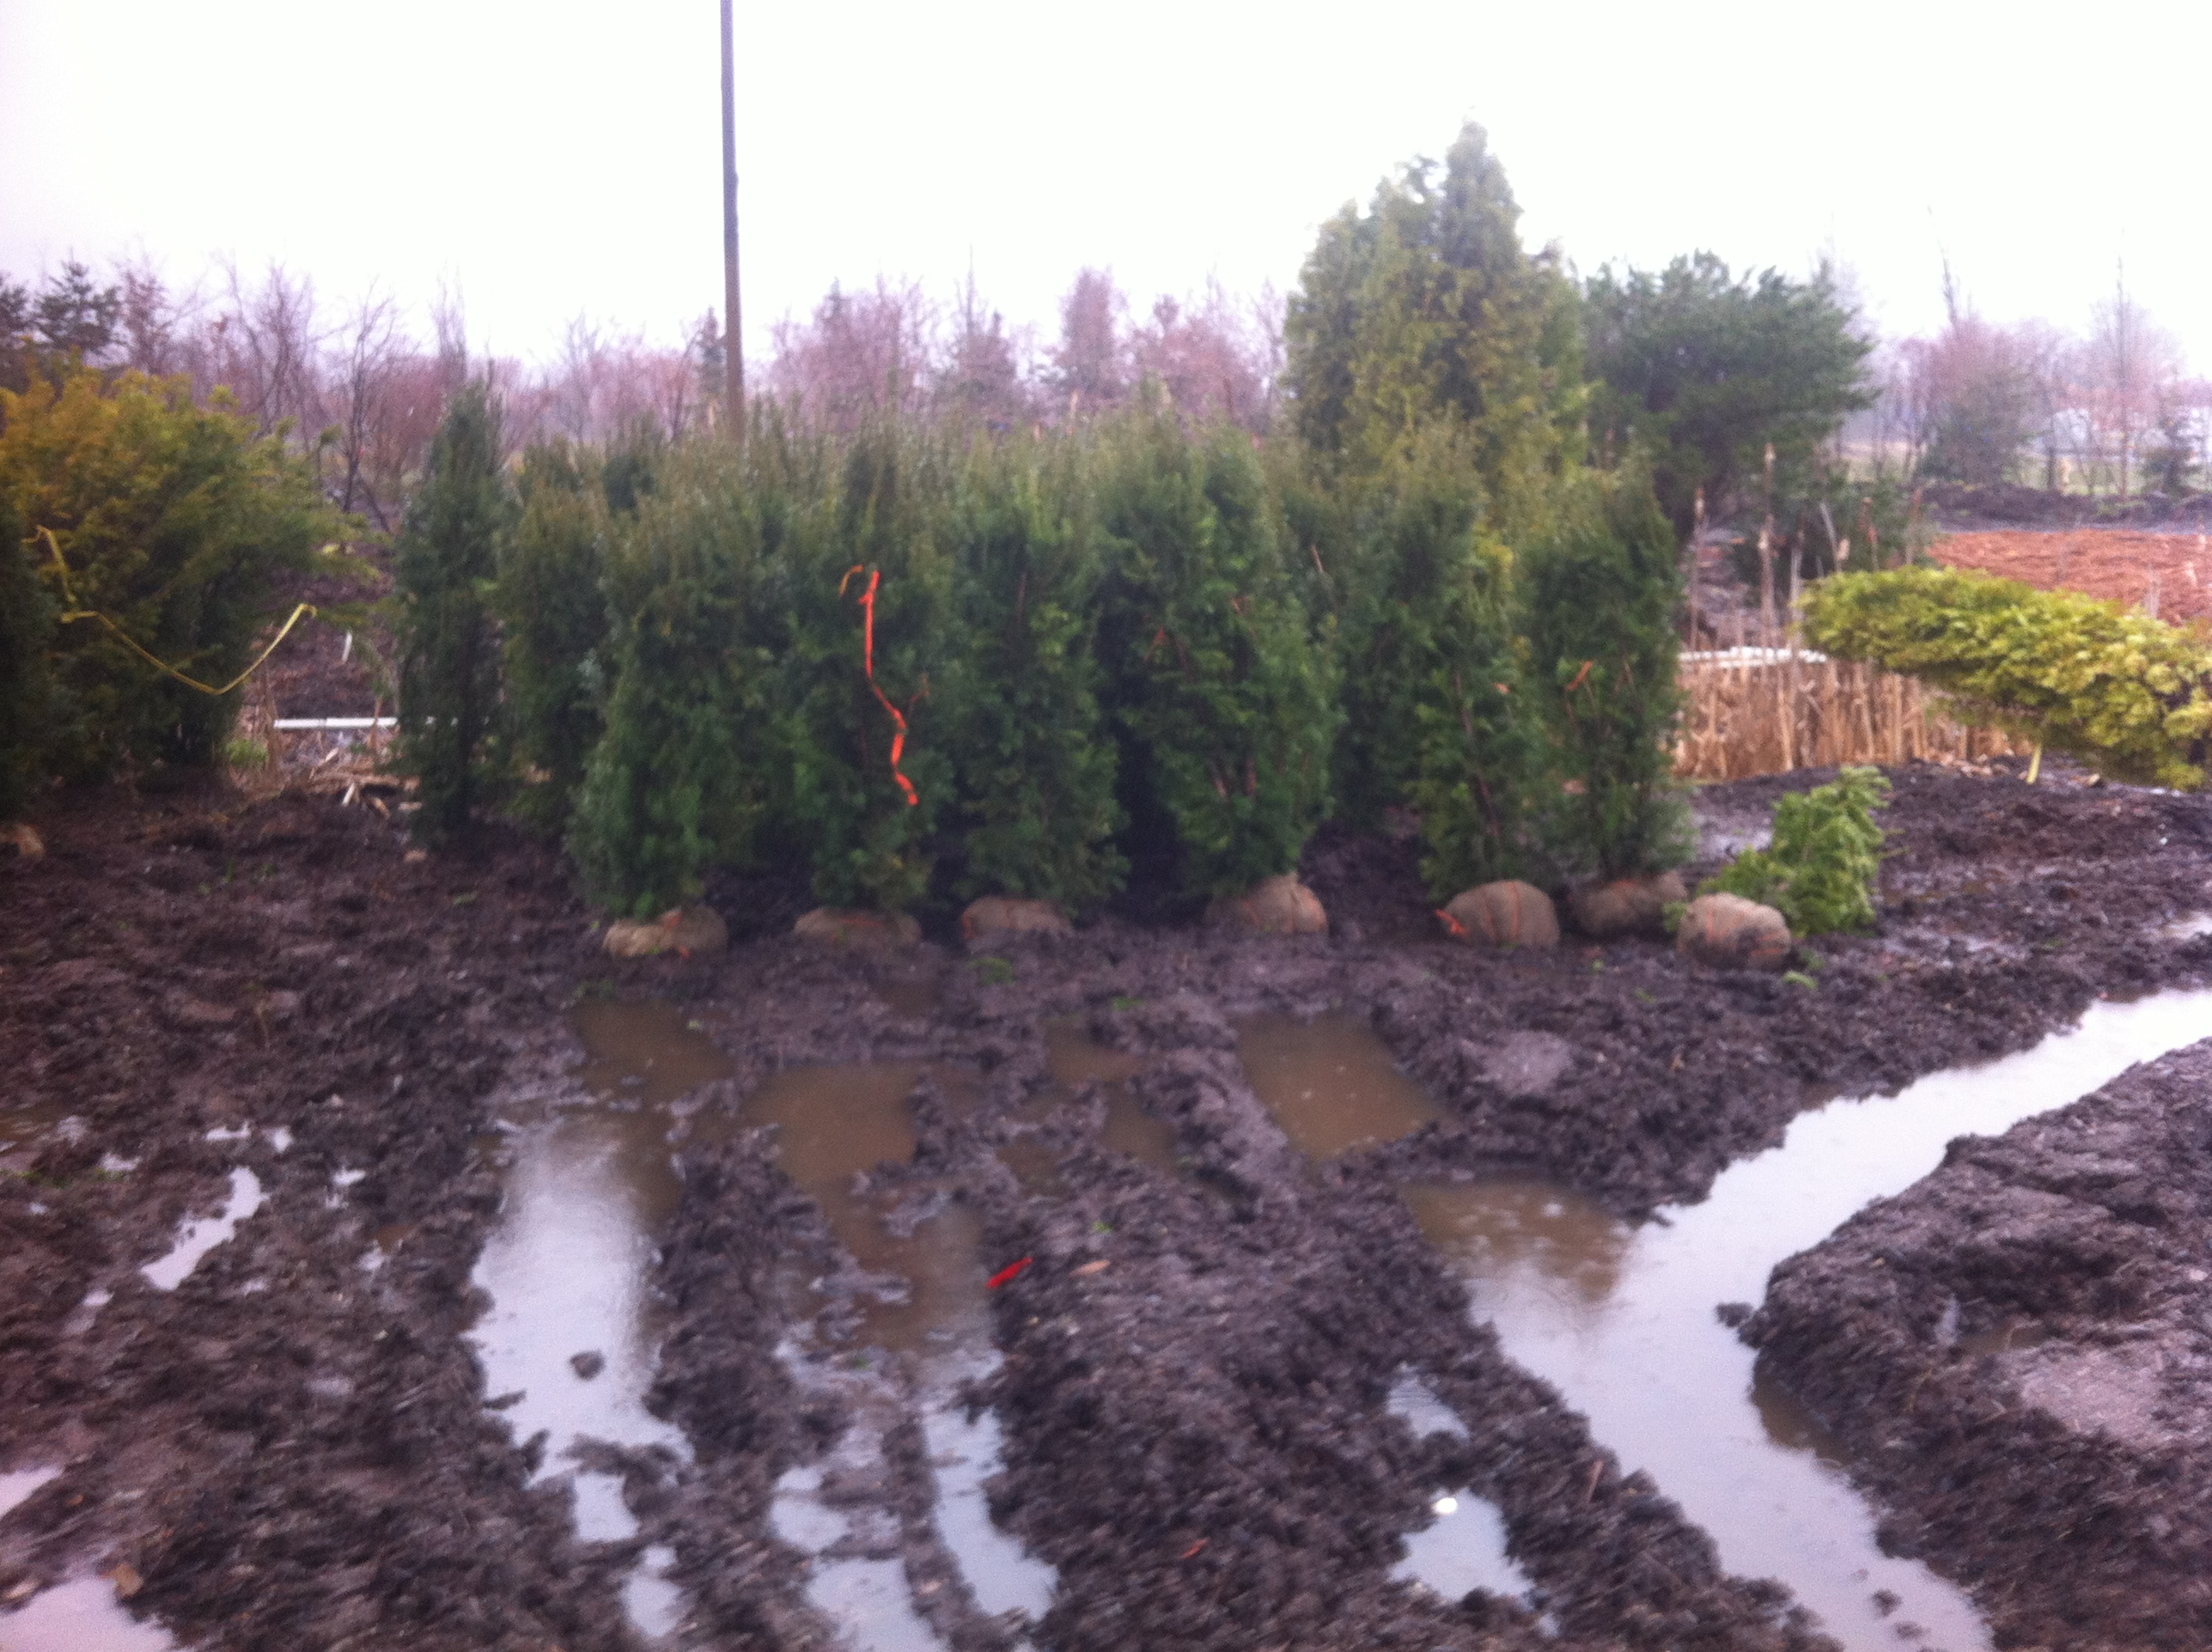
This step was fairly easy because there used to be a row of cedars providing privacy; until they died. This meant that the new grass wasn’t as established and the soil underneath was good. KEY: Considering the recent summer heat wave and winter snow load damage done to our landscape cedars (Thuja occidentalis ‘Smaragd’), companies are switching to sturdier yews (Taxus x media ‘Hicksii’).

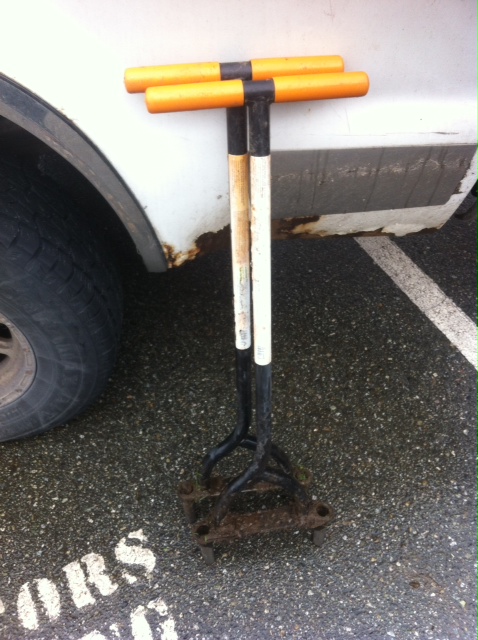
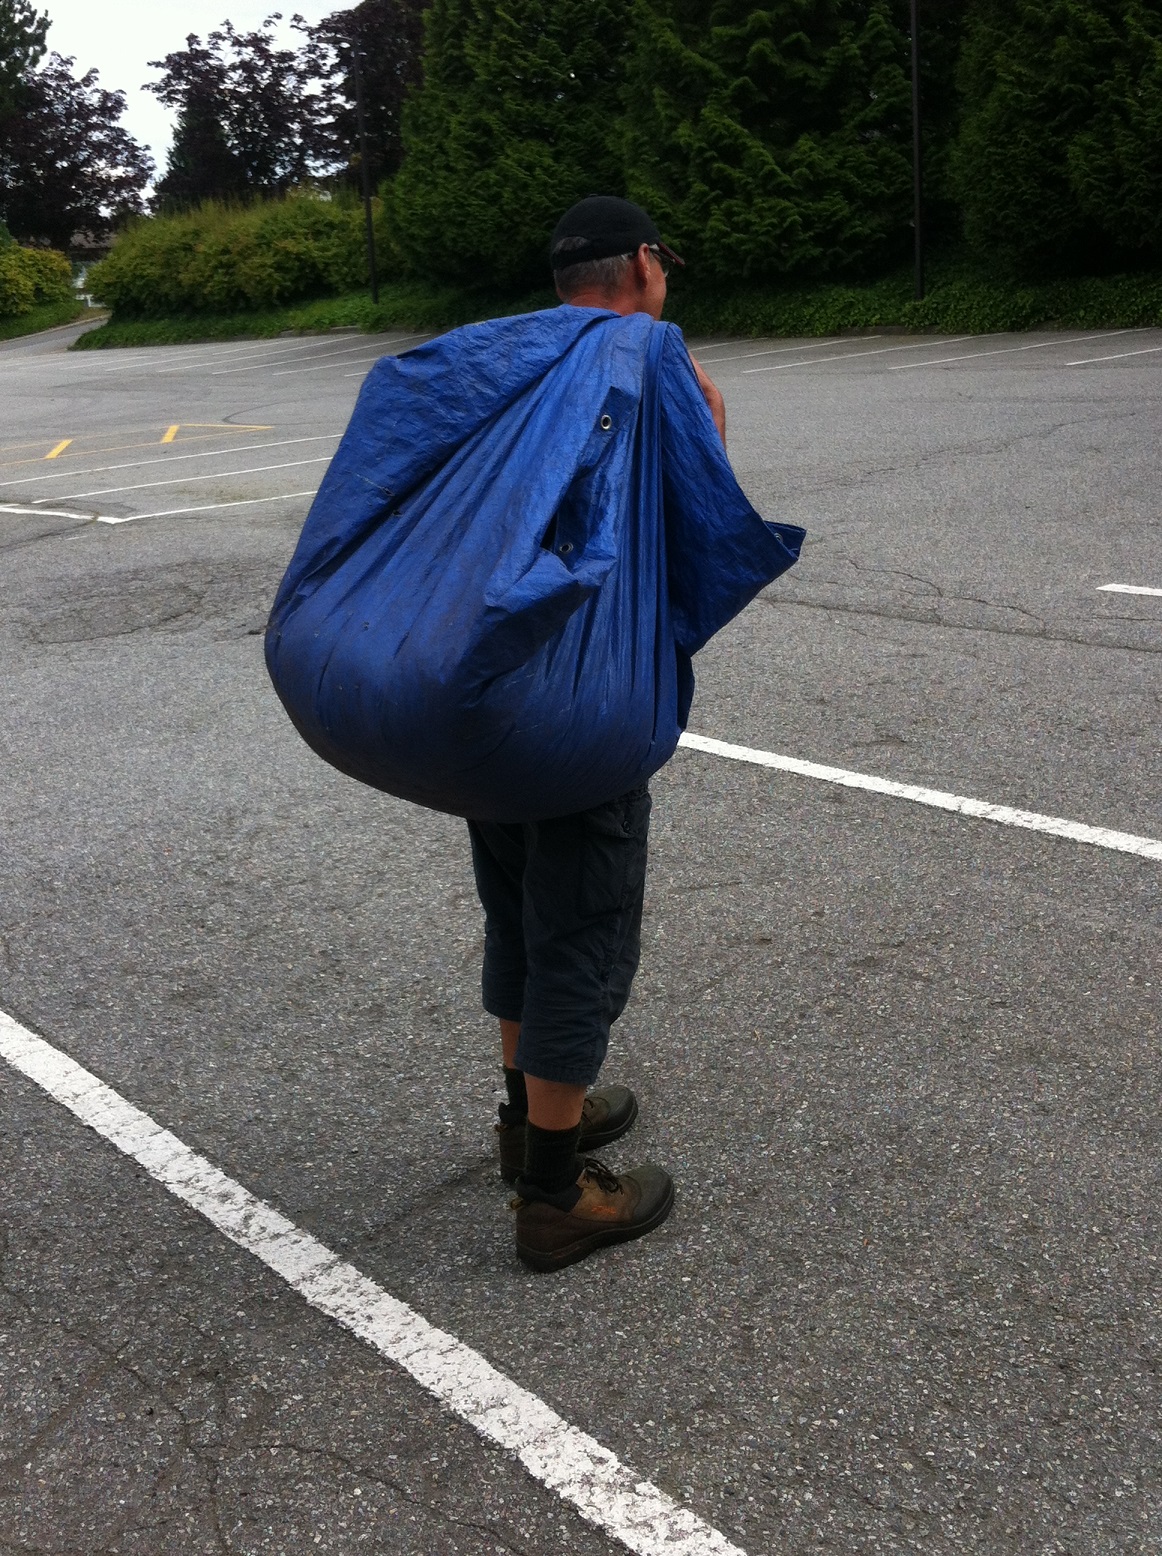
First, establish a deep edge line with a ninety degree edge. Then, dig up the turf and remove it. Warning: not all facilities consider grass chunks as green waste so ask first. It’s still fairly cheap to dump it but make sure it’s on the correct pile, especially if there are rocks attached.

Complete your bed preparation by levelling off the soil.


IMG_2543

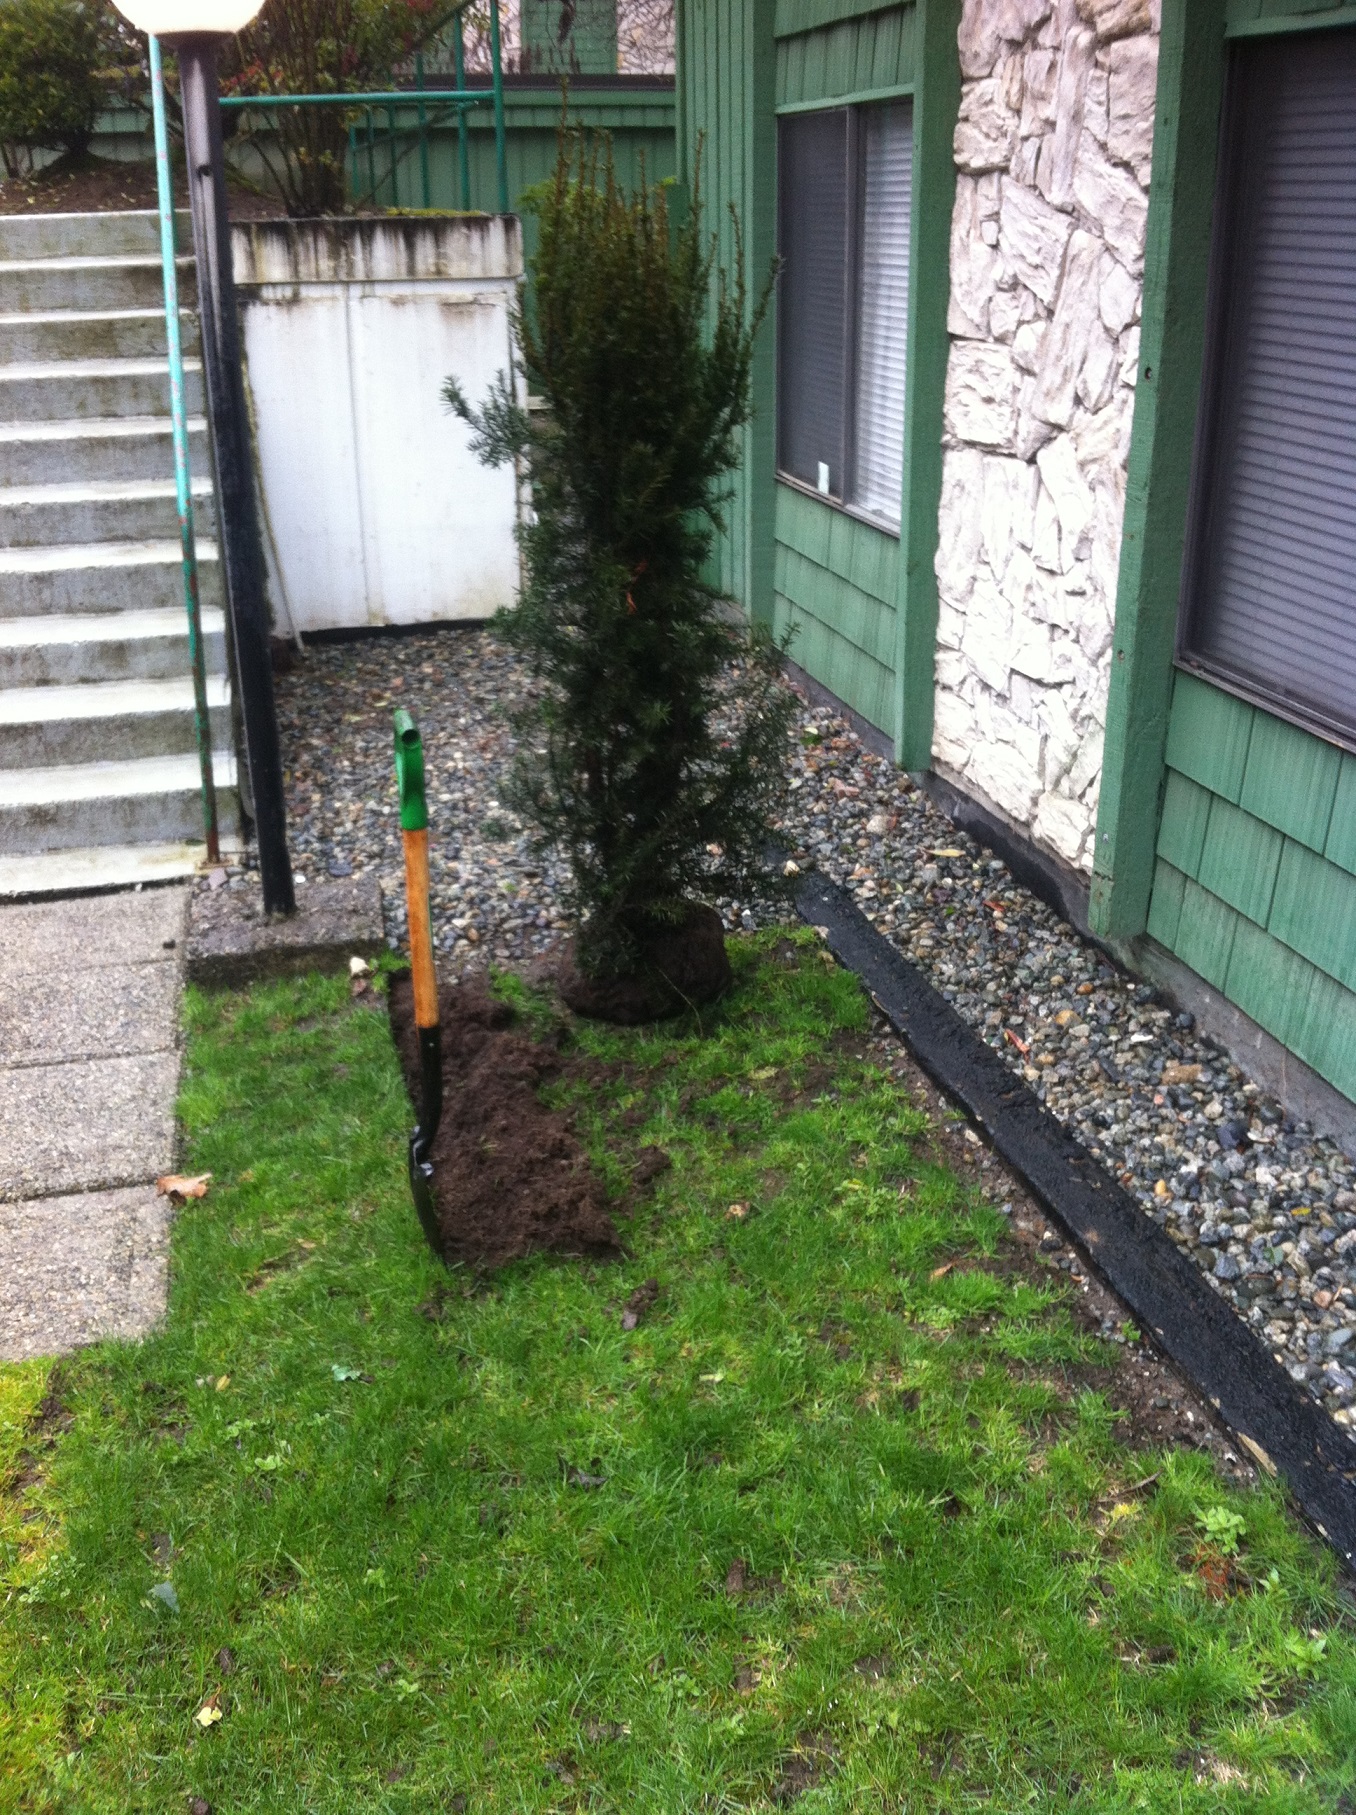
Establish deep edge.


IMG_2545

Remove all grass chunks.


IMG_2548

There used to be a cedar hedge here so the soil is fairly good.


Step 3 Yew install

I set out all twenty yews in the bed to make sure the spacing was correct. Then I installed the yews one by one. Each yew was treated the same exact way. Each plant was set in the hole and positioned so its best side faced the walkway. Who wants to look at stems? Make sure the plant is nice and green and full on the high-profile side.

Next, cut the string and remove it. Also remove the top third of the burlap. Then plant the yew slightly higher in the hole because the root flare is slightly hidden in the clay root ball; and remember, we will be top dressing everything at the end.

KEY: Backfill your planting holes with the original soil. It might be tempting to use the nice new amender from the truck. Don’t do it. Water will find it easier to enter the planting hole, it will waterlog and your yews will fall down like joysticks. Always use the original soil for back filing.


IMG_2549

Set it out and check for correct spacing


Step 4 Double-check and top-dress

Almost done! Double-check every single yew for positioning and then top-dress with soil amender. KEY: Make sure the plant root flares aren’t covered in inches of soil. Install the soil so it doesn’t cover the root flare. Then, touch up your deep edge, collect any debris or garbage and do a courtesy blow.
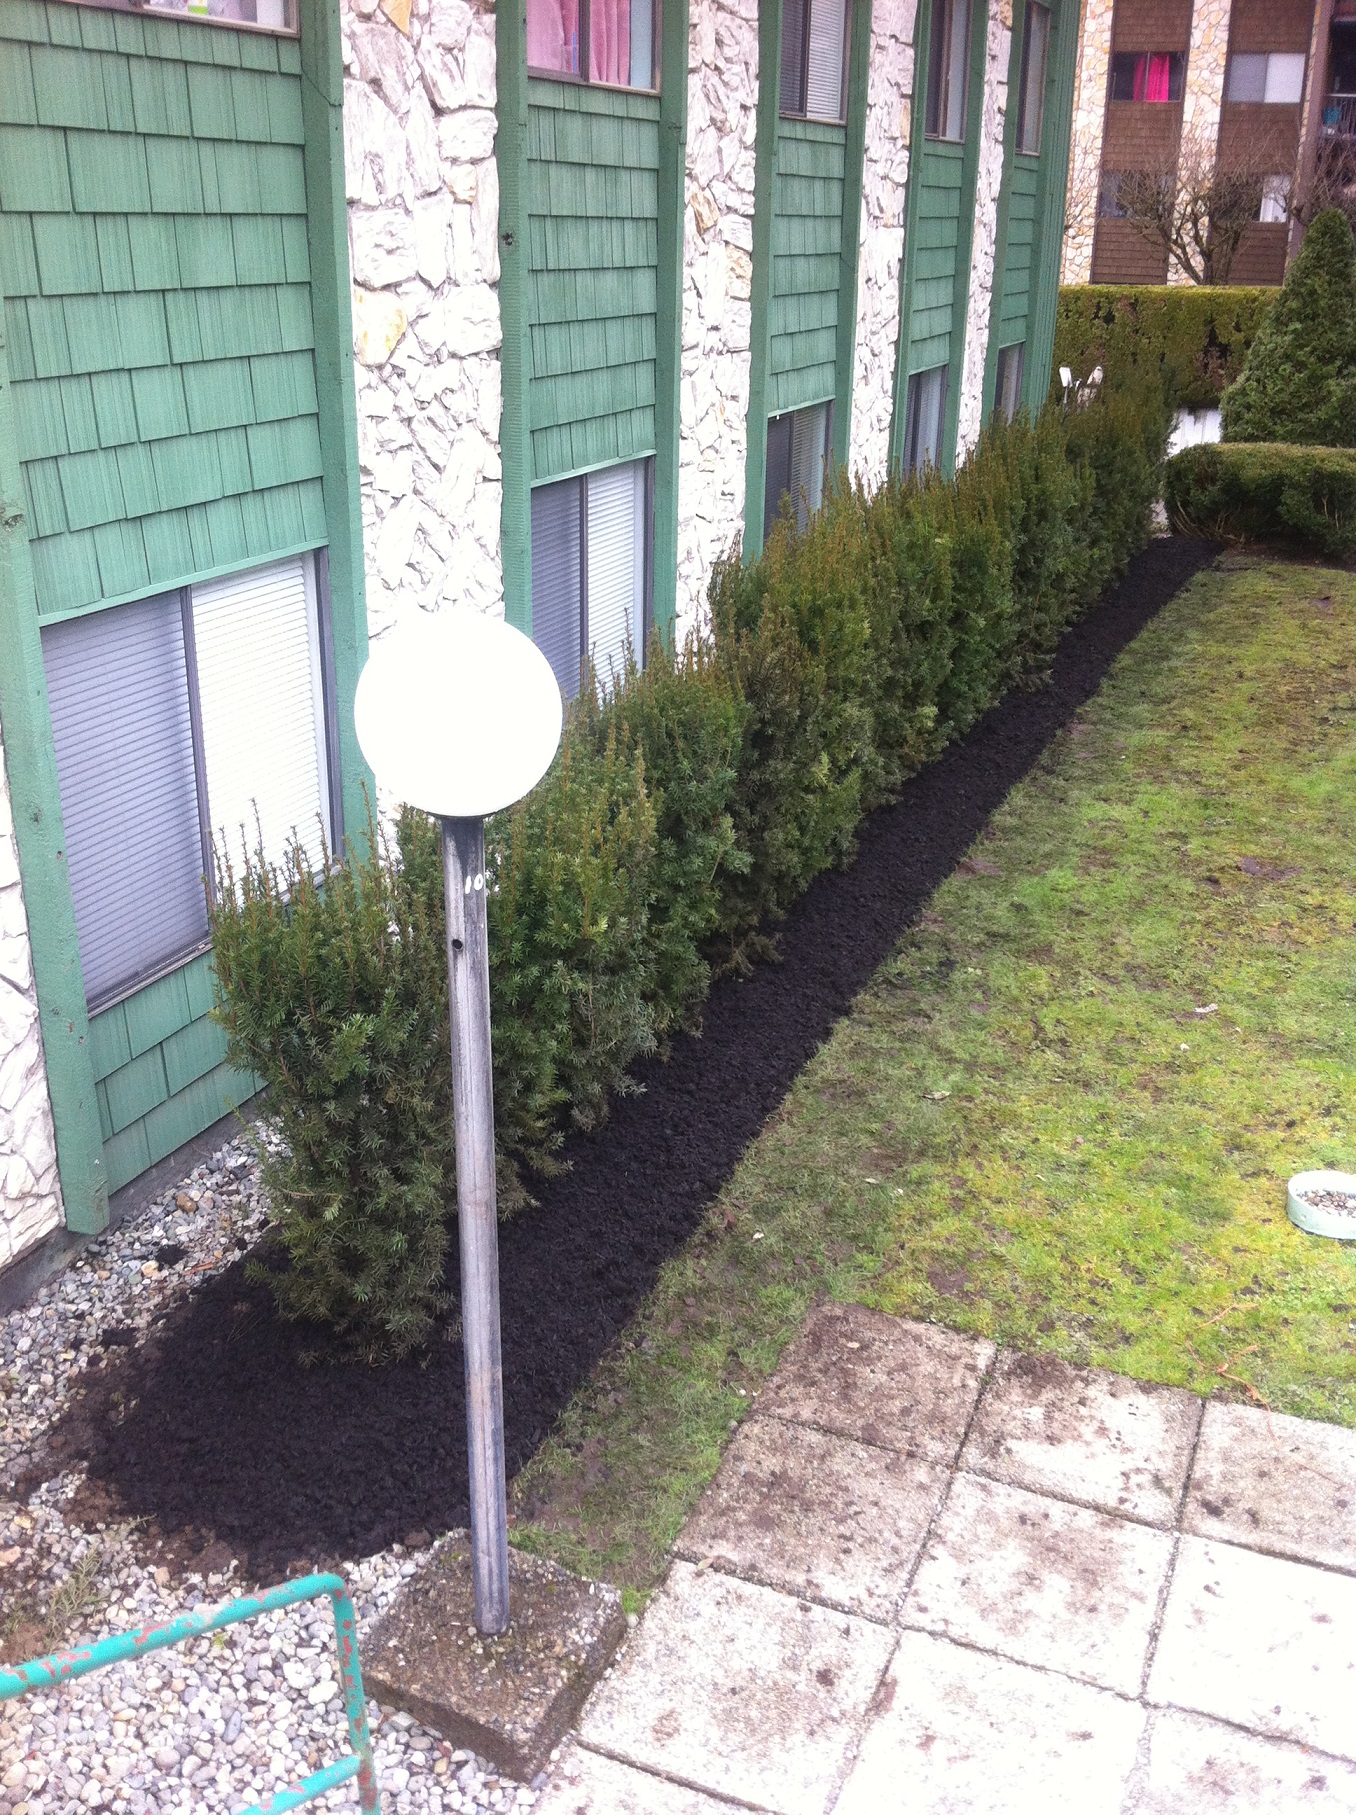
 

IMG_2553

All done!


Conclusion

Projects like this can be very satisfying. The residents get some privacy back and your helpers get to break their landscape maintenance monotony. The yews should perform better than the original cedars.


Lawn aeration: start with why

By | landscape maintenance, Landscaping Equipment, Lawn Care | No Comments

My introduction to lawn aeration wasn’t the best. My employer at the time, a prominent Lower Mainland landscape maintenance company, forced me to aerate roughly one half of their many strata properties. Incredibly, nobody even told me why we were putting holes into lawns. And the days were so busy I forgot to ask. I was that new to landscaping. It usually took two crews three weeks to aerate all of the properties.

Start with why

Now, many years later, I get to train new workers in the field. Before they even got to touch the lawn aerators, I made sure they knew why they were doing it. Armed with this knowledge, their physical punishment is easier to take. It also limits corner cutting. Once the dudes get tired, the number of holes and their depth decline. Don’t let up. Push on.

The one best thing

If you don’t do anything to your lawn all year, definitely aerate it in spring. Aeration allows air and water to reach the grass root zone which improves growth. Leave the cores on the lawn. They will disappear in no time.

Home owners without regular landscape service will probably get a knock on the door from a young guy with a pamphlet and machine in the driveway. Most strata landscape maintenance contracts include this service automatically with lime application.


photo 5 (6)

Aerated lawn. leave cores in place


Hands vs machine

If you have a smaller lawn you can easily hand-punch it with a hand core aerator. I love the Fiskars model because it’s larger and doesn’t get blocked with debris like smaller models. I use it on smaller client lawns where renting a machine wouldn’t make sense.


photo 4 (6)

Fiskars core aerator for small lawns and inaccessible corners


If you have larger lawns, you will need a machine unless you have a teenager at home with energy to burn. It’s fairly simple to operate. Just remember to slow down as you approach pavement and fencing. The big hog needs a second to slow down.

The machine comes with weights so use them to get nice deep cores. Skip the extra weights if your lawn is soft. Remove them when loading and unloading the machine!


photo 5 (7)


Conclusion

Let’s review. Lawn aeration allows water and air to reach the grass root zone and should result in a healthier lawn. If you don’t do anything to your lawn all year, at least aerate it. It’s worth the effort. Your lawn will thank you for it.


Five hernias, really!

By | health and safety, landscape maintenance | No Comments

Five hernias! That was the news an experienced landscaper delivered to his boss. That’s not good. Experienced, senior workers are expected to do a lot in the field. When they go down, production can suffer. Sometimes hernias require surgeries and rehab. They definitely lead to light duties for affected workers. For months.

I’m not a medical doctor, nor is this blog about diseases and ailments. But we must note that hernias happen when abdominal muscles fall out of place. There are many types of hernias. Not one of them is fun.

Key issue: you can get a hernia by lifting heavy objects improperly. That definitely applies to landscaping.

The worker above is incredibly stubborn and set in his ways. By examining his mistakes we can educate future landscape workers and thus avoid future medical issues.


  1. Don’t make tarp “bombs”! If your company uses tarps to collect green debris do a simple pull test once in a while. Can you still pull your tarp along? If it’s becoming difficult, tie it up using slipknots and get a new tarp. This is especially important when you work in hard to access corners of your landscape.
  2. Don’t be a hero! If you or your team mates made a tarp “bomb”, get help lifting it. You won’t look soft. You definitely won’t be a hero in a doctor’s office. Get help with heavy tarps. Big bombs can happen when you are short on tarps, for example. Whatever. Just try not to make them.
  3. Don’t be a tarp slave! Move your work truck closer to your tarps or use a good commercial wheelbarrow. Do not be a tarp slave. It destroys your back and can give you a hernia. It’s also inefficient. Consider my favourite story: working on a boulevard with my crew, weeding and cultivating, I looked up and saw four workers walking away. Each worker had a tarp on his back and I didn’t see them for another 15 minutes or more. That was extremely upsetting since we had a wheelbarrow 15 meters up the boulevard from me. One worker could have done the trip to the truck, maybe two. Not four.


IMG_5635edit

Vas as tarp slave, only do this for short distances


IMG_9524

Note slipknots for easy release; if it’s too heavy, get help

When landscapers decorate their house walls

By | Species, Tips | No Comments

You can easily decorate your house walls on a budget. I like to decorate my apartment walls with pressed plants put into cheap wooden frames. I started this when I collected samples of my favorite tree, Albizia julibrissin (silk tree). I wanted to keep it but I didn’t have the money for nice picture frames. It was the same with pressed tree leaves I collected in Western Japan.

Pressing plants

It is unlikely that you have proper plant presses at home. Not to worry. You can use older, heavier books. Put your collected leaf and flower parts into the pages of your book. Do it gently. Also make sure they aren’t wet. Do your collecting on sunny days. Once it’s all in, stack other books on top and leave it for a few days.

While you wait, visit your nearest Dollarama store and pick up cheap wooden frames. Mine cost $2-3 each.

After a few days, check on your pressed samples. Install them in your wooden frames. I like to label mine but it’s optional. I also find it useful to tape the samples into place so they don’t move when I put the glass on top. That’s it. You’re done. You can decorate your study, your hallway or your garage. All on a budget.

Past collections

This project reminds me of my undergraduate years at the University of Saskatchewan. My plant systematics professor issued proper plant presses to all of his students. He gave us the task of collecting plants and bringing them to class in September. Great! Now what? I had visions of Charles Darwin hopping on a ship expedition and disappearing for years. My story is much, much humbler.

Since I also needed cash, I took a low-paying motel job in a southern Saskatchewan town called Eastend. Town is a flattering description. I remember the people as friendly if slightly freaked out by my East European accent. Years later, someone would discover dinosaur bones in the area and tourism would improve. I have no desire to ever return there.

The collecting didn’t go well at first. The landscape was dry, sporting only grasses and cactuses. Pressing succulent cactuses is a bad idea. I was so inexperienced, I actually tried it.

Then I got a lucky break when I met a local teacher. He was very happy to take me to a nearby coulee. The place was predictably nice and green and my presses filled up fast. Thanks to this kind teacher, several of my samples were accepted into the university’s herbarium collection. They bear my name for future plant students to see.

Cruising

While my samples were drying I hung out with my employer’s kids. That’s when I experienced small town cruising where young people drive up and down the main street in town. This is what happens when you travel properly. Not like a tourist but like an embedded person. It was a bizarre way to spend an evening. But it was authentic. Sadly that was my first and last cruising experience.

Results


IMG_1365bIMG_1364b


IMG_1366bIMG_1369b


IMG_1368bIMG_1367b


IMG_1363bIMG_1362b


untitled

How to have fun with winter plant ID

By | Seasonal, Species | No Comments

Winter can be a great time for practicing your plant identification skills. The work days aren’t as hectic and the winter season offers a different look. Walking through your landscapes, you might notice a plant and realize that its name escapes you. I know all about it. It happens to me lots. At the worst moment, too. Like when the boss arrives on site.

Let’s look at a few examples.


Pinus contorta subsp contorta (Shore pine or Lodgepole pine)


IMG_1165b

This is a commonly used pine in our West Coast landscapes. Plant ID hints: a) The needles come in pairs and b) the cones have sharp prickles on their scales.


Hibiscus syriacus (Rose of Sharon)

You must be familiar with the Rose of Sharon flowers. But what about winter? What we are seeing is dehiscent seed pods. This means that the seed pods open along built-in lines to release their contents. In this case, the seed pod opens into five distinct parts and the seeds spill out.

The seeds are actually very cute. They are almost heart-shaped with hairs. I saved some and if I find time, I will try to grow them.


IMG_1180


Choisya arizonica (Aztec pearl)


IMG_1285

You will be familiar with Choisya ternata which has bigger leaves. This shrub has finer greenery and its white flowers are equally as nice. This is the one plant I had trouble memorizing until I saw it at last year’s CanWest Hort Show in Abbotsford. Now I try to associate it with Arizona.


Ophiopogon planiscapus (Black Mondo grass)

Full marks if you remembered the full species name! I love this plant because it’s so dark. New foliage is dark green. It produces bell-like summer flowers which turn into black berries. The Black Mondo grass in this photo is a great border plant close to a clubhouse.


IMG_1282


Sambucus racemosa (Red elderberry)

I remember this tree-like shrub well because we have hack it up every winter so it doesn’t go too wild on our strata properties. It looks bad for a while but the shrubs look fine in spring. It can grow 2-6 meters tall. Because it has soft stems with a pithy center, you can cut through most canes with your Felcos. (For my blog on Felco snips click here.)

Flowers appear at the ends of branches and are visited by butterflies and hummingbirds.


IMG_1147IMG_4525b

Now check out the sister plant Sambucus nigra (Black lace). This species is planted in people’s yards, not in wild zones, because it’s stunning. The first time I saw it in White Rock I was hooked. It took me a while to realize that this plant was related to its sisters in the riverbed zone. The sisters I rudely demolished so they wouldn’t grow out of hand.


IMG_3905b


Winter can be a great time for plant ID skill work. Give it a try. You never know what you will discover.

Kuno garden

By | gardening | No Comments

When I arrived at Garry Point Park in Richmond last year, I was there for a 10km MEC race. I had no idea Garry Point Park was a large 75 acre waterfront park. Since I got there early, I went for a walk to check out the park and to take a few pictures.


IMG_9016

Early morning rainbow.


IMG_9788


IMG_9789


IMG_9787 (1)


Kuno garden

Imagine my surprise when, during my pressing search for a public washroom, I discovered a Japanese garden! No way. Ignoring my bladder, I shot a number of pictures. Kuno garden is tucked nicely into a corner. It commemorates the centennial year of the arrival of the first Japanese immigrant to Canada. Many people don’t realize that pre-WWII Japan was fairly poor. Fishermen emigrating to Canada had it easy compared to the “karayukisan” girls. They were the spare mouths to feed in small towns so they were sent to points in Asia to earn money with their bodies.


IMG_9831IMG_9053

The garden isn’t huge. It sports many pine trees pruned Japanese style; and the usual elements like bridges and lanterns. The plant material is local. Nothing exotic. I thought the garden was in decent shape.


IMG_9802 (1)

Large rock, a lantern and tightly pruned pines.


IMG_9065

More stones and a bridge.


IMG_9068

Nothing shocking here: Japanese maples, Azaleas, rhododendrons, mugo pines.


IMG_9805


Garry oak


IMG_9841 (1)


Surprise discovery number two. To reach the public washroom I had to pass under Garry oaks from which the park obviously derives its name. Quercus garryana has round spreading crowns and thick, grooved, scaly greyish-black bark. It grows up to 20m tall.

Acorns are small with shallow scaly cups. Leave are deeply lobed and bright green above; paler with red to yellow hairs underneath.

As for my race, it went OK. I will always remember it for the farmer who closed the trail in front of us so she could shepherd her shaggy cows across. This pregnant pause confused my Suunto heart rate monitor. The cows were in no rush.

If you drive to historic Steveston, it might be worth your while to drive a bit more and check out this park. It was a pleasant discovery for me. Who knows, it might be the same for you.


Source: BC government.


Winter tree plant ID quiz: advanced edition

By | Arborist Insights, Plant Species Information | No Comments

As I write this blog post, the Lower Mainland is experiencing the harshest winter in thirty years! Last week some of our days were shorter so I used the time to study and to create blog posts. I think this might be a good time to look back at the 2016 season and review some tree names.

This tree ID quiz features lots of seeds and plant parts. It will challenge new landscapers. Do your best. Veterans should be able to ace it. Find the botanical names. Common names are fine but get used to learning botanical names.

Ten questions. Why not challenge your co-workers and friends. Check your answers below. 10 botanical names= 10 points; take 1/2 points if you only know the common name.

Plant identification skills are critical to our success as landscape professionals. Getting to know plants can be hard work but it’s also fun to know what populates your landscapes. Once you know what you have you can maintain it properly. You can also educate your clients and your new co-workers.


1.

IMG_0744


2.

IMG_0748


3.

IMG_0772


4.

IMG_0771


5.

IMG_0775


6.

IMG_9125

7.

IMG_9764


8.

IMG_0126


9.

IMG_0773

10.

IMG_0751


Scores

10/10: ask for a raise! You might be ISA or landscape certified

7+: veteran landscaper

5+: not bad!

1-5: review the whole list and ace my next quiz


Answers:

  1. Liriodendron tulipifera (tulip tree flower parts; the tree flowers AND leafs out at the same time which is why people often miss the flowers)
  2. Liquidambar styraciflua (sweetgum-common landscape tree and beautiful alternative to maples)
  3. Styrax japonica (common landscape tree with beautiful snowbell flowers)
  4. Alnus rubra (native alder)
  5. Robinia pseudoacacia (long seed pods are hard to miss in the fall)
  6. Quercus robur (English oak, nice change from pin oaks Quercus palustris)
  7. Carpinus betulus (prominent seed catkins, another great street tree)
  8. Rhus typhina (huge staghorn sumac fruit cluster)
  9. Metasequoia glyptostroboides (one of the few evergreens that loses its needles; sports gorgeous tree bark)
  10. Fagus sylvatica (four seeds fit nicely into each pod, once they dried out at home they popped their seeds)


The hardest day of 2016

By | Landscaping, Lawn Care | No Comments

The plan for our sunny summer day was fairly simple. Remove a circle of astro turf and turn the area into a grass field. Fine. Working with your boss is what I always recommend to our workers. I had no idea this day would almost kill me. A day before my vacation flight to Japan no less. It was easily my hardest day of 2016.

Step 1: remove astro turf

The turf peeled off quite nicely and the rolls we created were nice and neat; if slightly ambitious. For as we soon found out, the turf was brutally heavy sitting as it was on sand. This would be the hardest part of the job. The chunks were heavy and had to be moved by wheelbarrow to a nearby truck.

As the removal progressed, the rolls got smaller and uglier. By the end of it, we couldn’t even call them rolls. Both wheelbarrows were on their last legs. We loaded and dumped three truck loads for a total of 8,500kg. Where were the young guys which my boss insists the landscape industry is built for?


IMG_0129

All rolled up, and the brutality begins. There was no easy access for our truck.


Sep 1 completed, and my body was completely exhausted


Step 2: blow in some soil

This was a joke compared to step one. A company showed up and blew in the required amount of soil on top of the sand base. This used to be a putting green when the two residential towers were built. Massively underused, the strata finally decided to make changes. Grass field it was.


IMG_9126.JPG


Step 3: hydroseeding

So you want grass on what used to be a putting green. Now what? You have a few options to consider.

Hand seeding may result in a patchy lawn and it may take longer to establish.

Sod is expensive and the installation is time consuming. Also consider the headache of sodding a circular putting green. Sodded lawns also have lines and there could be transplant issues because the sod is laid on soil the grass wasn’t grown in.

Hydroseeding is a fast and easy alternative. It uses a slurry of seed and mulch and produces beautiful lawns in just weeks, at a fraction of the cost! This was my first direct experience with hydroseeding and looking at the pictures, I’m convinced it works well.


IMG_9668

IMG_9669

IMG_9670

IMG_9671


I won’t soon forget this brutal day. I thoroughly deserved my long visits to Japanese hot spring baths.


Grinding through winter landscapes

By | Landscaping, Seasonal, Strata Maintenance | No Comments

Last year came to a close with unusually cold temperatures and lots of snow in the Lower Mainland. As I write this blog post in early February, 2017, the cold weather continues. While working in cold weather with frosty landscapes can get very old and annoying, there is work. If you look closely. Some of it is obvious; some of it requires imagination. Consider yourself lucky if your employer let’s you work. In winter seasons past I used to get my work hours cut just because it happened to be foggy outside. Foggy!


The obvious

Snow clearing from walks and roads. The obvious and back-breaking task. Dress well and have some spare snow shovels ready. Just in case. Hydrate properly. Clear off high-profile walkways and car ramps.

IMG_0326IMG_0324

Brushing snow of plants. Gently take the load off. This will prevent damage. The Nandina domestica below must feel better.

IMG_0347IMG_0346


Surveying for damage. There will be branches to prune off and shrubs to stake or tie back.

Tree pruning. Assuming it’s not extremely cold outside, tree pruning is a perfect winter activity. The crown structure is clearly visible. Identify broken, crossing and rubbing branches; and anything dead or diseased. Identify every single tree species on your site using scientific names.

Cedars. Unless it’s extremely cold outside and positioning your ladder looks sketchy, cedar hedges can be sheared. Don’t forget you can warm up your hands on the gear case of your power shears. Just make sure the shear blades are stopped! No, it’s not very safe but what do you do with frost bitten hands?

Perennial and grass cutback. Some perennials get missed in fall or they are left to provide some winter interest. For example, Sedums and ornamental grasses. If you see snow damage it’s OK to cut them back.


The less obvious

River rock install. This was unexpected but it made perfect sense. Imagine a deserted landscape supply store on a cold morning. Loading my truck was quick and easy. No waiting. The client needed to cover up plastic that was protruding from her patio rocks. So we buried it with 2-6″ rover rock. As she came out to inspect the work and point out the protruding plastic, we enjoyed the heat escaping from her unit!

Drains. It’s critical to expose all snow covered drains. Before the surrounding areas flood. This step often gets skipped because it’s assumed municipalities are responsible for it. They are but they’re also busy. Be glad you have some work to do.

Exploring new sites. As new sites come on, this is a good time to familiarize yourself with your new work areas. Walk every inch, make notes, written and mental. Take pictures. Survey. You’ll be glad you did when the weather improves. This includes site clubhouses with washrooms and heat. Consider a brief safety meeting as you defrost. Just don’t make a mess.

Tree stake removal. Check to see how long the tree stakes have been on the trees. Anything over one year should be removed. Unless it’s a special case like downhill leaning pines that would collapse instantly. Staked trees fail to form reaction wood which is formed when wind events run though. It makes trees stronger.

IMG_0460


Tree training. Now is a good time to take a new arboriculture apprentice and point out weak, crossing and damaged branches.

Blowing snow. I hate blowers and the noise they make but there are cases when blowing snow makes a lot of sense. We exposed the light top layer and shovelled the remainder, thus saving ourselves a lot of time and back-breaking labour. Ice can also be blown away if you’re patient enough to let air build up under the ice. This can actually be a fun activity.


Conclusion

There is winter work to be done even when the weather does not cooperate. Just do it safely. Dress properly. I spent money today on a new, warmer toque, $1.99 on a neck warmer, and new, what I hope will be much warmer gloves. Test day tomorrow. There will be food on the table for my kids. That thought always warms me up!

It’s also a good idea to enjoy the frosty landscape views. Kids make cute snowmen; the mountains look great covered in white. Make the best of it.


IMG_0245


untitled

Tree topping requests

By | Arborist Insights, Landscaping | No Comments

Tree topping requests never go away. Never. Case in point. A strata owner in Maple Ridge walks up saying it’s time to “trim” his trees. (I prefer the term prune; trimming sounds suspicious.) So off we go to check it out. Outside his backyard fence -all of it belonging to strata- stand two perfectly healthy trees: Acer rubrum and Liquidambar styraciflua.

The key issue

The owner is upset because Mt. Baker is no longer clearly visible from his back balcony. He wants the trees “trimmed” to the level of his deck. Roughly 30% off the top, which means topping. He invites me to his house to see for myself. I decline. Since I signed ISA’s code of conduct, I am obligated to inform him that topping trees is a horrific idea. He doesn’t care. This is about his view.

Why is tree topping bad? (Get a complete pdf file here.)

  1. The trees produce weakly attached pseudo-branches from the top cuts which gets insurance companies very excited. Weakly attached branches tend to fail.
  2. It leads to decay.
  3. It leads to sunburn.
  4. It stresses the tree.
  5. It’s ugly.
  6. It’s expensive.


IMG_9943

The owner of the corner unit wants both trees “trimmed” to the level of his patio….


IMG_9213

The City of Maple Ridge is unlikely to allow a massive crown reduction on two perfectly healthy trees.


Strata letter

One week later the same gentleman produced a letter from his strata council stating that it was OK to trim his trees at his landscaper’s discretion. The future health of both trees had to be accounted for. As it turns out, the City of Maple Ridge has new tree bylaws from January 2016. Topping is clearly prohibited. Of course! Tree can be removed if they are deemed dangerous or in poor health, after city inspections to confirm this is really the case. There are fees to pay and replacements to install.

Compromise

The best we can do as landscape maintenance professionals responsible for the site is thinning of the tree crowns. It would not hurt the trees and it would partially recover the owner’s view of Mt. Baker. Perhaps he will invite us in for tea?


untitled