Category

Mulch

Are you still stressing over fallen leaves?

By | gardening, Mulch, Tips | No Comments

David Hobson’s opinion

This past October I travelled to Waterloo, Ontario to cheer on my son’s soccer team. They played in the youth U15 nationals, representing British Columbia.

Now, since they only played one match a day and the team didn’t hang out with parents, I had plenty of time to hang out.

I visited the St. Jacob’s farmer’s market, Canada’s largest outdoor farmer’s market. Safely absorbed by the market crowds, I bought a copy of the Waterloo Region Record newspaper. In it David Hobson wrote about fall leaves and how he deals with them “How about those leafs?” (Waterloo Region Record, October 7, 2023, section C8). Inevitably, this topic comes up every year so let’s see what David does in his own garden.

Easy does it!

David recommends bagging your leaves and leaving them outside exposed to the elements. By spring you should have layers of soggy, decomposing leaves you can add to your garden beds. He has done it for years and suggests you do the same. Start small. Even one bag of leaves is fine.

David doesn’t spread the leaves around in his own garden, except around shrubs where they get trapped and don’t blow away. Normally he makes a large pile of leaves, sometimes two metres across and just as high. The leaves should be wet for best results.

As the leaves begin to decompose, the pile shrinks by half. By early June he peels of compacted layers and adds them to his garden and vegetable beds. They stay there all summer and by fall those leaves are almost gone. They were used to build up soil just the way it happens in nature.

This is one reason I enjoy blowing leaves off multi-family complexes into woodland buffer zones. It’s good ecology and I cut down on green waste dumping charges.

If you like David Hobson’s ideas, try them out; and follow David online.

Stop stressing: blow it into one big pile and let it decompose!

Mind your landscape fabric

By | gardening, Mulch | No Comments

A big clue

When your landscaper uses a line edger in your planted beds for weed control, you know you have a problem. Lawn care machines don’t belong in planted beds; it’s a sign of desperation. It’s also unsafe because you can damage plants and launch stones into elderly passersby or windows.

I see this done when landscapers try to move out as quickly as possible, probably on the way to their next gig. Weeding is time-consuming. Perhaps it’s time to get a new residential landscape contractor.

One big clue is landscape fabric showing in the soil. Now, I’m not a fan of landscape fabric because over time, it doesn’t work. It clogs up and doesn’t allow water through. The sales dude at your local garden store doesn’t tell you that. He assures you that with fabric in place, you won’t have to worry about weeds.

If you must use landscape fabric, bury with at least two inches of mulch. This will deprive the weeds of sunlight. Dr. Linda Chalker-Scott has convincingly shown that going light on mulch can actually help the weeds. This is because they still get light and moisture protection from the skinny mulch. Making weeds feel cozy in your garden is a bad idea.

It’s time to bring in more mulch.

My suggestions

I made two suggestions to my new residential clients. One, leave everything as is, and pay me to hand weed their garden every month. I use hand tools, buckets and tarps to weed, never machines. That’s desperately amateurish, in my humble opinion. This option keeps my kids well-fed.

Two, bury the existing landscape fabric with at least two inches of mulch, and see me less often. Remember that weeds will be blown in or deposited by birds, so you will get weeds. But if you pay for regular maintenance visits, your garden will look great. With this option, my kids will still be well-fed but I will have to hustle elsewhere.

Conclusion

When you start seeing exposed landscape fabric and weeds, it’s time to top up your mulch or soil. I suggest two inches. And if your landscaper line trims your garden weeds, look for a better residential landscape company. Like this one.

Mulch tactics

By | gardening, Mulch | No Comments

Here we go again

I love mulch. It keeps moisture in your beds, deprives weeds of sunlight and it gives your beds an instant sharp look. Of course, it does break down so you might have to top it up once in a while.

Just last week, I did some clean-ups at a new site my day-job employer took over from another landscape contractor. While the pruning looked OK, I could tell the previous dudes didn’t care for finesse work much. And yet, it’s finesse work that gives your site a sharp look.

Running a line trimmer through your planted beds doesn’t qualify as finesse work. It’s extremely dangerous and desperate. If you somehow manage not to blow out windows, you will likely injure the plants. Never do this. Allegedly, the previous contractors did this all the time. Which is why they lost the site.

Don’t go cheap with thin mulch

Here I had to gently uproot the weeds and get rid of them without removing the mulch. It would be difficult to line trim the weeds into oblivion.

But this isn’t how mulch works. At a depth of 2-3″, it should keep moisture in the bed, block sunlight from reaching any weeds and give us a sharp look.

Of course, over time the mulch degrades and requires top-up. But I also find that many homeowners try to go cheap by applying a thin layer. Which is a huge mistake.

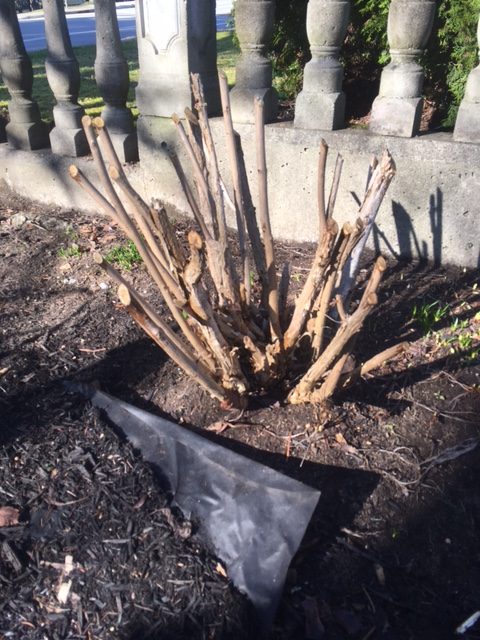
I learned why from Dr. Linda Chalker-Scott, my mentor. I knew mulch kept moisture in the bed and prevented sunlight from reaching weeds. What I didn’t know was that a thin layer of mulch made everything very cozy for weeds. It helped retain moisture in the bed without depriving the weeds of sunlight. That’s how we get beds like the one pictured above.

Now that it’s nicely weeded, it needs more mulch to replenish it and make it work and look the way it was supposed to. So, remember, don’t go cheap with mulch. Apply at least 2-3 inches and keep it topped up.

River rock at the border

By | Landscaping, Mulch | No Comments

Returning from a Seattle soccer tournament last weekend, I had time to examine the border landscaping while I waited in line. It was an early summer evening and I was relaxed because I didn’t have anything to declare. I literally spent four days near soccer fields watching my son take his U12 team to the finals.

Perfect fit mulch

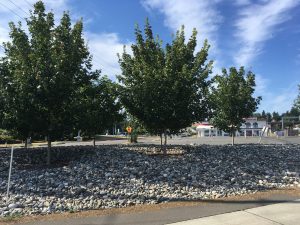
To my left was a row of red maples (Acer rubrum) planted in river rock beds. Aha! Another perfect fit.


IMG_2744

Approaching the Canadian border.


Now, personally I prefer organic mulches like arbor chips or composted bark. However, river rock can be perfect in some situations. I’ve already written blog posts about river rock as replacement for dog urine soaked lawn patches; and river rock as a solution for small dirt patches where new plants get flattened by car tires or, left bare, the dirt patches just grow weeds.

When you apply a nice, thick layer of mulch it keeps weeds out and doesn’t require any extra maintenance.

Now, back to our picture.

A. The river rock is correctly kept away from the critical root zone so water and oxygen can be accessed by the tree roots. The tree well also “captures” leaves  and, assuming they’re left in place, allows them to feed the tree.

B. The river rock looks nice and thick. Thickness is important when applying mulches because we need to block out sunlight so weeds don’t germinate. Thin mulch applications can actually encourage weed growth because they trap moisture and allow sunlight to penetrate. Go deep or don’t do it all.

C. There are weeds visible in the edges which is to be expected. Wind and birds can import weed seeds.

D. River rock eliminates the need for lawn maintenance. This eliminates extra costs and protects cars lined up at the border. It would be stressful mowing and line edging near so many car windows. And, I suspect, the people lined up in their cars appreciate the complete lack of noise and air pollution.


Yes, you can use river rock as mulch. And, in some situations, it works better than organic mulches. Give it a try.


Vas learns from his river rock mistake

By | Mulch | No Comments

River rock is a great mulch material. I prefer soft mulches but river rock has its charms.

Last year I had a fairly easy task: remove a struggling skinny patch of lawn soaked in dog urine and install 2-6″ river rock. Sounds easy, right? I just went a bit far in my preparation work by removing too much soil. Then the bed ate up a lot of river rock and I went over budget. Both on time and material.

Of course, the one upside of using lots of river rock as mulch is that the bed is weed-free. Twelve months later I can laugh about it but I also learned from it.

12 months later

This year my boss was more careful. He sent me to the same site with just one yard of river rock. Incidentally, one yard of river rock will cost you roughly $60, tax included. Delivery and labour are extra. Having Red Seal Vas install your river rock will cost you lots of coins.

Step 1

Step one involves weeding and removing a little bit of soil so the rock can be nicely anchored. It wouldn’t make sense to install river rock over weeds.

Step 2

In step two we install the river rock. Spread it out nicely so you get good coverage.

Step 3

If you have a garden hose close by, wash off the sandy river rock so the colours show up. Unfortunately, there weren’t any water outlets nearby and I had to go work on another project.


IMG_2428

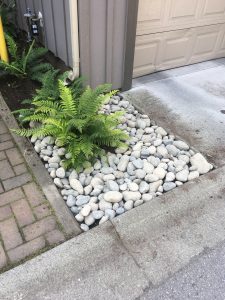
All done. We just have to hose off the rocks to reveal their colours.


River rock makes perfect sense here because cars access garages every day and they can run over the rocks. It’s harder with plants which get flattened; and bare soil just grows weeds.


IMG_2426

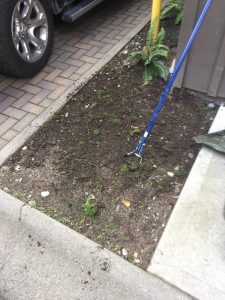
Weeds and compacted soil.


This is a maintenance nightmare. Bare soil just fills up with weeds and plants would just get run over by cars. Installing river rock is a perfect solution here.


I had to cover eight rectangles like the ones above with river rock and one yard was just right because I learned from my mistakes. Mistakes will happen from time to time. Learn from them and move on.

Mulch police

By | Mulch | No Comments

Sometimes strata council members can make your life very difficult. Just as you think your landscape maintenance program is on auto-pilot, things fall apart. One such case involves mulch.

The setting

Imagine a regular strata site with decent soil. Now, the landscape president decides to install a thin layer of reddish mulch in all edges, mainly by sidewalks. It sounds OK but there are problems with it.

One, the colour doesn’t match the dark site soil and, two, the layer is very thin and barely covers the edges. Now, how do we maintain the site without disturbing the mulch?

Freak out

I didn’t even know about the new mulch install until I substituted for our regular foreman. We did our regular clean-up blow until the strata president tracked me down and started fuming. Something about blowing too aggressively and not owning brooms. I was confused at first and then I clued in. And I knew that one day I would strike back with a blog post.

Procedure

Foul language and complaints shouldn’t be directed straight at the field workers. Everything should go through the strata management company. And yet, as a supervisor, I had to take the verbal abuse and calmly reply to a man who made a mistake with mulch.

Too thin

Dr. Linda Chalker-Scott informs us that a thin layer of mulch does nothing for weed suppression. If anything, a thin layer of mulch encourages weed growth by conserving moisture and allowing enough light to reach the weeds. You can either install several inches of mulch or not do it at all. As it is, you’re making it nice and cozy for weeds to grow.

Colour mismatch

Since only the edges got a sprinkle of red mulch, there is noticeable colour mismatch which I find annoying. But again, the strata member is in charge and he did the work himself.

Maintenance

The thin application of red mulch makes maintenance work extremely difficult. For example, there are Spirea japonica shrubs by the sidewalk and they have to be sheared to eliminate sidewalk obstruction. Now, before any shearing happens we have to put tarps down otherwise any debris removal would also risk removing more red mulch. This would inevitably expose the workers to the strata member’s colourful vocabulary.

The fall was an absolute nightmare. Normally backpack blowers would blow out leaves from the building and onto the curb lawns but not here. Here there was great risk of removing the eleven red chips remaining by the strata member’s sidewalk. (I’m kidding.) We literally had to rake out the leaves around his unit. Otherwise he’d bury us in expletives.

Lessons

  1. Strata members can make your life difficult.
  2. Verbal abuse isn’t OK.
  3. Put down several inches of mulch or don’t do it at all.
  4. Thin layers of mulch actually encourage weed growth.

How landscapers crush winter

By | Landscaping, Mulch, Seasonal | No Comments

I’m often asked what landscapers do exactly in winter. So let’s take a look at one example from today. Incidentally, today was a beautiful sunny December day and I’m hoping it stays like this until Christmas.

Materials

First, I had to dump green waste because I didn’t get to it on Friday. Normally it’s a routine task but since temperatures dipped over the weekend, I was worried about my green waste load freezing to the truck deck. Luckily it went well.

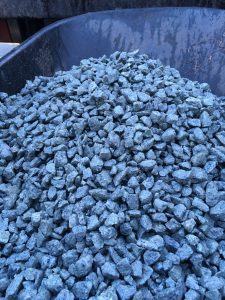
Second, I picked up three yards of 3/4 crush rock. Yes, installing rock is a great winter task because it can be done on colder days when soils aren’t really workable; and pruning brittle plants could ruin them.


IMG_5572

3/4 crush.


Community garden

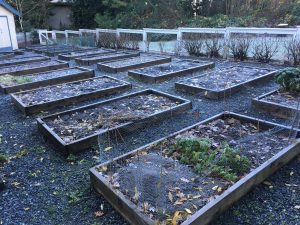
The goal was easy: replenish pathways in a community garden. The pathways did look tired and there were some big weeds so I spent some time on weeding.


IMG_5575

Note the weeds and depleted crush levels.


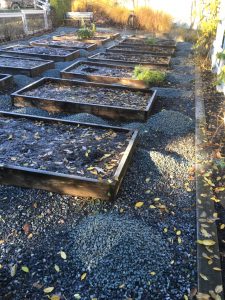
Then I wheelbarrowed the crush in. Simple work.


IMG_5581


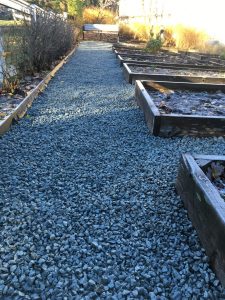
All done, for now. There will be more crush brought in here this week to make sure we have an adequate layer of crush. This should help to keep weeds down.


IMG_5584

This looks much better.


Preparations continued

Pathway preparation isn’t super exciting to read about but I want to point out that not all landscape tasks are sexy. Sadly, some workers attempt to “cherry-pick” their tasks, preferring to do easier stuff. I personally hate this approach. As a landscape supervisor I do everything, without any “cherry-picking” and I’m hoping it will rub off on our employees.

I recommend to all of our apprentices that they do all tasks and do them well. That’s the best preparation for their Red Seal exams.


IMG_5585

Scuffling weeds out of pathways is a lot of labour but it has to get done.


IMG_5599

All prepared for new crush install.


Conclusion

West Coast winter landscaping can be a challenge but there are tasks that can be done in lower temperatures. Installing crush and weeding pathways are two decent winter landscape tasks.

Fall landscape projects part 3: switching plants

By | Landscaping, Mulch, Plant Species Information | No Comments

Sometimes owners get tired of the plants around their strata units and demand changes. With strata approval, of course. This blog post covers one such case. The owner was upset with Rosa rugosa spreading into his lawn. OK, no problem. We can do some editing. I love plant editing in the landscape. And as luck would have it, the morning storm passed and the sun came out just as I got to this project.

Rosa rugosa

I don’t love it and I don’t hate it. It sports decent enough rose flowers. It’s a rose so it’s prickly and it does spread. Since the planted area was situated under a red maple (Acer rubrum) the digging was awful.  I had to cut away some of the maple roots just so I could extricate the rose.


IMG_2065ed

Rosa rugose, unwanted and despised for spreading.


Cornus stolonifera

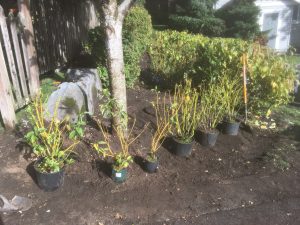
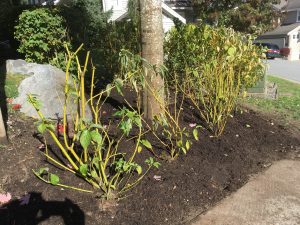
Since there was a patch of yellow twig dogwood already, it made sense to plant more of it. So we brought in six new specimens of Cornus stolonifera. I normally prefer the red twig dogwoods but here we had no choice. Yellow twig it was.

The plants don’t require any pruning but the potted plants had to be cleaned-up a bit. I removed some of the dead and anything low at the base.


IMG_2059ed

The dogwood on the right has been cleaned-up.


Once the plants were laid out, the planting was fairly easy. Just remember to rough up the roots before you stick the plant in the ground. Since the roots are circling in the pots, I make north to south cuts with my Felco2 snips. Don’t worry, the roots can handle it.


IMG_2068ed

The two smallest specimens were planted closest to the maple where the digging was the worst.


Plant details

Cornus stolonifera is a densely branched shrub with creamy white flowers; and creamy white fruit. It’s best mass planted. In this case we already had the same yellow twig dogwood on the right.

The yellow twig dogwood grows 6-8′ tall and likes full sun or partial shade. It will get plenty of sun in this location. No pruning is necessary but since this is a busy strata unit corner, I know it will get sheared, eventually.

All done


IMG_2080ed

All done!


It’s always a good idea to top dress new installs with soil. Here we installed half a yard of mulch for an instant sharp look. And lastly, a courtesy blow finishes the install. Always leave your work area clean.

Fall landscape projects, part 2

By | Lawn Care, Mulch | No Comments

In an earlier post about fall landscape projects we looked at river rock and aged mulch installs. In this post we continue with more examples of landscape projects that are perfect for the fall. The weather is still decent so take advantage of it by improving your landscapes.

Blowing bark mulch

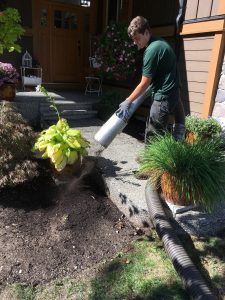
If you have a larger property or strata site, it can make more sense to have bark mulch blown in. There are several local companies that do this. They can transform the look of your site almost instantly. Paying for lots of labour hours by moving lots of yards of mulch by hand with wheelbarrows might not make sense.

Sure, if you have 4 yards to move, that’s fine. But how about 80 yards?

One key is to be present when bark mulch is being blown in. Walk the crew and show them precisely what should get covered. There may be some exceptions or no-go zones so explain it to them.


IMG_1297ed

Bark blowing saves you a lot of time.


Lawn repairs

Weak lawns can be top-dressed and over-seeded right now because we still have decent temperatures for grass seed germination. I observed three lawn repair projects recently. One was for a weak lawn where shade is an issue. The home owner did everything himself without involving his strata council. The other two projects involved lawn repair after dog damage. And as we know, unless you keep the dogs away, the lawn will get damaged again. Very few people take the time to hose off their lawns after their dogs finish their business.

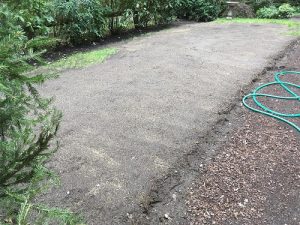
In step 1 you install new turf blend soil and then you rake it so it’s even.

In step 2 we over-seed the lawn with good quality seed.

In step 3 we roll the lawn nicely with a roller. Just fill it up with water and run it over your lawn. This flattens the soil and ensures seed-soil contact.

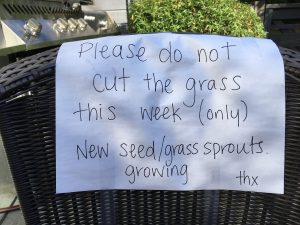
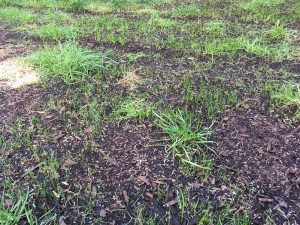
In step 4 lightly sprinkle water over your new lawn. Fast germinating seed can germinate in seven days. Some seed mixes take longer. Temperatures can vary from place to place so don’t panic.


IMG_1446ed


IMG_1447ed

We have germination but the dog inside is waiting.


IMG_1305ed

This photo is from the day of completion. It will take 7-14 days to get germination.


IMG_1939edd

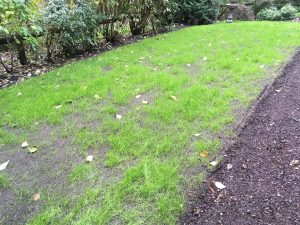
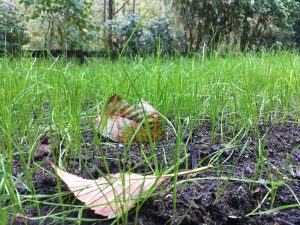
Germination!


IMG_1940ed


What can you do to improve your landscape this fall?


Free garden and landscape seminar May 11, 2016

By | Education, gardening, Landscaping, Lawn Care, Mulch, Seasonal, Tips | No Comments

Free seminar

A free gardening seminar in Port Moody within walking distance from my place will take place on Wednesday May 11, 2016. It sounds great already! Remember, this is in line with our goal of continuous improvement. Free education is awesome.

Master Gardener Dr. Linda Gilkeson will talk about “Naturally resilient gardens and landscapes.” Come learn how to make your lawns and gardens more resilient to variable weather patterns; and about year-round natural gardening, native plant selection and natural pest management. Also discussed will be gardening methods for drier and warmer summers, water shortages, and other types of extreme weather. This is very topical. I am in. Notebook in hand. Are you?

When: Wednesday May 11, 2016

Where: Inlet Theatre, 100 Newport Drive, Port Moody

Admission: Free!

A Sedum solution

The theme of this seminar reminds me of a recent strata complex case in Langley. The complex boulevard beds are exposed to the sun and the original planting didn’t survive. Planted between Acer campestre trees were Skimmias and Heathers. Many of them didn’t survive the hot summer. The proposed solution is to plant succulents like Sedums between the trees. It will be interesting to see what happens; and if we get another hot summer.


IMG_0608

Acer campestre and some surviving Heathers and Skimmias; Sedums will replace the Skimmias and Heathers.