Camellia japonica pruning: timing and technique

By | Plant Species Information, Pruning | No Comments

I heard recently about a case where one landscape maintenance foreman pruned a lot of stuff on his site. Including Camellia japonica full of flower buds. The owner loves her Camellia and she was extremely unhappy about losing so many buds to needless pruning. Oops.


IMG_3427ed

Camellia japonica


Pruning involves correct technique and timing. Normally we use hand snips or power shears and both are fairly easy to use. I prefer to use hand snips whenever possible because they are quiet.

Timing depends on the specific shrub or tree in question and thus requires plant-specific knowledge. That is both exciting and scary. All top horticulture professionals have a lot of plant-specific knowledge which takes time and experience to acquire.

December request

Then this week I helped with the last service of the season at a Port Coquitlam site. And there it was again. Another Camellia japonica and a passionate owner used to enjoying her flower show. And I was ready.

The timing of the request was way off. December is not the right time to prune Camellia japonicas. The only thing I really power shear in December is cedar hedges (Thuja occidentalis ‘Smaragd’).

The proper pruning time for Camellia japonica is in spring, right before bud break, according to my Timber Press book “Essential pruning techniques”.

Camellias don’t really need pruning but this specimen had several shoots sticking up and the owner wanted them pruned. But only those shoots. So I hand snipped all of the shoots down to a bud. It was easy and it didn’t take much time. Power shearing would have been slightly faster but the shredding that occurs is unsightly. Hand snipping works perfectly in this case.


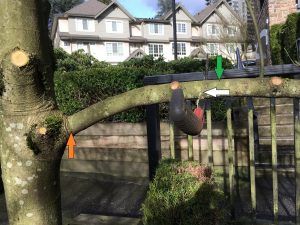
IMG_3426ed

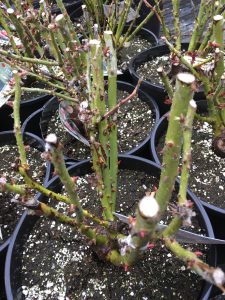
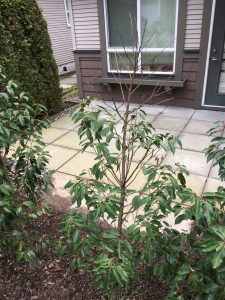
The task was to remove the long top shoots which don’t sport any buds. I made the cuts down to the first bud I encountered.


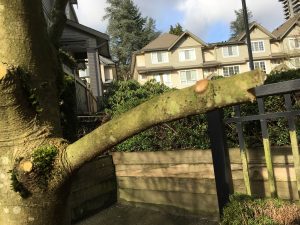
IMG_3428ed

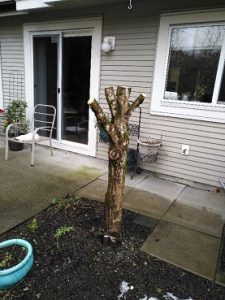
This is the after shot. The long shoots are gone and very few buds were lost in the operation. Any additional pruning will happen in spring, just before bud break.


Camellia japonicaed

Camellia flowers are stunning and can be cut for home vases. You can see why owners would get upset over losing this kind of show.


Conclusion

Remember to pick-up plant-specific knowledge so not everything on your site or garden is power sheared at one time. Camellia japonica should be pruned in spring, just before bud break; if you must prune it.

Frosty plant identification

By | Species, Trees | No Comments

It was fun to observe some of our common plant species covered in frost. How many of them do you recognize? I suggest you look up any that are new to you and learn more about them.


Acer ginnala (Amur maple)


IMG_3345ed


Viburnum davidii


IMG_3350ed


This is a common landscape shrub in the Lower Mainland. The berries are attractive. Hand prune when required. When it’s this frosty, just enjoy the view.


Skimmia japonica


IMG_3363ed


Symphoricarpos albus (Common snow berry)


IMG_3351ed


This is a native species and birds love it.


Imperata cylindrica (Japanese blood grass)


IMG_3358ed


Hydrangea


IMG_3366ed


Some people deadhead their Hydrangeas and use the flower heads in vases; some people leave the spent flowers on so they have something to look at in winter.


Crocosmia ‘Lucifer’


IMG_3369ed


This perennial should have been flush cut at ground level weeks ago. I don’t find it attractive, even when it’s covered in frost.


Gaultheria shallon (Salal) 

IMG_3364ed


Liquidambar styraciflua (Sweetgum)


IMG_3355ed


This is a common landscape tree and a nice alternative to maple trees.


Parrotia persica (Persian ironwood)


IMG_3357ed

This is an attractive landscape tree with great fall colours.


Cotoneaster salicifolius var. floccosus (Willow-leaf cotoneaster)


IMG_3368ed


Ophiopogon planiscapus ‘Nigrescens’   (Black Mondo grass)


IMG_3353ed


What plants did you notice on your walks and in your own gardens?

How to pimp out your boulevard tree wells

By | Arborist Insights, landscape maintenance, Strata Maintenance, Trees | No Comments

Sometimes you look out on the boulevard at your strata site and the tree wells look a bit tired. But it doesn’t have to be that way. With some tools and a bit of soil amender you can quickly pimp out your tree wells and make them look great before the holiday season hits.


IMG_3329ed

This looks a bit tired.


Step 1

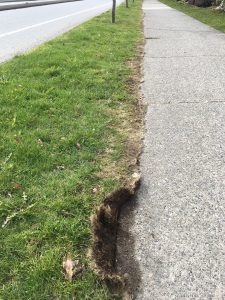
First we grab a nice sharp spade and we deep edge the tree wells. The spade must hit the edge at a ninety degree angle. Nothing else will do.

As for the depth, it should be deep enough to anchor the new soil that’s coming in but not too deep. We’re not building ditches although I have created some ankle-busters in my past. Soil conditions will sometime dictate the appropriate depth.


IMG_3330ed

Acer griseum tree well. You might as well remove the tree guard.


Step 2

I know, most people dread this step but we have to weed the tree wells nicely. Use a good cultivator and when you remove the weeds also grab the chunks from step 1.


IMG_3331ed

Nice and clean. The ground was a bit frozen so weeding was a challenge.


Step 3

Next, install good quality soil amender and pile it on nicely. Remember, it will settle so don’t worry if the tree wells look a bit puffy. This step gives you an instant upgrade because the fresh black soil looks great!

Warning: do you remember what a doughnut looks like? That is exactly what the soil around your tree should look like. Find the root flare and make the new soil level with it. Then build it up and taper it off as you hit your new deep edge.

Why? Because piling soil above the root flare leads to problems. For some reason, people love building soil pyramids at the base of trees. But it’s a common mistake. The bark above the root flare isn’t supposed to be in a dark, damp environment and it can over time rot. This in turn invites disease in.

Another potential problem is adventitious roots developing above the root flare inside your soil pyramid. There the roots start to circle and they can over time girdle the tree.

So remember, don’t create soil pyramids. Think doughnuts!


Step 4

The last step involves clean-up. Especially the grass edges of your new tree wells. Blow them off gently.

That’s it. Now your clients can enjoy beautiful boulevard tree wells on their Christmas holiday walks.


IMG_3339ed

All done! Weeded, edged and top-dressed. This is my kind of tree well.

European chafer beetle battles: December damage

By | Lawn Care | No Comments

I am seeing lawn damage related to European chafer beetles all over the place. Today we discovered a nasty patch of grass in Port Coquitlam. And considering the size it must have been done by raccoons, not birds. They must have enjoyed eating the grubs in early December when not much else is available. And it’s just as well. Let them eat all of the grubs.


IMG_3315ed

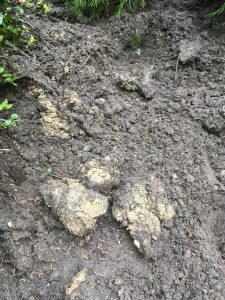
This isn’t exactly what you want to see three weeks before Christmas. This was done by larger animals, most likely raccoons.


Shock!

It’s the residents that are in shock. Then they rush to their laptops to pen angry missives to strata management companies which, in turn, call on their landscape contractors for help.

So what can we do? Not much in December. We kicked back the messed up turf as best as we could.


IMG_3327ed

Once the sun came out we kicked back the rolled up chunks to make the area look more presentable.


Action!

In spring, you can top dress the messed up spot with a thin layer of lawn mix soil and over seed it with good quality seed. Then, follow the steps outlined in municipal handouts.

First, aerate the lawn so more water and oxygen can reach the root zone. Second, water your lawn properly; and three, cut your lawn a bit higher. Fertilizer applications are also recommended.


Nematodes

If your lawn areas aren’t excessively big, you can try applying nematodes in late summer. I recommend this to all clients who have never tried it. What can you lose? Some cash.

Order your nematodes in spring and once they arrive, store them in your fridge. The application should happen in late summer in our Tri-Cities area.

In summer, the chafers emerge from lawns and fly into tree tops to mate. Then, the females descend back to lawn areas and stick their behinds into available turf. Long, healthy grass is more of a challenge. You can always hope that they will target your neighbour’s weak lawn.

The microscopic nematodes must be watered into your wet lawns just as the grubs start growing.

I tested nematodes at one residence in 2016 and the lawn was clear on my last visit in November 2017. I will do more follow up at this client’s place because he opted out of a second application in 2017. The drawback with nematodes is that they should be applied every year. But still, I prefer one nematode application to more soil and seed installations.

Of course, there is hope for people who give up on their lawns. Alternatives exist. You just have to pick one that makes sense on your property.

As we head towards Christmas, let the animals enjoy their grub feasts and then clean up your lawns as best as you can.


Notes on leaf blower wars

By | health and safety, landscape maintenance | No Comments

As a member of various Facebook lawn care and landscaping groups, I often run into interesting discussions. But recently I read about an outright war in Newton, Massachusetts. A local resident named Karen Bray is working on banning leaf blowers from Newton.

I don’t want to repeat the entire fight in this blog post. You can easily Google it. So let’s just say that Karen Bray hates leaf blowers; and local landscapers don’t care for her opinions. The rest is fun tabloid stuff.

The key argument is that leaf blowers emit fine particulate matter that lodges in the lungs of kids and blower operators. I’m not a doctor but this could definitely be true. For this reason I prefer to blow solo. When 2-3 workers blow at the same time it’s a mess.

Since leaf blowers come up once in a while, it might be good to share my personal thoughts.


IMG_2521ed

It would take significantly longer to clean up leaves on this site without blowers.


Strata leaf blowing

Large strata properties would be difficult to maintain in the fall without leaf blowers. Sometimes there are three workers blowing together which wouldn’t make Karen Bray very happy. But the fastest way to clean-up leaf avalanches is to blow them into piles. And for every Karen Bray, I know a strata owner who wants every single leaf cleaned-out. The same goes for building maintenance workers. They love leaf blowers because without them debris would get dragged inside their buildings.

Without leaf blowers strata landscape maintenance costs would either go up or service standards would go down. It just isn’t practical to send five workers out with brooms and rakes. Usually there is a lot of work to be done in a day and the crews are under pressure.

There are some strata sites that demand a later start. So instead of starting machines at 8am, we start at 9am. This allows the crew to perform other tasks such as bedwork; and the residents with night shift jobs get an extra uninterrupted hour of sleep. No big deal. No fights on Facebook.

Residential leaf blowing

Because most residences are smaller, there are things you can do when you encounter opposition from the neighbourhood. You can start your blower at a normal time and you can use the smallest backpack blower for noise sensitive environments.

I use one because I couldn’t afford to pay for a big $700+ machine. And it’s worked out fine. It handles fall clean-up just fine. Obviously, the extra power would be nice when I have to clean-up pine needles, for example.

Leaf blowers have been successfully pushed out of Vancouver’s West End but I don’t know how that affected the neighbourhood and their landscapers.

We also have silent gardeners offering services for people like Karen Bray. I’m sure their clients have to pay more and chances are they are happy to do it. It’s probably a good niche.

Blower-free 2014

I personally don’t care for leaf blowers. It’s a necessary evil. I find the noise annoying when I’m not personally blowing. When I blow, I just notice the work. In 2014 I worked under a municipal gardener who barely used a blower all season. And I confess, it was glorious. Whatever mess we made we swept up with brooms. But again, this was gardening NOT strata maintenance. So we mostly covered planted beds. Grass crews covered work that required heavy blower use.

Conclusion

In conclusion, I believe that the leaf blower wars are over-the-top. Yes, the noise is annoying. All landscape companies should do their best to blow at decent hours of the day and just long enough to get their work done. Smaller backpack blowers for noise sensitive environments are available. Some mess could be raked out and broomed.

Strata complexes tend to be larger in scale and, considering the amount of work to be completed, it isn’t practical to use rakes and brooms. There is often great pressure to complete a lot of work quickly.

I’m certain that any leaf blower bans would lead to either higher maintenance costs or worse looking neighbourhoods.

Some landscape installs come with challenges: yew privacy screen install

By | Landscaping, Species | No Comments

We already know from my recent blog posts that fall is a great time for landscape installation projects. Cooler temperatures and moisture in the fall are good for plants; and the fall is a bit slower once we get over the maximum leaf drop on our sites and in our gardens.

Privacy screen

Privacy is a common problem. New owners move into their unit just as we remove dead cedars (Thuja occidentalis ‘Smaragd‘). Now their windows are exposed just above a walkway and we have a problem. The husband is a nice guy but the wife can compose letters to strata that would make a construction worker blush.

So a quote is submitted to strata council and approved quickly so the problem goes away. I was the lucky installer on a sunny fall day. It just so happened that the site was a challenge.


IMG_2667ed

It’s not perfect cover for windows yet but give it some time.


Cedars vs Yews

The heat waves our landscapes have been subjected to in recent summers have been hard on our cedar hedges. Most strata owners are too busy to water their plants and regular weekly landscape work visits don’t allow for watering.

Thus, the switch to yews (Taxus x media ‘Hicksii’) which are considered hardier. They make nice hedges and sport red berries. But they are more expensive than cedars so it’s a strain on strata budgets when many cedars die.

Access

I got a bit sweaty walking the thirteen potted specimens up the back walkway and I loved it. It served as training. Access is another common hassle. Same for soil conditions. Since the soil closest to the edge was mostly clay, I was forced to off-set the yew row just a bit. Not that it’s a huge problem.

The soil was very wet and I had to be careful with irrigation pipes. Another challenge was soil volume. As soon as stuck my shovel in, I hit landscape fabric. Not good. I had to make adjustments.

Planting


IMG_2663ed

Not the best conditions: soggy soil, clay edge, ledge and low soil volume.


One adjustment involved removing the yews from their pots and cleaning off soil from the bottom of the root balls. This allowed me to plant the yews in their somewhat shallow planting holes. Also, don’t forget to rough-up the roots before planting so they stop circling.

The second adjustment involved moving in some soil. There were at least two specimens with exposed root balls so the extra soil levelled everything off nicely. Remember, when backfilling your planting holes, always use the existing soil. A very common mistake is backfilling planting holes with new soil. It looks great but water will find it easier to move into the new soil. It will then cause soil saturation and your yew will turn into a joystick. Who knows which way it will fall?

Remember the soil we cleaned off from the bottom of the root balls? I saved it and used it to top-dress the finished yew line. It gave it a nicer look.

One last step: blow off the muddy ledge below the yews. Always clean-up as best as you can. Weekend rain will water the yews in nicely. I wish them well. I always feel responsible for the health of my plantings.


IMG_2665ed

This is a nice change from brown cedars. I hope all of these yews survive and thrive.

European chafer beetle battles: when soccer parents struggle with lawn damage

By | Lawn Care | No Comments

The European chafer beetle problem isn’t going away anytime soon. We are seeing a lot of damaged lawns right now in the Tri-cities area where I live. So much damage, it even enters the conversation on soccer field sidelines. Many of the soccer parents are clearly frustrated with the damaged look of their lawns. Otherwise they would be discussing their sons’ performances on the pitch.


IMG_1693ed

A familiar sight after birds and animals dig for grubs.


Suffer

I don’t have any good news for you. It’s fall and if your lawn is damaged by birds and animals digging for grubs there is very little you can do. Once the grubs are eaten you should fix your damaged lawn. Simply rake out the damaged spots and install a light layer of turf blend soil. Then rake it into the lawn.

My City of Port Moody handout on chafer beetles suggests covering up the damaged lawn spots to deter further damage from animals.

November is a bit late for applying grass seed because there isn’t enough sunlight for grass seed to germinate. Wait for spring when daytime temperatures shoot up.

One thing you could do now is apply winter fertilizer to your lawn for strong roots. If your lawn wasn’t aerated in spring you could do that now before the ground gets really cold and stiff. Core aeration allows more oxygen and water to reach the root zone.

Spring

In spring 2018 you should start caring for your lawn or hire professionals to do it for you. Municipalities have their own handouts on chafer beetles so pick one up where you live and follow the steps. Aeration is a good idea again in spring.

I know it takes effort and costs money but fixing your damaged lawn areas will make you happier. Rake everything over and put down more turf blend soil. Rake it in and overseed once temperatures go up.

Nematodes

You can pre-order nematodes for late summer application in spring. I have a private client who applied them in 2016 but declined the service in 2017. As of right now, November 2017, his lawn is fine. Only his neighbour’s uncared for lawn has chafers.

This is an interesting case because the recommendation is to apply nematodes every year. I know, more bad news. But if you need help, I can come help you apply it the first time. Once you’re trained, you can do it yourself. Or just follow the directions; and check my previous blogs on chafer beetle battles. Read my previous blog on nematode application.

Alternatives

You can also consider alternatives. Yesterday I was blown away by a lawn in Port Coquitlam. The owners planted their front lawn in clover. Actual clover, not the micro version that’s mixed in with seed and sold as anti-chafer mix. For a hefty price, too.

Clover will attract bees and other insects and chafers don’t care for clover. I think when it’s nicely edged, it looks good. There are other ideas so spend the winter thinking about it. You can also read some of my previous blogs on lawn alternatives.


IMG_2626edd

Front lawn planted in clover and nicely edged. I love it and so will the insects in summer. Goodbye chafers.


IMG_2628ed


No action is required for your lawn in December. The way it’s been going, it will be covered by snow anyway. So just enjoy the holidays.


Tips for fall leaf clean-up: how to avoid pyramids and skeletons

By | landscape maintenance, Strata Maintenance | No Comments

Fall is here and the colours in the landscape are amazing. But it’s also busy time for landscape maintenance companies because all sites are getting leafy. So let’s go over some important tips before panic sets in. You can have a smooth fall season if you do things right.


IMG_2494ed

Don’t forget to enjoy the fall colours


Avoid pyramids

Pyramids belong in Egypt. I see this every year: eager and some not so eager new landscapers rake leaves into beautiful leaf pyramids as if it was a contest. But it isn’t. Remember our objective: we need the leaves loaded on our truck and quickly. And how do we accomplish it? By raking onto tarps from the get-go. All raking movement should be pushing leaves onto tarps.

When I handle large leaf piles I frequently put my first tarp right onto the pile. Try it.


IMG_2526ed

Don’t be shy. Place your tarp in the pile and stuff it in there.


Big boy for maximum drop

All trees will reach their maximum leaf drop at some point so push through it. The new Stihl 700 backpack blower is super powerful and perfect for big leafy accumulations. If you can get one, use it. It made a huge difference for us this week.

And remember, when you blow avoid pyramids. Create decent looking piles and move on. There are no extra points for beautiful symmetrical leaf piles. It’s a waste of time.


IMG_2521ed

The Stihl 700 blower is a beast. I love it!


Safety

The side panel on most backpack blowers shows warning signs so get to know them well. One of them warns us about long hair getting sucked into the back of the blower. Now, I never really worried about this because I never had long hair. I listened to my parents. And now that I am of a certain advanced age, growing long hair is not really an option. But still, you might have girls on your crew and young men who ignored their parents.

While blowing a large strata site on Halloween one of our blowers got jammed when a skeleton got sucked into the back of the blower. It was abrupt and loud. God help you if your ponytail gets sucked in. You’ve been warned.


IMG_2510ed

Read the warning signs on your blower before you use it. The green fabric used to belong to a skeleton. Once it got sucked in, it jammed the machine.


Personally, I love the fall. Once I clean up a leafy site, anything fresh on the ground is fine. It’s fresh so enjoy it. The fall is beautiful.


Winning with simple landscape improvements

By | landscape maintenance | No Comments

There are many simple improvements you can make in your landscapes. And they don’t cost tons of extra cash or time. You just have to work them into your regular maintenance schedule. Below are a few examples.

Drains

Drains in lawns are often forgotten until one day they get swallowed up by your lawn. Don’t let it happen. Let me illustrate with a quick story. Many seasons ago I was in charge of maintaining a smaller strata complex in North Vancouver, British Columbia. One day, water people came in looking for controllers. Except they weren’t able to locate them. It took extra phone calls and searches for them to realize that the controller in question was under the lawn.

Once they dug it up and did their thing, they gave me a speech on maintaining drains and covers in lawns. And even though it wasn’t my fault, this episode stayed with me. So now I keep all drains and covers in lawn areas nicely blade edged so they can be located and accessed. And the best part is that you don’t have to do it weekly. Once in a while will suffice.


IMG_6607ed2

Before long this cover will disappear.


IMG_6608ed2


This problem can be easily fixed with a blade edger.

IMG_6621ed2

This is much better.


IMG_6620ed2


Plant separation


IMG_0093ed


This another overdue procedure. Note how the rhododendron and the sourwood tree (Oxydendrum arboreum) co-exist without any separation. This will only get more pronounced as time goes on. And how do we enjoy the rhododendron flowers?

I had a meeting at this site in spring and the strata council didn’t want anything pruned (correctly) before flowering. But when I showed up in August, I couldn’t help myself. I removed branches from the sourwood tree and also some of the height from the rhododendron. See the picture below. What do you think?


IMG_0101ed

This wasn’t anything serious. I removed some tree branches and some high stuff from the rhododendron.


I suspect we’ll be able to nicely enjoy the rhododendron flowers next year. This was another simple landscape maintenance procedure. It just has to be squeezed into your regular weekly scheduled tasks. But like the blade edging above, it won’t have to be done again for months.

What simple improvements can you make to your garden and landscape?

Fall landscape projects part 3: switching plants

By | Landscaping, Mulch, Plant Species Information | No Comments

Sometimes owners get tired of the plants around their strata units and demand changes. With strata approval, of course. This blog post covers one such case. The owner was upset with Rosa rugosa spreading into his lawn. OK, no problem. We can do some editing. I love plant editing in the landscape. And as luck would have it, the morning storm passed and the sun came out just as I got to this project.

Rosa rugosa

I don’t love it and I don’t hate it. It sports decent enough rose flowers. It’s a rose so it’s prickly and it does spread. Since the planted area was situated under a red maple (Acer rubrum) the digging was awful.  I had to cut away some of the maple roots just so I could extricate the rose.


IMG_2065ed

Rosa rugose, unwanted and despised for spreading.


Cornus stolonifera

Since there was a patch of yellow twig dogwood already, it made sense to plant more of it. So we brought in six new specimens of Cornus stolonifera. I normally prefer the red twig dogwoods but here we had no choice. Yellow twig it was.

The plants don’t require any pruning but the potted plants had to be cleaned-up a bit. I removed some of the dead and anything low at the base.


IMG_2059ed

The dogwood on the right has been cleaned-up.


Once the plants were laid out, the planting was fairly easy. Just remember to rough up the roots before you stick the plant in the ground. Since the roots are circling in the pots, I make north to south cuts with my Felco2 snips. Don’t worry, the roots can handle it.


IMG_2068ed

The two smallest specimens were planted closest to the maple where the digging was the worst.


Plant details

Cornus stolonifera is a densely branched shrub with creamy white flowers; and creamy white fruit. It’s best mass planted. In this case we already had the same yellow twig dogwood on the right.

The yellow twig dogwood grows 6-8′ tall and likes full sun or partial shade. It will get plenty of sun in this location. No pruning is necessary but since this is a busy strata unit corner, I know it will get sheared, eventually.

All done


IMG_2080ed

All done!


It’s always a good idea to top dress new installs with soil. Here we installed half a yard of mulch for an instant sharp look. And lastly, a courtesy blow finishes the install. Always leave your work area clean.