Adding some winter colour is easy

By | Seasonal | No Comments

By early fall most summer annuals start to look suspicious so we remove them and clean up the beds. Now what? What do we do with bare beds all winter?

Don’t worry, there is an easy way to add some winter color to your planted beds. And it won’t blow up your budget. Consider using ornamental kale which adds nice, bright whites and purples to your beds. Brian Minter, writing in Tri-City News, (October 10, 2018 A24) reports that ornamental kales should be fine in winter unless it’s -10 degrees Celsius for long stretches.

It’s nice to plant ornamental kale with good companions. We used pansies but Dusty Millers are also good. Planting around evergreen Carex species is also good.

Key tips

Brian Minter offers two key tips. One is to plant ornamental kales in groups so the bright colors really stand out. This is obvious. The other tip isn’t. Plant ornamental kale deep so they look like they are popping out of the ground. Since I read Minter’s article half-way through our winter planting, I adjusted my planting afterwards.

A third tip involves peeling off the bottom leaves that look brown or yellow before planting your kale. It cleans up the plant nicely.


IMG_3821

Remove the yellow foliage before planting.


IMG_3822

Much better; and ready for planting.


Examples

Let’s look at some actual examples. First comes bed preparation. Remove all annuals and rake and cultivate your beds so they are clean. Cultivation fluffs up the soil and makes planting easier.


IMG_3814


My directions were to plant kale and then alternate with yellow and blue pansy lines. At your house you can experiment and arrange everything to your liking.


IMG_3833


This driveway corner looks much better now and hopefully the plants survive the winter. Remember to do your clean-up blow gently so you don’t blast out the plants.


IMG_3824


This is another high-profile boulevard corner and it looks fine for now.


If you haven’t tried winter planting with ornamental kale and pansies, give it a go. You can also do your garden pots. It will add fresh colour to your garden just as the days get shorter, darker and colder. Group the ornamental kales and plant them deep. Then pray for a mild West Coast winter.

How to inspire future green workers

By | Education, Landscaping | No Comments

I know a landscape foreman who received a nice card from a kid living on his site. As the seasons piled up the two developed a nice relationship. The kid would “help” on site and it would totally excite him. His mother appreciated the attention the boy received but now they were moving away.


IMG_0437

This is a card for a foreman from a resident boy moving away.


What I remember

I would see them only sporadically and every time I saw the woman she was very pregnant or stuffing her family car with kids. I also remember the boy handing me a bag of cookies once to hand over to the previous foreman. But since the man was on holiday, I promised to hand over the cookies later and thanked the boy. I lied.

One of the cookies broke so I tested it and the others soon followed. And they all passed their final test. I’m not proud of it but the boy never found out.

I also remember the boy being excited about tree work and my ISA certified arborist patch. Unfortunately, I couldn’t give him one. He can easily earn it later.

Two lessons

1. This boy is a poster child for biophilia, defined by Edward O. Wilson as “the urge to affiliate with other forms of life”. He loved “helping” the landscape crew, excited by trees, machines and the big truck moving around the site. I’m sure he will become a green industry worker when he grows up.

2. This case also nicely illustrates that providing good quality work on site isn’t the only thing landscape companies should focus on. Building relationships is just as important. Sure, it takes precious time away from never-ending maintenance work but it’s an important sacrifice. Assuming it doesn’t get out of hand.

Clients that get to know you well are more likely to retain you so don’t forget to build relationships with your clients. You might get a cool card one day.


“The science of gardening” course review

By | Education | No Comments

Because I follow Dr. Linda Chalker-Scott on social media I knew that she was in the studio recording her Great Course called The Science of Gardening. Then after several months I checked the Great Courses website and the course was available. There was just the small problem of cost. The course list price is over $200US which is way over my budget.

Soon after this I opened my copy of Fine Gardening magazine and inside it was a priority code which lowered the cost to $59.90US. So I bought access to the course on the same day and it was well worth the price.

I believe all gardeners and landscape professionals should go through this excellent course. Here’s why.

a) Dr. Linda Chalker-Scott is based in the Pacific Northwest which makes her a great local resource. I own several of her books and often refer to her extension publications. If you are a gardener or landscaper you must know her. Period.


38800233_10217128405506717_8333181206526951424_n

Dr. Linda Chalker-Scott


b) The course is made up of 24 lectures and each lecture runs at around 30 minutes. The key selling point is that everything is science-based. There are many myths in gardening and Linda destroys many of them. This should save gardeners a lot of money.

Take, for example, the sale of deer-resistant plants. Home owners install their new plants but deer eat them up anyway. That’s because a very hungry deer will eat whatever she can get (feeding pressure). There are no pest-proof plants.


IMG_9344


Another myth is landscape fabric. Long sold as guarantee of a weed-free landscape, it actually doesn’t work. In the course Linda covers two beakers with two different landscape fabrics and they both don’t allow any water in. So much for the promise of water and air movement between the fabric and the soil below. Landscape fabric is a waste of money. Now you know.

c) The studio lectures are nicely interrupted with field visits which gives the student a nice mental break. Linda also gets her hands dirty demonstrating various things like bare root planting and pruning.

d) My favourite lecture is number 17 CSI case studies where various interesting landscape issues are presented and analyzed. This was by far the most interesting lecture.

e) If you need CEUs toward your Landscape Industry Certified re-certification this course will be good for 12 credits. I haven’t checked with the International Society of Arboriculture (ISA) yet if they will recognize this course.

Conclusion

The Science of Gardening is an excellent science-based course that’s well-worth the $60US cost. Dr. Linda Chalker-Scott is an excellent Pacific Northwest professional and I’m convinced that all gardeners and landscapers should be familiar with her work.

How I became a top 10 landscape writer on Quora.com

By | Education, gardening, Landscaping | No Comments

Quora.com is a fun site where you submit any question you want and wait for someone to answer it. As you read the answers, you are asked to upvote the one you really like which in turn helps the writer.

Lately, I’ve been hanging out on the site answering basic landscape questions. Then, recently I received a notification from the site. I was now officially a top 10 landscape writer. I had no idea they kept track.

So let’s take a look at some question examples and my answers. If you have a burning question, you can ask on Quora.com or message me through this blog.


1. What is an interesting book about flowers or plants?

The Hidden life of Trees is the best book about trees right now. It will blow your mind. You will never look at trees the same way.

Braiding sweetgrass is the best book I’ve read on native use of plants in the US and Canada. Absolutely amazing.

Lab girl is a great book by a Ph.D. researcher; chapters alternate between plants and personal life. Also a great look at women in academia and what a struggle it is. First time I read about “resurrection plants”.

The triumph of seeds is also amazing. How do seeds survive for hundreds of years and then, one day, decide to go for it?

2. Why is tree trimming important?

Tree trimming is an amateur phrase, I’m sorry. Always say tree pruning. Trimming sounds suspicious and it usually is. I prune trees.

Most trees know what to do but in our cities and multi-family complexes with limited space, pruning is often required because of obstruction issues. Say, a resident has to duck to get out of her apartment on her way to Starbucks.

Pruning is also important for young trees so they can be trained to look great in the future.

Pruning is also required when we find diseased, dead, damaged or crossing branches.

My e-book on Tree maintenance is available on Amazon for less than a cup of coffee, just search by title or by name: Vas Sladek.

3. How do I maintain a lawn mower for perfect lawn mowing?

Check your oil levels weekly, change spark plugs and change blades often for a great cut. Sharp blades are critical. Otherwise you are shredding grass blades.

Check your wheels so they don’t wobble. Tighten as required. Anything else, visit your nearest dealer.

If you can, use Aspen fuel, which is allegedly gentler on machines. It is also 99% hydro-carbon free which means you don’t pollute your home with poisons. See www.aspen.se

IMG_7897

4. It’s been raining for two days right after my lawn got aeration. Do I have to aerate the lawn again?

No! The point of lawn aeration is to allow more water and oxygen into the root zone so rain after aeration is perfect. You should only have to aerate once a year although some companies also do fall aeration.

5. What exactly does the choke setting “do” when I start the cold motor of a riding mower?

When your small engine is cold, the choke restricts air flow so the engine is getting a richer gas mixture and therefore starts easier. Once your engine is on, you should take the choke off.

Warm engines will start again easily without a choke.

There you go. If you have a burning question, go to Quora.com and ask away. You can also share your knowledge by answering some questions.

Are you afraid of chainsaws?

By | Company News | No Comments

I have an uneasy relationship with machines but I’m not afraid of them. Years ago when I was a candidate in the Landscape Industry Certified program at the Kwantlen Polytechnic University I was literally shaking when I hit the chainsaw practical station. The attendant noticed and asked me if I wanted to walk away. No, never!

I did everything correctly but I forgot to put a log in place which made it difficult to cut anything. Oops. Luckily it wasn’t a deduction. I found a log and passed the station. Walk away, don’t make me laugh.

Now, fast forward to 2018 and read about a perfectly good day I had with an old warrior chainsaw. The chainsaw is very old but a new chain made it usable. The bonus was that I got to change the chain myself which was extremely therapeutic.

It’s hard for an ISA certified arborist to admit that in my nightmares my chains always break and fly off. So putting a new chain on correctly made me relax. After all, I installed it myself.

The other bonus was that I was flying solo and allowed to practice. There was nobody watching.

Dead birches

My task was fairly easy: take down six dead birches (Betula papyrifera).


Blow like a pro

By | landscape maintenance | No Comments

It’s October, 2018, and leaf season is here. Landscape contractors rely on their backpack blowers to clean-up leaf avalanches on their sites. If you drive around you’re bound to see a few a rose-cheeked landscapers blowing for hours.

I personally don’t stress about leaves. I love fall and I clean up the leaves as well as I can. Then I return the following week for more.

Aside from leaf clean-up blowing, there are two more blowing techniques every landscaper must know.


IMG_3375


Pre-blow

Early in leaf season when the leaf drop isn’t overwhelming, a pre-blow can be a great time saver. Pre-blow involves a quick blow of your site where leaves are blown onto lawns and then mowed. This eliminates time consuming leaf pile pick-up with rakes.

Simply mow over the leaves and bag everything. Then all that’s left to do is a final touch up blow. The only issue is judging the right amount of leaves. If the leaves really accumulate after your pre-blow, the mower will struggle to shred them when you mow. Don’t kill your mower. That’s why this technique is best used early in the leaf season. I think it could be used more in landscape maintenance.


IMG_3462

This is a well executed pre-blow. There isn’t enough leafiness to overwhelm the mower engine or to start raking piles.


Final blow

As the name suggests, this is the final courtesy clean-up blow. But I’m finding that many new employees only concentrate on the actual clean-up. With proper training they would know that their final blow also doubles as the final check.

Yes, foremen are responsible for checking their sites in theory but it’s not always easy in practice. That’s because some strata sites are huge and asking the foremen to walk the entire site at the end of the day can be too much.

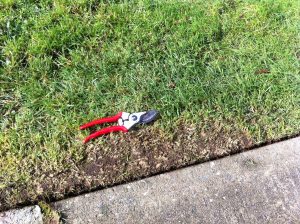
So the worker doing the final blow is responsible for checking everything over as she goes. That includes missed debris piles, full green waste tarps, empty tarps, open gates and missed hand tools. It’s up to the worker to alert the foreman so we avoid calls to the office later.

Lawn care mistakes must also be corrected. Mistakes happen. Nobody goes home until missed lawns are mowed and huge mohawks eliminated.

Again, I find that new workers aren’t trained to perform final site checks when they blow. Once they get into the habit everything runs smoothly.

When a missing hand tool is discovered on site later, it means that the area wasn’t blown or the worker only occupied himself with blowing, not checking.


IMG_2358

This missed tarp was discovered during the final blow.


IMG_2366

This yard didn’t get mowed at all.


Conclusion

Consider training your landscape workers to perform pre-blows and final blows with site checking. Your whole operation will be smoother.

How you can have fun with a stump grinder

By | Landscaping, Trees | No Comments

If you read my blog posts consistently you will know that I’m not really a machine kind of guy. But as I found out, learning to use a new machine can be a fun way to spend your day and it stretches you a bit. This is exactly what happened on my stump grinding day.


The goal


IMG_9112


The goal for the day was to annihilate the two stumps, level off the bed with new soil and install a row of cedars (Thuja occidentalis ‘Smaragd’) to separate the two units.


Step 1

I rented the stump grinder at Home Depot. It’s cheaper if you can fit all of your work into four hours. Otherwise you will have to pay for the whole day.

Because the machine is heavy my boss had suggested asking a passerby for assistance. Unfortunately, I only saw teenage girls heading to school and it would have been suspicious asking them for help with a stump grinder. So I called for help.

There is only one trick to the machine. When you’re ready to stump grind, activate the black lever on the left. It locks the left wheel in place allowing you to rock the machine blade side to side over your stump. That’s it.

I really enjoyed doing this by myself without anyone kibitzing and it worked out. Only later I learned that a little boy in the window had a blast watching me.


IMG_9115

The stump is disappearing nicely.

Once the stumps are erased, you will have to rake up the wood debris and remove it. Also, don’t forget to clean up the machine or the Home Depot attendant will have a fit.


IMG_9119

Ready for soil install.


Cedar hedge


Digging through the middle of this bed was actually very hard because I ran into heavy clay. Soils in the Lower Mainland are mostly clay but it’s hard to tell because new developments sometimes have engineered soils installed. And they don’t look anything like the native soils.

New cedars installed in spring will require consistent watering so they can get established. Both units were alerted but sometimes I wonder. I reminded them to slow soak the cedars; quick spray from a hose isn’t really watering.

The new grass seed, on the other hand, will need gentle sprays to achieve germination in one week or so.


IMG_9124

All done. Stumps are gone, the area is level with new soil and a new hedge is in. The lawn will require at least a week for germination.


This was a fun day for me because I got to transform a bare area into something new. And in the process I got to practice stump grinding which means that next time I will be super confident. Both residents were delighted with the change and promised to water religiously. God help them.

Why Persian ironwood rocks!

By | Arborist Insights, Species, Trees | No Comments

I discovered the Persian ironwood tree (Parrotia persica) in 2014 while working for municipal gardener Tracey Mallinson. We had many of these trees at the Poirier complex in Coquitlam, BC. But I didn’t expect this tree species to rock the Urban Foresters Symposium. It was mentioned in two lectures and for good reason. It also appeared in the plant ID contest as one of the 25 specimens.


IMG_3596


Bullet proof


In lecture one on urban street and landscape trees, the lecturer referred to Parrotia persica as bullet-proof. Then he introduced us to three new Parrotia persica cultivars (cv.).

Parrotia persica cv. ‘Ruby Vase’ has a more compact crown while P. persica ‘Vanessa’ has a narrow crown habit. The third cultivar is the most interesting. Called P. persica cv. ‘Persian spire’, it’s a slow-growing non-aggressive street tree or it can be used as a hedge plant. The leaves have an awesome purple boarder.


Lecture two

Lecture two covered moisture stress in the landscape. While the lecturer didn’t want to recommend specific species he did cover three tree species he liked. One of them was Parrotia persica, our new bullet-proof friend.

It can handle drier conditions because it comes from the high deserts of Iran. Thus the specific epithet “persica”. It has thick, somewhat hairy leaves. And it tolerates drought and alkaline soil conditions. It doesn’t suffer from any diseases and it has beautiful fall colours.

Cons

Parrotia persica is a slow grower; and the specimens I know from my landscapes tend to have irregular crowns because once in a while a branch pushes out of the crown. But again, it depends on who is looking. Personally, I have no trouble with some idiosyncrasies. Other people freak out when the crown isn’t perfectly round.

I don’t recall any problems with this tree species on any of our strata sites. So bullet-proof it is.


Perottia persica


Conclusion

If you’re considering what tree species to plant as our climate goes drier, the bullet-proof Parrotia persica is a great choice. You can try any of the three cultivars mentioned above; and you should expect decent fall colour.


IMG_3734

It feels like fall when cedar pruning starts

By | Pruning | No Comments

It always feels like fall when cedar pruning season starts. Cedar pruning is usually written into landscape maintenance contracts and it starts in fall; it can run into the New Year easily depending on site size and work load but normally the goal is to get everything sheared before Christmas.


IMG_2921

All you need: a ladder and good, sharp Stihl power shears.


First day

Last week I had my first full cedar pruning day of the season, cheered on by patches of Rudbeckias still holding on to summer. Just like me.

The line I was pruning covered enclosed patios and it was slower than usual because some owners have incredibly cluttered patios. And, of course, I didn’t have the right of way so I had to be careful not to damage anything.


The set-up

To properly top cedars a ladder is mandatory. I also used two sets of Stihl shears: one short model for tight spots and one extendable unit for topping. Remember to sharpen your blades before starting your cedar pruning season. Sharp blades glide through the foliage and give you a nice cut. Dull blades slow you down and leave little strands sticking out. Try to avoid this by sharpening your blades.

Unless your truck is nearby, always bring a jerry can with mixed gas to avoid unnecessary walking. It wastes valuable shearing time.

I also keep my water bottle handy.

No robots

Never approach cedar shearing like a robot. On this day I had to recall that patio owners value their privacy so I sheared the sides in a straight wall line, except where there were obvious deliberate undulations in the hedge.

The tops are usually hit much tighter for a nice tight laser line.

Just remember NOT to prune between the gaps because the owners want the cedars to grow into the gaps and thereby give them the privacy they crave so much.

Once in a while step back and check on your top line to make sure your laser isn’t off.


Clean-ups

Don’t go cheap on clean-ups. You can expect to do some hand cleaning off the tops of plants and outdoor patio furniture because cedar debris is fine. But don’t stress about the small stuff; use a blower for the final round and put all pots and furniture back.

Yes, shearing all day can be hard on your muscles but you get the satisfaction of seeing great looking cedar hedges.

Have some fun with it.


IMG_2923

All done: there’s a decent top line and the sides are still green. No pruning happened between individual plants because only solid hedges provide solid privacy.


Water your new installs for success

By | landscape maintenance | No Comments

It drives me crazy when I see my landscape installs neglected and suffering from lack of water. It must be the biophilia effect because I feel responsible for the suffering plants. An yet, I can’t do much about it because it’s up to the owners to water their plants. I water them in on install day.

Water for success

This is your main take-away from this blog post: new plants require copious amounts of water to properly establish. As water goes in, roots chase it down and extend. And on it goes but not without water.


IMG_1736

Disappointing.


This is the worst case because I did everything myself. I removed the dead cedars, dug the holes, bought and delivered the new cedars (Thuja occidentalis ‘Smaragd‘), planted them and watered them in. Months later I took this picture with some disgust. Directly behind me was a perfectly functioning garden hose. It just takes time to properly soak the cedars once in a while. Cedars are very thirsty in their first year.


Magnolia


IMG_1734


Because of our summer drought this Magnolia tree exhibited early leaf senescence. With some watering from me it bounced back by pushing out new foliage. The cedars behind the tree weren’t so lucky. To be fair, shading from the Magnolia becomes permanent over time but I suspect lack of water was also a major contributor to this carnage.

Note the garden hose in the picture. I have no idea why it can’t be turned on and left to soak the area for twenty minutes. Again, it’s up to the owners to water.


Success!

Luckily, some owners get it. This unit has two little kids and the owners water. Plus they installed a soaker hose so their new cedar hedge would establish. This space used to be bare with only two stumps to look at and I, literally, paid for this install with my blood. Because the nearby creek breeds a lot of summer mosquitos this project was an adventure. My next blog post will be on my intimate knowledge of insect repellents.


IMG_2777

These owners get a gold start for watering.


As we ease into fall, there will be more landscape installs. It’s absolutely critical that owners water their new plants. Good plant establishment can only happen with good watering.