Good landscape maintenance dictates that we follow our plan for the day. Usually there is a set rotation so that every section of a given site is completed. Working without a plan is a recipe for disaster. Landscape foremen must know what tasks they must complete on the day they visit and on the following visit.
When small requests pop up we try to do them right away. Assuming they are small. Anything bigger and time consuming should be pushed to your next visit.
One exception
There are always exceptions, in life and in landscaping. This occurred to me in late July 2019, when a resident came out to alert us to a social event happening that weekend in the barbecue area. Now what? Do you ignore it and continue with your finesse work plan?
We decided to pimp out the barbecue area because when residents have a social event they talk. And the barbecue area needed some help so we switched and attacked the area.
Tasks
One obvious blemish were the many crack weeds showing around the barbecue pit and benches. So we carefully line trimmed them to oblivion. When you do this work check for nearby windows and pedestrians so there isn’t any trouble.
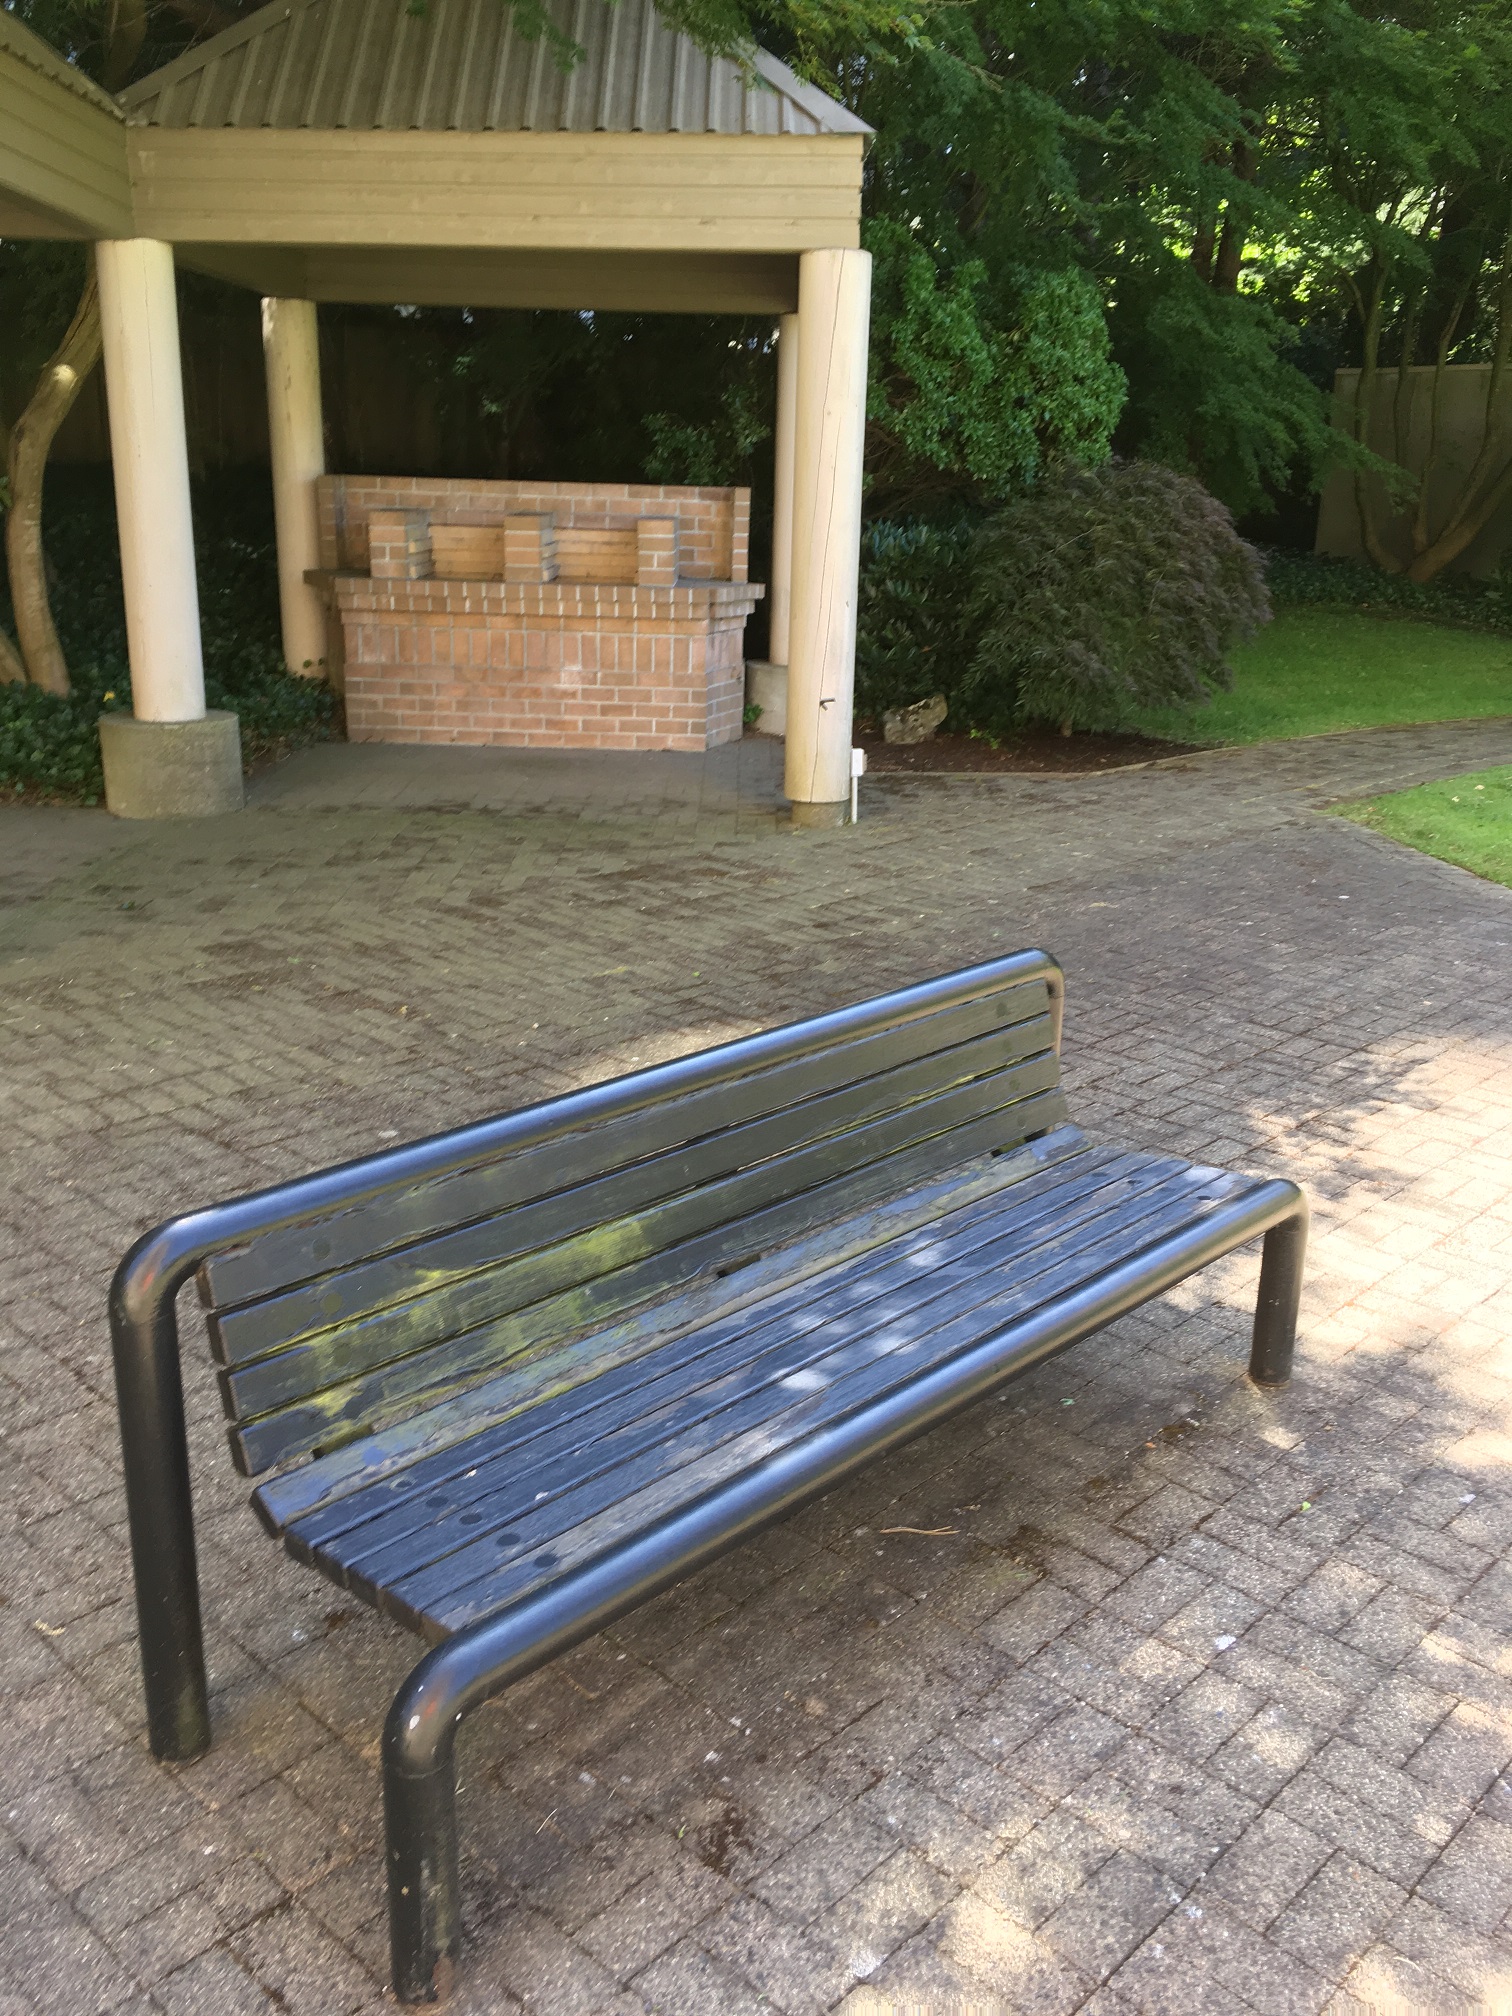
All unsightly crack weeds are gone.
I also pruned the Japanese maple (Acer palmatum) lightly. A few branches were sticking out into the walkway; and there were some dead branches inside the tree. You should be able to see through Japanese maples.
The other maple (Acer palmatum disectum) had a weeping habit and it didn’t require any pruning but there was a lot of landscape fabric showing around the tree. That’s very unsightly. Landscape fabric should be covered by several inches of mulch.
Since we didn’t have any fresh mulch, I poached some mulch from a lonely corner on the site. Poaching mulch from a neighbouring site would be wrong.
Weeds and tree seedlings were also removed from both beds. I cultivated where the old landscape fabric was still covered by mulch. This gives the bed a fresh look and it uproots weeds.
The final task is always a courtesy clean-up blow. Just try not to blow too long in summer because it’s hot and dusty outside and windows are open. I blew the barbecue area and bailed, satisfied that the residents would enjoy their barbecue.

Weeds and seedlings are gone, the bed is cultivated and the maple is off the walkway.
Would you raze your own garden? It seems like a radical waste of time but I like the idea. What if you try gardening and years later you admit to yourself that you’re not really a gardener?
This blog post was inspired by a story I had read in the Globe and Mail newspaper. The writer started gardening in her small Calgary garden and everything went well. Her husband helped with spring preparations and the garden produced all sorts of vegetables for the family.
Then they moved to British Columbia where their new neighbours were gardening all-stars. And it must have been a bit intimidating.
I have some experience with this. I was once a happy community garden plot “owner” and then I made the mistake of renting a bigger plot. It was bigger but also closer to the main building. This meant close scrutiny of my plot by a gardener on disability with time to kill. He would constantly analyze my vegetable choices and rob me of the joy of growing and experimenting with new plants. I let my plot go to some lucky person on the waiting list. And to this day I regret accepting the bigger garden plot.
Back to our family. While the husband helped in spring, he didn’t do much beyond that. Same with the kids. The wife was left to care for the garden, weeding, planting, watering, harvesting. And soon she was overwhelmed.
That’s when the family decided to quit. The husband went out and razed the garden; the wife walked out on the patio and instead of worrying about the garden, she opened up a book and relaxed. The change felt great. They weren’t really gardeners and they openly admitted it.
I totally loved reading this article because it’s different from beautiful garden magazine stories. You never read about people giving up and razing their gardens. That wouldn’t sell many gardening magazines or books, tools and seeds.
I read the Globe and Mail newspaper regularly but I often ignore the latest news. Instead, I look for interesting stories and recently I got lucky. I found a story about a Toronto street horse-chestnut tree (Aesculus hippocastanum). It’s almost a love letter to a lost friend.
The writer had a huge specimen in front of his house and one day city crews came out to remove it. They showed him how the hollow areas inside made it likely that it would collapse on the sidewalk or street. It was in everyone’s best interest to remove it and plant something new.
The story reminds me of how trees can become your friends, even if they annoy you by dropping stuff all year. Flower parts, chestnuts, leaves, etc.
Even I remember doing crafts with horse-chestnuts as a kid. I recall we made animals out of them. And now, many years later, I still can’t resist picking up the shiny brown chestnuts. Then I forget them in a work truck and the boss freaks out.
As soon as the tree was removed the author immediately noticed the lack of shade; and, of course, trees provide many free ecosystem services, shade is just one of them. The street also didn’t look the same post tree removal. Large trees give streets character.
There is lots to like about horse-chestnuts. The large prominent flowers look great, the leaves and buds are huge and the chestnuts are fun to hold and look at.
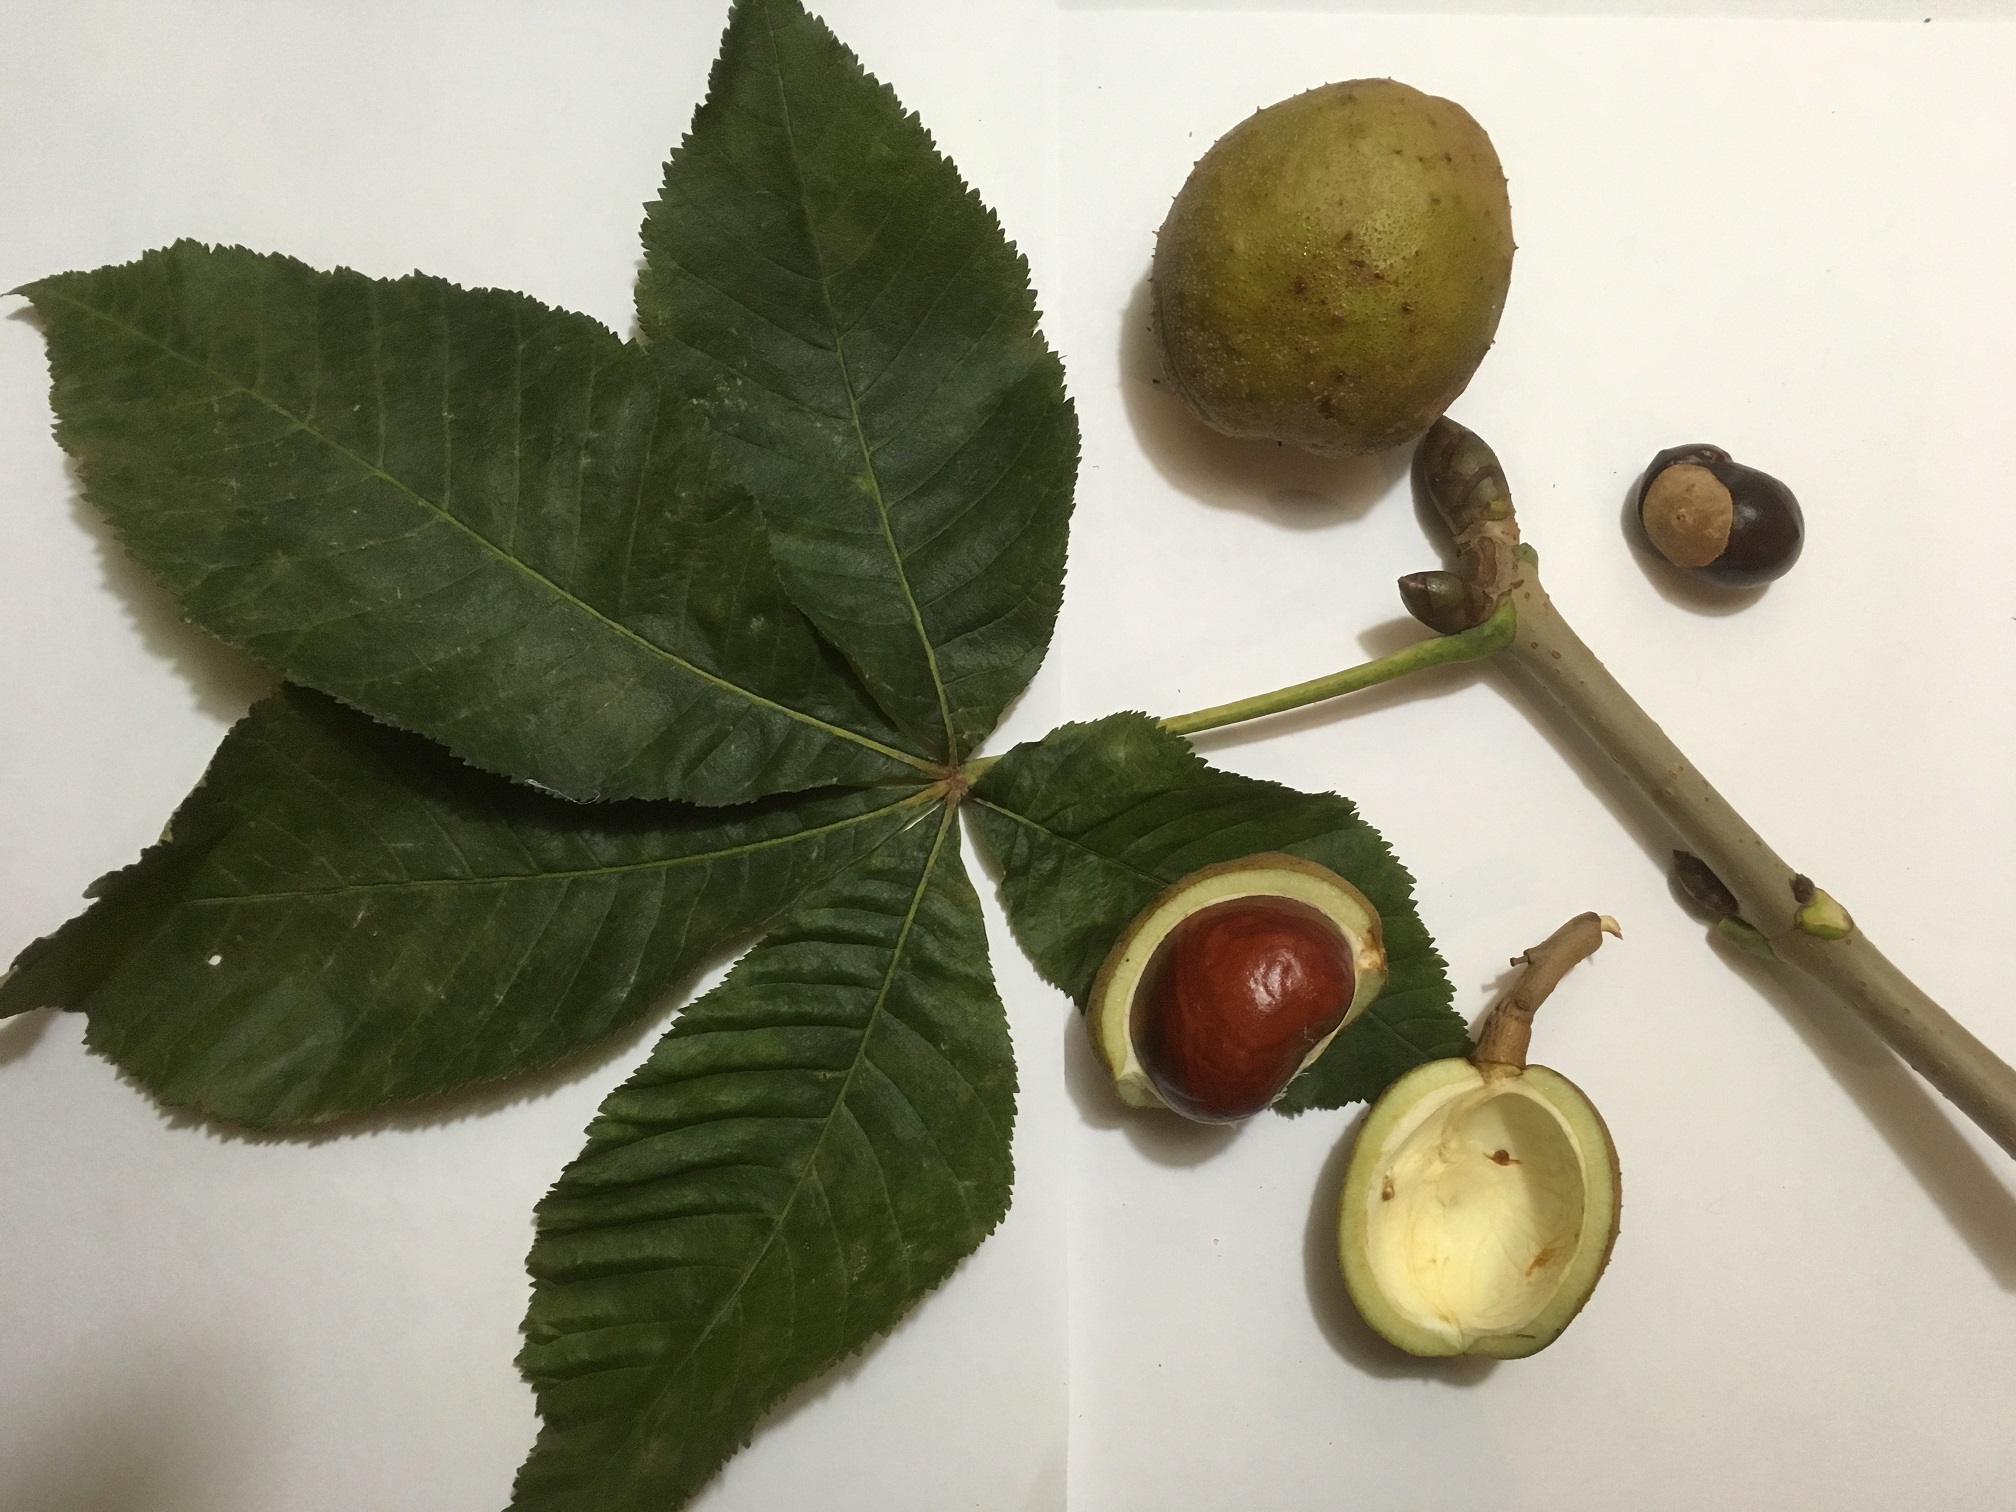
Aesculus hippocastanum: note the huge buds, leaves and nuts.
The author’s municipality offered him a free replacement tree and, of course, he will plant one. He just won’t live long enough to see it mature into a giant. And that’s fine. We need more trees to give cities some character and to combat Global Warming.
Returning from a Seattle soccer tournament last weekend, I had time to examine the border landscaping while I waited in line. It was an early summer evening and I was relaxed because I didn’t have anything to declare. I literally spent four days near soccer fields watching my son take his U12 team to the finals.
Perfect fit mulch
To my left was a row of red maples (Acer rubrum) planted in river rock beds. Aha! Another perfect fit.
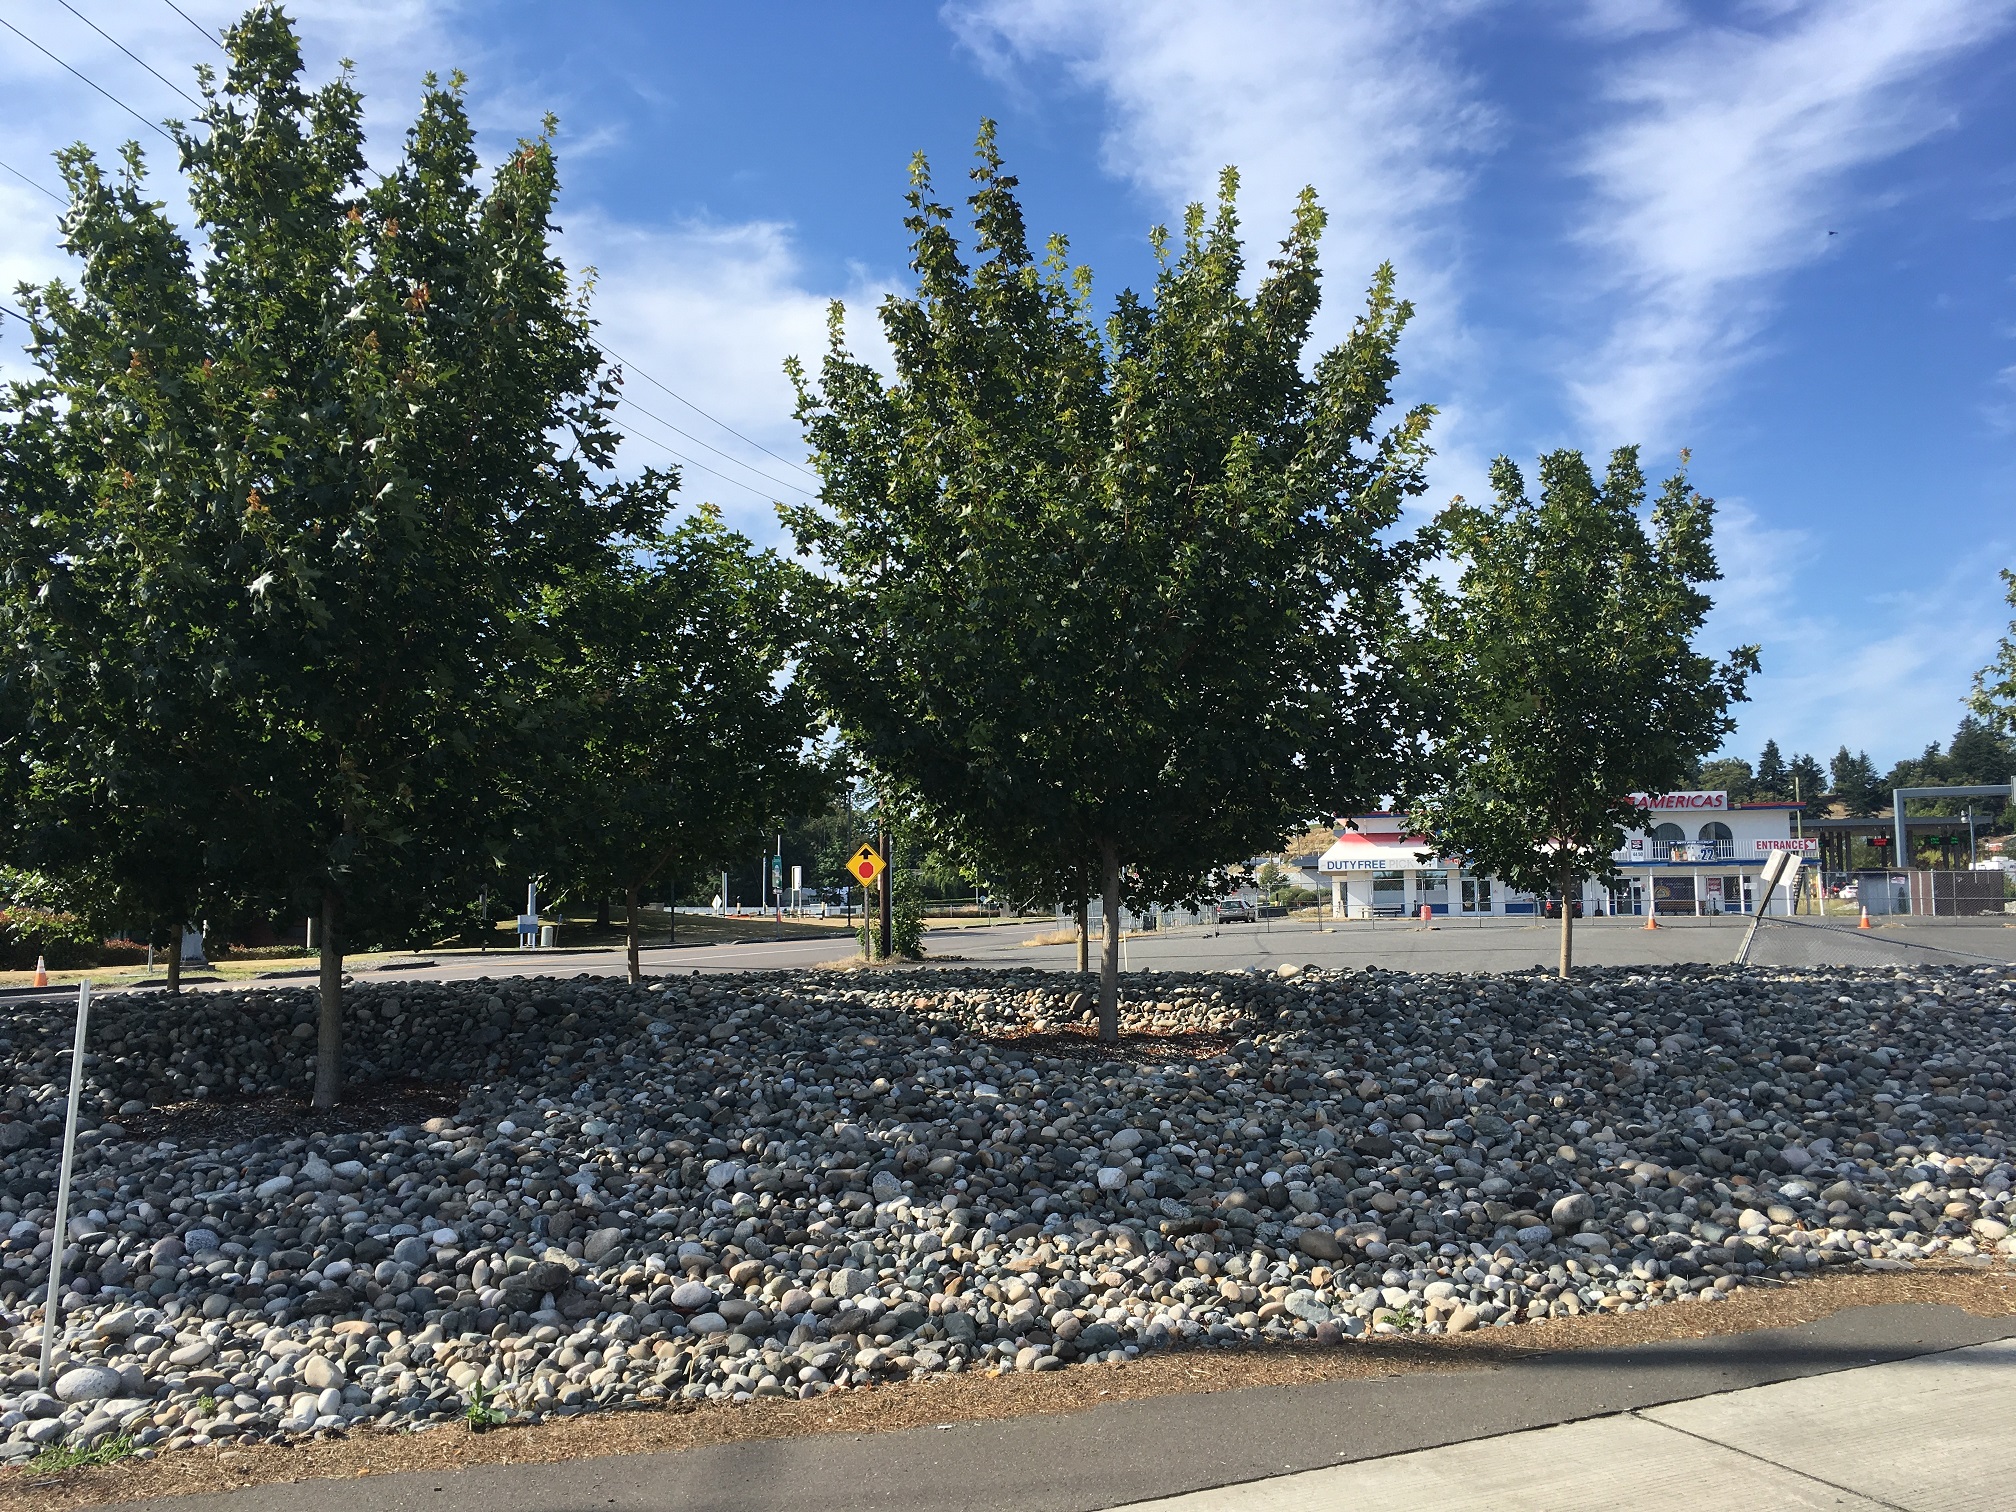
Approaching the Canadian border.
Now, personally I prefer organic mulches like arbor chips or composted bark. However, river rock can be perfect in some situations. I’ve already written blog posts about river rock as replacement for dog urine soaked lawn patches; and river rock as a solution for small dirt patches where new plants get flattened by car tires or, left bare, the dirt patches just grow weeds.
When you apply a nice, thick layer of mulch it keeps weeds out and doesn’t require any extra maintenance.
Now, back to our picture.
A. The river rock is correctly kept away from the critical root zone so water and oxygen can be accessed by the tree roots. The tree well also “captures” leaves and, assuming they’re left in place, allows them to feed the tree.
B. The river rock looks nice and thick. Thickness is important when applying mulches because we need to block out sunlight so weeds don’t germinate. Thin mulch applications can actually encourage weed growth because they trap moisture and allow sunlight to penetrate. Go deep or don’t do it all.
C. There are weeds visible in the edges which is to be expected. Wind and birds can import weed seeds.
D. River rock eliminates the need for lawn maintenance. This eliminates extra costs and protects cars lined up at the border. It would be stressful mowing and line edging near so many car windows. And, I suspect, the people lined up in their cars appreciate the complete lack of noise and air pollution.
Yes, you can use river rock as mulch. And, in some situations, it works better than organic mulches. Give it a try.
When I ran across the novel “Overstory” by Richard Powers, all I knew was that it was about trees and it won a Pulitzer Prize. I avoided reviews just so I could form my own opinion and thus write an honest book review for my own blog.
Obviously, most Pulitzer Prize winning books are great but it’s not guaranteed that you will like them. As soon as I heard that this novel was about trees, I was hooked.
Go audio
Considering the novel’s door stopper size, I opted for the audio version through my Audible account. I probably wouldn’t have finished the book if I had it by my bed. Audio is easy and I listened to it mostly at work while I worked. It runs at 23 hours and I usually listen at 1.25 speed.
When I’m not running landscape crews, it’s OK to put a book on while I landscape.
Tree hugger
You will like this book if you love trees. Trees take center stage in this novel. Just the way I like it. And while this is a work of fiction, you will learn lots about trees. I can tell that the author did his homework on trees. If you removed the fictional humans, this would be a great tree primer.
For example, we now know that trees aren’t stand alone plants. They’re interconnected, they communicate and help each other. Only trees have achieved what humans couldn’t: true communism.
Of course, there are deeper questions that go beyond trees. What are we doing to our Earth? Are we messing everything up? Can we do better?
Direct action
Some of the characters resort to direct action to protect ancient trees. Having read about Earth First! and Ed Abbey’s work, this was my easily my favourite part of the book. And like Earth First!, some end up in jail.

Ed Abbey’s Monkeywrench gang is a classic.
Conclusion
Overstory deserves it’s Pulitzer Prize status! I thoroughly enjoyed it. The human stories are there in the background and you almost don’t notice that the author is teaching you about trees. The details about trees are hardly fiction. You will learn lots of new stuff about trees in this novel.
And you will be left to ponder some deeper questions about the way we live with nature. Read this novel if you like trees or wonder why humans are messing things up.
5 stars out of 5, easily, but get the audio version. It’s 23 hours well spent.
When I was in Seattle, USA, recently for my son’s soccer tournament (they made it to the final!) I went hunting for coffee in the morning. My cheap Motel 6 didn’t have any coffee in the lobby, nor in the room. No problem.
So, I walked into the nearest gas station to get my dark roast which happened to come with a free banana. Even better; but no sign of the New York Times.
Surprise
On the way out I noticed a familiar looking groundcover with orange fruit. I recognized the foliage but had never seen the fruit. Imagine that, a new personal plant discovery at a gas station! I would later post my pictures in a Facebook group and some people laughed. Usually people post beautiful flowers from exotic, far away places. Not me; I get excited by gas station groundcovers.
I rushed to our cramped room to use the motel’s very wobbly and unsecured Wi-Fi to confirm that it was Rubus groundcover. I knew the evergreen foliage which is brownish on the underside.
There is lots to like about Rubus. It tolerates heat, the foliage is attractive and it’s evergreen; and it produces orange fruit which resembles Salmonberry. And it makes sense because the botanical name for Salmonberry is Rubus spectabilis. We know that Salmonberry is a native West Coast plant with edible berries.
I always buy travel insurance but just to be safe, I didn’t eat any of the groundcover berries. Back home when we go for a walk with the kids, we sample all ripe Salmonberries within reach.
The groundcover Rubus also shades out weeds which is important for gas station beds. In Canada, gas station owners have very limited landscaping budgets which is why most of gas stations look awful.
Awesome groundcover
I was really surprised to see a nice looking groundcover with fruit at a gas station. It works really well and it would work well in your garden as well. If you need groundcover plants, consider Rubus. It might even feed you.
Once in a while I see an interesting question on Quora.com which I think deserves its own blog. This blog covers the following question: What’s the best training for a landscaper?
Face your fears
By far the best training for a landscaper is working in the field under an experienced foreman who is willing to train you well. Ask about this in your interview.
Yes, you can mow grass all season but it’s better to learn everything. You can learn to use all lawn care machines and then move on to pruning with power shears and bedwork.
It’s important to face your fears. Like I did today. I had to use a brush cutter, a pole chainsaw and a wood chipper.
School
If you think landscaping is still your dream gig, then take landscape horticulture courses. You can do it online, full time in school or as an apprentice aiming for Red Seal status after four seasons. Schooling increases your knowledge and your value to your company.
I also recommend getting Landscape Industry Certified. This used to involve written and practical exams but the practical exams are getting eliminated in the United States. In Canada, the practical testing will stay but there will be changes from 2020.
And don’t forget about trees. Take the International Society of Arboriculture (ISA) exam and learn about trees. This will increase the value you provide to your company. It also allows you to work year-round because tree pruning is done in the off-season.
Some clients are also touchy about their trees. Non-arborist landscapers aren’t always trusted with tree work. Get ISA certified. I’ve done it. Trust me.
Reading
Read the best books, magazines and journals and attend conferences. Training never ends! I regularly attend evening courses, for example, at Van Dusen Botanic gardens in Vancouver. I’ve also been to client education days put on by Bartlett Tree Services.
And I never miss the premier landscape horticulture trade show, CanWest.

Best for last
You can get the best education for new landscapers by following my blogs, here on the Proper Landscaping site and at West Coast Landscape Professional. My eBooks are available at Amazon for spare change. Search for Vas Sladek on Amazon. Don’t forget to leave reviews.
Landscaping can be extremely rewarding if you work and study hard under a professional foreman who is invested in your development. Good luck!
There are many beautiful landscape trees in our gardens and landscapes and some are easy to identify. We’ve covered five easy to identify tree species in a previous blog post and here we continue with five more. Do you know them already or are they new to you?
Sweetgum (Liquidambar styraciflua)

The sweetgum tree is a nice alternative for places where maples dominate. The pointy leaves resemble maples but what gives away the sweetgum are its hard spiky fruits. When you see them, you know its a sweetgum tree. They remind me of spiky floating mines from war movies.
Paperbark maple (Acer griseum)
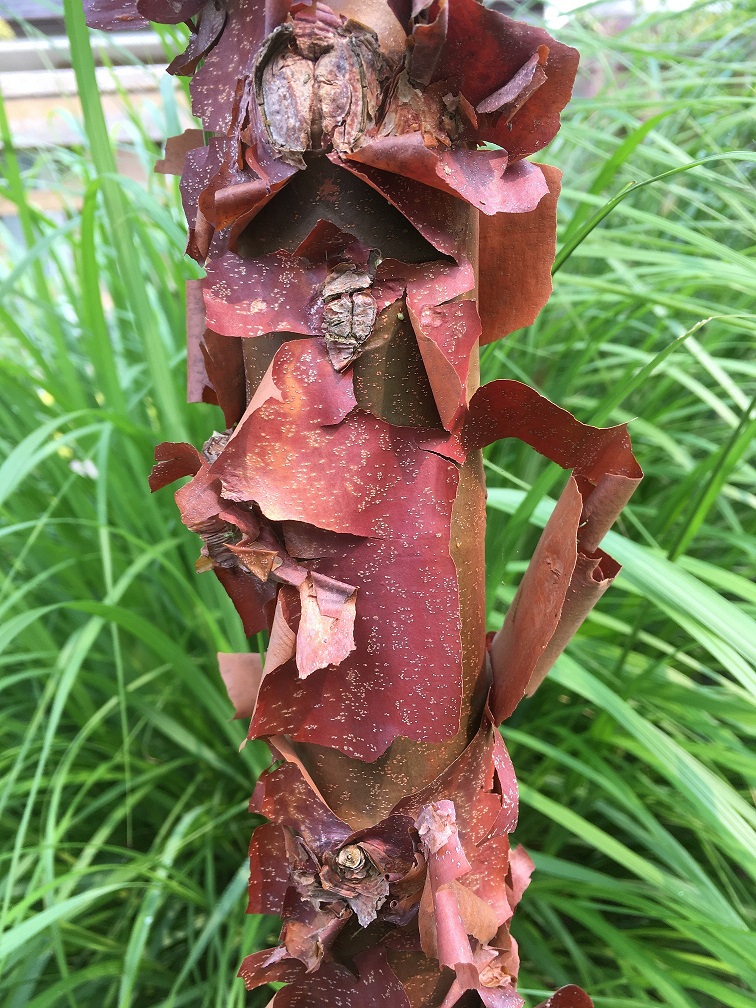
The common name gives it away but as soon as you see the gorgeous cinnamon coloured peeling bark, you know it’s Acer griseum. Sometimes, when no one is watching, I peel one section of the bark just for fun. This is beautiful landscape tree.
Horse chestnut (Aesculus hippocastanum)
There is lots to look at on the Horse chestnut. The buds are huge and so are the leaves; the key identifier is the inedible chestnut.
European beech (Fagus sylvatica)

The key identifier are fuzzy cupules which contain triangular beechnuts. Wait for the cupules to open up or take some home. They will pop open in your kitchen. My wife loves this.
London plane ( Platanus x acerifolia)

The London plane leaves are huge and the key identifier are the spherical fruits produced on long stalks. You will never forget this tree if you get close enough. I don’t suffer from any allergies but this tree can make me cry. That’s because young leaves shed short stiff hairs and so do the fruits. Backpack blowing around these trees is a nightmare.
London planes are also extremely effective at removing pollution.
Now, it’s your turn to practice identifying these five trees. They are easy to identify especially now that you know what to look for.
Get ready for volume 3.
Proper tree planting is extremely important so when I got a chance to judge a tree planting and staking practical station, I jumped at it.
The landscape industry certified practical tests run twice a year, in June and October but there will be major changes from 2020. Stay tuned.
Planting and staking
Incredibly, I had to do this section three times. My ISA certified arborist status didn’t help me because I failed to follow the specifications. And while I can’t comment in detail on any of my seven candidates, I can say that a few of them didn’t follow the written specifications.
The second time I failed this station was because I totally forgot to put on a headset during stake pounding. Safety is also super important. If you fail to use the provided personal protection equipment, you will most likely get a few deductions.
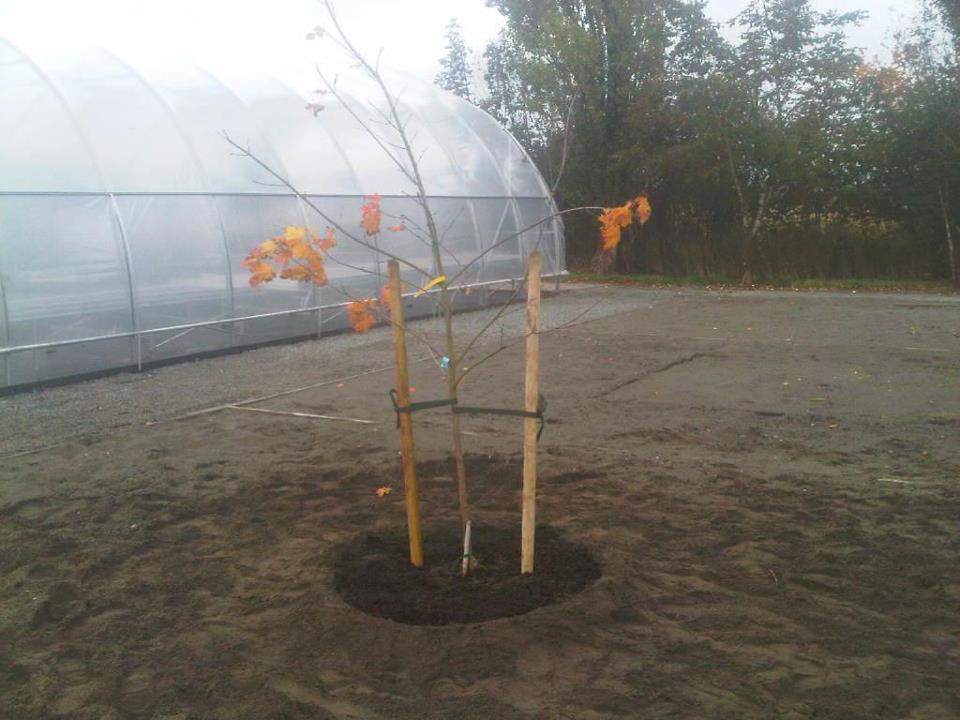
My historic third attempt, finally done correctly, and giving me the prized Landscape Industry Certified technician status.
Planting depth
As a judge, I can’t give away the station’s secrets but let’s just say that planting the test specimen too deep is a major problem. And rightly so because landscape trees planted too deep suffer. They suffer because their roots can’t get enough oxygen. Then, when they decline and die we have to replace them which is costly. Let’s do it right the first time.
Mulch
This is another serious issue. My blog post from September 10, 2019, covered the mulch volcano epidemic. Luckily, my candidates have clear specifications to follow. The key is that there must be a few inches of soil clear between the tree trunk and the mulch. This eliminates any chance of mulch volcanoes.
And if you haven’t read my September 10, 2019 blog then go back and review the problems associated with tree mulch volcanoes.
Staking
Some newly planted trees must be stakes; and staked correctly. Once you follow the specifications, all you have to know is that the stakes shouldn’t stay on for more than one season.
Conclusion
Not all of the candidates I judged passed but I had a great time judging the tree planting and staking stations. I had a manual to follow and the other veteran judges helped me.
Incorrectly planted landscape trees suffer, decline and die. Then we lose their free ecosystem services at a time when more trees are required to fight Global Warming.


