This isn’t my first blog post about mulch volcanoes and I’m returning to this topic only because of a picture I saw on Facebook. One lawn care group member shared the picture below and people had a good laugh. I felt like crying.
What’s wrong here?
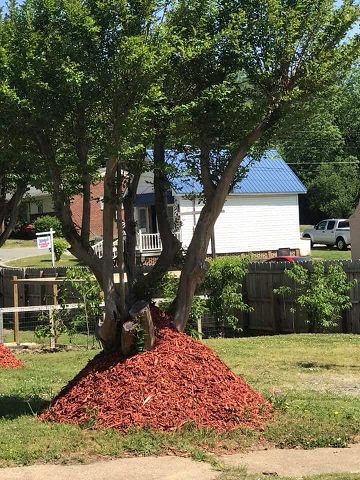
It will definitely prevent weeds from growing and it looks pretty, doesn’t it? It’s a massive volcano; and reddish, too. But it’s completely twisted. I know the workers weren’t professionals. Professionals would never allow this kind of work to pass inspection.
Here is what mulched tree wells should look like: imagine a donut. No mulch touches the root flare, then it extends out in the middle and tapers towards the lawn edge.
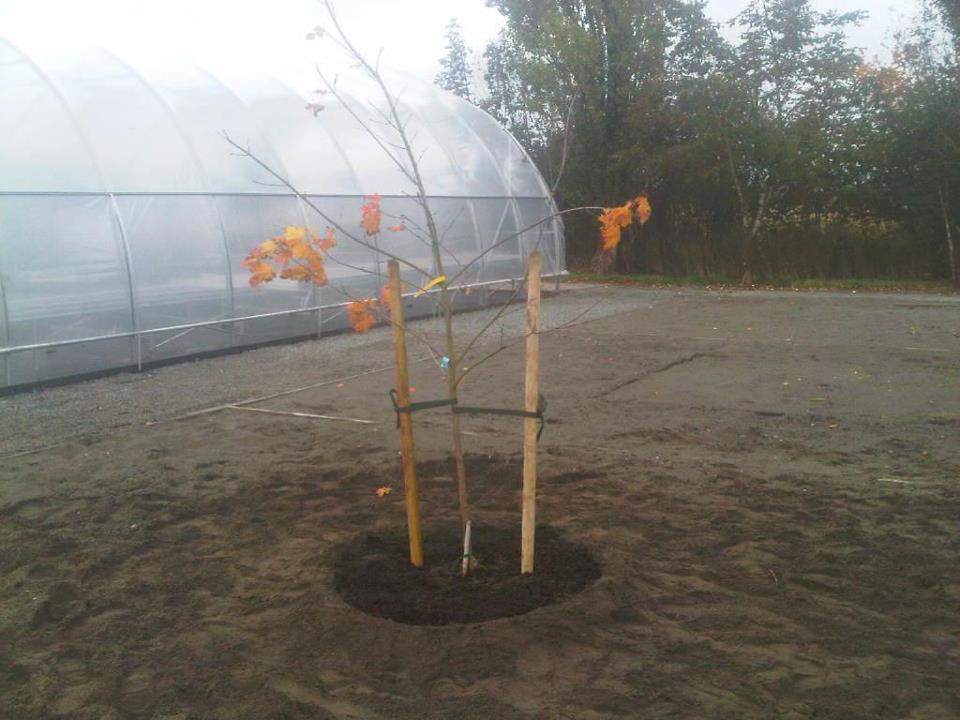
This Acer platanus has a berm around it because that’s what specifications demanded. The mulch doesn’t touch the tree trunk. Why is this so critical? To answer this, I’m borrowing heavily from the work of my mentor Dr. Linda Chalker-Scott.
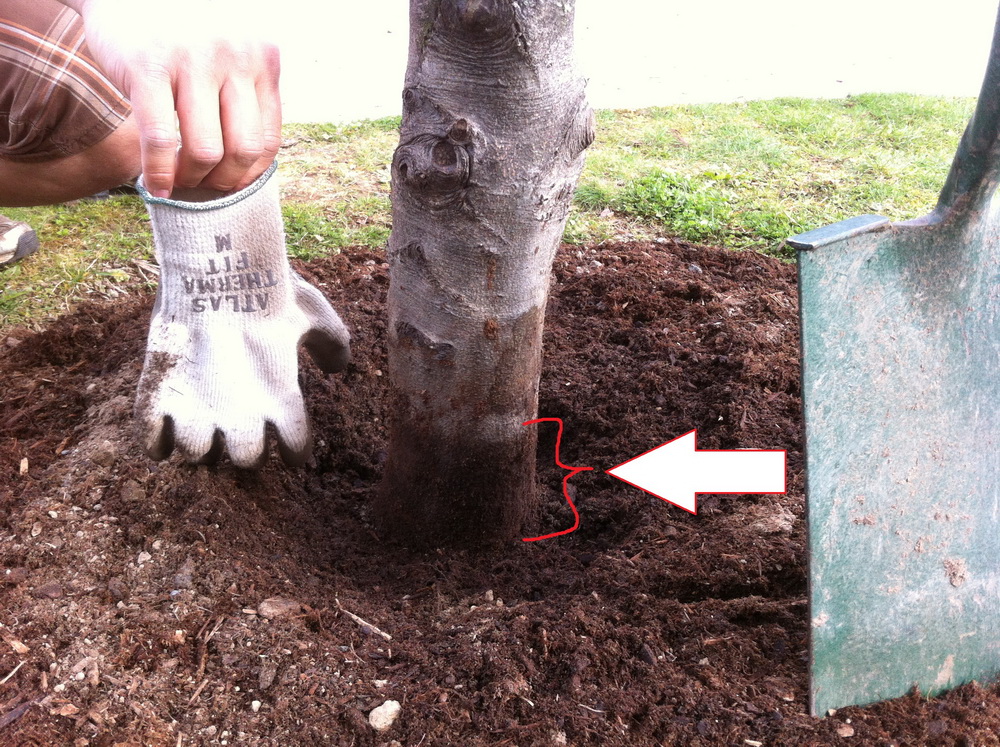
The above trunk tissues aren’t supposed to be covered by mulch because it creates dark, damp and low-oxygen conditions. The wetness can lead to rot and disease entry. See below how wet the section above the root flare is. This is asking for trouble. Opportunistic pests love this.
Another problem related to mulch volcanoes is root girdling. When you cover trunk tissue with mulch, the tree can push out adventitious roots which develop from the stem. As they grow and thicken, they can girdle the tree, essentially choking itself to death.
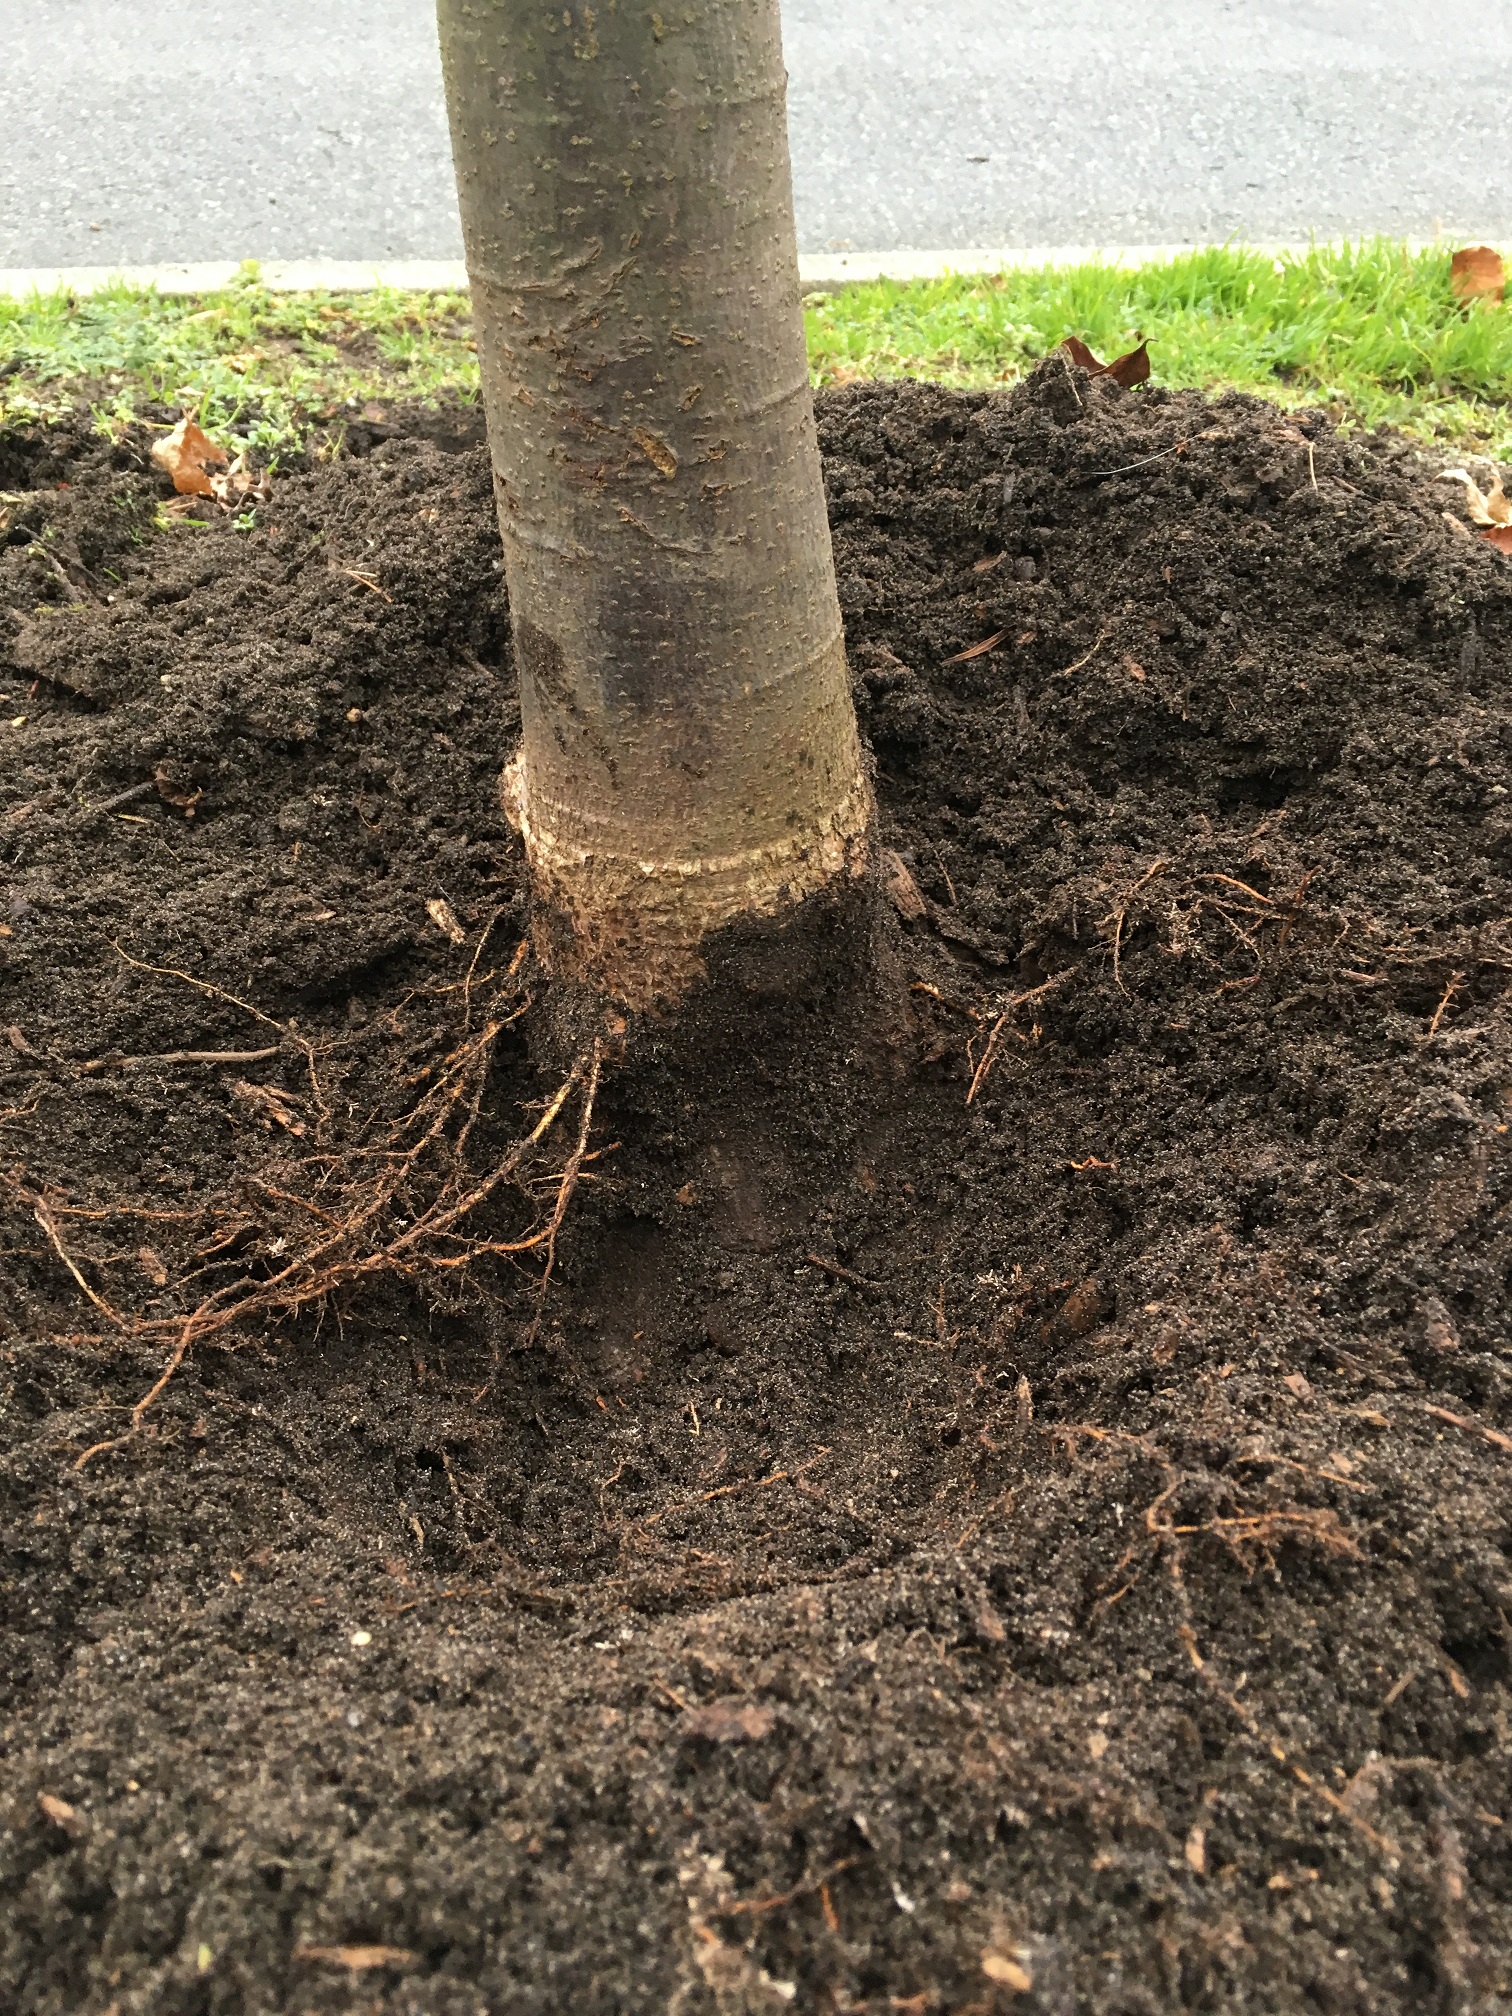
This is a great example showing adventitious root development inside a mulch volcano.
Mulch volcanoes aren’t going away. They’re like antibiotic resistant bugs. We need constant vigilance and good worker training. Otherwise, our landscape trees will suffer at a time when more and more trees are needed to combat Global Warming.
So, remember, apply tree mulch as if you were making a donut. Don’t build tree mulch volcanoes or I will erupt again on the pages of this blog.
Coincidence can bring lots of fun and excitement into your life. A few months ago I got to test the new and beautiful Stihl Magnum blower. And on that same day, I purchased a copy of The Atlantic magazine with a story by James Fallows about a successful blower ban in Washington, D.C. See “Get off my lawn“, The Atlantic, April, 2019. I had no idea landscapers could have so much fun in one day.
The key information
(Disclaimer: I am in no way associated with Stihl).
The new Stihl Magnum is beautiful. And here’s the key selling point. Stihl’s previous models had great air speed with low volume; and then they increased air volume but air speed suffered. Now, the two volumes meet successfully in the Magnum.
This is why your leaf blowing season is about to get better. The Magnum has good air volume AND air speed. It’s a fantastic blower that will make you fall in love with blowing. Unless you’re a writer from Washington, DC.
Key features
1. innovative 2-stroke, stratified charge engine, providing outstanding performance, plenty of power, a 20% reduction in fuel consumption and up to 70% fewer exhaust emissions
2. automatic starting position and automatic choke reset, very simple to start
3. professional anti-vibration system, making them very comfortable to use, reliable and user-friendly.
Vas tested
The features from above are all sales copy from Stihl’s website. I prefer to do my own testing in the field so this blog isn’t full of fiction. My field testing went really well. I believe this is the best blower I’ve ever used. Why?
- It has tons of power so it can move large amounts of debris
- It feels great on my shoulders
- It doesn’t feel heavier than the previous models
- It really starts nicely
- And I don’t notice any extra noise
If you have larger properties to maintain or sites that get very leafy, this would be a great blower to invest in. I think the new Magnum will make you fall in love with blowing again.

My favourite local dealer is Tri-City Power Equipment, 98 Fawcett Road, Coquitlam BC V3K 6V5, 604-520-3000
River rock is a great mulch material. I prefer soft mulches but river rock has its charms.
Last year I had a fairly easy task: remove a struggling skinny patch of lawn soaked in dog urine and install 2-6″ river rock. Sounds easy, right? I just went a bit far in my preparation work by removing too much soil. Then the bed ate up a lot of river rock and I went over budget. Both on time and material.
Of course, the one upside of using lots of river rock as mulch is that the bed is weed-free. Twelve months later I can laugh about it but I also learned from it.
12 months later
This year my boss was more careful. He sent me to the same site with just one yard of river rock. Incidentally, one yard of river rock will cost you roughly $60, tax included. Delivery and labour are extra. Having Red Seal Vas install your river rock will cost you lots of coins.
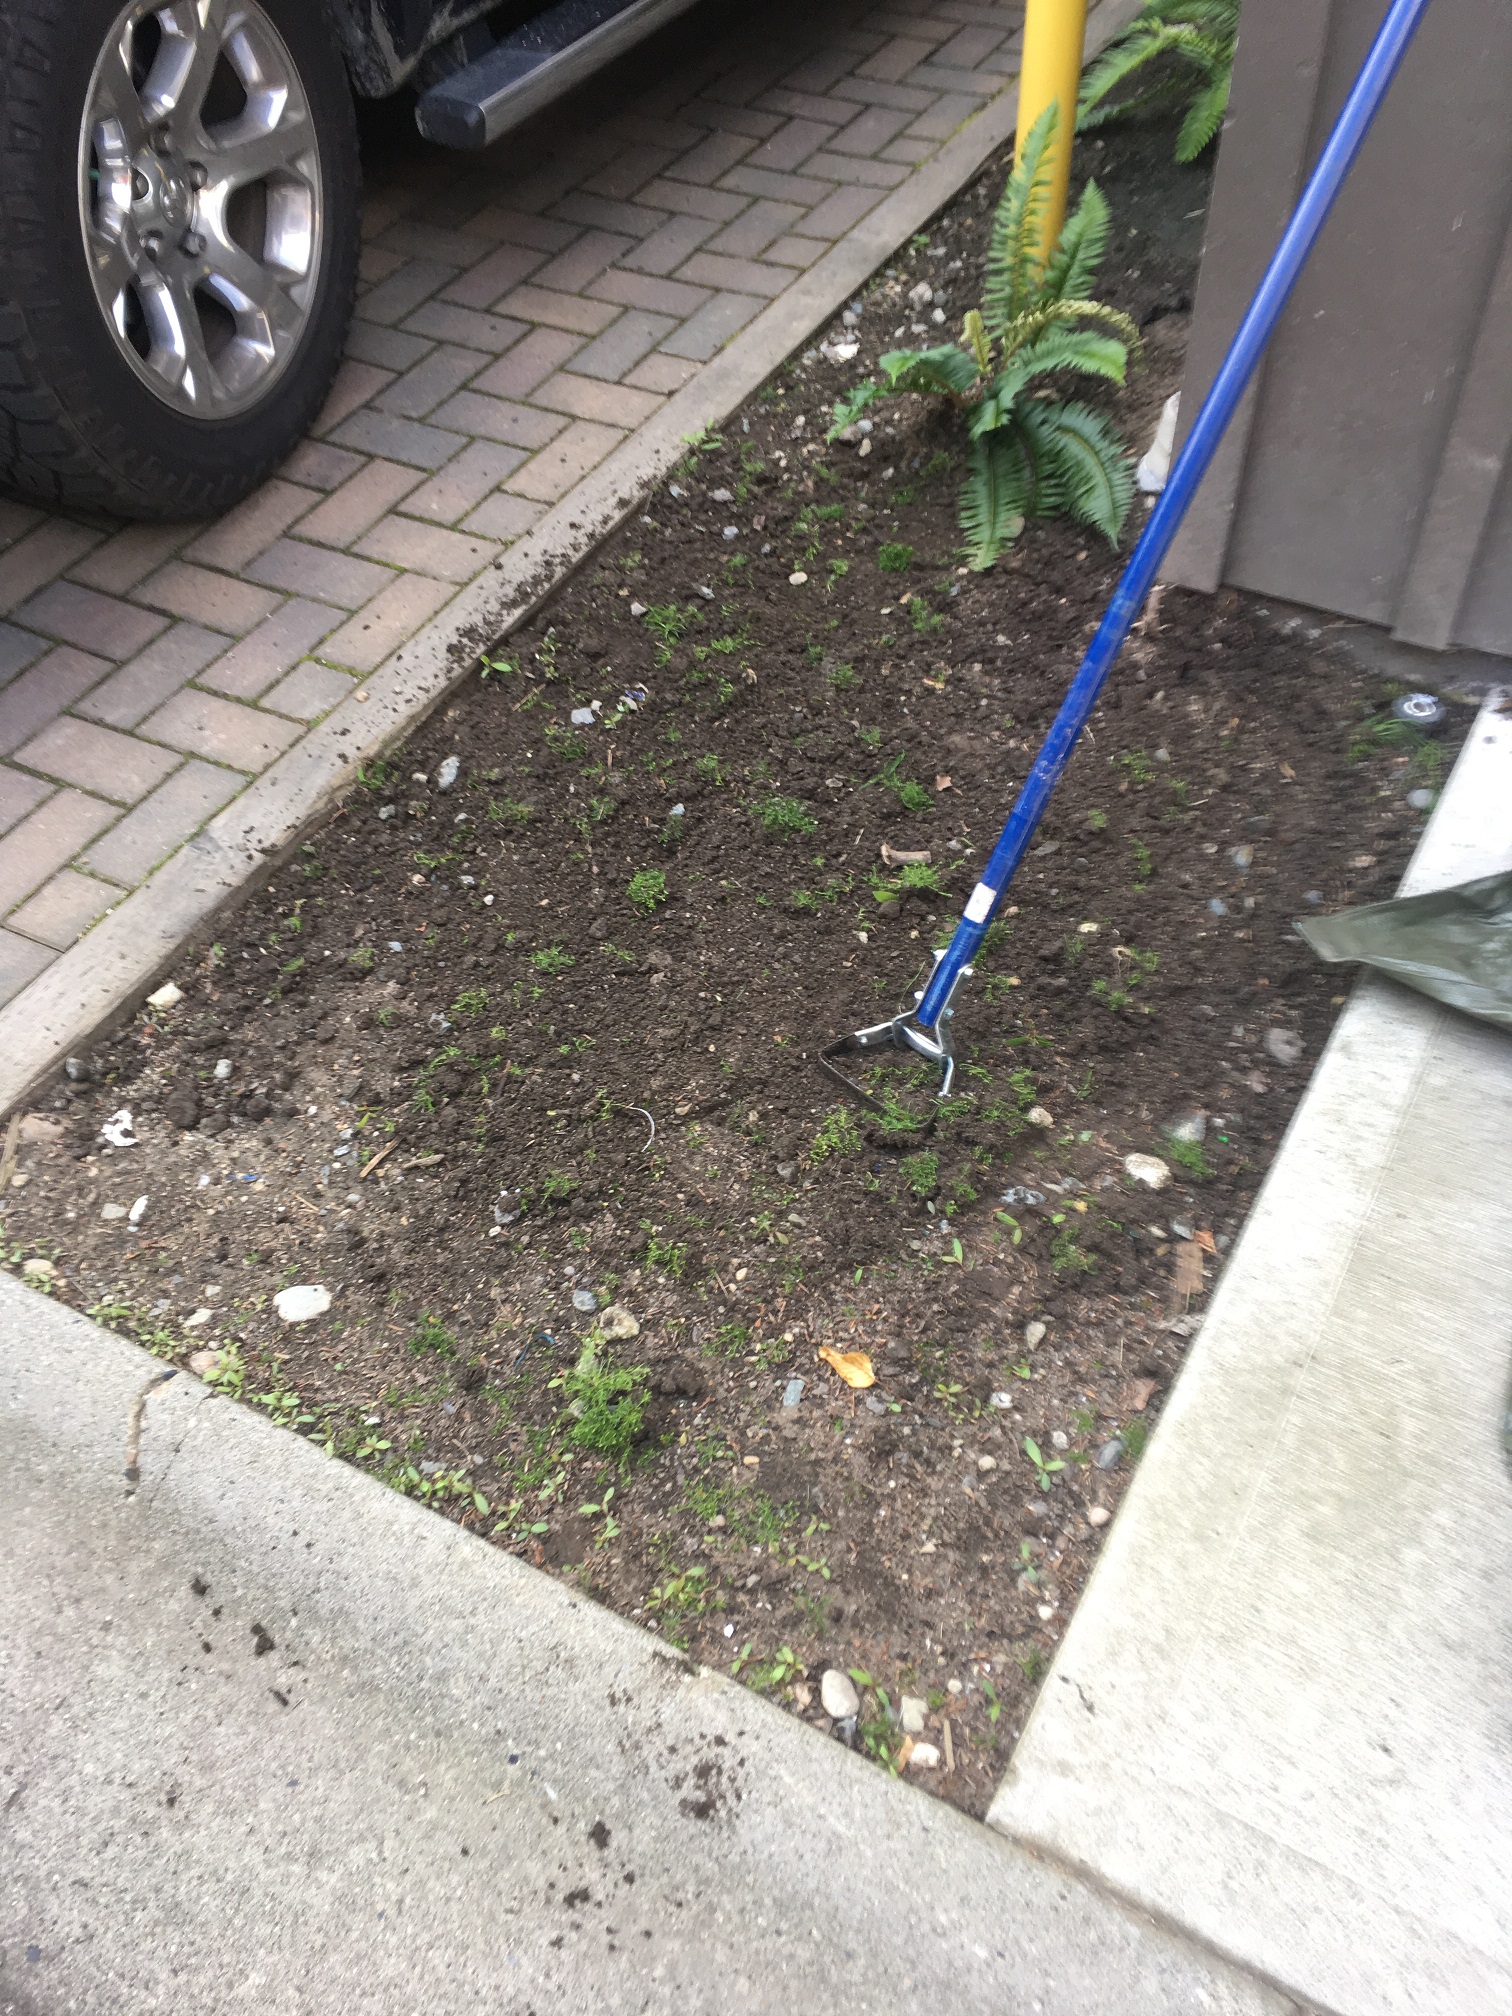
Step 1
Step one involves weeding and removing a little bit of soil so the rock can be nicely anchored. It wouldn’t make sense to install river rock over weeds.
Step 2
In step two we install the river rock. Spread it out nicely so you get good coverage.
Step 3
If you have a garden hose close by, wash off the sandy river rock so the colours show up. Unfortunately, there weren’t any water outlets nearby and I had to go work on another project.
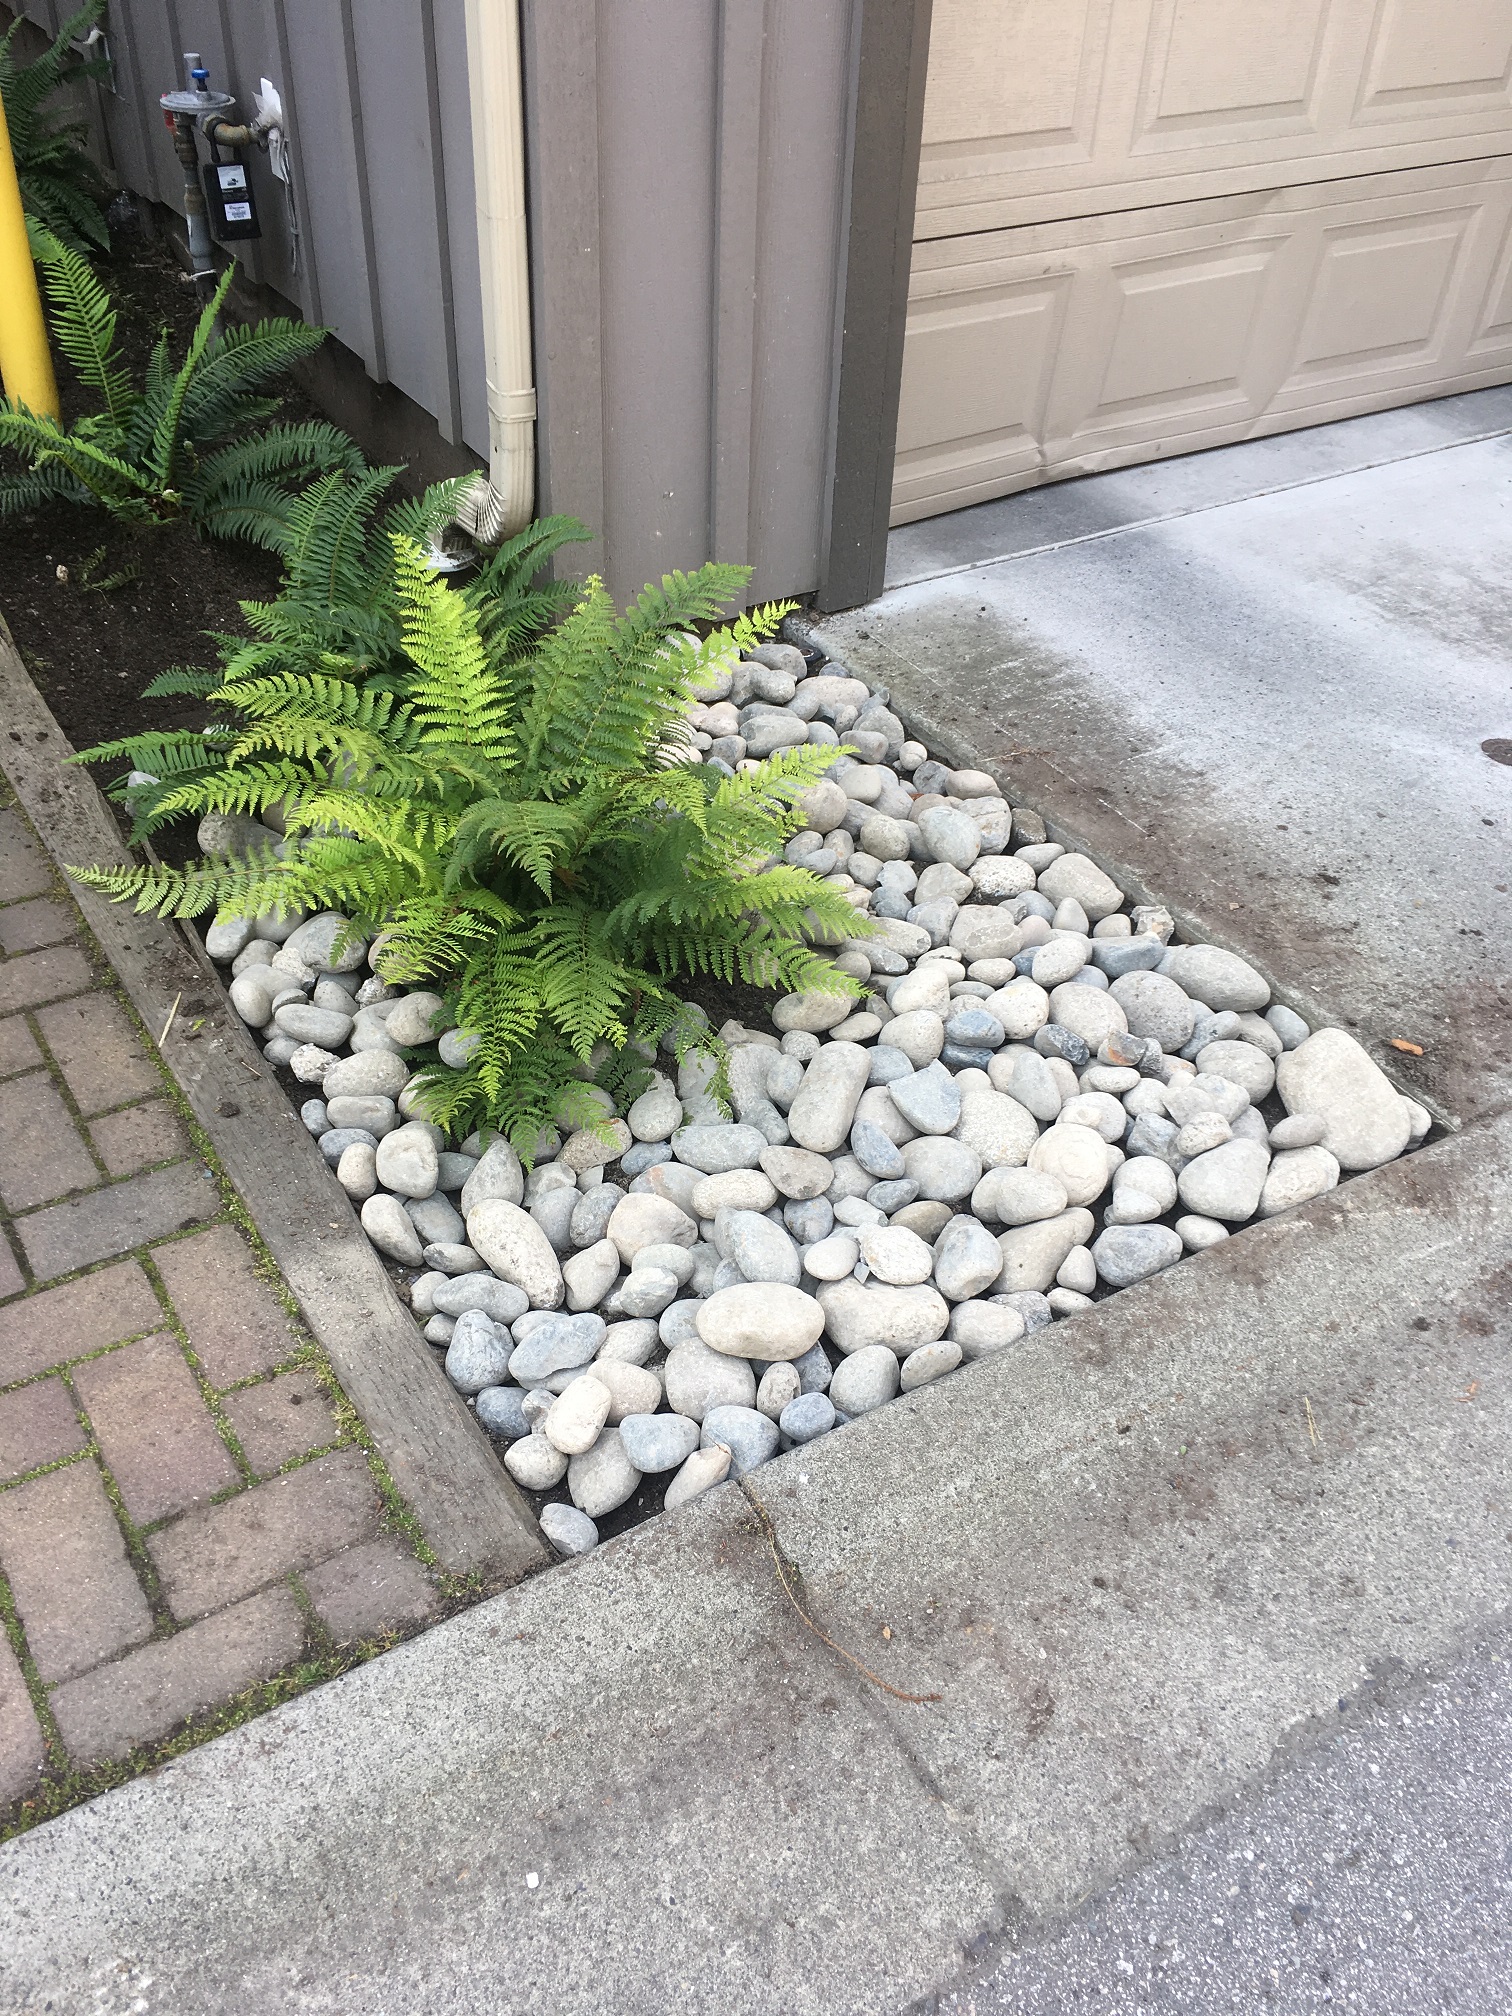
All done. We just have to hose off the rocks to reveal their colours.
River rock makes perfect sense here because cars access garages every day and they can run over the rocks. It’s harder with plants which get flattened; and bare soil just grows weeds.
Weeds and compacted soil.
This is a maintenance nightmare. Bare soil just fills up with weeds and plants would just get run over by cars. Installing river rock is a perfect solution here.
I had to cover eight rectangles like the ones above with river rock and one yard was just right because I learned from my mistakes. Mistakes will happen from time to time. Learn from them and move on.
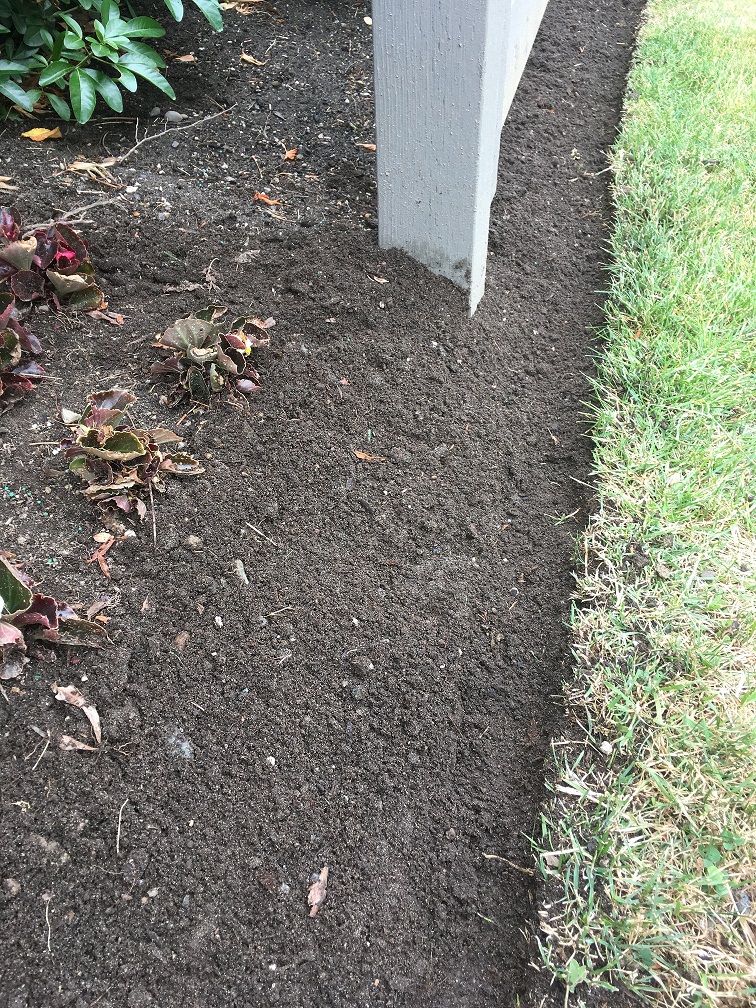
Great bedwork gives your garden and landscape a beautiful edge but it’s not a popular task. So let me show you how it’s done properly.
Struggle
Busy with pruning, I could only observe a new employee performing finesse work with her hands and a rake. Since she wasn’t given any time parameters it took her a long while to complete a small bed area. She raked and hand picked weeds as best as she could. Then she finally moved on, leaving a nearby weedy tree well untouched.
And I don’t blame her. She wasn’t set up to win. But it doesn’t have to be this way. Bedwork is simple. You just need to bring a good attitude to it. Let’s get sweaty.
No more struggles
Unless you’re hand picking huge trophy weeds, stop using your fingers for weeding. Professionals use tools and they stay on their feet. Sit down to enjoy your break, not to weed.
(Warning: if your company insists on hand weeding, use a small hand tool to save your fingers from abuse. )
Cultivate
Use a cultivator to uproot the weeds and fluff-up the soil. Concentrate on edges because that’s where weed seeds get blown; and where people miss them.
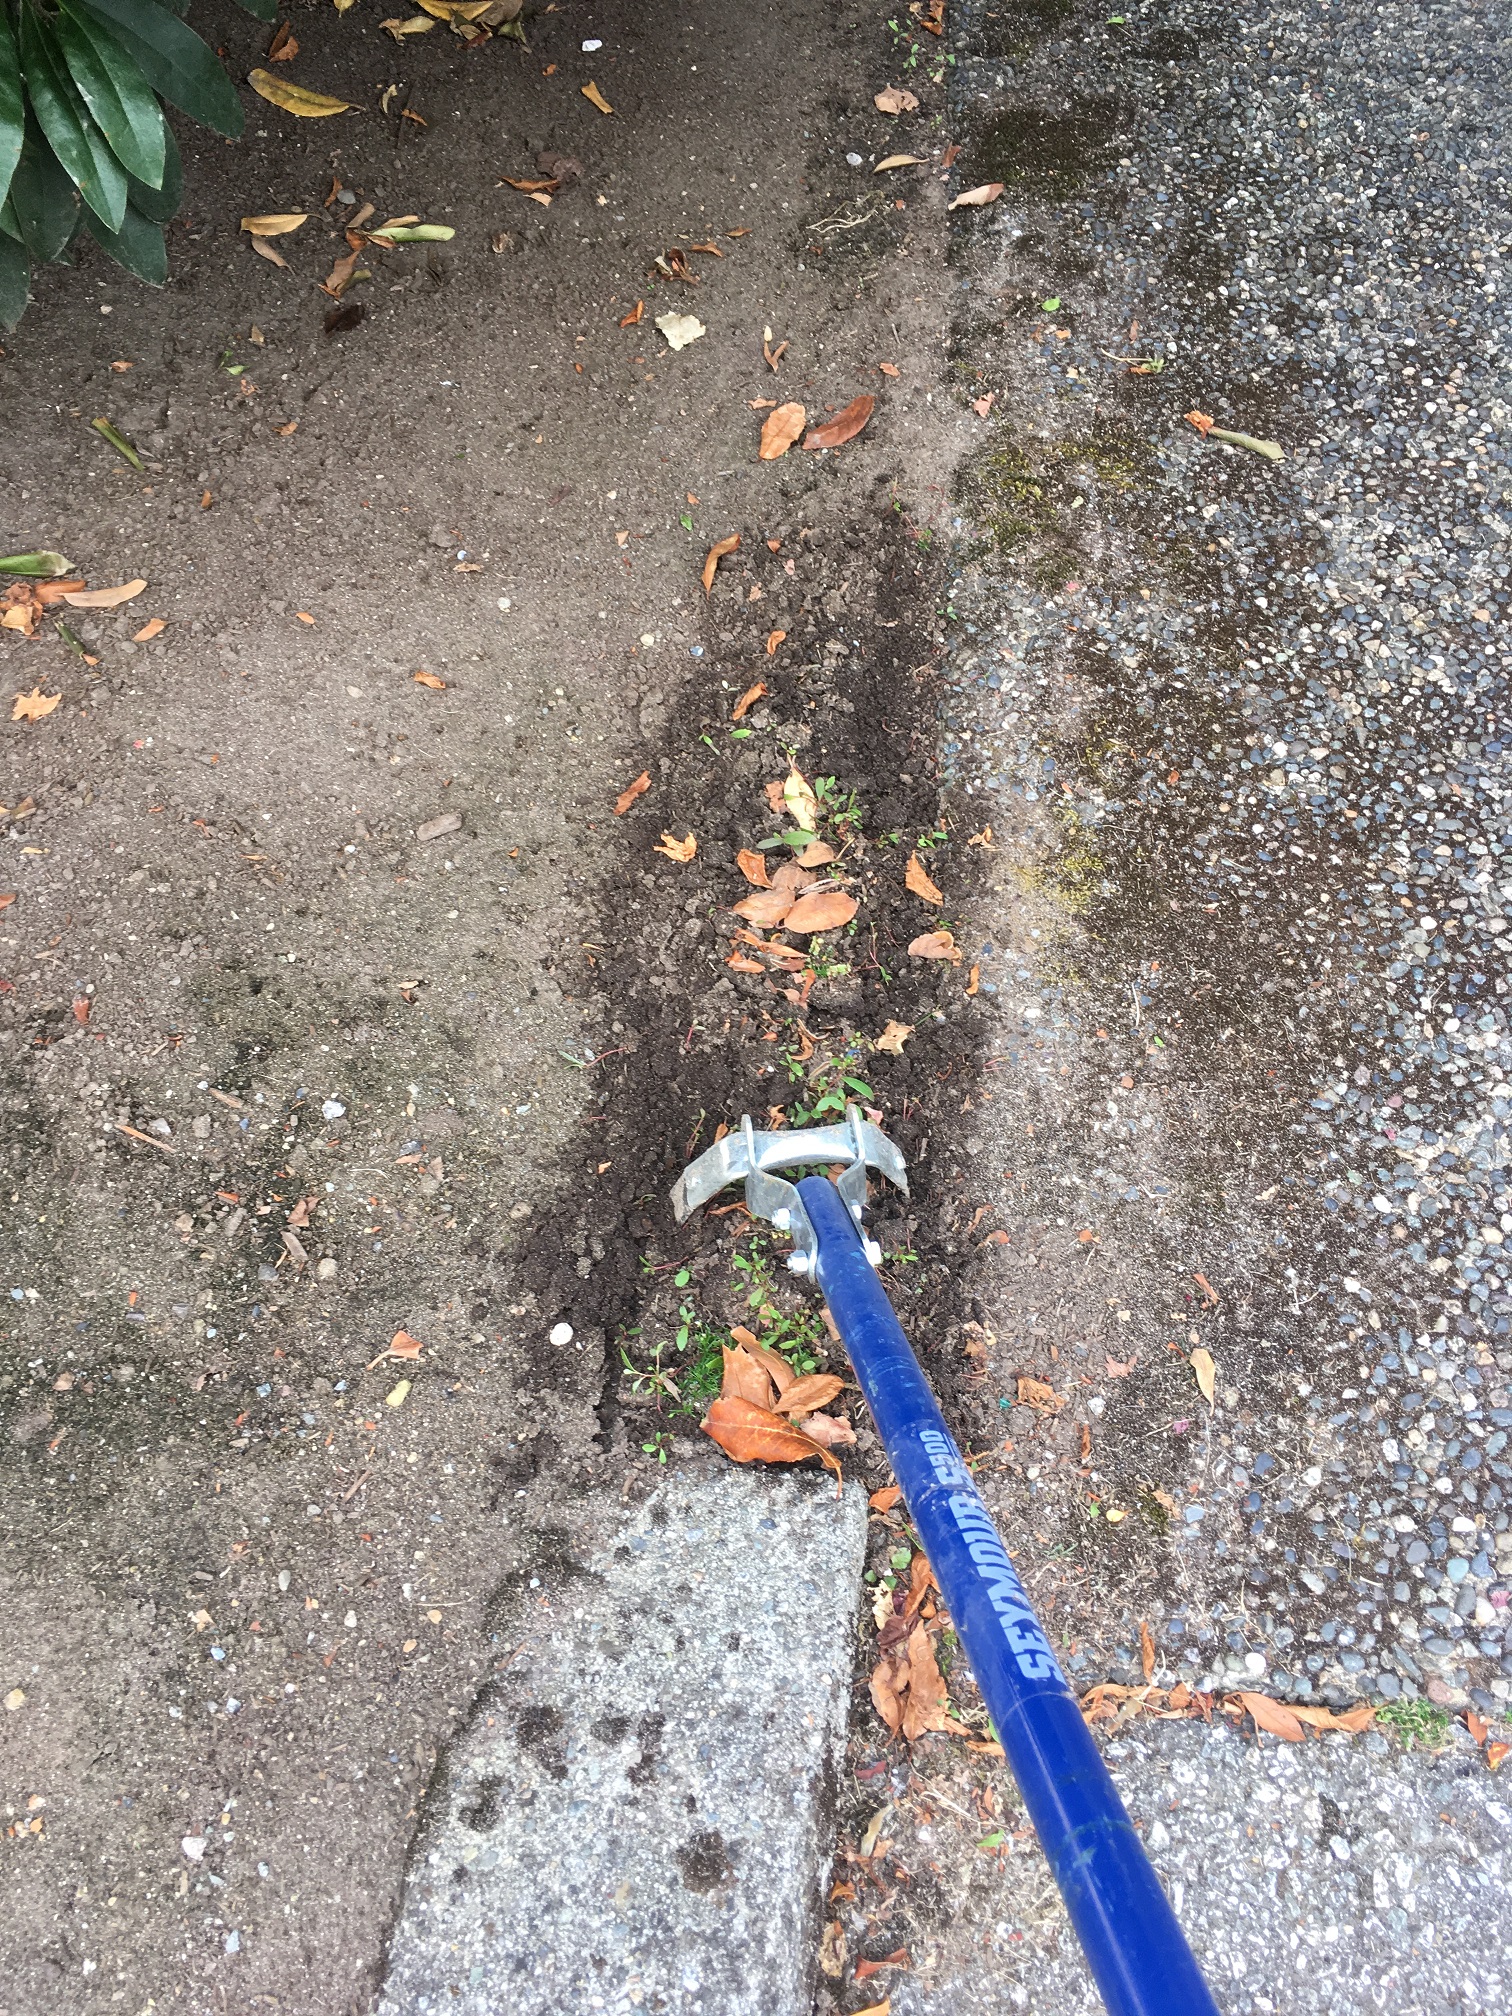
Run your cultivator along the edge and uproot all of the weeds. Don’t hand pick tiny weeds.
The cultivator uproots the weeds and then we rake them up. Hand-picking many tiny weeds is time consuming and it’s unlikely you’ll pick the entire weed. This is why weedy hand-picked beds quickly return to weedy mess.
I also find that my fingers hurt after hours of slow weeding by hand. Don’t do it, unless you’re picking big trophy weeds.
Rake up
Next, gently rake up the mess you just made and be careful not to remove too much soil. If you do remove some soil-and you will!-remember the time you just saved. Your hand-picking colleagues are probably still hand-picking tiny weeds somewhere.
Place your debris into a tarp.
Remember to always keep your debris piles in bed edges, not outside on pavement or lawn. This eliminates unnecessary blowing later on.
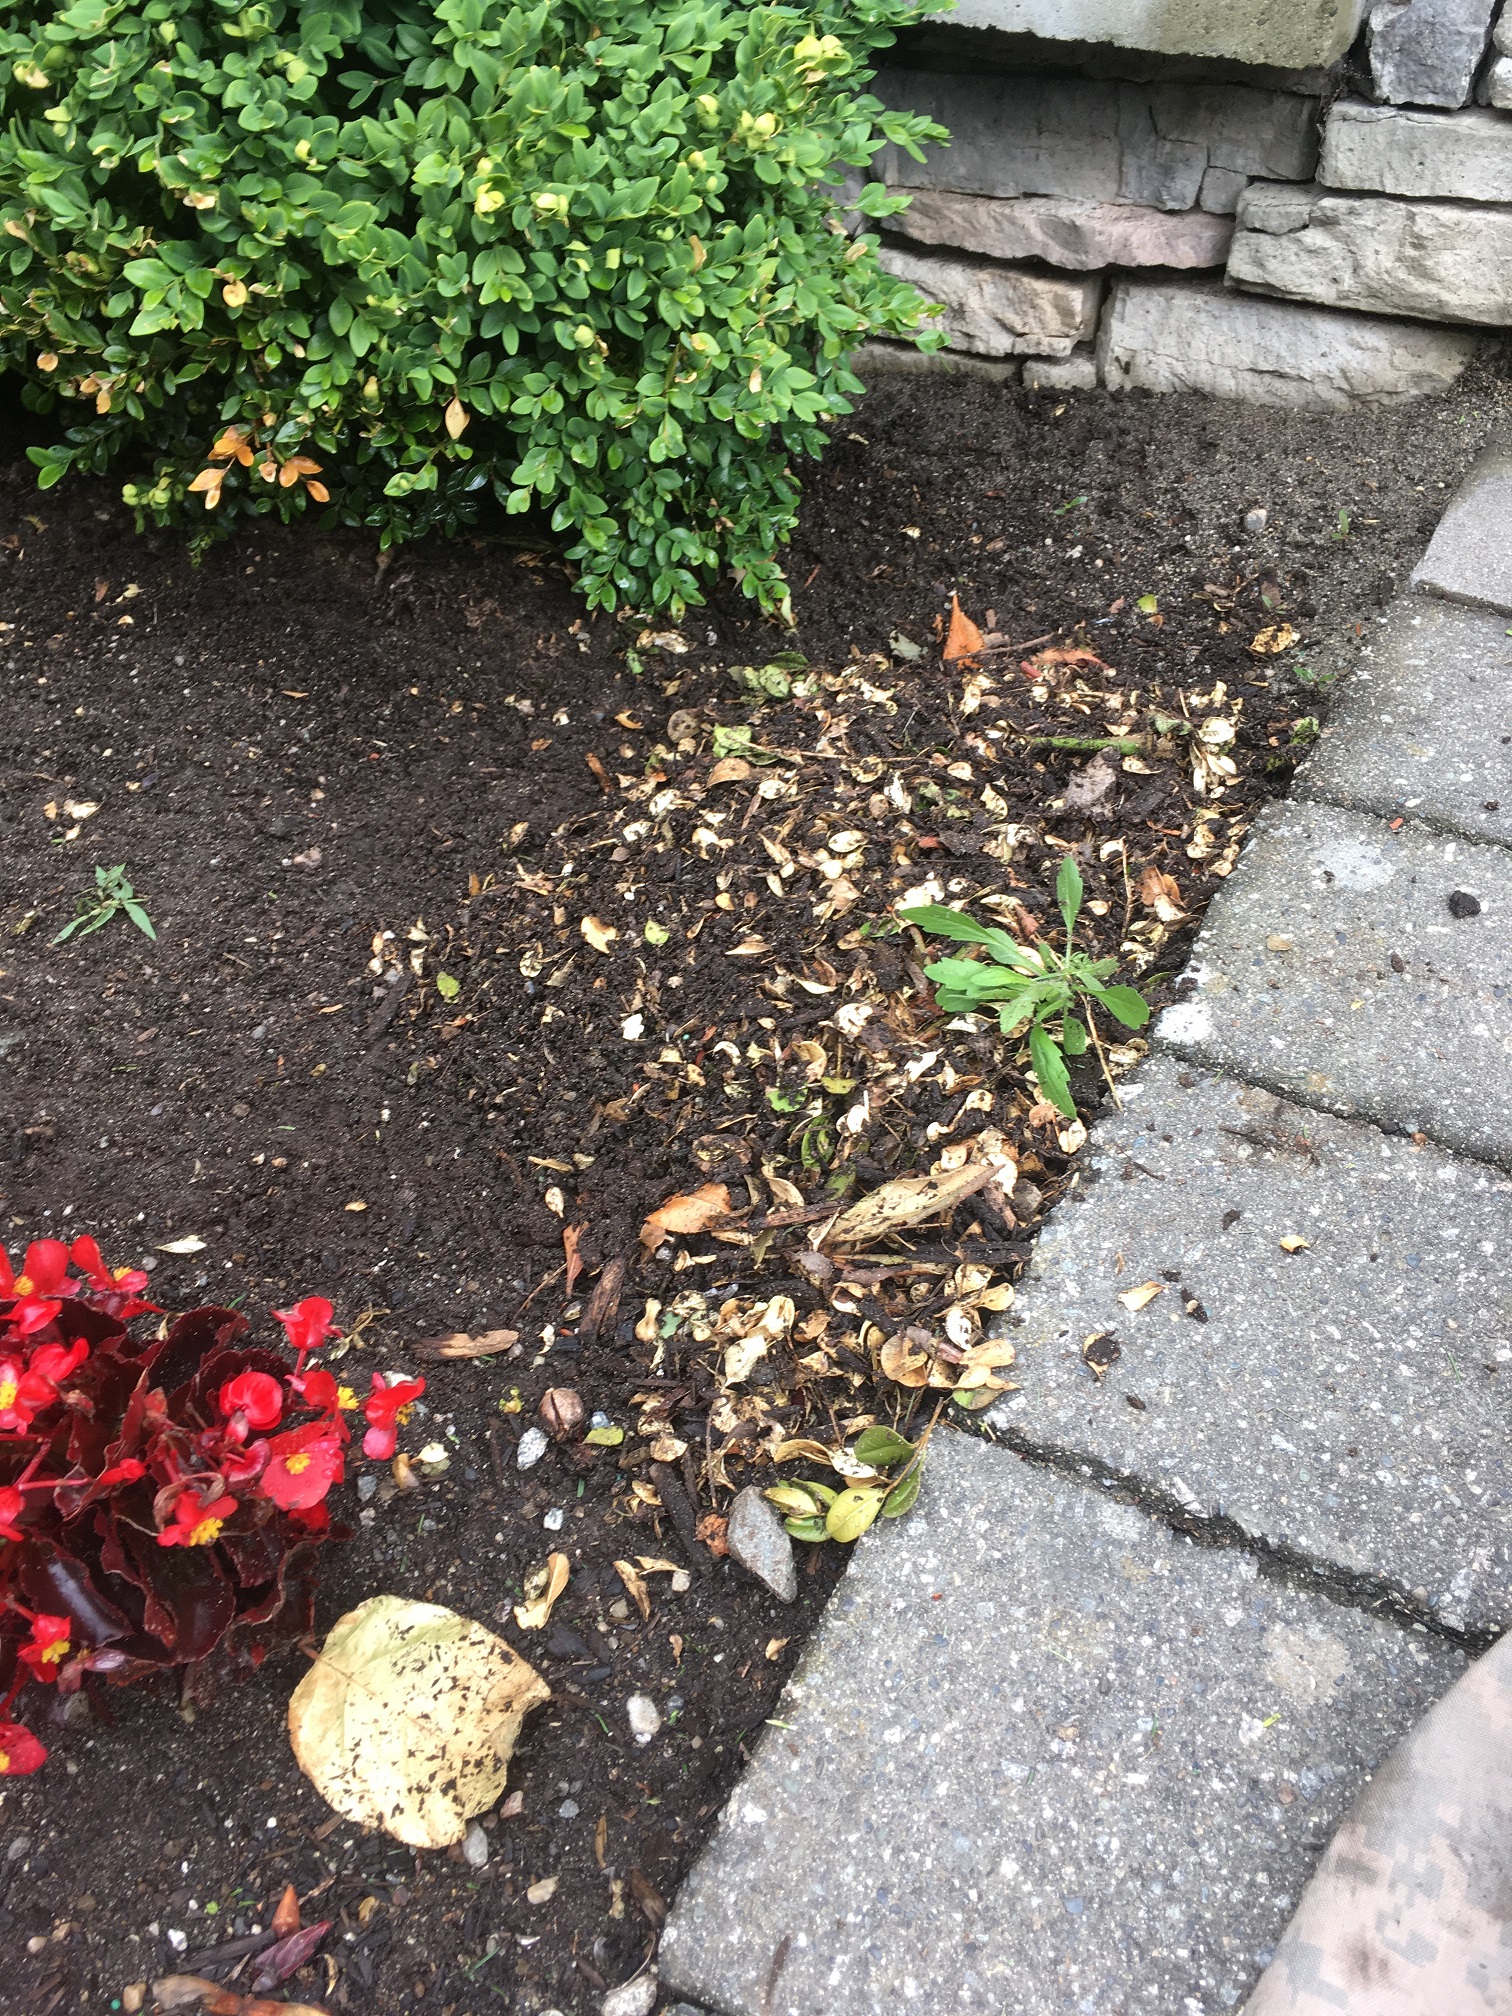
Note that the debris pile is raked to the edge, not on the stones.
Final step
The real final step is a clean-up blow but that’s done at the end of the day. Before you move on, rake any soil away from the edges.
Note that I raked soil away from the bed edge to keep it sharp looking.
Bonus effect
One huge bonus is that cultivation leaves your beds fluffy and fresh looking. Hand-weeded beds still look tired afterwards. Shame. So what if it costs you a bit of sweat. Your beds will look great longer.
Bedwork is a critical component of landscape maintenance and yet it’s often labelled as “bitch work”. This is wrong. Follow my steps outlined in this blog post and you’ll be a gold star in no time.
I recently took my kids to Adams lake north of Chase, British Columbia. There they got to swim, ride in a motorboat and stay in a camper for the first time. And Daddy got a few days of rest which is critical for landscape professionals.

Adams lake, British Columbia.
At the lake front is a collection of campers parked on leased lots. This makes everything safer and more fun. One feature of the community that delighted the kid’s mother was a nearby community washroom and shower building.
Of course, I didn’t stress about my kids showering because they swam in the clear lake every day. I also believe in not scrubbing away protective skin oils daily, unlike my wife, who is an expert on bacterial soaps.
All this leads us to the building mentioned above and its landscaping.
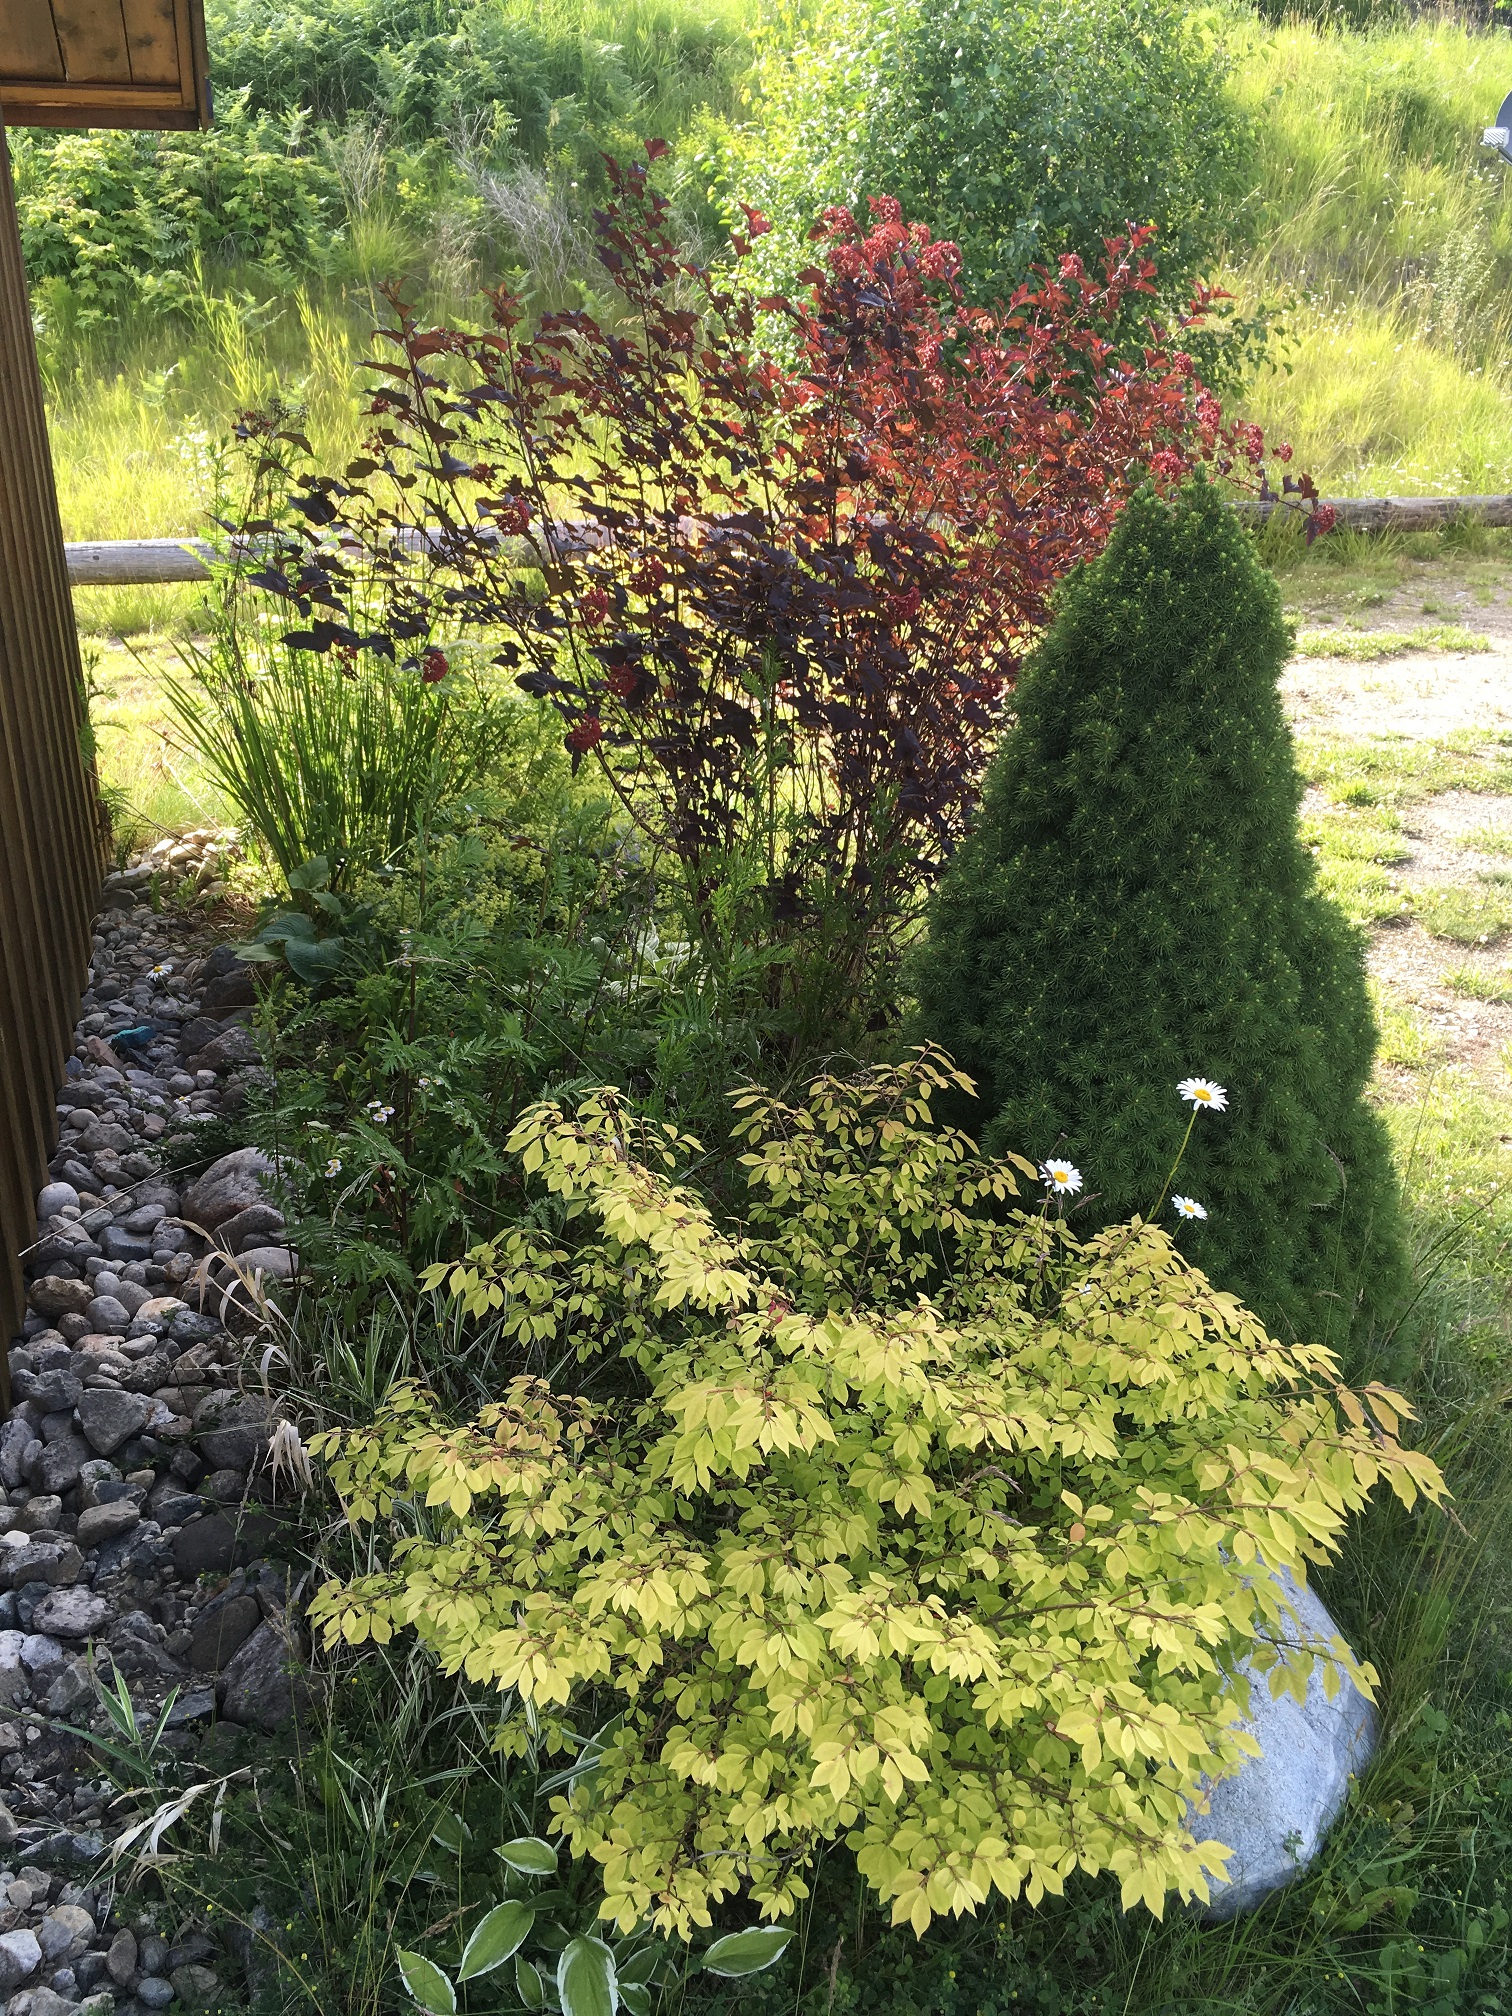
What do you notice about the landscaping?
This bed is as relaxed as the setting. Just shooting the picture wasn’t relaxing because this was the women’s side and I didn’t want to arouse suspicion by taking too many pictures.
The plants look natural. They aren’t sheared into tight shapes they way their cousins are on strata title properties. It’s refreshing to see plants left to grow.
Also note that nobody is stressing about weeding. There are all sorts of wild grasses and weeds in this bed and nobody cares. It fits nicely into its natural setting.
The dwarf spruce and native Pacific ninebark (Physocarpus opulifolius) give us height; and there are small Hostas enjoying shade created by Euonymus alatus.

Euonymus alatus
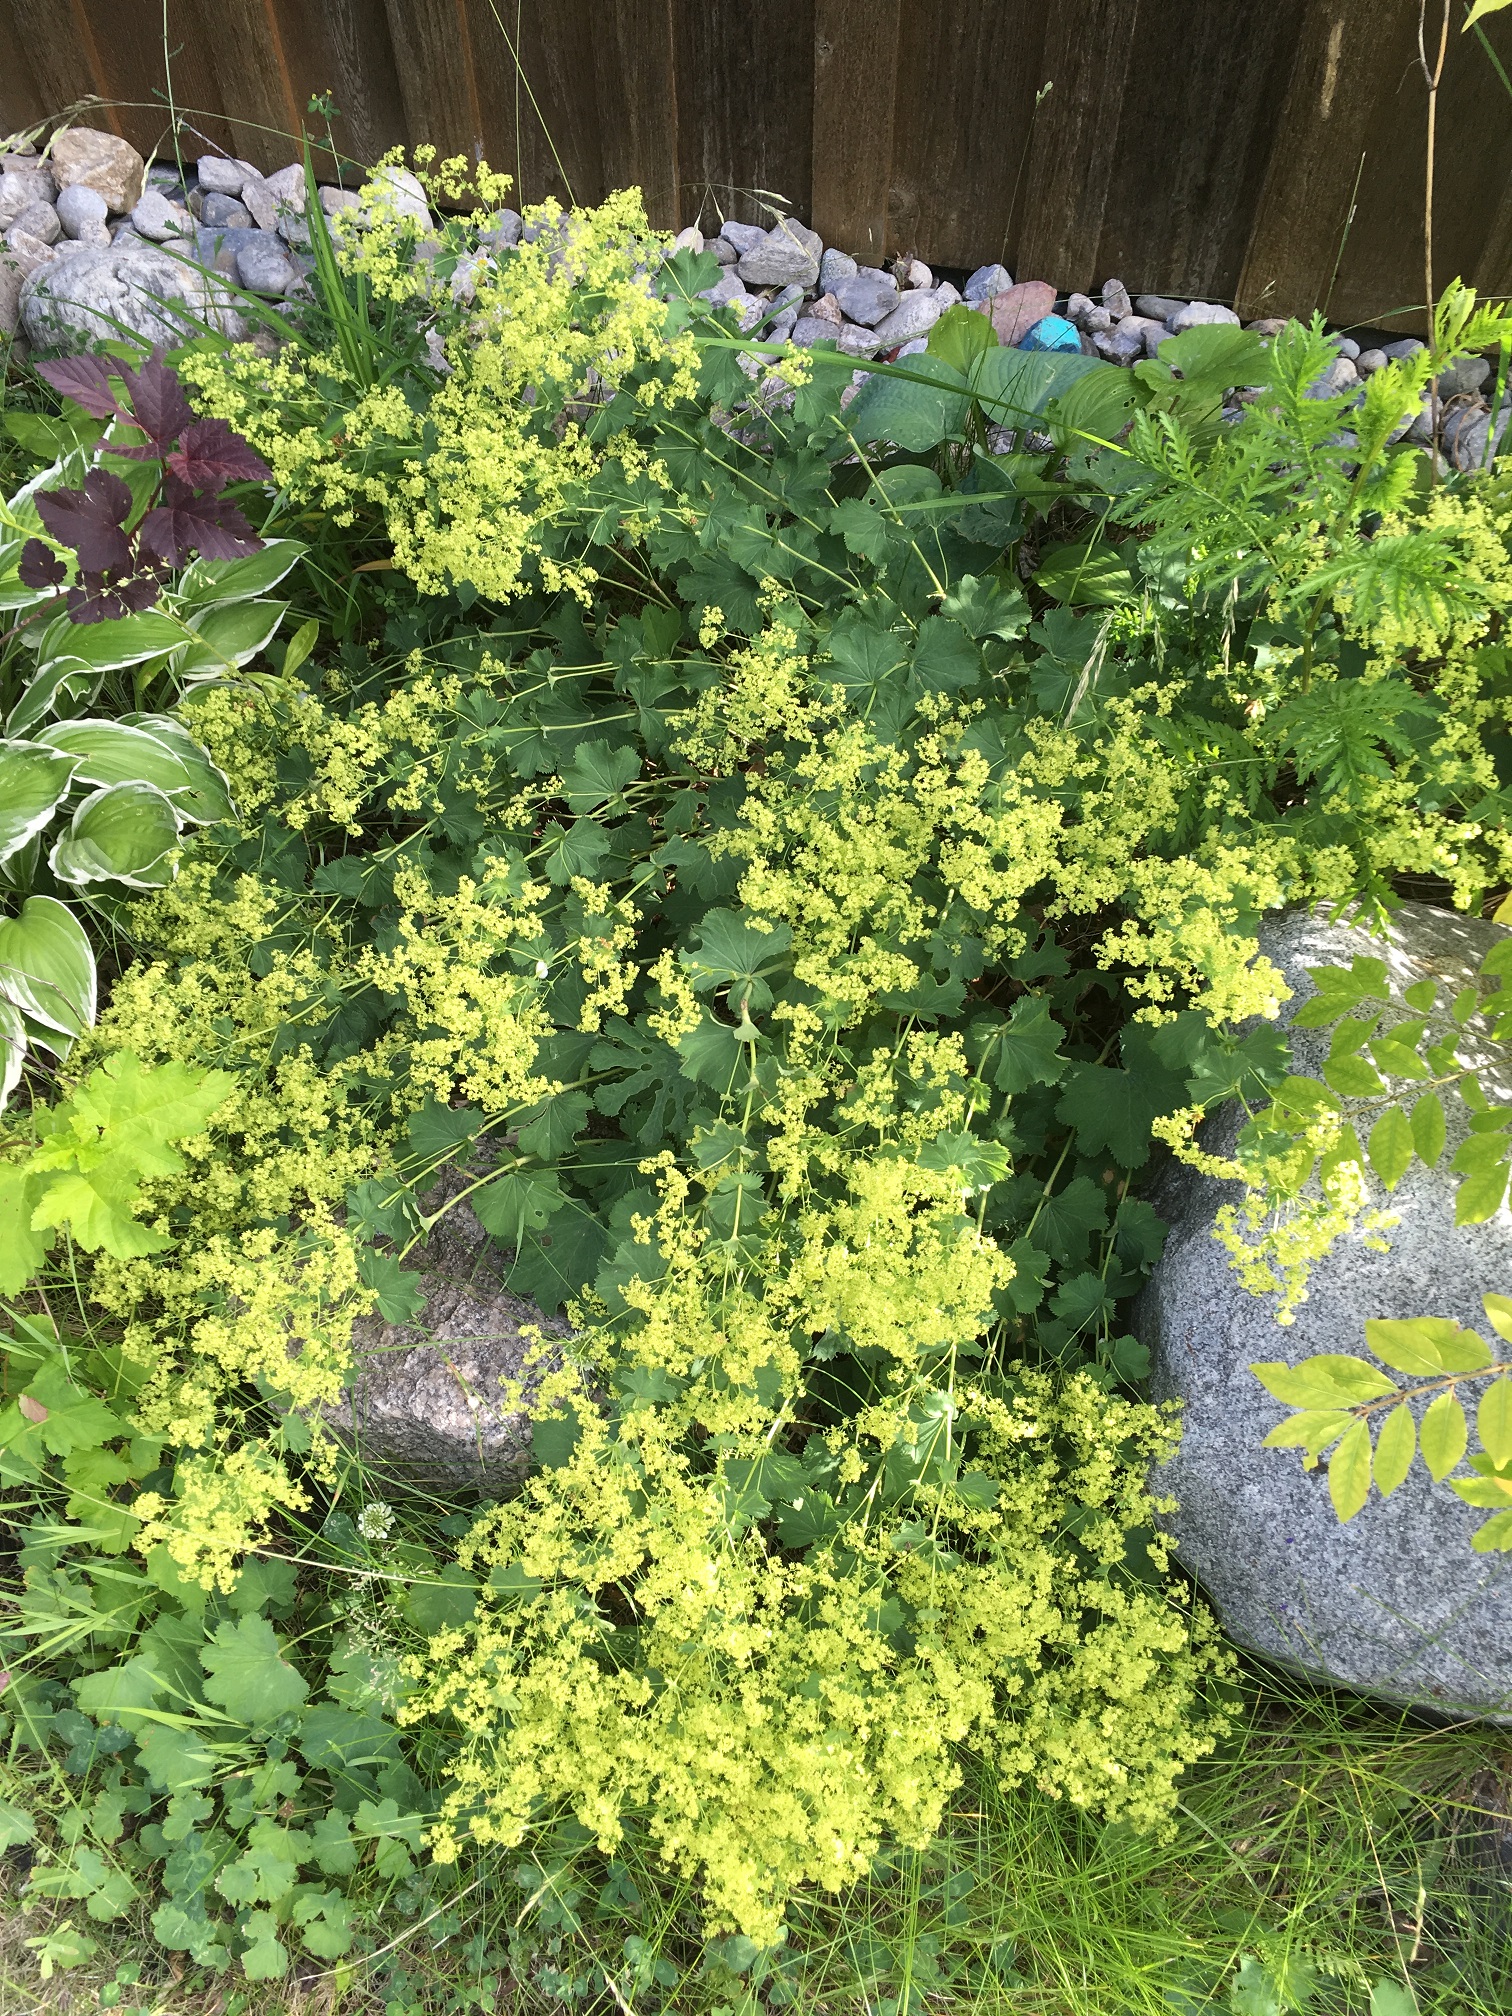
Alchemilla

Hosta
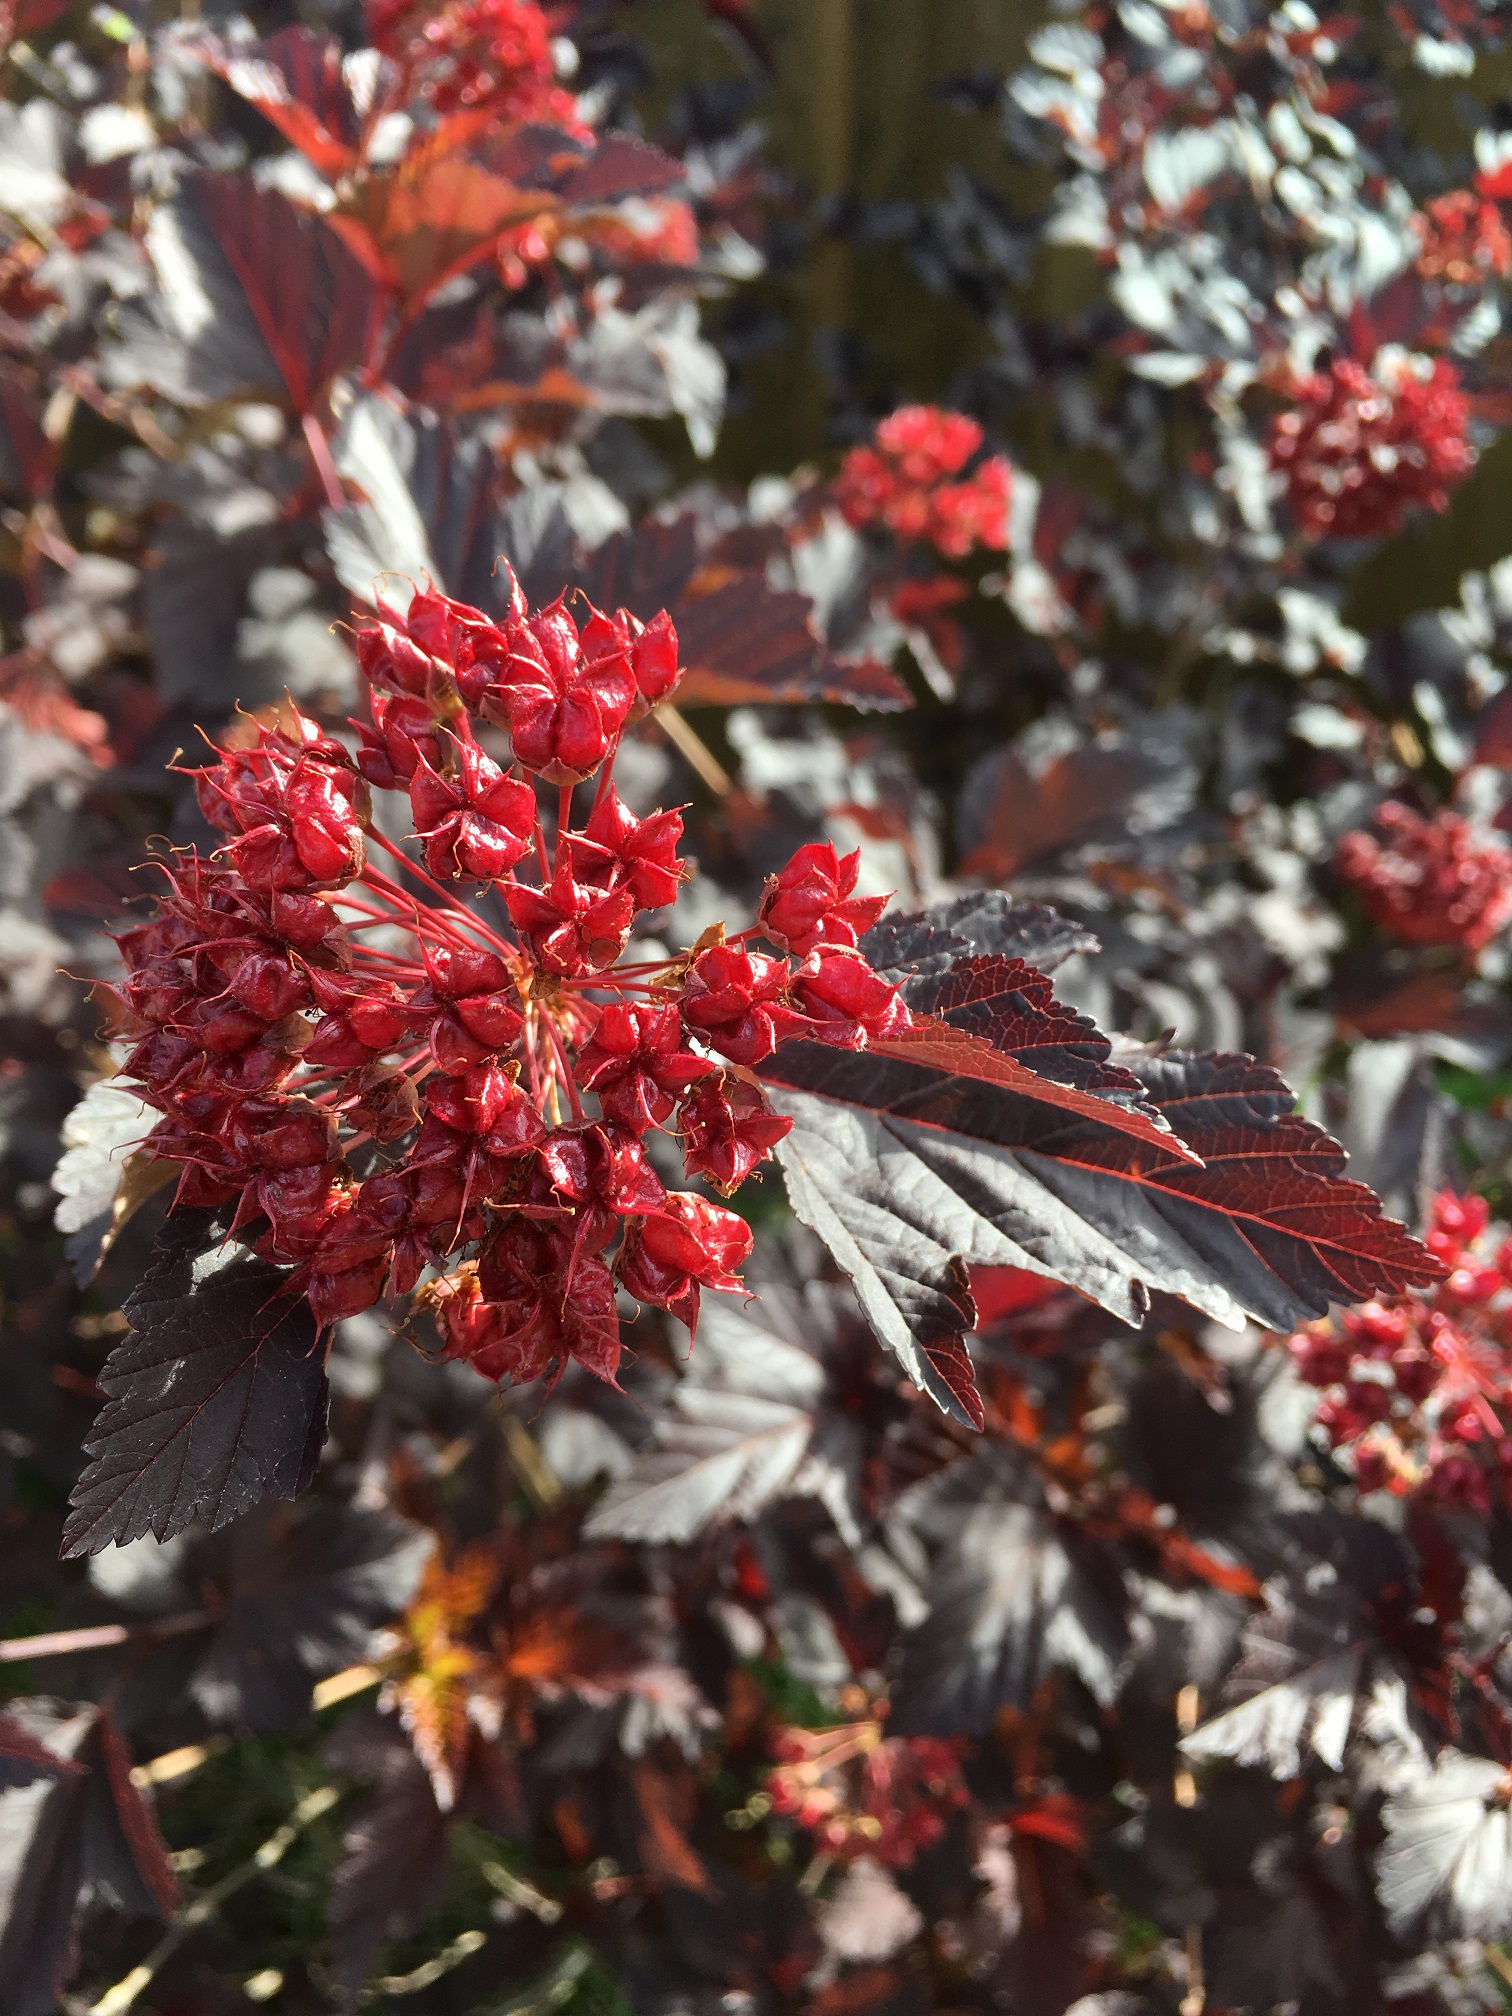
Native Pacific ninebark
It was nice to spend Canada Day weekend with family at a lake and provide my kids with new experiences. But I also enjoyed seeing the relaxed landscaping which perfectly matched the relaxed setting. The plants were allowed to grow and look natural. It was nice to see.
I’ve always argued that all landscape professionals should be ISA certified arborists. It allows them to stay busy in winter with tree pruning and it also introduces more variety to their work days. They can also charge arborist rates which are higher than landscape rates.
And the best part? Extra income. Allow me to illustrate with one of my recent experiences. After reading this blog post, you might be tempted to get ISA certified. If that’s the case, contact me and I’ll help you prepare.
Tree babysitter
A friend referred me to a tank removal company. It turns out that municipalities require ISA certified arborists to be on site during excavations where trees are present. In this case there was only one tree which could potentially suffer damage, a giant Douglas fir (Pseudotsuga menziesii).
With DBH at 24 inches, the critical root zone extends 3.6 m away from the trunk. In this case, 3.6 m reached to the edge of a cement car port. The tank was buried under the car port but the mini-excavator worked on the lawn side, at drip-line.
Excavation Amigo
It was almost surreal getting paid to watch two young Mexicans jackhammer cement. The excavator did the rest. After a few hours the young dudes wondered what I was doing there, standing with a hard hat on, watching. Once I explained I was there to make sure nothing happened to the tree behind them, they wanted my job. Of course they did. It was a good gig with a good mission.
Other than watching the excavation, I also had to pick up the city permits in person and write two letters. The first letter lets the city know that a great ISA certified arborist will be on site to monitor the tree; and the final report shows that, in my professional opinion, there was zero impact on the tree.
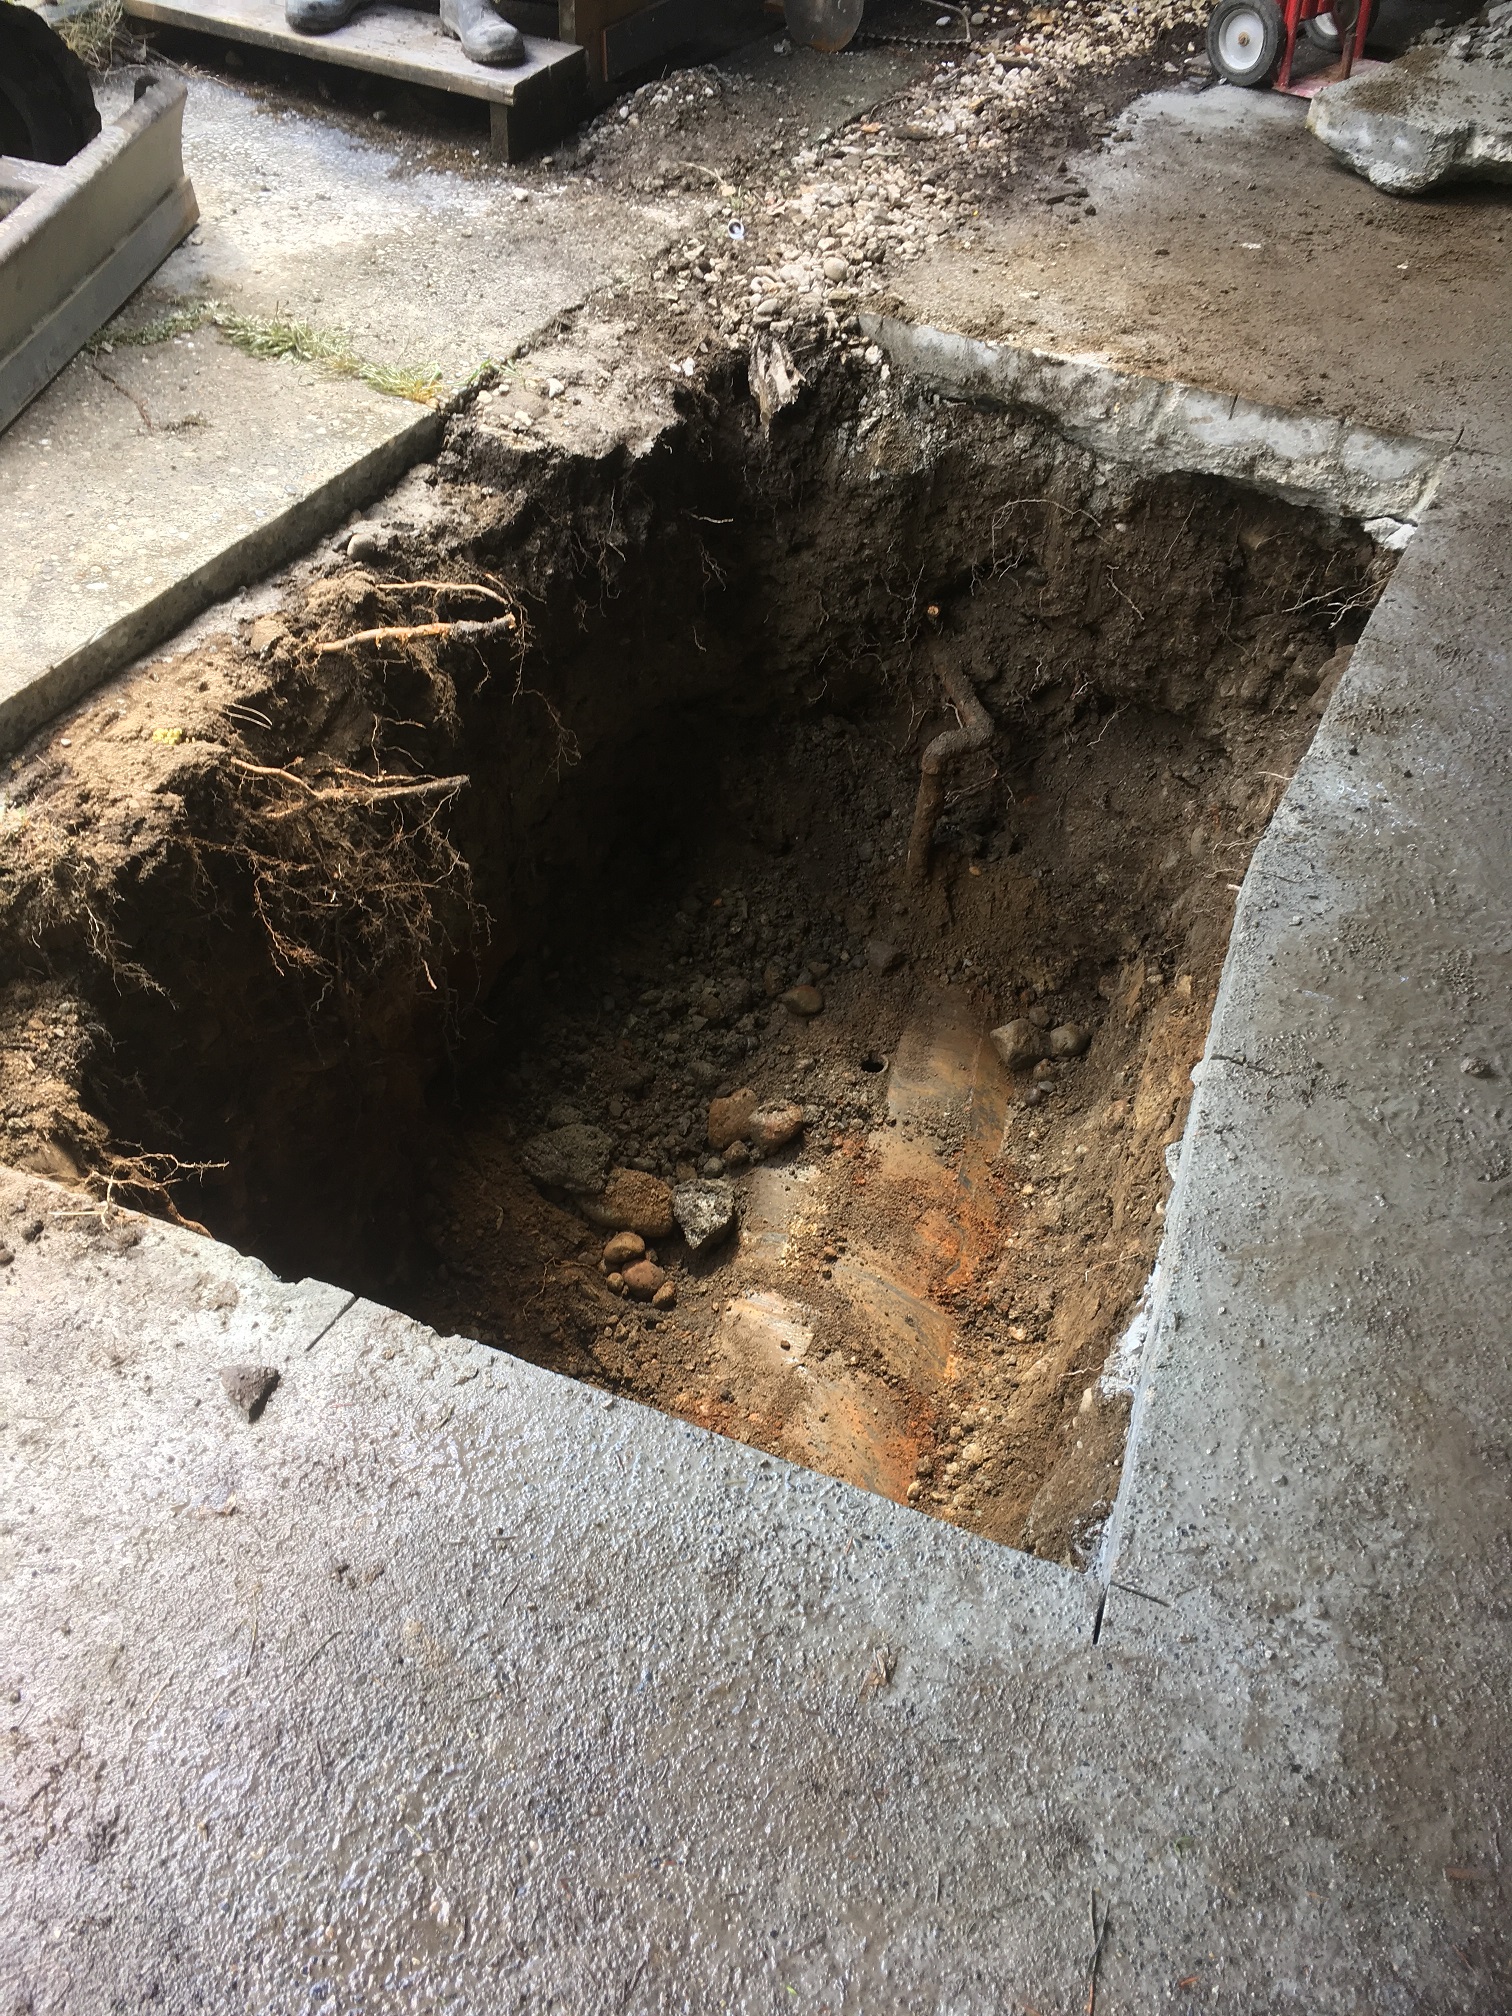
The tank awaiting excavation. No structural roots were encountered at dripline.
Let’s recap: The critical root zone (3.6m from the trunk based on DBH of 24″) was never touched by the workers or machines. Remember, soil compaction silently kills trees; the first pass with an excavator does the most damage. This was news to the company owner.
When you compact a tree’s critical root zone you make it hard for fine surficial roots to collect water and nutrients. It might take several years for the tree to start declining.
Since all of the excavation took place at the edge of the dripline there was no damage. The tree obviously did well with the cement car port in place for many years. Any compaction would be on the lawn beyond the dripline.
I was extremely happy with my first tree babysitting gig. It was a good experience, both professionally and financially. And I’m confident the Douglas fir will easily outlive me.
Get ISA certified and reap the benefits!!
How do you cut a flat strata site with several long open lawn sections and some tighter spots? You use X-Mark’s 30 walk behind mower. Standard 21′ mower would be fine but it would require extra passes; and a big ride-on mower can’t access many of the tight spots.
I don’t often get to use the X-Mark 30 walk behind because, as a landscape supervisor, I usually move around different crews; and we often leave mowing to the newer workers.
But once in a while people go missing, especially during the summer months. There are weddings to attend and camp sites to populate. Then I get to help out and everything starts with lawn care.
Why X-Mark 30?
- Obviously, the larger deck means you have to make fewer passes which reduces user fatigue. As a landscape professional I’m used to fatigue but new guys get spooked by their own sweat. Fewer passes is a dream for them. It was so much fun cutting long straight stretches of lawn, it inspired this blog post.
- Because the mower is bigger, it takes some getting used to. It’s self-propelled and feels like a tank. It will crush any garden gnome that gets in the way.
- One drawback is that you will need help to load this beast on and off your truck, unless you have a ramp.
- The gas tank is huge so you can cover a huge area before re-fuelling.
- One cool feature is that the front wheels get adjusted separately: just lift the pin and the wheel pops out so you can insert it into whatever height you desire, quickly.

Making fewer passes on long straight lawns is a bonus.
X-mark tech notes
You can read X-Mark’s notes on their website if you like. All I want you to know from this blog post is that the X-Mark 30 walk behind is surprisingly fun to use. If you have long straight stretches of lawn definitely try this beast.
This is yet another blog post inspired by a question posted on Quora.com. As a landscaper, what do you think are common mistakes homeowners make?
There are some mistakes that repeat so let’s take a look at my list.
A. Poor watering
People are busy so they take out their garden hose and spray their plants for a few minutes. Unfortunately, some plants, trees especially, require slow soaking which takes more time and attention.

New plantings require slow soaking.
Before you water your garden beds, stick your finger in your soil to see how much moisture is in there.
Hanging baskets require heavy soaking. I learned this when I worked at the City of Coquitlam. I had to soak every hanging basket until the water was gushing out on the bottom. It seems crazy but if you have hanging baskets, water them really well. Don’t just spray them.
My boss’s wife dumped her hanging baskets last week because they dried out. I told her to soak next year’s baskets like hell and now, slightly upset, I fear she will start making mistakes on my paycheques.
B. Reaching for chemicals
Homeowners are quick to reach for chemicals to solve problems in their gardens. Yes, I know, your local big box store is selling it so it can’t be bad. Right? Don’t do it. Search for better solutions, don’t introduce synthetic chemicals to your garden.
I know people who dump Killex on their lawn weeds every year. Then their kids go out to use the trampoline. I tried to cover the weeds by fertilizing their lawns really well. It didn’t matter. Killex it was.
Incidentally, I object to the cover photo. Dandelions (Taraxacum officinale) are awesome and edible. I frequently drink dandelion root tea. If you hate dandelions, dig them up manually.
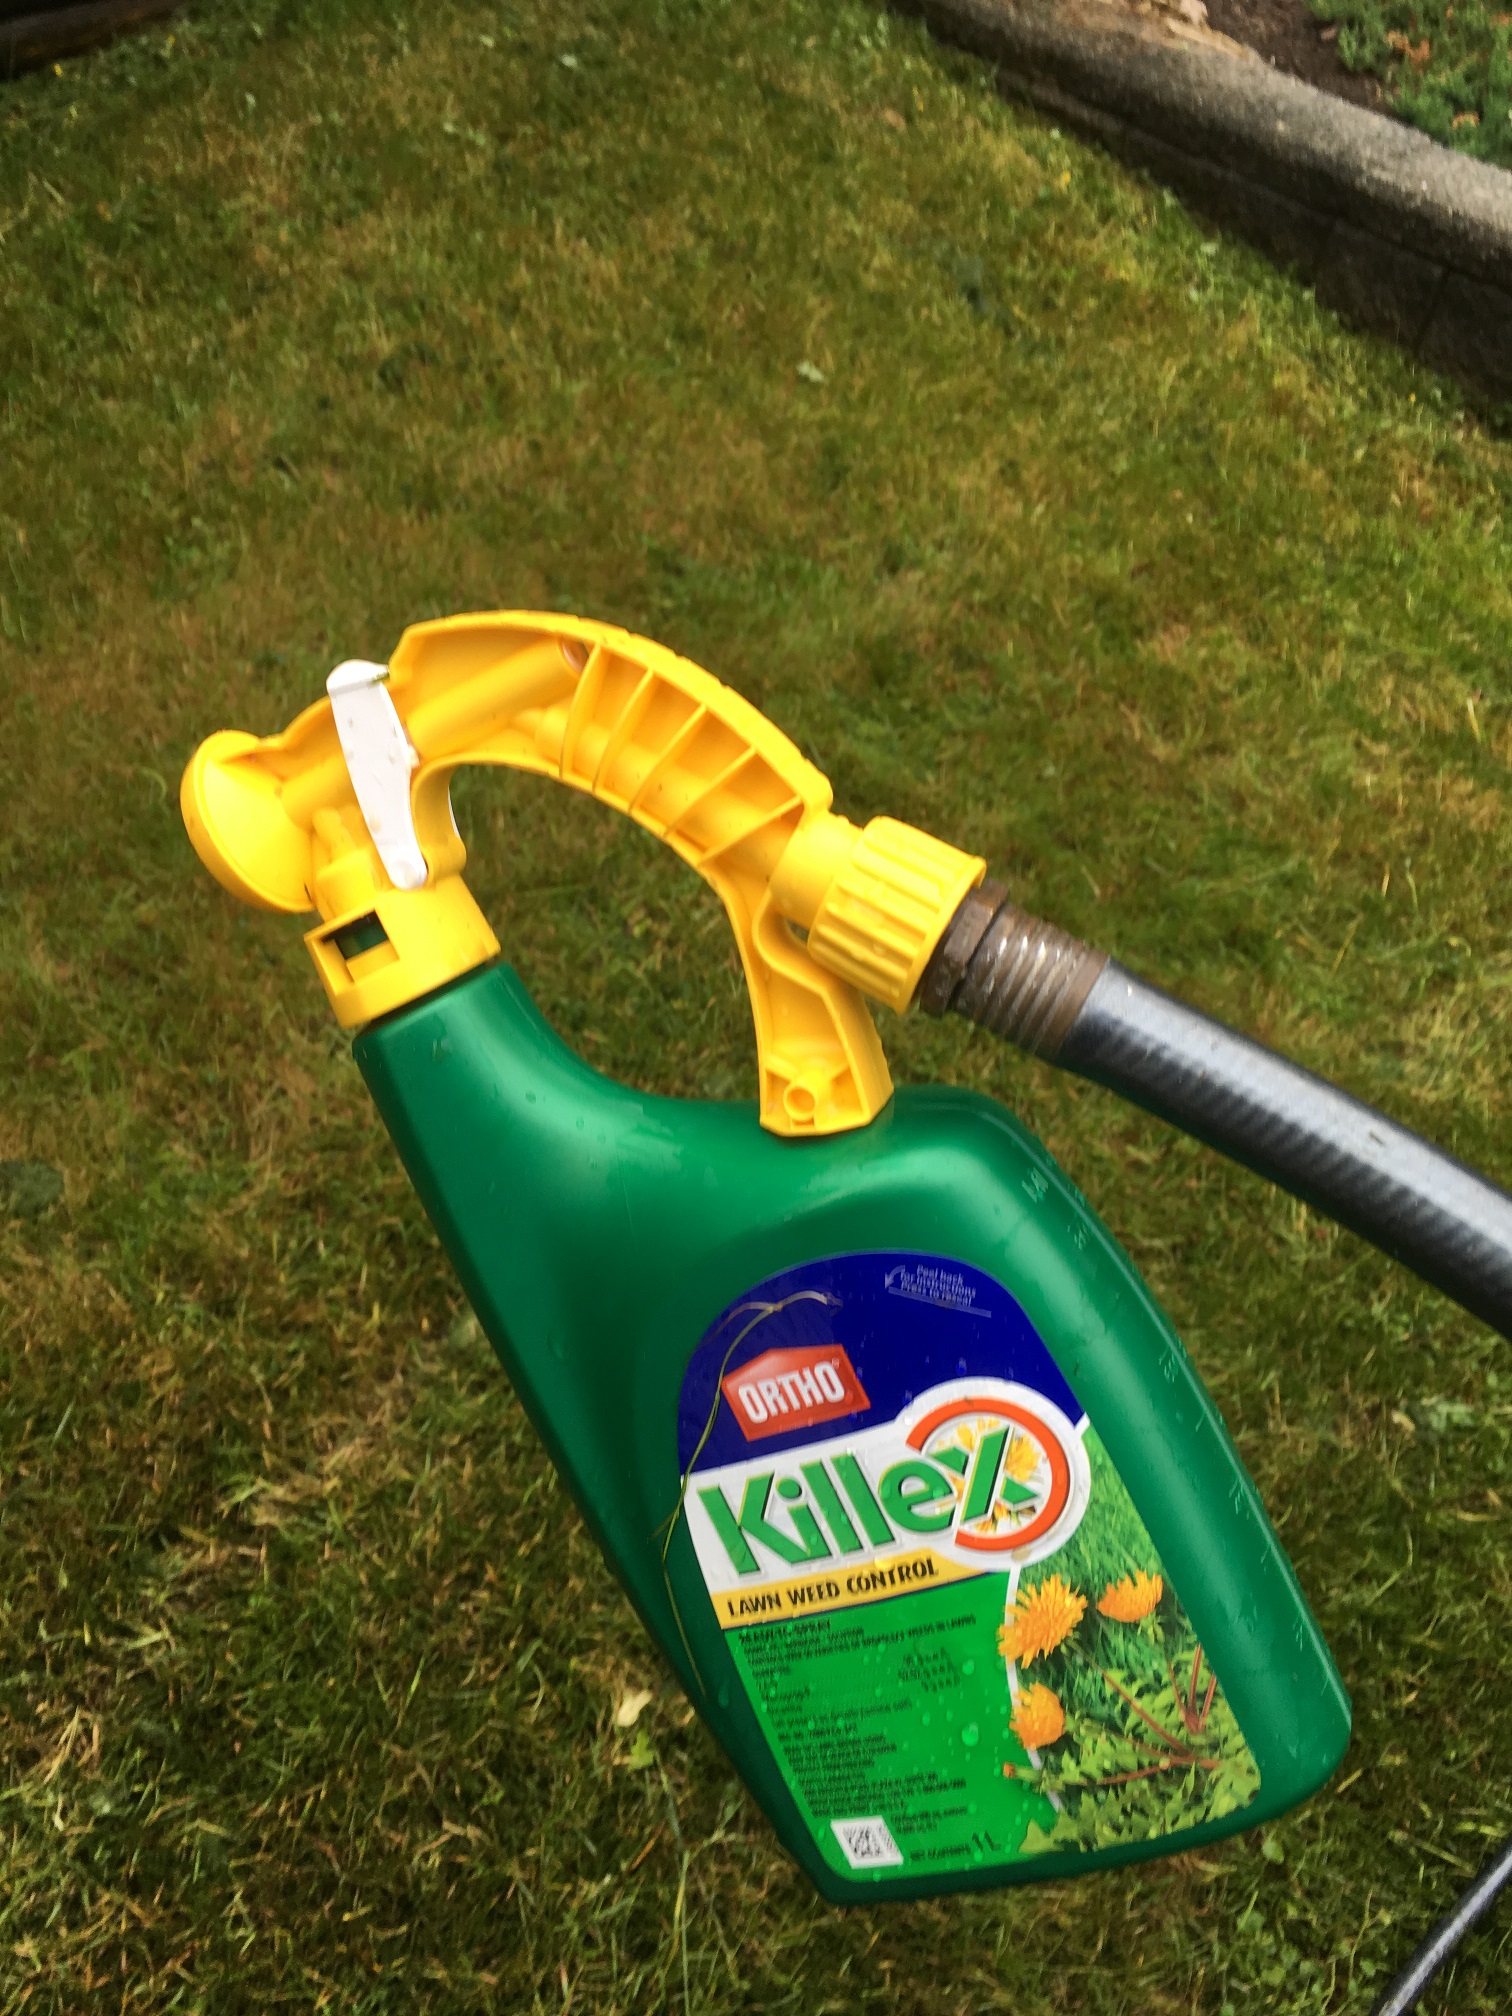
Just attach your hose and push the lever to on. Red Seal Vas does NOT recommend this.

Are you sure you want this on your home lawn?
C. Client vs customer
Nobody enjoys getting ripped off but, please, get to know your landscape professional and keep him for years. That’s how you become a client and landscapers love clients. Why? Because we can educate clients while we solve their landscape problems. It becomes a good relationship.
I run from customers. Earlier this year, I was referred to a man with pressing landscape problems so I went to see him. His first question was how much? It seems logical to ask about rates but I already know this dude will be a headache.
His mugo pines (Pinus mugo) were covering over half of the public sidewalk and he was afraid of getting fined by the city. I would be more afraid of ladies in motorized wheelchairs raising their middle fingers.
I did the pruning by hand, got paid and left. I hope I never hear from him again.
Now, back to my own mistakes.
Enjoy your summer.
Some months ago I spent a very satisfying morning at one site removing dead plants. I say satisfying because I hate seeing dead plants on any site. It always looks like the landscapers don’t care.
We removed so much dead plant material, it loaded up our truck. That’s how bad it was; and how long overdue it was.
Two special cases
There are two special cases where removing dead plant material can’t be done. One is where the strata council decides against it for whatever reason. Since they’re the people paying you for your services, all you can do is suggest courses of action.
Two, the site plants may still be under warranty if the site is still new and the strata council hasn’t taken over the site from the developers. You might get to catalogue the dead specimens and hope the developers replant them. It’s usually a bitter fight so don’t make it worse by removing dead plant material. Just wait until everything gets resolved.
Why?
It’s not always possible to find out why some plants died but you should try. With our West Coast summers getting hotter some plants are doing worse than others. For example, Western Red Cedars are suffering.
Sometimes it’s poor installation or malfunctioning irrigation system.
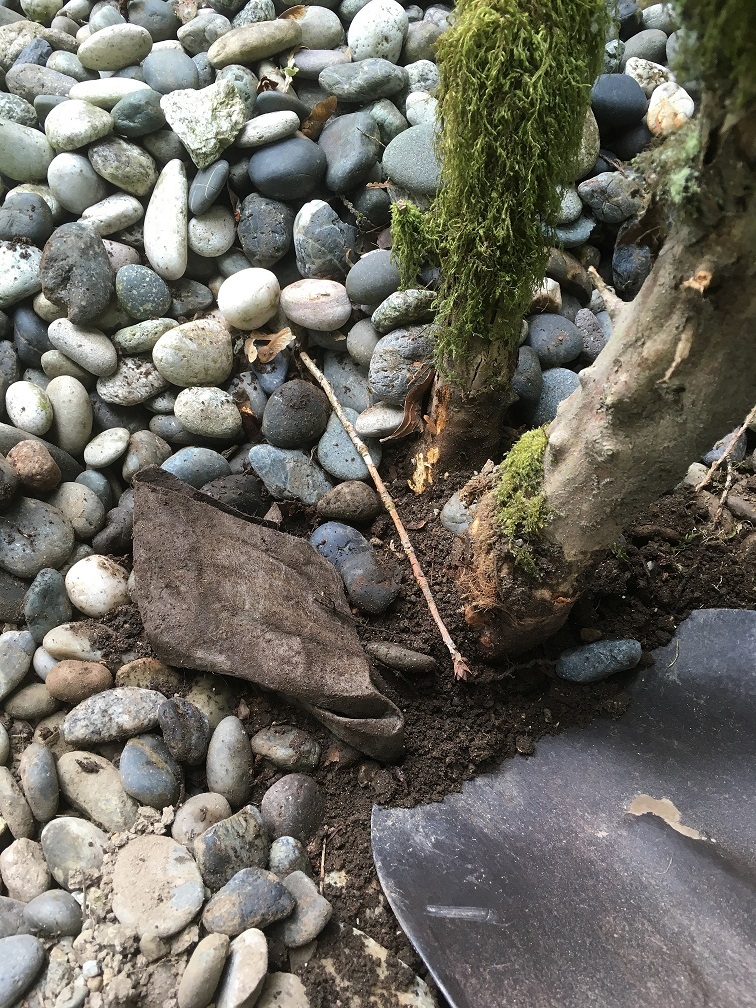
This Rhododendron was smothered by landscape fabric and river rock. Fabric plugs up and doesn’t allow water to penetrate to the root zone.
Assuming the plants didn’t die because of your poor maintenance, this is a great opportunity to sell the strata new plants. And that means putting together a quote with labour costs plus mark-up on every plant. In exchange the strata gets a better looking site. Looking at dead plants is depressing.
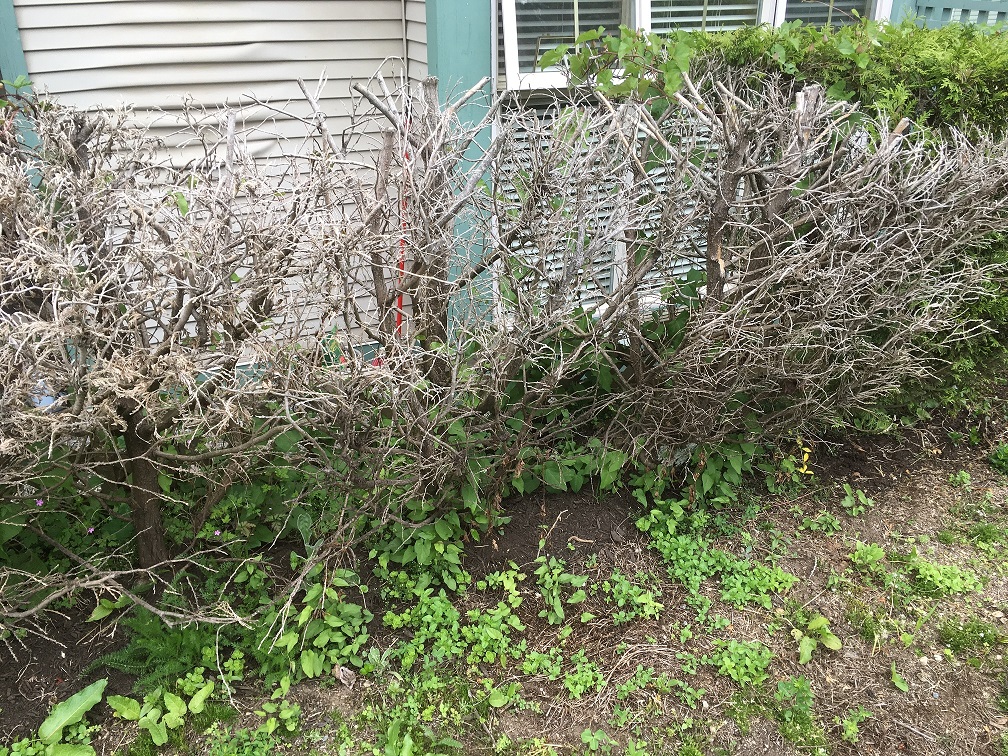
This dead Thuja plicata hedge looks terrible.
Not same old
Obviously, it wouldn’t make sense to replace dead cedar hedges (Thuja occidentalis) with more cedars. We’re finding that Portuguese laurels (Prunus lusitanica) are doing much better in the landscape and form very nice hedges. You just have to make sure they get established well.
Trees should be treated the same way. Try a different tree species once you’re sure the tree is really dead. If you’re not sure, take your snips and gently scratch a branch. If it’s green underneath there is still life in it; if it’s brown, it’s toast and you should replace it.
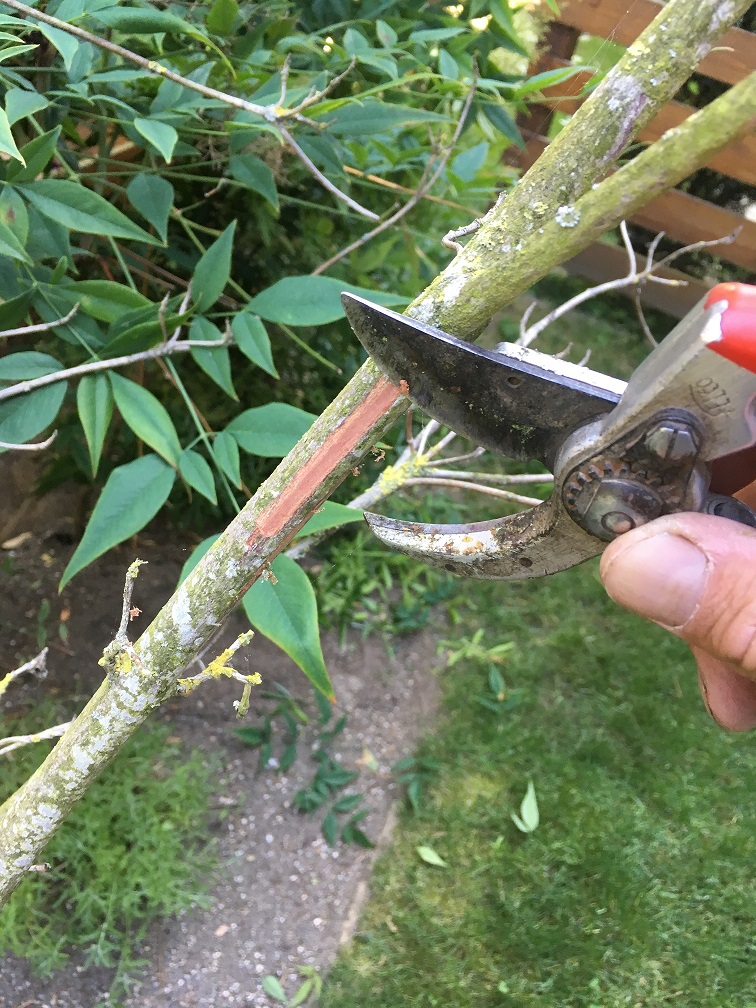
This Cornus tree failed the wiggle test but just to make sure, I scratched the branch. Brown means it’s toast so I pulled it out easily.
Conclusion
Dead plants look awful in the landscape. We want healthy, beautiful landscapes for people to live in. Try to remove and replace dead plants as soon as you can get approval from your clients.


