All Posts By

Vas Sladek

Remnant pile of a remnant pile

By | Landscaping, Training | No Comments

Danger zone

I know from past bad experiences to avoid end of the day confrontations. That’s the danger zone where people are tired and ready to go home. They might also be wet from heavy rain or annoyed by their under-performing colleagues. It’s best to make some mental or paper notes and bail.

A few months ago I couldn’t hold my tongue at the end of the day. I was on site to help out and I, too, was ready to go home. My son had soccer practice as usual and I knew traffic would be bad.

Stand-up comedy

What I didn’t expect was to witness an experienced landscaper blow a remnant pile of some leaves and a few pebbles into yet another remnant pile for us to pick up. That must be the worst case of overtime ever. Pushing the entire crew past exit time over a few leaves and some pebbles is unacceptable.

So, I told the dude to stop playing around and blast the remnants out of sight. This could be into the nearby lawn or, better still, into neighboring shrubbery. That’s it. Aggressive, direct and no overtime.

If you catch yourself blowing a remnant pile of a remnant pile, something went wrong. Perhaps the original pile was just a standard pile.

This is how you do it

Let’s see how I put a remnant pile to bed quickly and aggressively.

Some dust, pebbles and leaves.

After picture, 30 seconds later.

Unless you have a broom handy and extra time, blast the remnants into your lawn or nearby shrubbery. Discreetly pushing the dust into a neighboring strata complex is best. Just do it quickly. No more piles.

The lesson

Remnant pile management seems obvious to some and mysterious to others. Blowing remnant piles into more piles is ridiculous. Because this is a family blog, I can’t use stronger language. But I did on site.

This is why staff training never really ends. I want my workers to be sharp and aggressive with small tasks like remnant piles.

Enemies on strata council

By | Strata Maintenance | No Comments

Planting cedars

When you look at the picture below, you know something isn’t right. You have cedars in plastic pots sitting in a raised bed; and it looks like the work is still in progress.

Except, this particular unit is occupied by an accomplished home gardener. You know the type. They do their own planting and maintenance and, if you’re lucky, they let you make a pass through with a backpack blower.

Now, the proper planting technique would be to remove the trees from their pots and plant them in the raised bed. This allows the roots to establish in the soil, whereas in the pots the roots would likely circle and eventually girdle the tree.

So, I bravely knocked on the door to find out what’s going on. Perhaps the owners needed help with planting the cedars. I would be happy to help.

Council bomb

It turns out that the owners had removed the pots and-correctly- planted the trees in the raised bed. Then there was a twist. A letter from their strata council arrived shortly thereafter, advising the owners to put the trees back in the plastic pots and plant them like that!? What? That’s ridiculous.

This is what happens when the enemies you make in your complex volunteer for strata council. Now you’re facing a monthly $200 fine if you fail to comply with the order. And we know that the order doesn’t make any sense. The best planting for long-term health is to remove the pots and plant the trees in soil. The way the owners had it in the first place.

Of course, you can go to council and make your case. Not every strata council has the same bylaws. You have to check with your own strata council. I think your unit comes with access to the bylaws.

The owner I spoke to didn’t sound motivated enough to fight. That’s obvious because the trees are now sitting in their plastic pots.

One trick would be to remove the plastic pot bottom so the roots could escape.

Conclusion

Avoid making enemies in your strata complex because you never know who will get on council later. Your enemies could cause lots of headaches for you down the line.

Magnolia trees need space

By | Arborist Insights, Landscaping | No Comments

Round 1

As a professional landscaper and ISA certified arborist, I provide the best possible advice for our clients. So, when a client is asking me to plant a tree near his gate, I have to object to his plan. Gently.

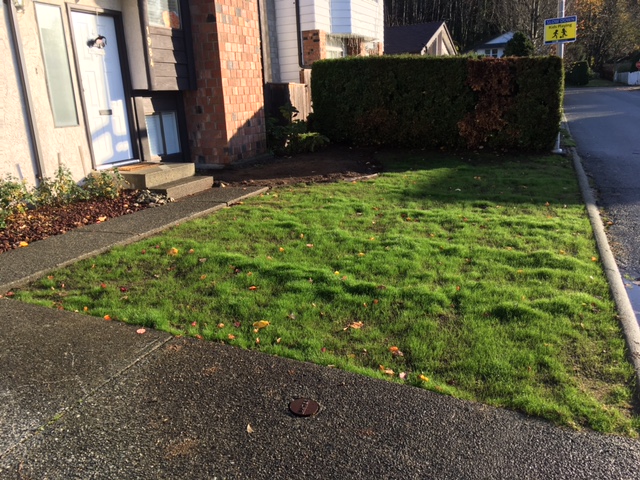
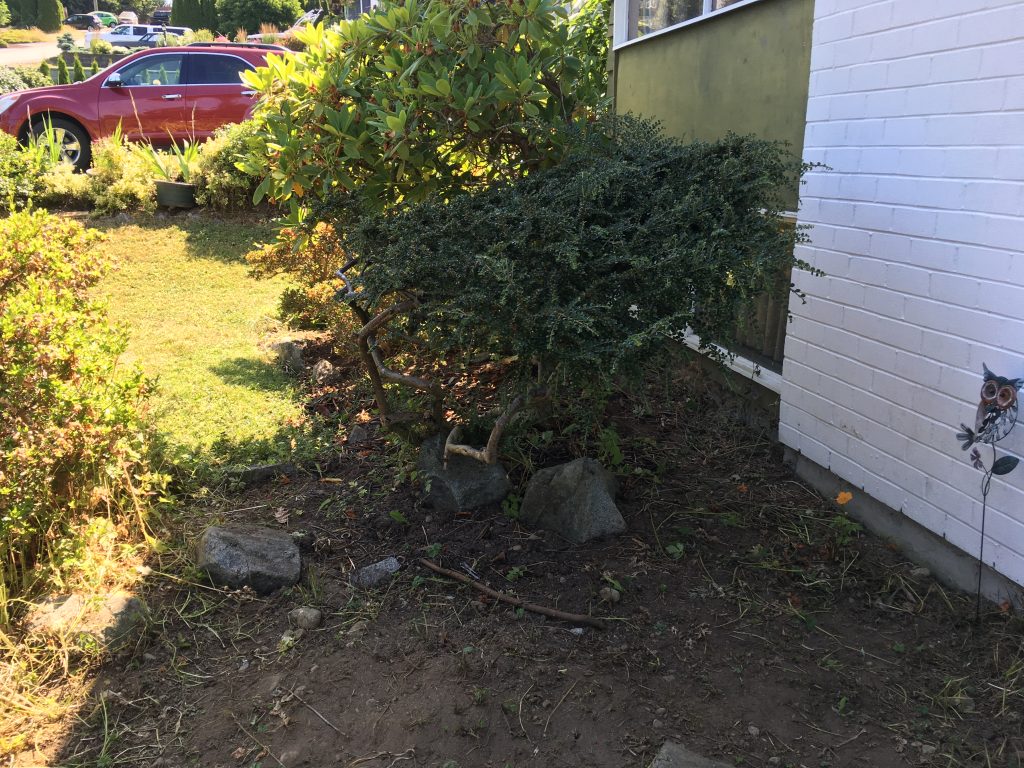
Take a look. What’s the problem here?

Freshly planted Magnolia.

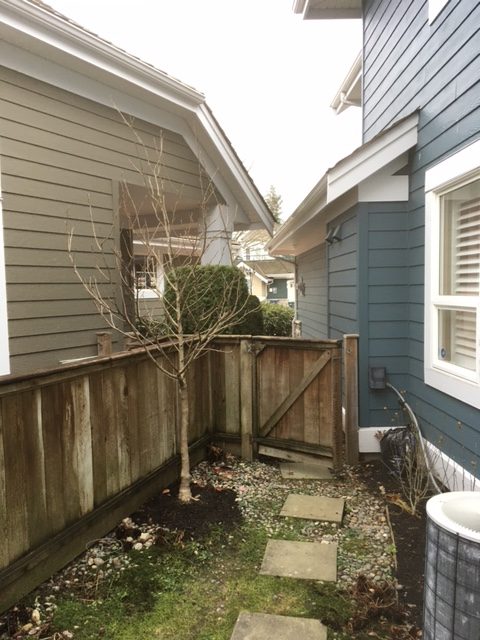
First of all, the planting spot has marginal soil; and you can see immediate access issues for the owners and for landscapers walking in to do lawn care maintenance: the branches are already sticking out.

But by far the worst sin-one I see repeated all the time- is the owner’s refusal to consider the Magnolia’s mature size. All he needs to do is look around; there are several mature Magnolias around his unit.

Since the owner paid for the tree and my labor, it had to be done his way, over my objections. So I did the work and let it go. But I didn’t think I’d be back months later.

Round 2

It turns out, somebody in the complex convinced the owner to move the tree to a more suitable spot. Well done.

Luckily, we found space just over the fence where he would still be able to see the Magnolia. Now we just had to dig up the tree and move it, which wasn’t easy considering the root ball size.

Much better!

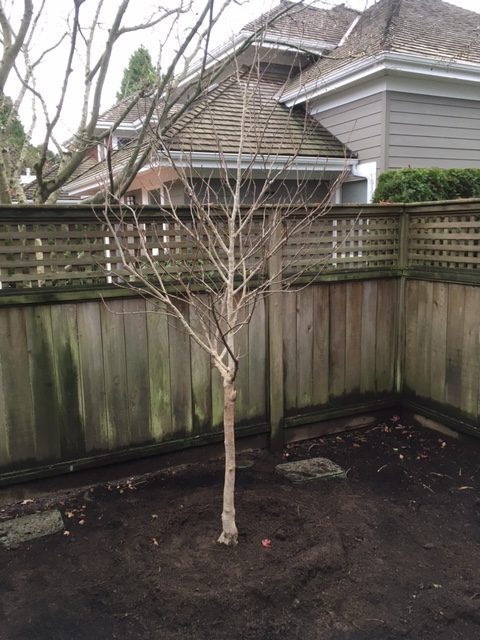
Now I can sleep at night. This Magnolia should be happier in this corner because it has more room and it won’t be in the way. Once the nearby dead western hemlock (Tsuga heterophylla) gets removed, there will also be more available light.

I’m pretty confident the owner will be able to see the flowers from his unit. If the tree somehow fails to thrive, I will find a helper to blame.

Conclusion

Always consider your new tree’s mature size before planting. Don’t get distracted by its beauty. Otherwise, you will have to re-plant it later like I did with this Magnolia.

Clover lawn goes missing!

By | Landscaping, Lawn Care | No Comments

Clover rebels

I still remember walking by this front lawn and discovering that it was planted in clover. What a surprise. I thought these owners were total rebels. What’s not to like about this simple design?

You don’t have to mow which saves you time and money; and that is also very gentle on our warming planet. Also, European chafer beetles don’t like clover and are unlikely to lay eggs in it.

The only maintenance I see would be keeping the clover inside the rectangle. And that can be accomplished with a blade edger or even hand snips.

The clover will flower and attract insects in summer. That’s another huge plus. Unless, of course, your kids get allergic reactions to bee stings.

I was so excited about this discovery, I turned it into a blog post and shared my picture online.

New owners, new regime

Then, this past November I was back in the neighborhood to help with leaf clean up. And I looked for the clover lawn. Except, it went missing with the new home owners. Sad, sad, sad.

This shows the enduring power of the lawn. That every house should have a green lawn is a powerful idea that still persists. And I should be glad, I guess, because I make my living from landscape maintenance where lawn care is a big part of the service.

But, if this was my new home, I would have kept the clover lawn. Who cares about the neighbors.

Now we are back to the usual regime. Water, fertilize, mow and edge weekly or possibly bi-weekly. I suspect it will be done with gas-powered machines which create noise and air pollution; and all of it will either require time from the owner’s life or money to hire a professional like me.

Freedom

People are free to do what they want in their homes. If you want a green lawn in front of your house, then definitely get one. But I still love the idea of a low-maintenance clover lawn. I never did meet the clover rebels.

Proper herbaceous perennial cutback

By | gardening, Tips | No Comments

Rudbeckia stubs

Rudbeckia


Every fall I shake my head at landscapers rushing perennial cutback by using power shears. To avoid shredding all of the green foliage, they cut the flower stems high, leaving a nasty stub. And because they use power shears, they have to go in and clean up, which means they didn’t save any time at all. (Don’t even get me started on air and noise pollution.)

Instead, I wish they would slow down and enjoy the cutback with hand snips; this allows you to grab a hold of the stems, cut them back close to the ground, leave the green foliage unmolested, and there is no further clean up. Just dispose of the stems you’re holding in your hand.

I find this quite relaxing, even when I have to cutback a large mass of Black eyed Susans (Rudbeckias). Just make sure you can see your fingers at all times as you do the cutback.

Long stubs I detest.

Cutback low.

Enter Christopher Lloyd

There is more to add to my rant. Early into Christopher Lloyd‘s book “The well tempered garden“, he writes about herbaceous perennials and how gardeners cut them back by leaving nasty stubs. They do this so they can remember the plant locations later when not much of the plants remains.

And Lloyd, the late famous English gardener, abhors this practice. That was a nice surprise because I do, too. Too bad I will never meet Mr. Lloyd. I suspect he could be my friend.

Lloyd argues that herbaceous perennials should either be cut right down level with the ground or left standing. Even dead perennials can look awesome covered in frost. See my blog post from December 4.

The problem with stubs

What’s wrong with leaving stubs? Lloyd gives us a nice list. Stubs look awful, they become hard and hollow; and they become a refuge for earwigs and woodlice. They also obstruct new growth in spring. But by far the worst is when people collecting cut flowers hit the hard stubs and stab themselves. (p.16, The well tempered garden by Christopher Lloyd)

Now you know. Start cutting back your herbaceous perennials right down without leaving nasty stubs. Use hand snips and enjoy your time in the garden. Leave your power shears in the shed.

Gunnera: late season step

By | gardening, Plants | No Comments
Gunnera

In your face plant

I love Gunneras. They almost make me laugh because they’re so big and imposing with their huge umbrella-like leaves. I happened to run into a few specimens at a garden in Morgan Creek, Surrey, last week but the show was clearly over.

Many of the spent leaves, now completely brown, were drooping into the pond. And this is already a hint: Gunneras require moist soil conditions.

They also need space and shelter. So, whoever designed this large water feature garden knew what she was doing. I found the plants at the pond edge, under deciduous trees where they have shade or semi-shade conditions. They all had plenty of space.

Gunneras work best as specimen plants. Fully grown, they’re hard to miss.

Last step

Gunnera buds are tightly packed around the crown. So, remember this one last step: cut back the leaves and stack them over top of the crown to protect it from frost.

I remember seeing a pile of giant Gunnera leaves stacked high by a creek at Como Lake, in Coquitlam. My first reaction was that someone forgot to clear away the debris. Now I know better, years later. The giant leaves protect the crown from frost.

Because Gunnera require lots of space, we don’t get to cut them back very often. Most strata (multi-family) complexes don’t have large gardens that would fit Gunnera specimens. This one does, so we had some fun cutting it back.

You can tell from the rough leaf piles that we need more practice. Twelve months from now, we’ll try to stack the leaves nicely. I always tell my apprentices to do everything in the field; and experience as many new things as possible. This was one such experience. Now they can file away Gunnera and remember the one critical late season step.

I hope you do, too.

Gunnera crowns

Cut back leaves stacked over the top of the crowns.

Fun with early frost

By | gardening, Plants | No Comments

Prerequisite

Yes, you can have some fun with early frost but, first, you have to leave some of your perennials and ornamental grasses standing. If you cut them back too early, you’ll lose out on seeing magic in your garden.

One good example are Sedums. Right now their flowers are still standing and they wear early frost quite well. Also, take a good look and you’ll see new growth at the base, waiting to push out in spring 2022.

If the flowers aren’t looking great or you find them broken up, then cut them back. We can’t do much about that. See one example below.

This Sedum is ready for cutback.

Sedum

Ornamental grasses

Ornamental grasses covered in frost look even better than Sedums. Unfortunately, people cut them back too soon. As soon as one stalk looks amiss, the entire plant gets cut down. And that’s too bad because many ornamental grasses flower in the fall; and, covered in frost, the flower heads look awesome.

Don’t be afraid to experiment by letting your ornamental grasses stand all winter. I have one potted specimen of Calamagrostis on the patio, and it looks fine.

Shrubs and trees

In December we don’t have to do much to our shrubs and evergreen trees, unless they’re in the way. Just watch for early frost and enjoy the show. Like I did recently at a strata complex we service.

Walk into your morning garden and observe it for a few minutes. If you work at a strata property, steal a bit of company time to enjoy the show. Azaleas and dwarf evergreen trees looked fantastic covered in light frost.

Azalea

Frost magic

I love seeing plants covered in light frost. It gives them a new look in late fall. If you want to enjoy the show in your own garden, cutback your plants later or wait until spring.

And don’t forget to share your own pictures.

Are you nice to your mailman?

By | Pruning | No Comments

Clear path

During a visit to my buddy’s place yesterday, I made a slightly shocking discovery. As we stood in front of his house, I pointed out a small gap in his front bed. And my buddy didn’t skip a beat. Oh, yeah, he prunes his shrubs every year to make room for his mailman. What?

Yes, it’s true, he intentionally prunes his shrubs so his mailman can shave thirty seconds off his route. That’s so nice. Perhaps next year he’ll put in a few stepping stones so the mailman doesn’t step on plants or compact the soil.

The mailman’s gap.

A better man

Clearly, my buddy is a better man. As soon as I heard gap and mailman, my mind started devising ways of blocking off the bed. Now, I’m sure I’m not the only one. I know people who are very touchy about their landscape. Sometimes you can’t even touch their garden hose; never mind sneaking through their planted beds on a daily basis. I can just imagine neighborhood Karens rising.

So, if you like your mailman, keep on pruning your shrubs for great access and consider installing a few stepping stones. Adding some perennial color might be a nice touch, assuming the mailman has time to notice them.

But what do you do if shaving thirty seconds off your mailman’s route isn’t a huge priority for you?

Prickles

I think a great natural barrier that might stop a mailman would be planting Berberis. It has soft prickles that are annoying enough to make you switch course, but not serious enough to draw blood. We don’t really want the mailman knocking on our door seeking first aid.

Pyracantha, for example, has nasty prickles but the shrub wouldn’t really fit into my buddy’s gap. The smaller Berberis would.

We could also install rocks in the bed edge and plant shrubs densely just behind them to deflect the mailman from his destructive path; and to make it obvious that this isn’t a pathway.

Conclusion

Every day gives us a chance to learn something new. Yesterday I learned something about my buddy and about myself.

How nice are you to your mailman?

Are knee pads for softies?

By | health and safety, Reviews | No Comments

Do you need them?

I used to think foam knee pads were for softies. Or, for female gardeners of a certain age, too frail to stay on their knees for more than a few minutes. But now, as my own birthdays pile up, I’m starting to change my mind. Or am I just going soft?

Facing a full day of paver installs, I stopped by the nearest Home Depot to buy the cheapest pair of foam knee pads. In this case, they were Husky foam knee pads, the cheapest pair on the shelf at $8. That’s all I needed because I really only need them for the occasional paver install and annual planting.

The other factor was summer heat. It’s simply too hot in early July on the West Coast for me to give up my shorts. That, of course, leaves my knees exposed. I didn’t find the idea of all day paver installs on my bare knees very appetizing. So, I splurged on a cheap set of knee pads.

They work!

I must say, for a cheap $8 pair, my Husky foam knee pads worked fine. They definitely made paver install and weeding work bearable.

Allegedly they are made of durable EVA foam for extended wear but it’s too soon to comment on that. We’ll see how long they last.

The elastic straps worked fine; and the soft, laminated fabric interior does provide some comfort. Having your skin rubbing against foam would suck; the fabric makes the experience much nicer.

The knee pads come with a limited two-year warranty and you’re welcome to check out Husky’s website for details. At $8, I couldn’t really care less. I won’t be using them that much.

Changed mind

In years past, I openly made fun of landscapers wearing knee pads. They all looked soft, males and females. But, knee pads have their place in landscaping work.

One example is annual flower planting where you have to bend over planted beds all day. That can put stress on your knees.

The other, more extreme case, is paver installs where you have to bend over hard surfaces. Now, in my carpenter pants that might be OK but not in shorts. I happily spent $8 on a cheap pair of foam knee pads to prevent unnecessary suffering.

Get a pair of knee pads if you think you need them. I won’t make fun of you. Not anymore.

Another Rhododendron massacre

By | Plants, Pruning | No Comments

Power shearing, really?

I get it, in commercial landscaping time is short. Crews have lots of work during the day and it’s not a good idea to get stuck on one task for too long. But there is a price to pay for this rush, especially when it involves plants.

I thought about this as I waited for my son to get picked up by his buddies and driven to a bike park for hours of fun. As I waited, I examined the landscaping in the roundabout and came across freshly sheared rhododendrons.

Now, this isn’t the first time I blog about this. I don’t think rhododendrons are good plants for shearing but I understand why people don’t want to hand snip them into shape. It takes time. And time may be short.

Ugly!

Rhododendrons are woody shrubs. They’re not soft like, for example, boxwood. The power shearing shreds the plant tissues, leaving stubs and shredded stems and leaves. And it looks awful. It’s like punishing the shrub after it does its job of flowering nicely.

Power sheared rhodo

Whenever I see power sheared rhodos, I feel like reaching for my hand snips and cleaning things up. And, considering that this specimen is next to a high-profile sidewalk, that might not be a bad idea. But again, it would take time.

A rhodo injured by power shears
Remove stubs like this

I also observed injured plant tissues and obvious stubs because rhodos aren’t made for power shearing. It’s important to clean things up with hand snips.

Hand pruning

Hand pruned rhodo

The above rhododendron was hand pruned fairly quickly without air and noise pollution. We removed one to two year’s growth thereby keeping the shrub in its available space; and we pinched off any spent flowers so the shrub doesn’t waste precious energy on seed production.

There aren’t any shredded leaves or stems visible and everything looks fine and green. Also, note the timing of our pruning, right after flowering.

Conclusion

For best results, hand prune your rhododendrons right after flowering. Don’t reach for your power shears to save time. The shrubs look awful after power shearing. Save time elsewhere.