Monthly Archives

December 2023

Why I added lawn creep to my online course

By | Lawn Care | No Comments

Lawn care mastery online course

When I first put together my course outline, I had five of the biggest lawn care mistakes covered. The course was done and published on Teachable: greenfirstacademy.com. I thought I was done and I started working on course number two. But then I started noticing lawn creep at work and in online posts.

What’s lawn creep?

Lawn creep happens when the edge between say a sidewalk and lawn gets bigger and bigger. Eventually a large gap develops, giving the impression that the lawn is retreating from the sidewalk.

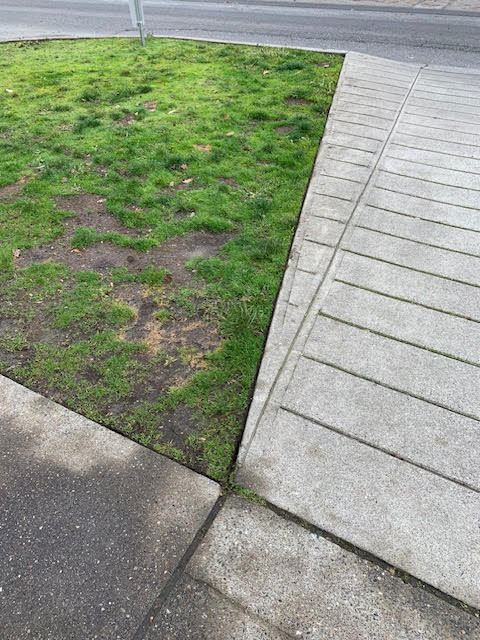
How does it happen? It’s caused by landscapers vertical edging with line trimmers from the lawn side. Since the line doesn’t hit the edge at precisely ninety degrees the way a blade edger can, the lawn edge gets shaved off on weekly or bi-weekly basis. Here’s an example.
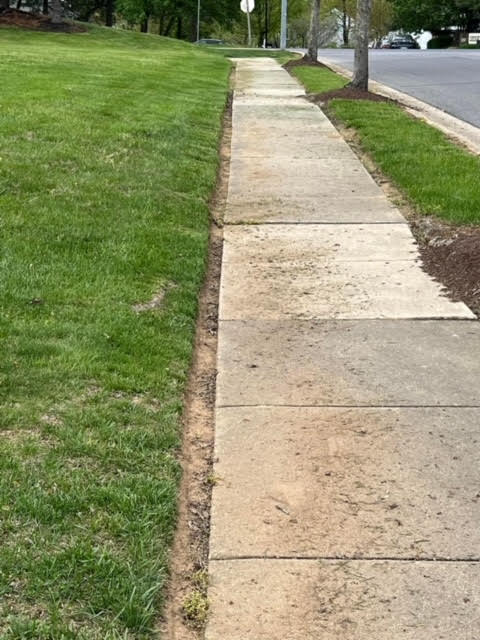
Lawn creep in the USA: note how wide the gap is between the lawn and sidewalk

What’s wrong with lawn creep?

Lawn creep looks ugly and, once the gap is wide enough, weed seeds will take hold in the gap. Now you’ve created extra weeding work for yourself. See below how beautiful the blade edger is. The difference is huge.

How to prevent lawn creep

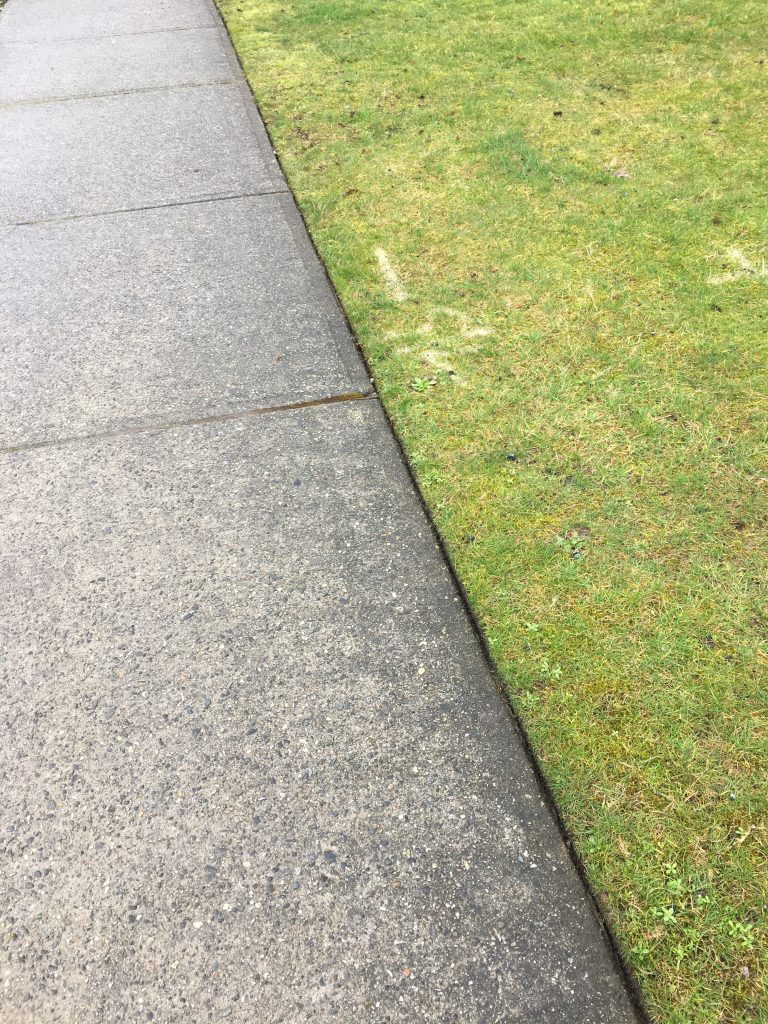
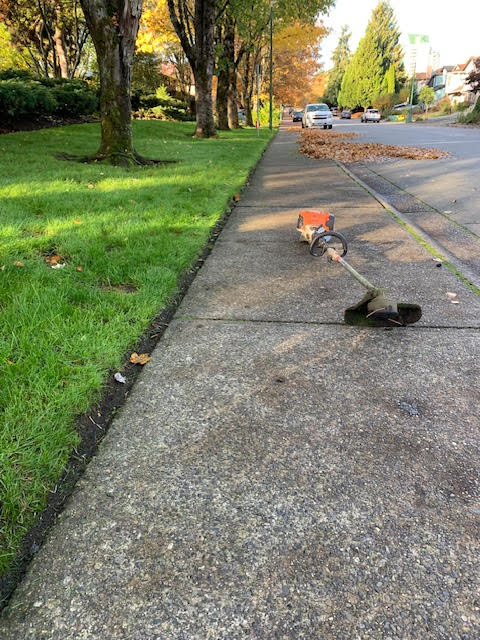
The best way to prevent lawn creep is by using a blade edger with a skinny blade. Since the blade follows the hard sidewalk edge at ninety degrees, there is no creep. All we get is a sharp line that keeps the lawn from spilling over the sidewalk. Here’s an example:
No creep happens with blade edger use.

I can hear the complaint: what if I don’t own a blade edger? No problem. When you vertical edge, stand on the sidewalk. That way if you don’t achieve the desired ninety degree angle, you will just chew up your line, not the lawn.

Lawn creep happens more than you think.
Another massive gap created by poor vertical edging. I didn’t touch the grass.

Here the homeowner wondered why the edge was creeping closer to her house.

Stop lawn creep

Stop unsightly lawn creep by using a blade edger or vertical line edging from the sidewalk, not the lawn side. The gaps created by lawn creep look awful and invite weeds to move in.

Rhododendron reduction follow-up

By | Pruning | No Comments

Rhododendron reduction

What do you do when your rhododendrons get too big? You can reduce them with your hand saw and hope the shrubs recover. That’s what happened at one strata (multi-family) site where the residents wanted their rhododendron significantly reduced.

So grab a sharp hand saw and get to work. But before you do, remember one rule: rough-barked specimens recover better than smooth-barked specimens. Luckily, in my case, the shrubs were rough-barked.

Latent buds

Rhododendron reduction works because the shrubs have latent buds hiding under the bark. Once you reduce your shrub these buds start emerging and popping. You just have to be patient. Once, I reduced a client’s rhododendron so hard, the lady wasn’t exactly happy. I told her the shrub would recover nicely and I was right. It just took way longer than I expected.

Now back to our strata example.

Follow-up visit

Months later I showed up on site and went to see the rhododendrons just as daylight was fading fast. Clearly the latent buds I had seen popping months earlier were now fully grown and showing buds. Those buds are set for next summer so don’t touch them in December.

One problem

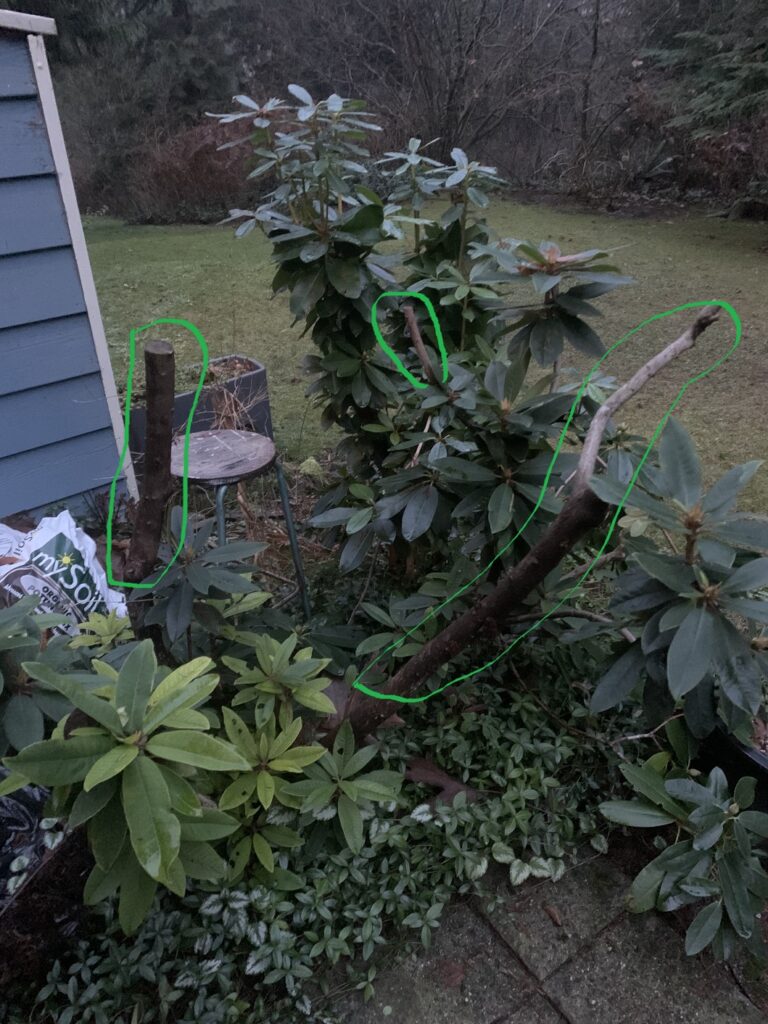
I did notice one problem. There were several large stems without any buds or growth. It’s as if there were no latent buds anywhere, which is weird. I have no idea why the odd stem is bare, looking like a stick.

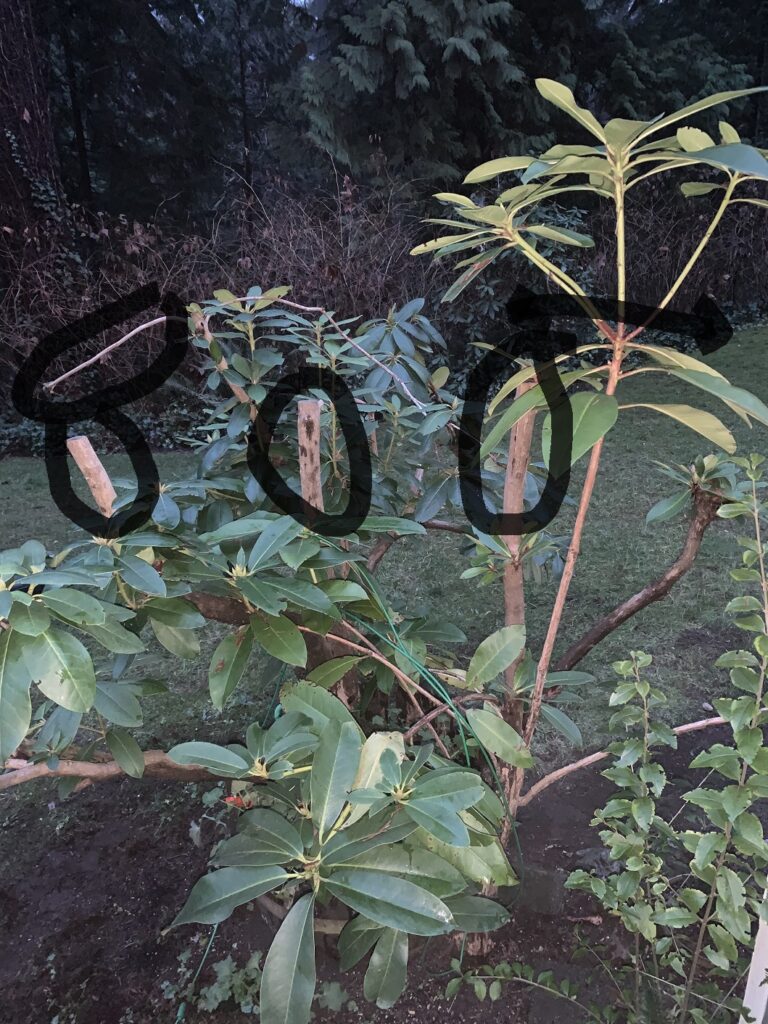
The fix is obvious: follow the bare stem to the next green growth and remove it just above it so the “stick” doesn’t show anymore. If the entire branch is bare then we’ll remove right at the base. As if we were coppicing it.

This will give us the look we want: a green rhododendron shrub, nicely reduced by more than half. Now to keep it at that height, we’ll diligently remove each season’s new growth.

Remove sections highlighted in black

Remove entire branch, if bare.

Conclusion

Yes, you can reduce your rhododendrons significantly thanks to latent buds hiding under the bark. Just remember that rough-barked specimens recover better than smooth-barked specimens. If you get branch sections totally devoid of any growth and poking out like “sticks”, just remove them with a sharp hand saw.

Native plant lesson from a construction site

By | Plants | No Comments

Roadside planting

This afternoon I went for a walk while my son refereed a soccer game; and on the way back I noticed a number of pots by the trail. They were set out and ready for planting. Aha. Here was a perfect chance to see what the city is planting and to test my plant identification skills.

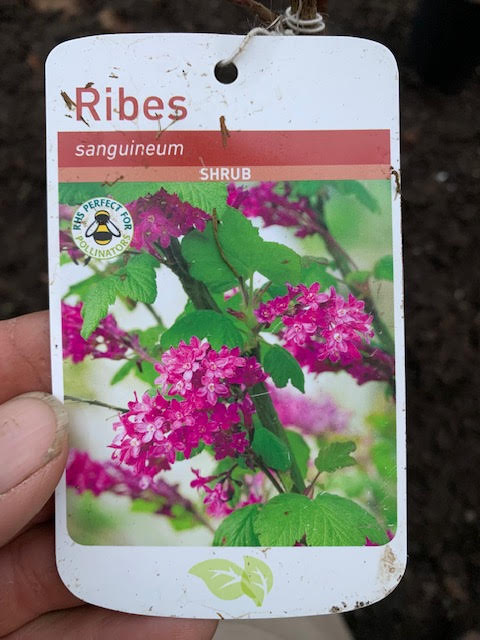
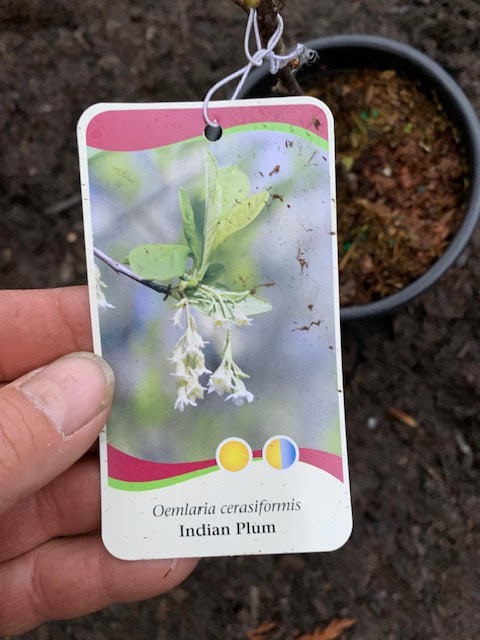
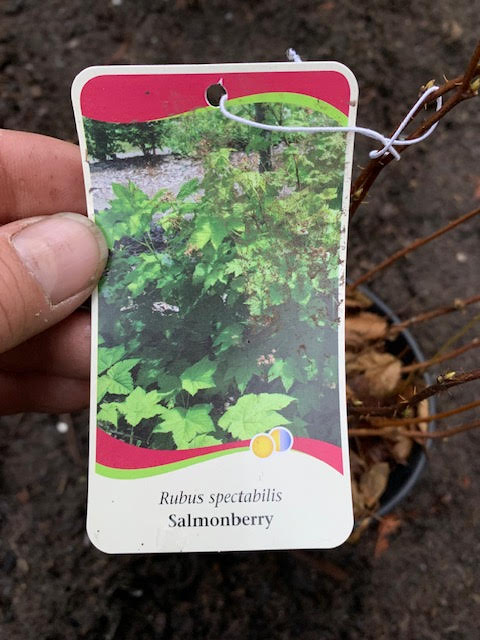
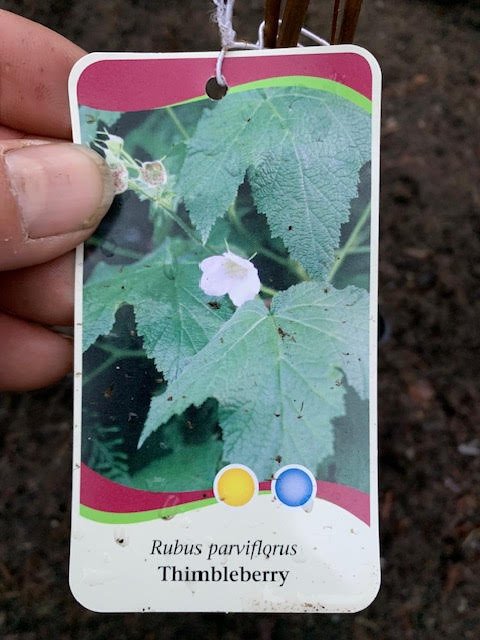
As soon as I saw the pots and tags I knew this was a native planting scheme. All of the plants are native and they will quickly cover up the unsightly construction zone. Most of the plants are already growing in the nearby park areas; this would be a terrible place to introduce non-native plant species.

So let’s take a look. See how many of the plants you already know. I openly admit to not knowing the botanical name of the last plant.

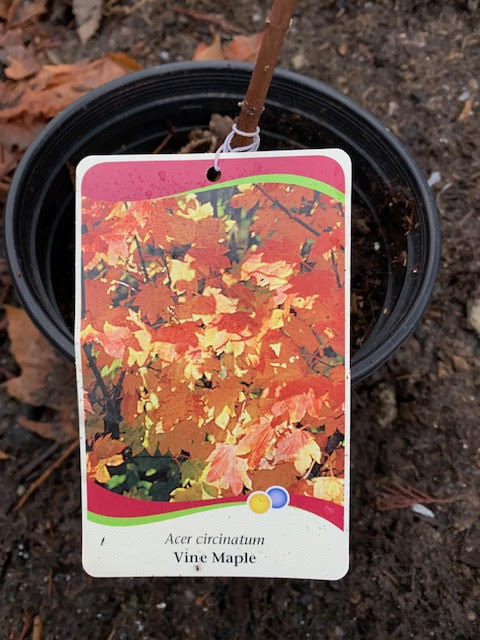
Vine maples (Acer circinatum) are well-known native trees in BC and they have nice fall colors.

Both the vine maple and the Black Hawthorn (Crataegus douglasii) trees are correctly positioned farthest from the newly rebuilt trail so they don’t interfere with trail users.

I love Ribes sanguineum because they flower in early spring and lift up the landscape with their flower clusters.

Indian plums (Oemlaria cerasiformis) take abuse from some people for being boring after flowering but I disagree. The white flowers are nice and so are the edible berries.

Salmonberry (Rubus spectabilis) berries are enjoyed by both people and animals. Black bears love them. But when my kids were little they didn’t believe me when I told them they were edible. I had to consume several berries before they tried them.

Thimbleberry (Rubus parviflorus) berries are also edible but don’t take my word for it. Google it before you raid the woods next summer.

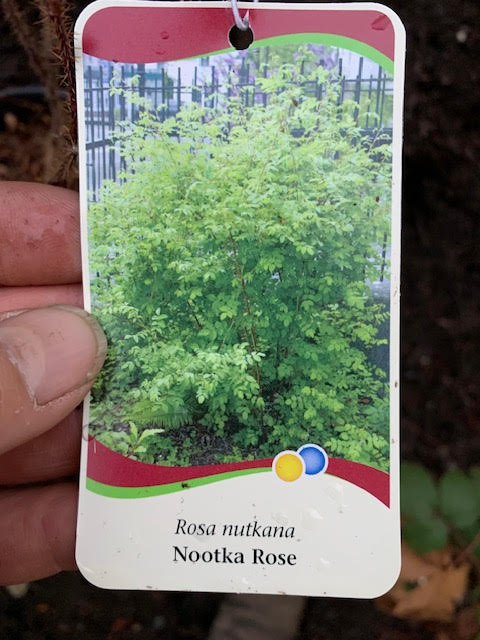
The Nootka Rose (Rosa nutkana) will grow fast in its new home and its flowers should be nicely visible from the trail.

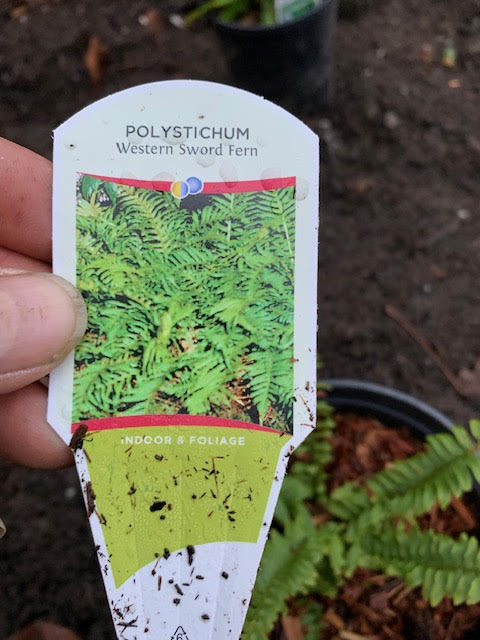
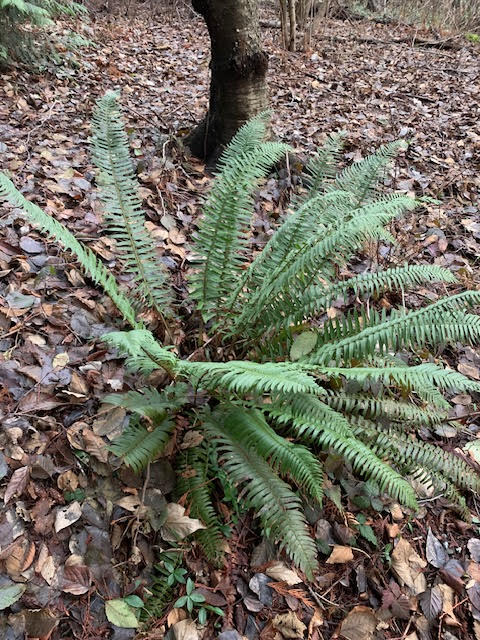
Our forests are full of Sword ferns (Polystichum munitum). See the next picture for a mature specimen.

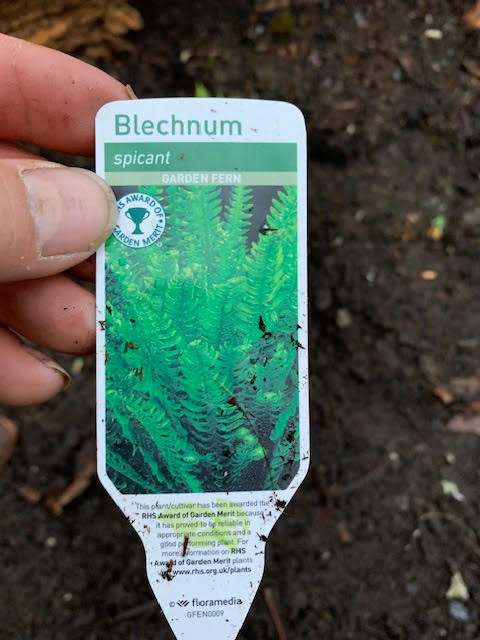
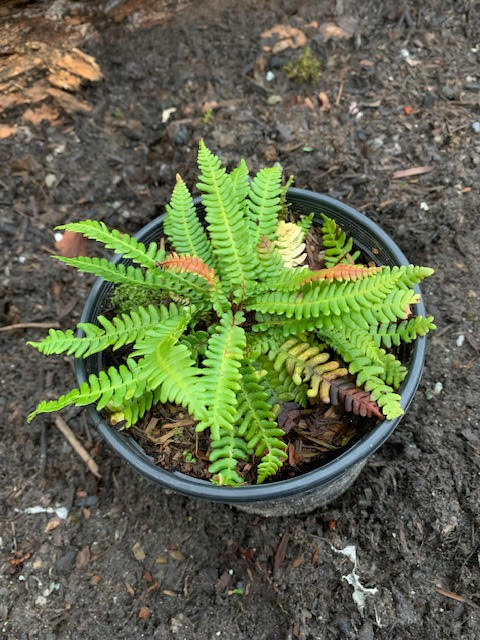
This is the other fern species being planted. Blechnum spicant (Garden fern).

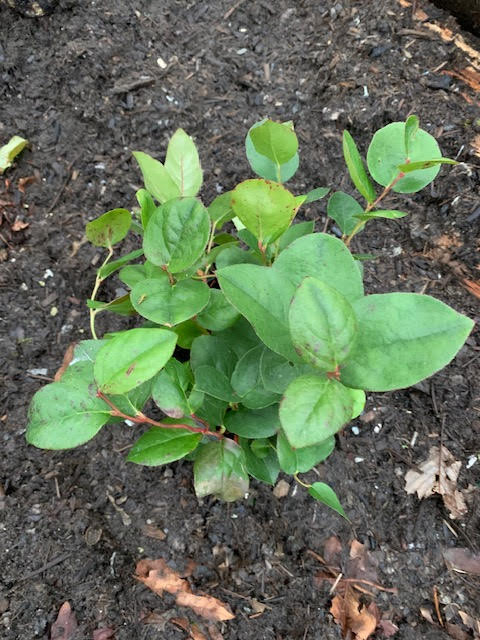
Salal (Gaultheria shallon) is a common groundcover in our forests and wild areas,

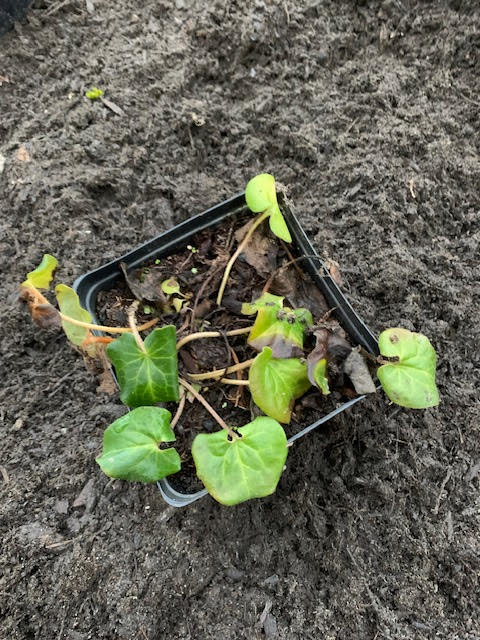
One species I didn’t know!?

The last species I had to guess at and I definitely didn’t know its botanical name. That made the whole walk into a fun learning experience. Do you know it? Since it’s the lowest growing species it’s being planted near the trail.

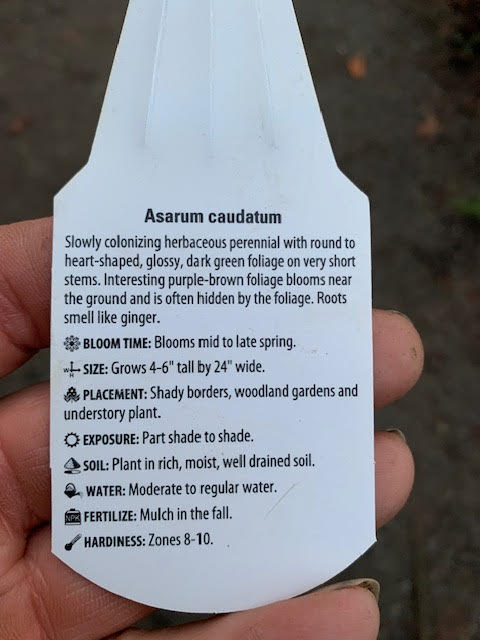
Asarum caudatum (Wild ginger)

Running into a native plant planting zone on my walk made my day. I tested myself on plant identification and I learned a new botanical name: Asarum caudatum (Wild ginger). So get out into nature over the holidays and see which native plants you can identify.

Are you ready for your first blade change?

By | Company News | No Comments

First time!

It’s hilarious when after working with someone for months, I discover that they have never changed the blade on their blade edger. Blade edgers give us beautiful definition where hard edges meet lawns. I love to put one last blade edge on a site before the winter holidays because it sharpens the site look; and it will last because our lawns aren’t growing actively.

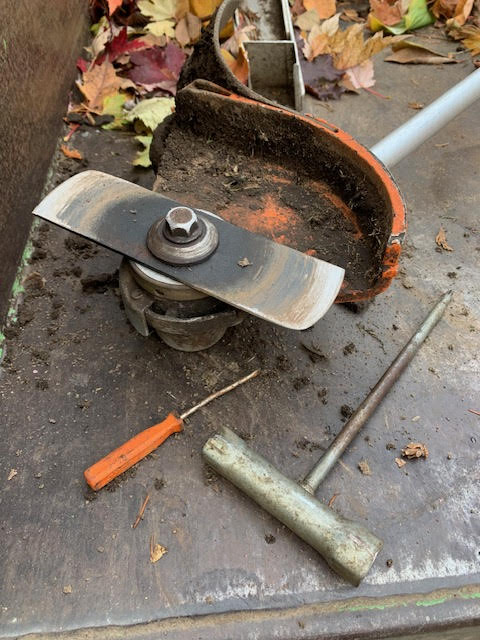
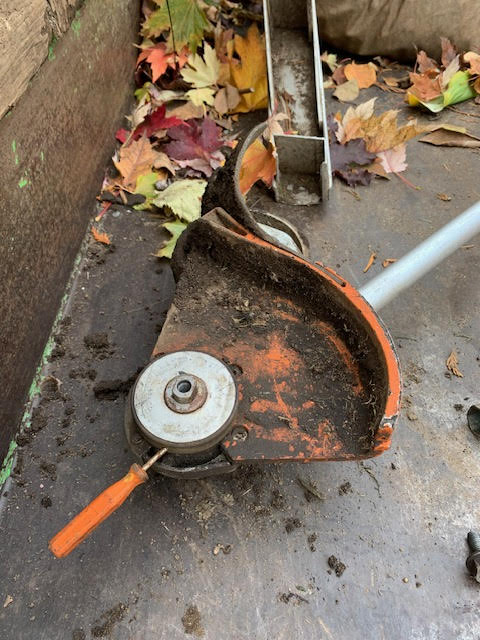
Of course, it’s difficult to put in a nice, sharp edge when your edger blade is down to a short stump. You must know how to change it. There are two important keys to this simple changeover: you must know how to stop the blade from spinning and realize that blade edger bolts loosen clockwise. That’s it!

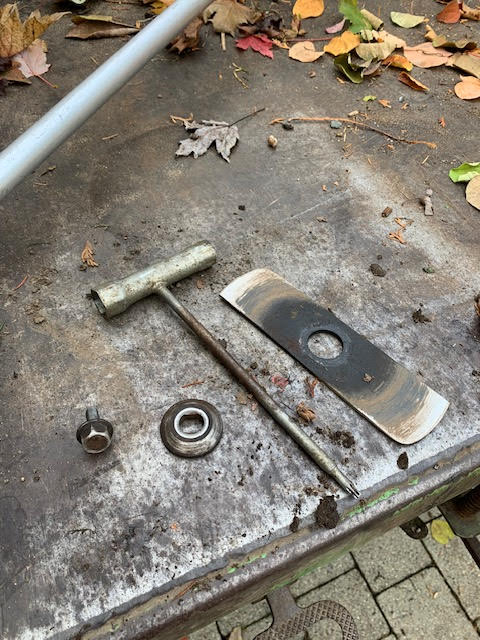
Tools you will need!

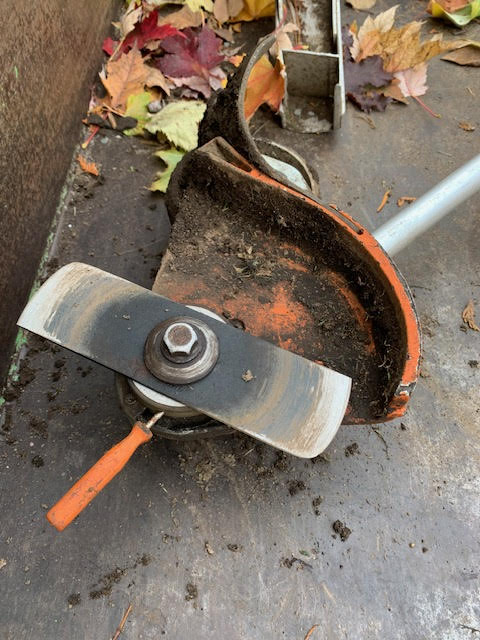
Step one is lining up the holes and inserting a Stihl screwdriver to stop the blade from rotating

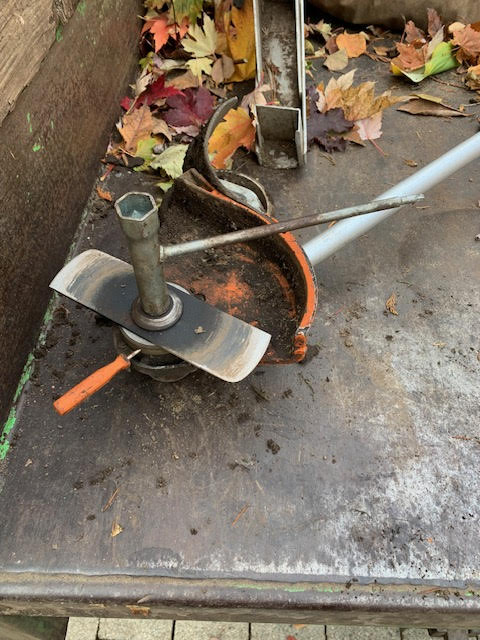
Loosen the bolt clockwise and avoid cutting your hand on the blade. Wear gloves.

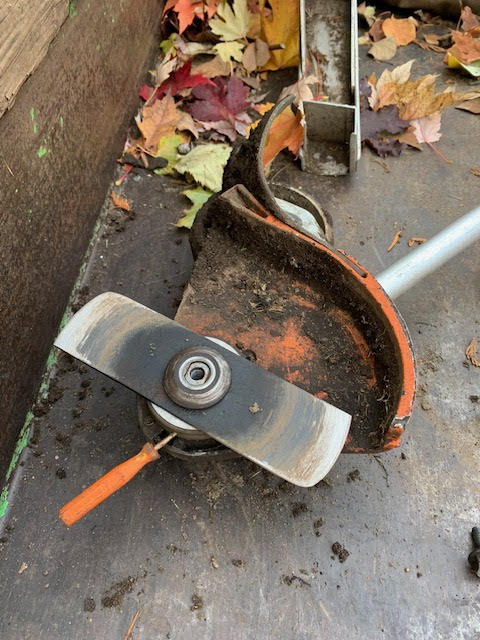
Remove the bolt, cover piece and old blade. Yes, this one still looks good.

Ready for a new blade!

Now we put it all together!

Safety

Back when I was young and sloppy, my hand slipped on a stubborn blade and I cut the palm of my hand open. This required freezing and stitches at a nearby clinic. So wear gloves and don’t over-tighten the bolt.

Fly baby!

I love the way hard edges look after edging and blowing. Always run your blower along the entire edge to dislodge any debris. Then look back and enjoy your beautiful work.

This is much nicer!

The edge above looks great but if you look closely there is some soil on the bottom right that could be forced out with a rake. Still, not bad, thanks to your new sharp blade.

Don’t forget to teach the next new landscaper or homeowner that comes along. Be great!

Watch where you plant!

By | Planting | No Comments

Think about your planting spots

Some planting spots are better than others. This is what I was thinking today on a visit to my client’s place. I had to remove remnants of a pruning job I did to keep mature Photinias from touching the house; and I also had to knock down some blackberries.

As you can guess, this isn’t a well-maintained landscape. The owner calls me to put out fires periodically; I wish she would pay for regular maintenance throughout the year.

Shrubs in lawn

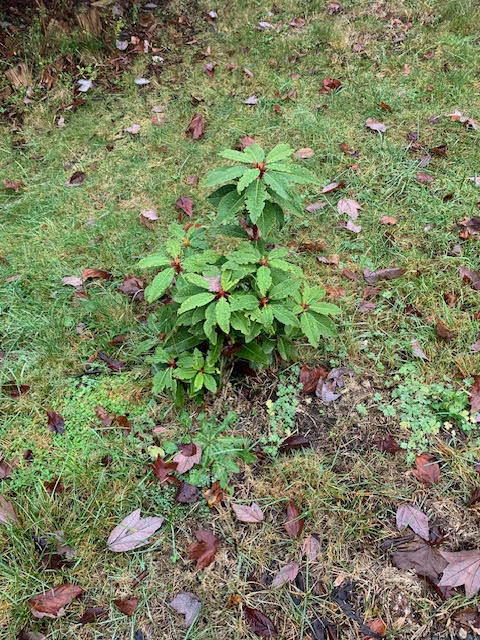
To reach the Photinia debris I had to walk past the front lawn where one small rhododendron sat. It’s a sad-looking specimen. The reason it’s struggling is because it’s sitting in a lawn and competing with grasses for resources like water and food. Never underestimate your turf grasses.

Even if you cut out a small tree circle around the rhododendron, you will likely get no growth or very slow growth. And I’m not making it up. Even the legendary gardener Christopher Lloyd agrees on page 17 of his excellent book “The well-tempered garden“.

Sadly, this isn’t my first blog on this topic. In 2022 I published a blog about a struggling Pieris, now long gone. This poor shrub struggled with grass competition and lawn care machine abuse. It never had a chance without a circle cut out to warn workers to stay away.

Trees in plastic turf

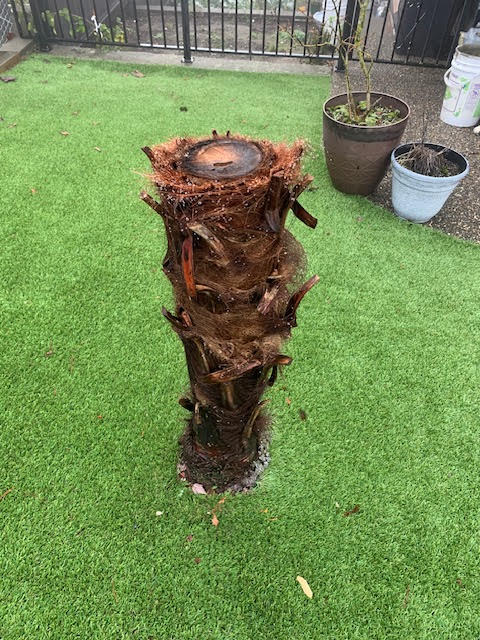
Next door to my client lives a homeowner with three Chinese windmill palms (Trachycarpus fortunei). Two are planted in beds and doing fine; one sits in plastic turf! I’m not kidding. It looked all brown a sad with only a hint of green this past summer. Today I found it beheaded with only a “joystick” left.

Why the difference? Well, water falling on the turf runs off and in summer the plastic heats up. That’s why soccer fields are watered down in summer; and why pet owners do the same. A palm standing in plastic turf gets cooked; and surface roots can’t find the resources they need under plastic, assuming they are alive . It’s a terrible idea.

Toast!

Conclusion

Choose your planting spots well before installing trees and shrubs. Plants struggle to survive in lawns and plastic turf. Now you know.

Lessons from a gardener’s garage sale

By | Events, gardening | No Comments

Deals!

I know that some people frequent garage sales where they buy stuff they then flip for profit online. I’m not one of them, not yet. But this morning I made the forty-five minute drive into Vancouver to visit a garage sale put on by a retired professional gardener.

A few hours later flurries would come down so it was a cold morning but I had fun visiting another gardener and ISA certified arborist. This gentleman ran his own gardening company for over thirty years, servicing well-to-do residences in Vancouver. He never had more than four employees.

So now what, I asked him. It turns out he discovered his second act: he’s working as a tourist guide in Vancouver and sharing its history! That’s definitely less taxing physically; and he’s enjoying himself.

Greed and unaffordability

The current housing situation in British Columbia and the rest of Canada is horrendous. It turns that our retired gardener got a “renoviction” notice last fall to move out by February 2024. Thus the garage sale.

Having lived at the house for the past nine years means that his rent was probably very low and affordable. So the landlord is moving back in, allegedly. But I say they will eventually rent the place out at 35% more. And finding a new place to live for a seventy-plus retired gardener must be a nightmare.

Last year my own landlord openly, and illegally, emailed me with a 35% rent increase, saying I should be paying “market rates”. Oh, the beauty of greed! Laws only permit 3% annual rent raises. Yes, the market has gone nuts.

Here we go, 2024

So now I have to make more money to cover a huge rent increase, like the rest of Canada’s renters. That’s why I combed through the garage sale for items that would help my own one-man company. And I found some. Let’s see:

An 8′ landscape ladder in great condition for cheap was a huge score for me. I will eventually need bigger ladders like 10′ and 12′ but this baby will do for now.

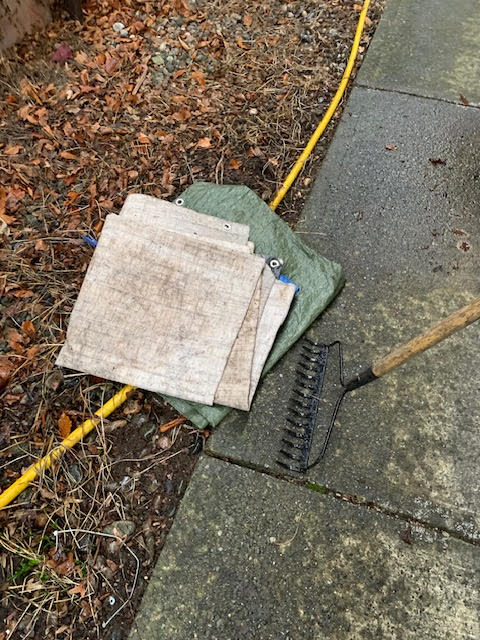
Old tarps. Now I know that sounds a bit sketchy but new green waste tarps are fairly expensive. It was nice to score a few.

Used tarps are extremely useful.

I also scored a STIHL safety helmet with earmuffs and a shield. It’s nice to have a back-up unit; or I might sell it later. It has a nice ISA certified arborist sticker on it.

Five and ten litre jerry cans will also come in handy; and so will another hard rake in great condition. Wooden tools eventually break.

Afternoon flurries

By the time I got home the flurries were annoying so I changed my plans. I went home to compose blog posts like this. I still have Sunday and Monday to hustle.

It’s important to stay flexible and resilient. Careers end, rents go up, the weather turns ugly. Change is constant so get ready. I’m looking forward to 2024. Are you?

Definitely say “Thank you!” to your landscaper

By | gardening, Landscaping, Seasonal | No Comments

Thank you!

It’s a long year outside in the landscape so it’s always nice when a resident shows up with gifts to thank us. Like today. While I was deep-edging and enjoying a beautiful sunny mid-December day a resident “woke me up” from my audiobook.

The lady handed me an envelope with sweets and a card with cash inside. The sweets didn’t last very long; before lunch is the most dangerous time for landscapers because blood sugar levels are low. So I took care of that problem very quickly; and there was enough cash to buy lunch at Tim Horton’s an hour later. That was really nice.

It doesn’t matter who maintains your complex or residential garden, say “thank you” just before the holidays. Your landscapers and gardeners work hard to keep your place looking great. They will definitely appreciate a simple ‘Thank you’.

Bitch, bitch, bitch

It isn’t always rosy like this. Sometimes things go wrong so I fully expect to get several complaints a year. Not that every complaint makes sense. When I was a new landscape foreman every complaint threw me off and many times I lost sleep because of it. Not anymore. Now I’m a working manager and most complaints can be dealt with. I no longer lose sleep over it.

Now it’s also easier to blame junior staff for mistakes…….

A long season

Every Christmas it hits me how long the season is. Landscapers sweat outside all year in heavy rain, 30+ summer temperatures and in freezing temperatures. Every spring is super busy, then comes hot summer weather. When school starts, leaves start to turn and fall and the clean up can drag into December.

December is always a bit sketchy because we never know what we’ll get. This year El Nino is giving us a mild start to winter so it looks like we’ll make it to Christmas without interruptions. I can’t remember the last time I did side jobs the week before Christmas; and I have tree work ready for the new year. I’m counting my blessings.

Conclusion

When you’re enjoying your Christmas holiday this year look outside at your garden or landscape. If it’s in great shape, don’t forget to say thank you to your maintenance workers. They spend a long year outside doing their best.

Poor strategies from experienced workers!?

By | Lawn Care, Leaf clean-up | No Comments

Lessons learned?

It’s always better to learn from other people’s mistakes. That’s why I put together an online course which covers other people’s lawn care mistakes. It’s on sale for only $5 until January 1, 2024. Check it out.

This blog post covers two strategic mistakes committed by experienced workers!? How, you ask? I honestly don’t know why experienced workers work like amateurs. But I know that we can learn from their mistakes. It doesn’t matter if you’re a new landscaper or homeowner. Use good strategies to get things done efficiently. Every time.

Leaf clean-up

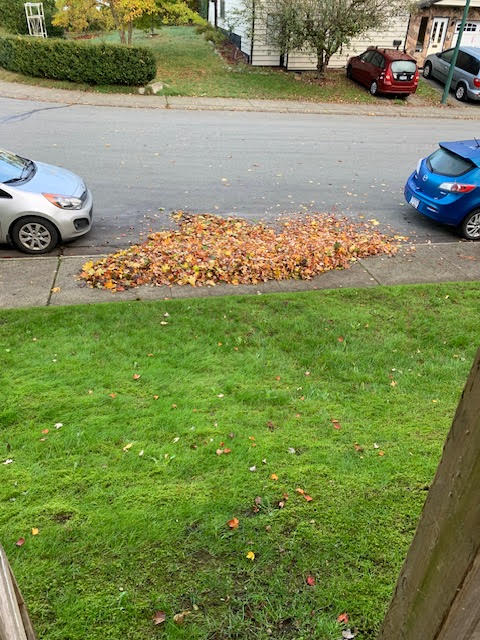
What’s wrong with this picture?

After all, the leafy pile looks tight, doesn’t it? Sure, but it should be blown onto the lawn for several reasons. One, it’s an obstruction. Think visually-impaired passerby with a seeing-eye dog or someone disabled using a motorized wheelchair. Your pile could cause trouble before you get to it. Remember, some disabled people ride around like pirates. They will finger you for making life difficult for them.

Two, it’s easier to rake up leaves on the lawn and, as a bonus, you don’t have to come back later to blow off remnants. You’re saving time and creating less noise and air pollution. If you’re mowing, the mower will suck up any remnants left on the lawn.

Now, I would expect senior landscapers with tons of experience to do better.

Lawn care

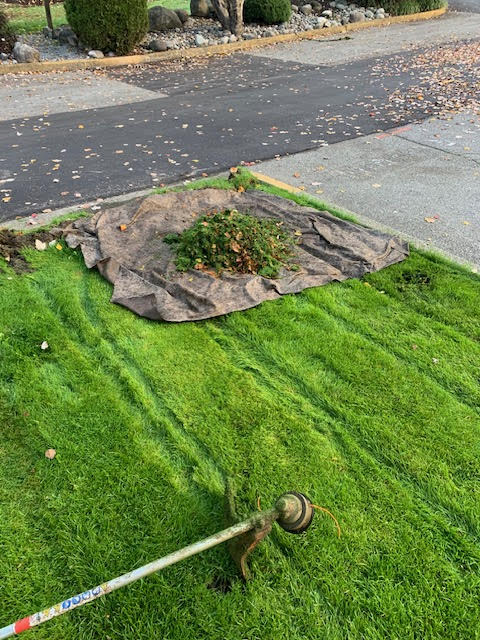
When you’re mowing, keep your tarps close by so you don’t have to waste time walking. But please don’t put your tarps on the lawn edge where they’re in the way.

Here you’re asking the line trimmer to stop and move your tarp!?

In the above picture I’m line trimming and I only have two hours to spend on this site. So it’s tight. The last thing I want to do is move tarps out of the way so I can edge the lawns. This is really dumb from another experienced landscaper; the kind of dude who frequently shoves his experience in your face.

Place the tarp near the lawn but not in the way. It’s slowing down the line trimmer for no good reason. It’s not like there is a lot of car traffic inside this complex. Always use the best, most efficient strategies to get your lawn care done. Click the button below to see my online course which covers the biggest lawn care mistakes. Learn from other people’s mistakes. The course is on sale for only $5 until January 1, 2024.

On the pain of planting in clay

By | Planting, Trees | No Comments

Clay is a bitch

What’s wrong with this picture?

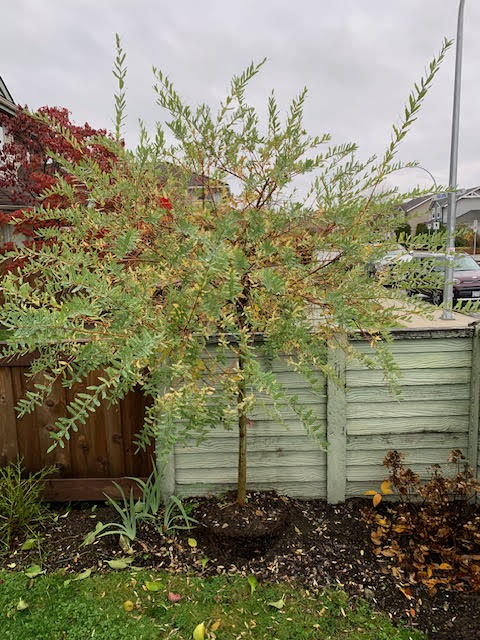
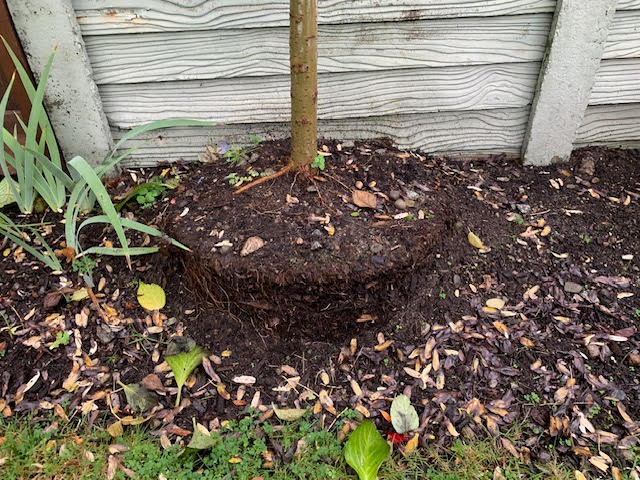
As soon as I saw this poor willow (Salix) planted way too high, I remembered the setting. The entire neighbourhood in Port Coquitlam, British Columbia sits on clay soils which are notoriously tough to dig through and keep the soils soggy because they can’t drain. And so I knocked on the door and asked the owner what happened: and just as I suspected, he gave up digging in the clay and planted the willow high. Good enough! I guess.
Is it good enough?

Is this planting good enough? I don’t think so. With one half of the root ball showing, many roots will desiccate and die. It also looks funny. But I totally understand because once I had to prepare three holes for cherry tree planting and it was a bitch. The clay layer is so tough, it’s easy to give up. I remembered it was solid but I should mention that all three cherries are doing well and flowering every spring.

A better solution?

My solution would be this: take another stab at the clay on the bottom of the planting hole with different tools. Then, once I would run out of energy and bad words, I would “massage” the root ball to make it smaller. It’s very likely that those two steps would allow for planting at grade, just the way we want it.

You can fight clay soils with organic amendments. Adding some to the planting hole and to the backfill soil would help over time. Sometimes you just have to accept the conditions you’re given and do your best. There is no point stressing but I do find the willow root ball sitting high very annoying. I would fight to plant it close to grade. The willow would be happier and I would sleep better at night.

Fountain grass rebel

By | Plants, Pruning | No Comments

Red Seal Vas rebellion

I love fountain grasses. I especially like Pennisetum alopecuroides which is described as a graceful ornamental grass with foliage that rustles in the wind. It also provides non-stop drama, like many of my crew members. And best of all, it requires very little care and this is the main topic of this blog.

Now, I know one site which signs on for ten or eleven months so there is always rush to get everything done before Christmas. Pruning must be completed, weeds removed, and one final blade put in on hard lawn edges. Inevitably, one suspicious landscape manager asks the crew to shave the fountain grasses into tiny mounds. Except the timing is wrong!

Remember how fountain grasses provide drama and rustle in the wind? Well, they can’t when they get obliterated into almost nothing. So let me repeat this: the timing is wrong. Fountain grasses should be sheared in late winter just as the grasses start to grow. Late winter, not early December, which is technically still fall.

With the weak landscape manager mentioned above out of the picture, I instructed the crew to leave the fountain grasses alone until late winter. And to seal the rebellion I also informed the strata council about the change. As soon as I mentioned fountain grasses covered in light frost, the female strata council member was sold. I know she will thank me later.

Sides

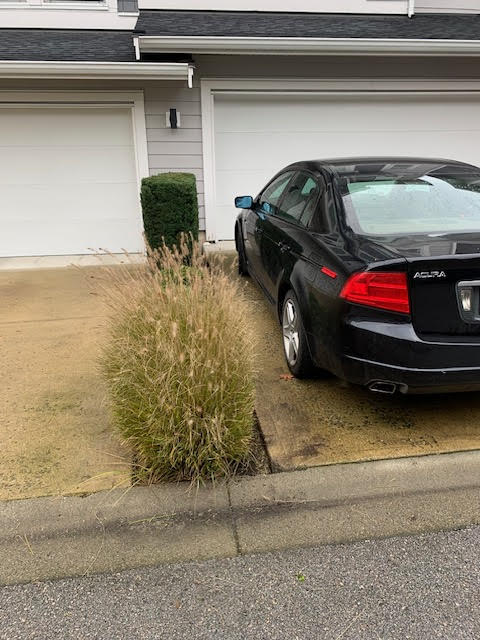
I won’t lie, there was some grumbling from homeowners about their cars brushing against the grasses. I know that nothing happened to their cars; the paint is still attached to their car bodies. But I did lightly shear the sides where the foliage looks like beige straw. This was one easy compromise to make.

Lightly sheared sides to shut up fussy car owners.

Lessons

What lessons can we derive from my rebellion? One, make sure you get your timing right. Look up your target plant and prune it when it’s best for the plant, not when some landscape manager thinks it should be done.

Two, don’t be afraid to change things up. We’re not AI bots. If the fountain grasses get obliterated every fall, leave them alone one year. Enjoy them and cut them back in late winter. That’s all you have to do to them all year.

Support my blogging

Support my blogging with merchandise purchases: redsealvas.com