Category

Species

Japanese willow response to drought

By | Landscaping, Species | No Comments

Every time I install new plants on a site I worry about them because I want them to get established and thrive in their new landscape. Usually I won’t see the plants for months but in the case of two Japanese willows (Salix integra) I planted it was different. After my company schedule was re-done in spring, I kept coming back to the same site so I could observe my newly installed plants, including the two willows.

Summer heat

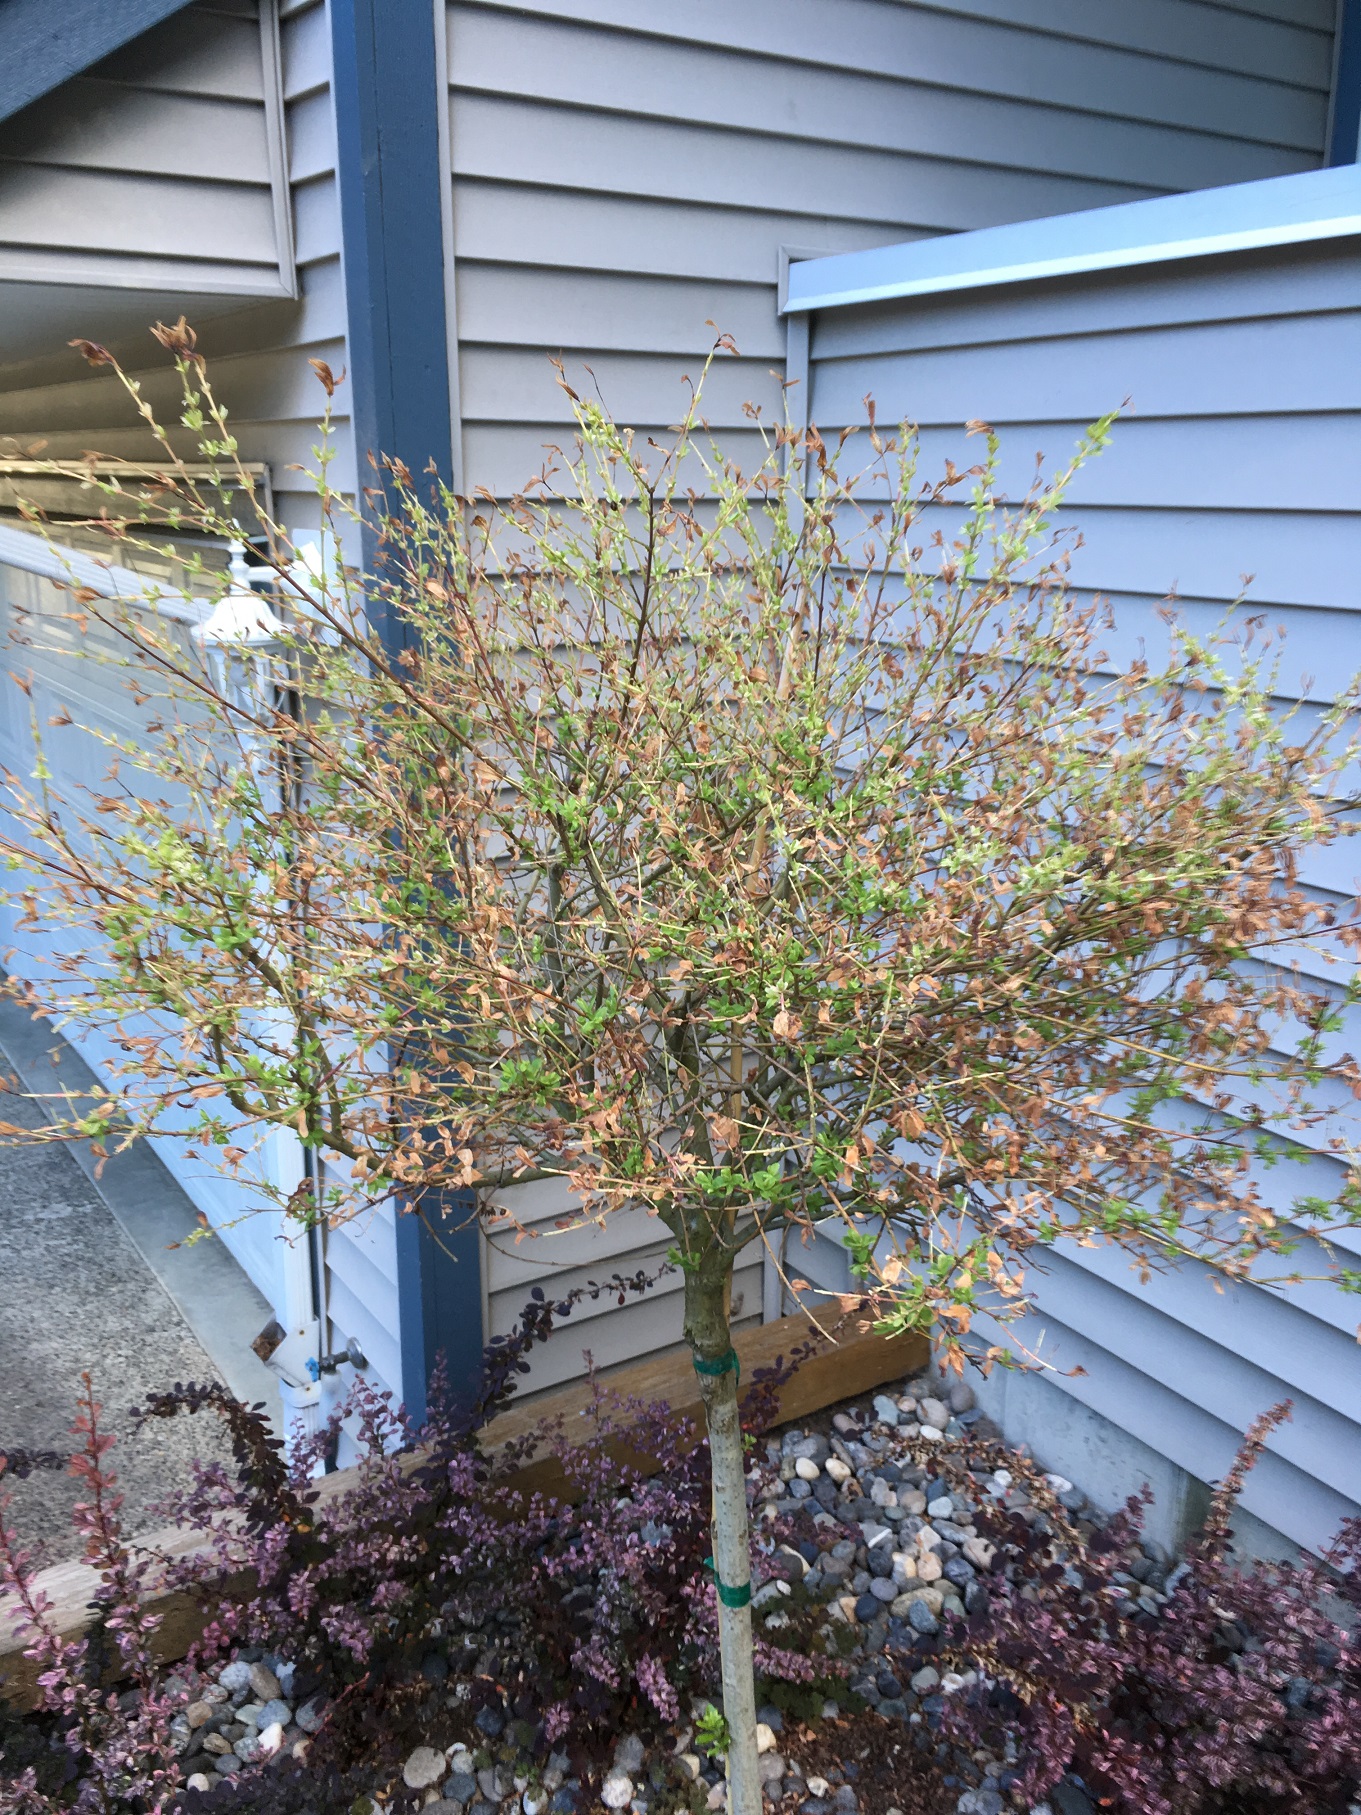
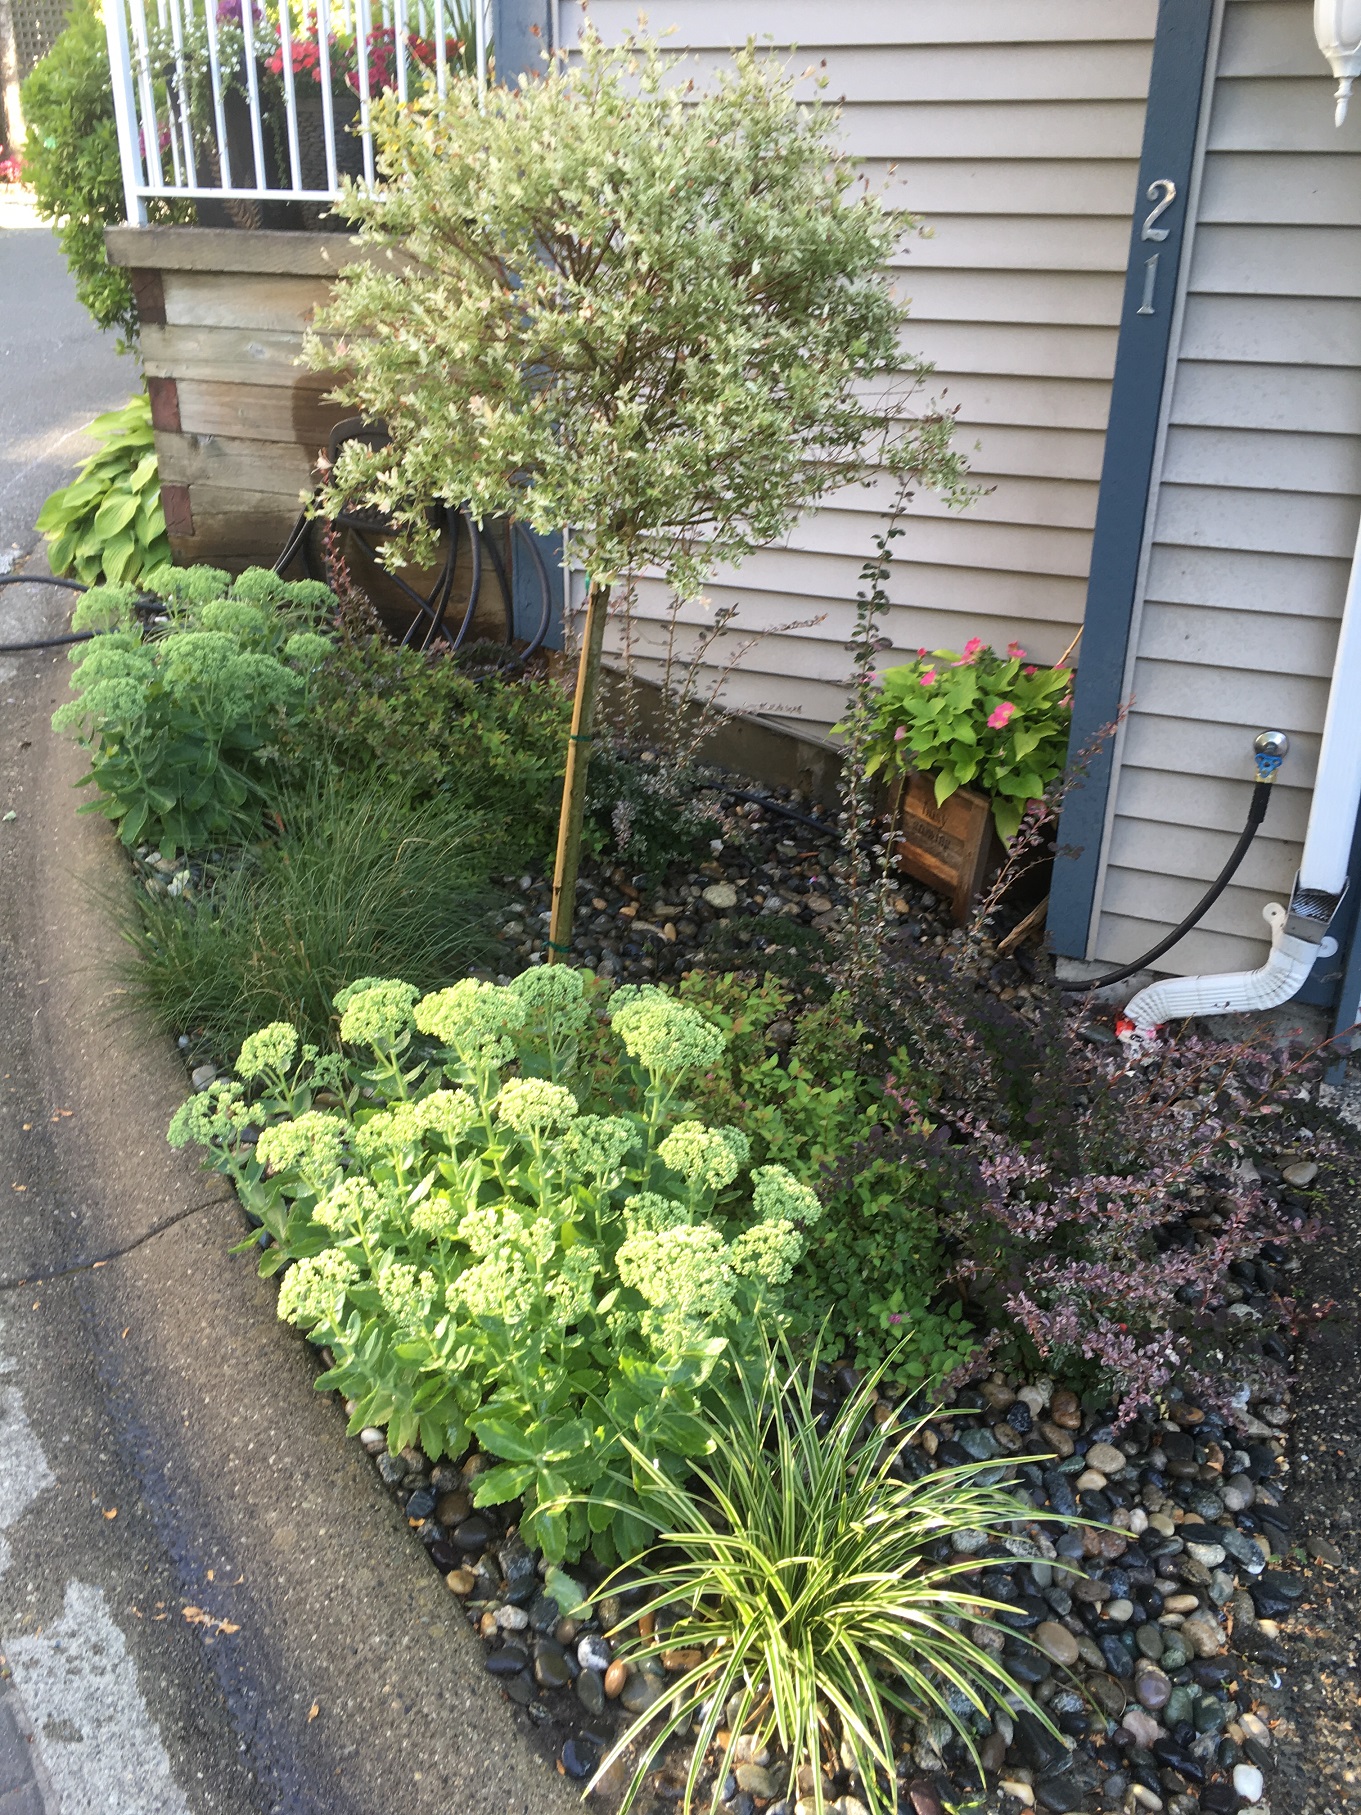
Everything looked fine until summer heat arrived. That’s when I noticed browning in the leaf tips. That’s called necrosis or tissue death as the plant is unable to draw up enough water into the crown. So I immediately did my own weekly watering with a hose that’s literally right next to the bed.


IMG_9516

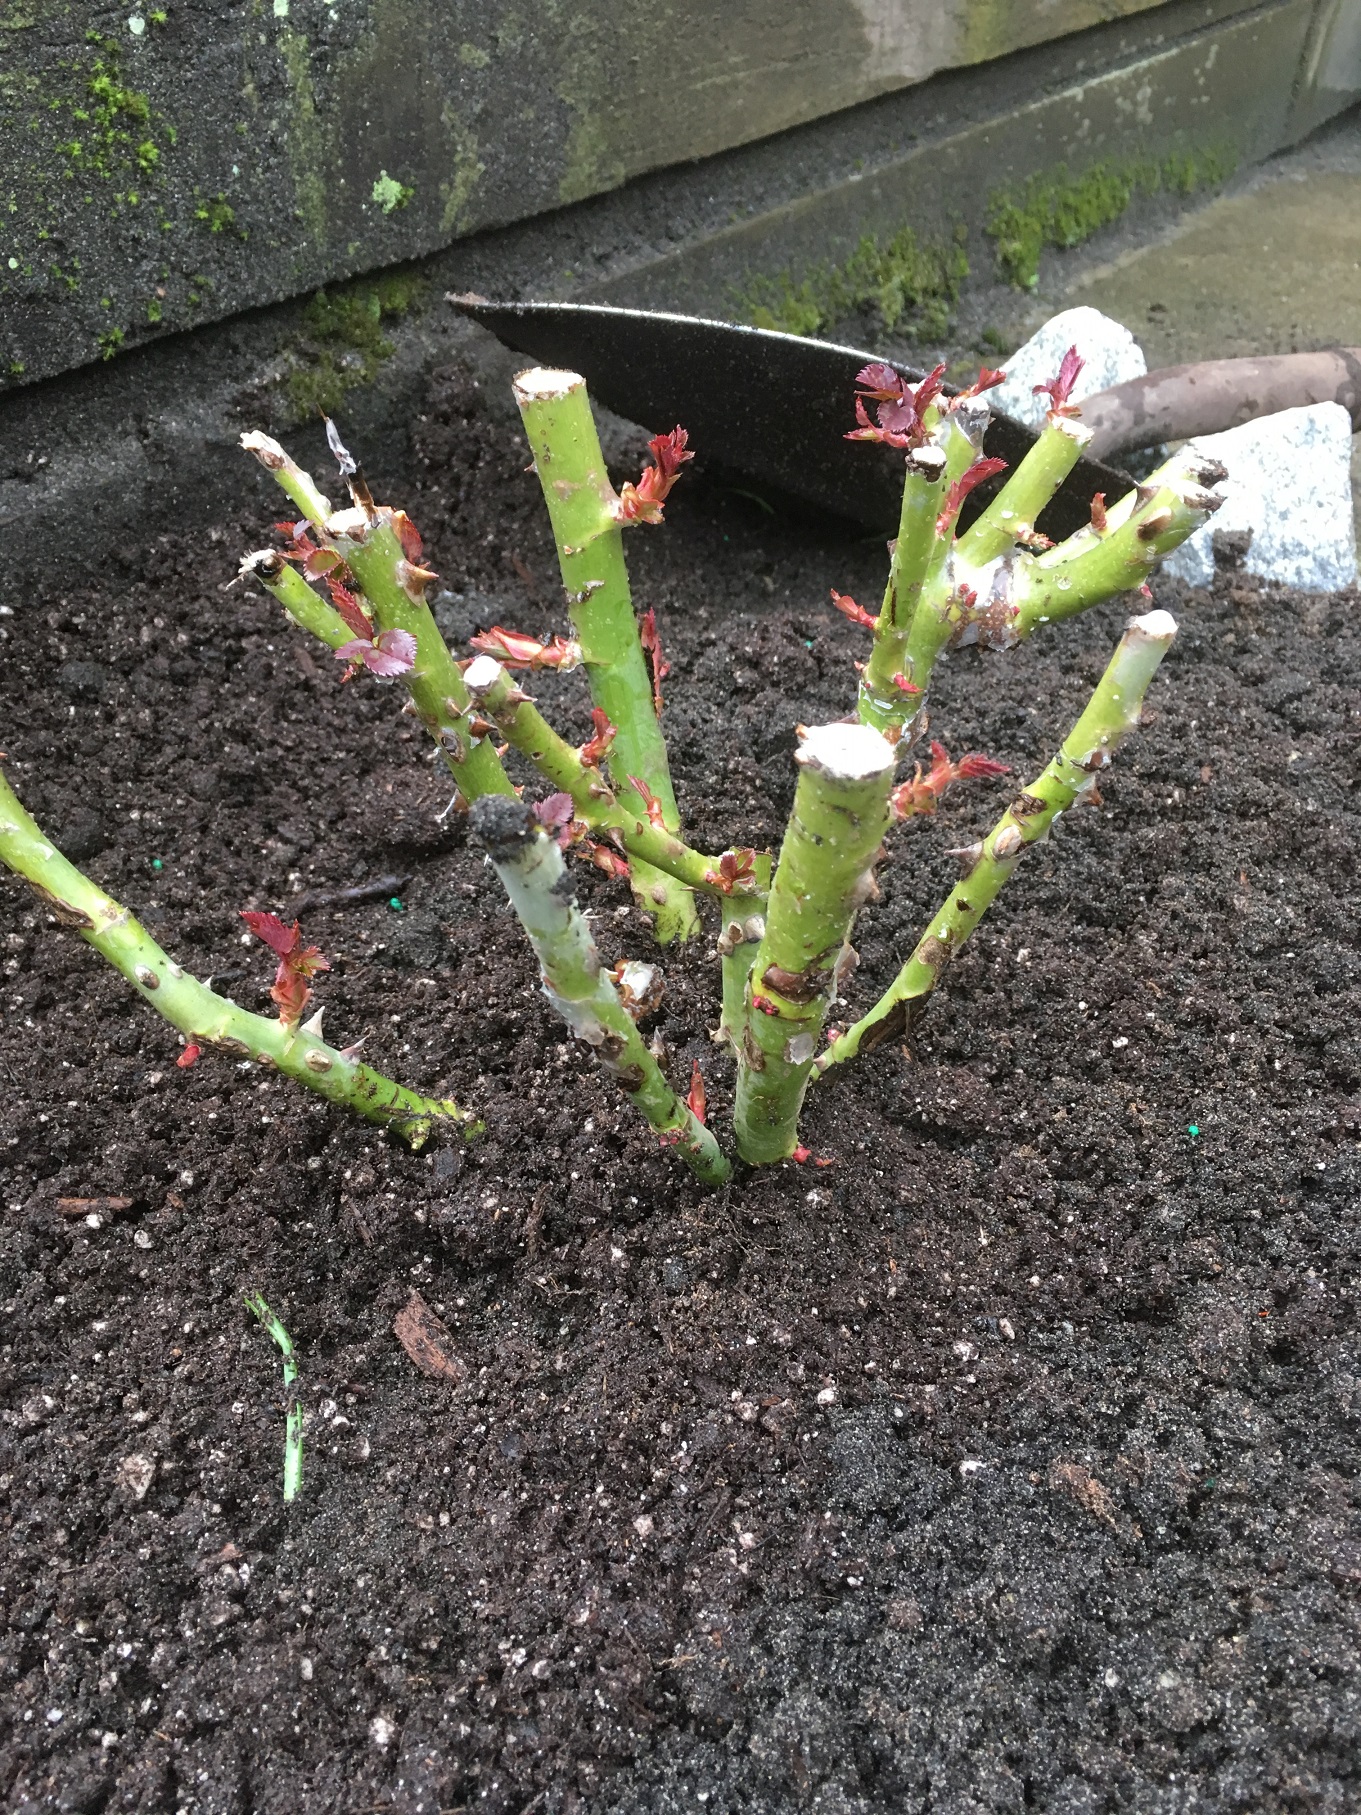
Also note the growth at the bottom of the stem.


Sadly, this is very common on strata (multi-family) complexes. People are very busy and when they water, they do it badly. Guaranteed, the owners sprinkle the plants for a few minutes and go back inside. Proper watering requires a gentle soak that lasts for several minutes. I watered in the morning and then again before exiting the property.


Bonsai response

Now observe the same plant weeks later. The top is recovering but the stem has significant growth along the stem. This is another classic response to lack of water. Since the top isn’t getting enough water, the plant starts to bonsai itself by pushing out new growth along the stem. I’m leaving it on for now to protect the bark but by fall I will prune it all off.


IMG_1114

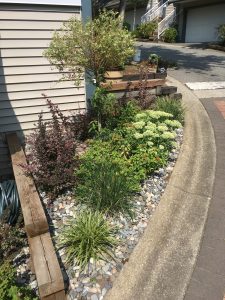
Note the growth along the stem.


For comparison, examine the other Japanese willow (below) planted at the opposite corner. The owners water better and it gets a little bit more shade. I noticed some browning in the leaves but it wasn’t severe enough for the plant to attempt a bonsai move. The stem is clear of any new growth.


IMG_0566


Conclusion

Summer heat conditions are harsh for landscape plants so owners need to water properly. And when there are newly installed plants, watering is an even more pressing issue because water allows roots to develop. So check on your plants and don’t forget to water them.


Hydrangea horror shows to avoid

By | Pruning, Species | No Comments

Hydrangeas are beautiful workhorses in our West Coast landscapes. Healthy Hydrangeas reward us with lots of beautiful flowers, many of them in big mop heads. I’m so used to seeing them I don’t even take pictures of them every season.

Lately, I’ve been running into Hydrangea horror shows and so I thought this whole thing begged for its own blog post.


IMG_8165

Hydrangeas come in all sorts of colours and we love them all.


Pruning


When it comes to pruning, we can follow the same general rule: prune after flowering. Some people leave the spent flower heads on all winter so they have something to look at. Add a bit of frost and you have a nice show in your winter garden.

Alas, strata landscape bosses like everything tidy so the flowers are deadheaded and the overall size of each shrub is reduced. The key is not removing the old second year canes on which the current year flowers emerge. There are some varieties that flower on all canes but most follow this rule.

If you remove too much of the old second year cane, all you will get next season is greenery. Flowers won’t come until the second season.

This is where problems arise. Homeowners torch their Hydrangeas almost to the ground and when the shrubs fail to flower in the following season, the frustrated owners hack them back. And so it goes until I correct them.


IMG_9519

The owner hacked back his Hydrangea and most of the old canes went missing.


Landscapers are also guilty of taking too much old wood in their struggle to manage shrub sizes inside strata complexes. Strata unit owners notice when their favourite Hydrangeas fail to flower. I made this mistake early in my landscaping career and I still remember the old lady complaining to my manager about her missing flowers. And I never forgot that lesson.


IMG_9521

Not much of a show, is it? I’m almost certain these shrubs were cut back too much last year. You can expect flowers next season.


I saved the worst example for last. This is a high-profile walkway and the strata complex’s Facebook group lit up with negative comments soon after this pruning job. And for good reason.

The timing is all wrong because these Hydrangeas are flowering nicely. Why remove flowers at their peak?

The other problem is the severity of the pruning job. I would have at least left some green or alternatively, removed entire canes. Looking at severed canes while the rest of the shrub is still intact and flowering is a bit weird.


IMG_0003


It would be best to wait until the flowers fade and then remove maybe the top third of each cane, roughly 2-3 buds down. When you do this, you can also select the 1-3 biggest canes and prune them right down at ground level. Otherwise the old wood accumulates; what we want is nice straight canes growing out of last year’s wood.


Conclusion

So please remember that Hydrangeas flower from canes growing on second year wood. If you cut back the older canes too hard you will only get green foliage the following season and your clients will wonder what happened to their annual flower show.

Prune your Hydrangeas after flowering and cut back your canes down by 2-3 buds. That should guarantee another flower show next year and that’s why we plant Hydrangeas in our landscapes.

If your Hydrangeas aren’t producing flowers this season then I would be willing to bet that your pruning last year was too harsh.

Surprising landscape corner with a twist

By | landscape maintenance, Species | No Comments

Strata (multi-family) sites come in all shapes and sizes and my job, all year, is to maintain their landscaping. And I’m rarely wowed or surprised as I work in the landscapes. But it can happen.

Corner garden

As I line trimmed around a corner I literally ran into a nice wave of yellow. What do you think?


IMG_7892


I love warm yellow colours and the Irises deliver lots of warmth. I also immediately noticed the Rodgersia in the background. Aside from its prominent flower spike, it sports tough leaves. I was first introduced to this plant when I worked under municipal gardener Tracy Mallinson.


IMG_8394

Rodgersia


I also noticed nice bed edges and a ball made out of driftwood.

Overall, this whole corner works for me. It was fun working around it and taking pictures of it on company time.

Twist

I posted my corner discovery in one Facebook group and many members liked the picture. Except for one friend, Heike Stippler, who is the ultimate green professional and owns her own Heike Designs business based in Whistler. Because she is also involved with the Invasive Species Council of BC she gently pointed out that the Irises above are invasives called Iris pseudocorus or Yellow flag iris. Bummer. I had no idea. I was just taken with the yellows.

Then I remembered that several seasons ago, while working in the Klahanies neighbourhood in Port Moody, British Columbia, I had to remove several Yellow flag Irises because they were close to a stream that empties into the Inlet and is currently populated by beavers. The resident who called in the removal request sounded like the world was ending.

Iris pseudocorus

For this section I am openly borrowing from the Invasive Species Council of BC website. As it turns out, I’m not the only person wowed by this yellow Iris. It’s a popular, eye-catching plant and allegedly sells well at nurseries and garden centres.

The problem is that this Iris forms dense stands in wet areas and pushes out native plants. When cattails, sedges and rushes are pushed out, birds lose nesting areas. The yellow flag iris can invade irrigation canals, ditches, shallow ponds and stream and lake shorelines.

Since the iris is invasive it makes sense that it reproduces quickly through seed dispersal and horizontal root systems.


IMG_8395

Iris pseudocorus: 3 sepals curve backward, 3 petals point up, mature plants can reach 1.5 m.


Conclusion

Be careful when you fall in love with a yellow Iris. One suggested alternative plant is Iris ‘Butter and sugar’. Since this spot is buried deep inside a huge strata complex and far from water it’s unlikely to invade anything but winds are unpredictable. I would consider replacement with some other plant just to be on the safe side.

Strata owners are addicted to flower colours!

By | landscape maintenance, Species | No Comments

When you work on strata title properties all week you notice two things. One is the repetition of plant material on all sites. And two, you notice the addition of bright flower colours by individual owners.

Repetition

If you read my blogs often you will know that I bring this up a lot. Trees and shrubs on our strata (multi-family) sites tend to repeat because they fit in with our mostly clay, acidic soils. I keep telling my new workers that, while this repetition might seem boring, it helps them with their plant identification skills. Once you learn Prunus laurocerasus ‘Otto Luyken’ you will keep on seeing it elsewhere. Then you will see it bloom and discover its scent. And if your skills are decent, you will get to hand snip or power shear it. Then you move on to the next shrub or tree until your plant ID skills become first rate.


IMG_7216

May 15, 2018, Prunus laurocerasus ‘Otto Luyken’. If you don’t notice the scent, get closer until you do. It’s not bad.


Power colours

As you work in various strata units you start noticing annuals and perennials with bright colours. That’s usually the work of female owners but I also confess to picking up cheap plants at RONA. Like Lithodora diffusa. I planted one on my patio and now when I see it in a garden I know what it is. No surprises. It barely cost a few bucks.


IMG_7203

Lithodora diffusa


Examples

It’s mid May 2018 now so let’s take a look at what other specimens are favoured by home-owners. You might want to get some for your own place.


IMG_7210

Osteospermum


IMG_7213

Dahlias are very popular!


IMG_7202

Dianthus, another popular plant. I know of one yard where the owners planted various cultivars of this plant. That’s love or obsession.


IMG_7214

Geranium, another quick and cheap way to add colour to your place.


IMG_7229

Poppies tend to spread but they look fine in afternoon sun. I love yellow.


IMG_7224

Alliums are also very popular but here it’s just one lonely specimen by the door.


IMG_6359

Monardas are nice!


IMG_7204

Clematis is a popular vine. Just keep the base of this climber cool.


Can you handle boxwood aroma?

By | Landscaping, Species | No Comments

Last spring one strata owner approached me regarding boxwoods (Buxus sempervirens) by her front door. Allegedly they smelled bad and she wanted them removed. Yeah, sure. Once she shut the door I bent down and smelled the green foliage. The aroma was completely neutral: I didn’t love the smell nor did I detest it enough to pull the plants. Then a new foreman took over the site and I forgot about it.

Now let’s fast forward to spring 2018. After making landscape upgrades at one of our sites, one corner unit had a new boxwood hedge installed by their front door. It looked great but the owner’s wife couldn’t handle the smell!? So we had to pull the boxwoods and replace them with dwarf cedars.


IMG_7113

These “smelly” offenders were removed and replaced.


I couldn’t believe it. There it was again: female occupant unable to handle the smell of her boxwood hedge. And a new blog post was born because I had to look this up.

Searching for aroma

According to one internet source, boxwoods get their scent when the sun heats up the oil in their leaves. I find that I have to get really close to the plant to smell anything. And there are people who compare the boxwood scent to cat urine. Others get reminded of their time spent in gardens. Personally, I fall into a neutral category: I don’t find the scent attractive, nor do I detest it. I simply notice the plants.

Buxus

Boxwoods are great! They can be sheared into formal hedges and they stay green all year. In one case four owners got together and they replaced tired-looking Heathers with boxwoods.


IMG_6894

Note the pile of discarded Heathers.


IMG_6896

Buxus


Actions

So what can you do if you want to avoid boxwood aroma issues? For one, don’t install Buxus sempervirens by front doors or by any frequently used area in your landscape. And two, plant Buxus microphylla which doesn’t sport the same offensive aroma. Finally, you can replace the boxwoods with something else.


IMG_7129

The switch is completed.


The key idea is that everything depends on your own sense of smell. Some find the boxwood aroma unbearable and some get reminded of the happy times they spent in gardens. So next time you see boxwoods, bent down and smell them.

You can also learn about boxwoods by joining the American Boxwood Society.


Unsung landscape hero: Liriope muscari

By | Species | No Comments

The first time I really noticed Liriope muscari I was a municipal parks worker maintaining a sports complex. I noticed the mass planted clumps of green but I had no idea what they were until my knowledgeable co-worker helped me out. After you read this blog post I hope you will agree that this plant is a workhorse in our landscapes. I would say it’s an unsung hero.

Landscape uses

Liriope muscari is a perennial with grass-like evergreen foliage and it works well either as mass-planted groundcover or as a border along sidewalks. This is precisely where I ran into this plant again early in 2018. I was helping one of our foremen at a new site and as we walked along he asked me what the grass-like plants were. And I was ready to answer his question thanks to my municipal experience.


IMG_4404ed

Liriope muscari border use


IMG_1009 (12)

Liriope muscari groundcover use.


This plant fits perfectly between the fences and the sidewalk. The grass-like foliage shades out any weeds and the plant doesn’t spread aggressively. One big bonus is that Liriope muscari doesn’t require any maintenance. All you have to do is cut back the old foliage.

The plant prefers full-sun to part-shade conditions but it tolerates different types of soil and light, heat, humidity and drought! Not bad at all. That’s why it’s a landscape workhorse.

Bonus flower

Liriope muscari produces flowers in late summer which then turn into single-seeded berries on a spike. My picture shows a white flower but you will most likely see purple flowers.


IMG_1010 (11)


Lawn edging

When I opened a recent issue of Fine Gardening magazine, I noticed a hint from a reader. Instead of deep edging his lawn-bed border he plants Liriope muscari. Then when he mows his lawn he just brushes by the plants and allows them to define the border between lawn and planted bed. Mowing is easier than establishing and maintaining a deep edge. I really like this idea.


If you need a good, low-maintenance perennial for your border or groundcover, you should try Liriope muscari. It tolerates all kinds of conditions, requires minimal maintenance and it produces nice flowers and berries. It deserves its unsung hero label.

How I spent an afternoon with dandelions

By | gardening, Landscaping, Species | No Comments

Dandelions (Taraxacum offcinale) didn’t become unwanted weeds until the twentieth century, probably just as green lawns became the norm for detached houses. Ted Steinberg shows us how the whole quest for perfect lawns happened in his book “American green.” This blog post will show you that you can actually have some fun pulling dandelions from your lawn.


IMG_5863

Taraxacum offinale


Strata setting

Stratas or multi-family complexes also demand lush green lawns so that’s why I got to pull dandelions one afternoon from high-profile front lawns. And after mowing for four hours straight, it was a welcomed cool-down task.

The yellow dandelions stick out too much and kill the green monoculture look so they have to go. And I had a great, sunny afternoon at work pulling them out.

Fiskars tool

This was also my first time using and testing Fiskar’s weeding tool which promises easy weeding without bending over. Great. The tool worked perfectly fine but allegedly some of the other units fell apart quickly.

Step 1

The unit has a plastic orange slider which gets the tool ready like a one-shot gun. Pull it up and get ready to aim.

Step 2

Aim the tool right over the dandelion leaf rosette and plunge it in. You need good aim and decent soil. Our lawns were fine so forcing the tool in was relatively easy. My aim took a bit of time, especially when the plant was smaller. I still had to bend over to pick up leftovers and pull out very stubborn specimens.

Step 3

Step on the black plastic bar. This tilts the tool and pulls up your dandelion, assuming your aim was good. No bending over required.


IMG_5457

Step on the black bar to pull out the weed without bending over.

Step 4

Move the plastic orange bar down to release the captured weed. This step reminds me of removing a spent gun shell. Definitely use a tarp for your weeds unless you’re mowing the lawn right after. I brought a wheelbarrow with me.


IMG_5458

Slide the orange bar down to eject the captured weed.


IMG_5461


Cool plant

According to Wikipedia, in the past gardeners used to weed grass from around dandelions. How things have changed. I remember playing with dandelions as a kid but now as a landscape professional I’m not allowed to tolerate them in the landscape.

I knew you could make tea from dandelion roots because once I bought a box and actually drank the tea. And you can eat every part of the plant. The roots are best consumed in late fall or winter when they’re not as bitter. Both flower buds and leaf rosettes can be eaten.

I don’t want to list all of the health benefits here but let’s just say dandelions contain a lot of good stuff. I think they’re amazing plants.


IMG_5476

The entire plant is edible!


Plant photo essay: spring sun edition

By | Plant Species Information, Species | No Comments

I love sunny spring mornings. The plants look great in the sun and the mornings are still cool enough for me to thoroughly enjoy. Yes, the landscape is finally alive. I dream of these days when I work outside in the winter landscape. So let’s take a look at a few common plants I shot with my iPhone in the sun.


IMG_6165


Tulips don’t come back reliably every year so try to change them. Have some fun and experiment with different color combinations. I love this yellow red variety.


IMG_6498


It’s a riot when Rhododendrons are in full bloom. I don’t see too many yellow flowered Rhodos.


IMG_6143


Bergenia cordifolia is a fantastic perennial. I even devoted a short blog post to it. Enjoy the flowers and then just clip off the flower stalk when the show is over.


IMG_6396


Ribes sangiuneum has attractive early spring flowers.


IMG_5265


Mahonia aquifolium is a common landscape plant with prickles on its leaves. I like the warm yellow flowers on this landscape workhorse.


IMG_6397


Vinca minor is now considered an invasive groundcover plant but the purple flowers are attractive. I have salvaged Vinca in pots on my patio and they work well there. Garden centres still sell them.


IMG_6176


Euphorbia hybrid cvs. is hard to miss in the landscape because of its prominent flowers. If you have to prune them you will discover the sticky white sap that courses through the plant.


IMG_6428


Japanese maples (Acer palmatum) are landscape all-stars. I love the reddish leaf margins.


IMG_6502


Katsura trees (Cercidiphyllum japonicum) are stunning in full bloom.


IMG_6161


Magnolia trees are also flower champions but sadly the flowers don’t last very long. In full bloom the trees are stunning.

What’s growing in your garden? What are your favourite plants? Feel free to post a comment and share your favourites. I’m looking forward to working in more spring sun this week.


How you can use Berberis thunbergii as a green barrier

By | Landscaping, Species | No Comments

Prickly plants can be used as green barriers in the landscape to discourage people from entering certain spaces. I was reminded of this recently when I was sent to a strata (multi-family) complex to install Berberis thunbergii plants. My task was to plant a row of plants at the top of a wall because the strata council was hoping to discourage kids from playing on top of it. Aha. There you go. It’s not just about pretty flowers. Plants can be used for specific functions. In this case to deter young kids from playing on top of a wall.

Why Berberis?

There’s lots to like about Berberis thunbergii. For one, the purple foliage is very attractive. Berberis also flowers nicely but the flowers aren’t super showy. The plants also splash out nicely in arches and they tolerate shearing.

One important key is that the plants do well in our Lower Mainland landscapes once they’re established. But how do they deter kids from playing? Well, the plants sport soft prickles that hurt just enough to discourage you from brushing your body parts against them but not so much as to cause deep gashes and bleeding. It’s a perfect plant for this situation. We had enough prickle collisions when we planted, I imagine the kids will also have some fun.


IMG_5346

Berberis thunbergii, attractive foliage and soft prickles ready to meet any juvenile trespassers.


Step one

First, my apprentice and I had to remove the struggling Mahonia aquifolium plants which, incidentally, sport prickly leaf margins. Also note that I kept the best looking specimens and re-used them at a bare boulevard bed. I hate throwing out decent plants.


IMG_5330 (1)

If you’re lucky enough to have a 4th-year apprentice to help you, squeeze him hard!


Step two

Planting the Berberis thunbergii wasn’t very easy because woodland setting means tree roots and moss. Always massage the plant roots before planting. We don’t normally have time to water in our new plants but the ground was wet and rain was in the forecast. And remember, Berberis thunbergii is a champ, that’s why we use it. As the plants grow they will fill out and form a nice barrier.

Step three

Whenever possible, use soil amender to top dress your new planting. It gives it a new black look and it gives the plants a nice kick with new soil. And remember to top dress only. Always backfill your planting holes with the native soil you excavated.

Step four

Clean up nicely with a blower and broom. Always leave your work site in great shape. If you read this blog regularly you will already know that.


IMG_5344

All done! Planted, top-dressed and cleaned-up.


Step five

Re-plant the rejected plants elsewhere. I did this on a boulevard bed which was mostly bare and it made me happy to see the plants salvaged and given space to grow.


IMG_5332

Unwanted Mahonia aquifolium and Nandina domestica were replanted in this almost bare bed.


Conclusion

Berberis thunbergii is a great plant to use if you need a decent plant barrier to discourage people from entering a certain space in your landscape. The prickles are hard enough to discourage trespassing and soft enough to not cause deep gashes and profuse bleeding.


Lady Di: Grandiflora Rose

By | gardening, Landscaping, Species | No Comments

I don’t get to work with nice roses very often. Most of the time I have to cut back Rosa rugosa specimens because they are suckering and spreading out of control. Usually it’s raining so my rain gear gets all torn up by its rough thorns.

Lady Di

Recently I got to install Grandiflora rose called Lady Di. That’s more like it. Finally some class!

The potted roses displayed wax on their canes and I had no idea why. That’s how little I work with roses. So I googled it and found out that wax on roses is used to prevent them from drying out during transportation or while they sit on the shelf. No action is required because the wax will eventually fall off.


Rose details


IMG_5072 (1)

Grandiflora rose showing wax on its canes.

According to the tag, this rose variety produces bouquets of perfectly formed soft coral pink flowers. Great. I can’t wait to see them. The glossy green foliage is allegedly also spectacular.

The Grandiflora rose is expected to reach the height of 3-4′ and I hope there is enough room in the skinny front beds where we planted them. Since the rose has strong fragrance it should keep the owners happy.


Planting

Our small front beds have trees in them so I expected some push-back from tree roots but overall we managed fine. The one interesting twist is planting depth. To properly plant this rose, you have to make sure the branch union (the big fist-like base from which the canes shoot out) is planted slightly below ground level.

We are also advised to keep the soil moist throughout the growing season. Spacing between roses should be 60cm or 24″. Plant Lady Di in full or partial sun, not in shade.


IMG_5191ed

Ready for planting.


IMG_5194ed

Planted. Note how the branch union is covered by soil. The wax will fall off eventually. Now we just keep it watered and wait for the flowers and fragrance.